
Image Credit: Alex Wilson
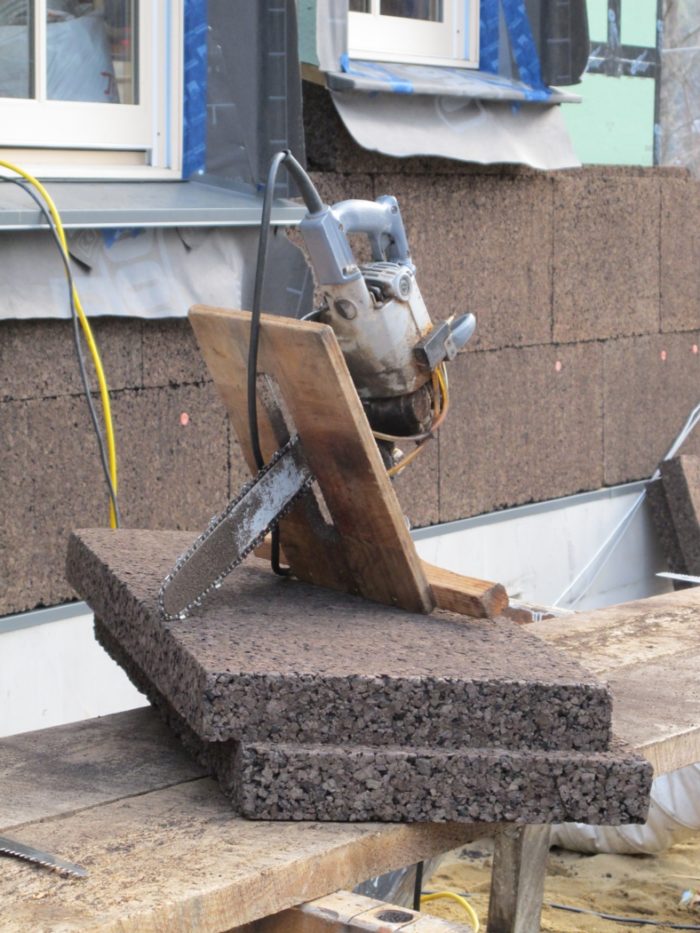
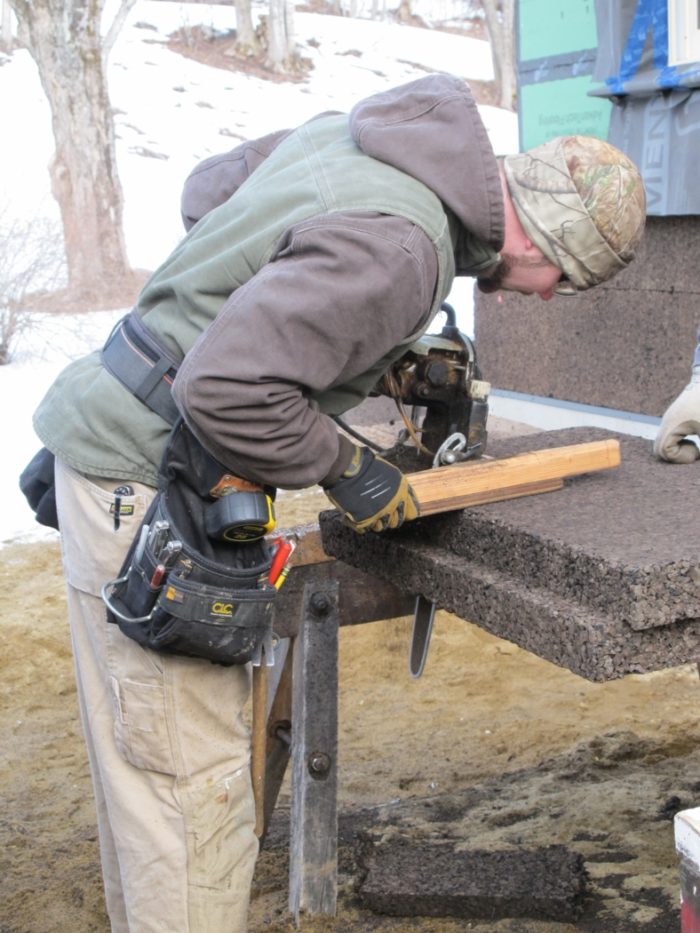
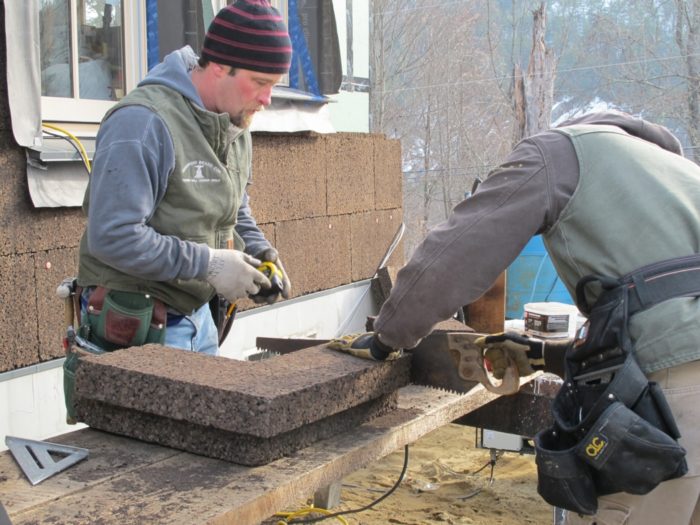
Image Credit: Alex Wilson Eli's crew used various saws to cut the cork, including this specialized tool for timber framing.
Image Credit: Alex Wilson Cutting angle on panel with the timber saw
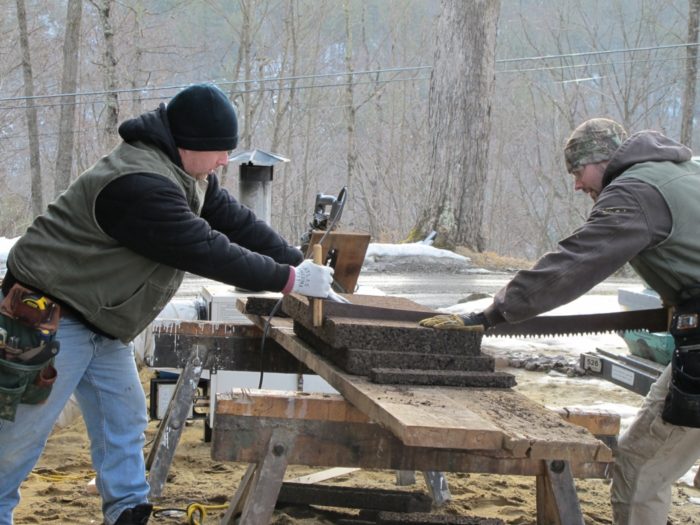
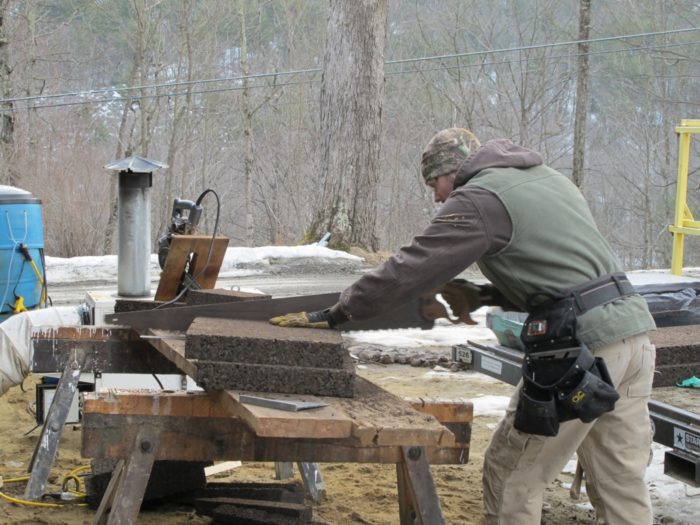
Image Credit: Alex Wilson An old two-person cross-cut saw removed a much smaller kerf and the large teeth did a good job at removing sawdust.
Image Credit: Alex Wilson Trying out different saws for cutting the cork
Image Credit: Alex Wilson This old one-man crosscut saw was in our attic
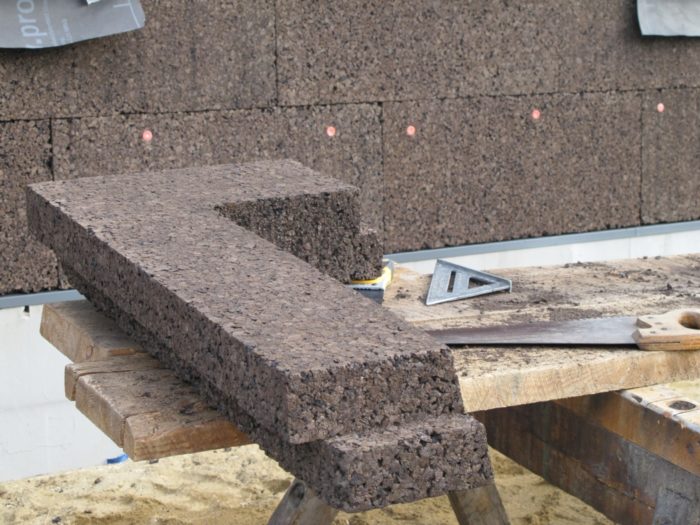
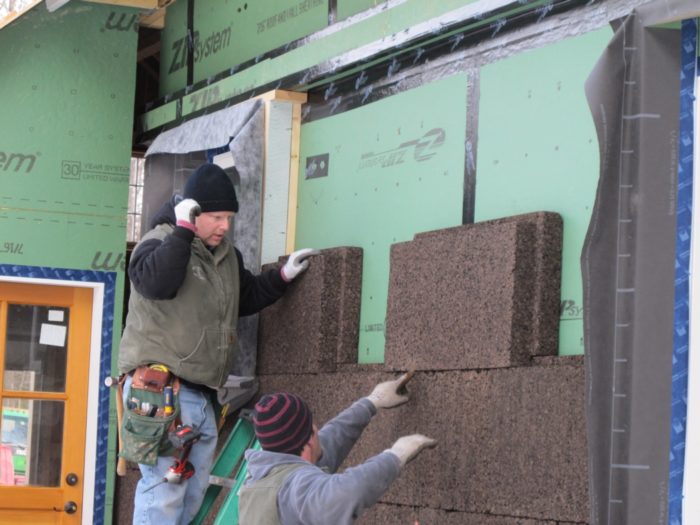
Image Credit: Alex Wilson The sloped sills in the window surrounds made for some tricky cuts.
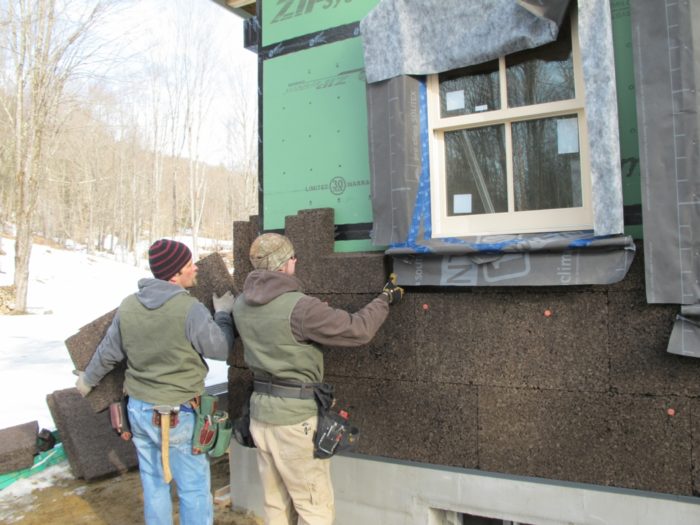
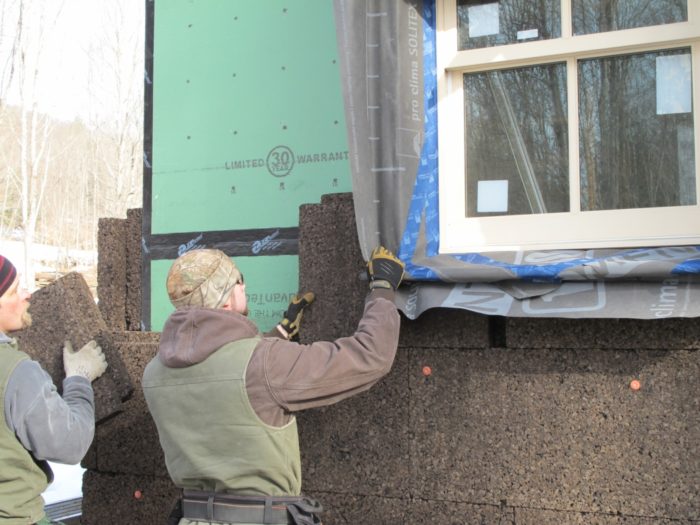
Image Credit: Alex Wilson Installing a carefully cut piece of cork under a window surround.
Image Credit: Alex Wilson Sliding the cork in under the window
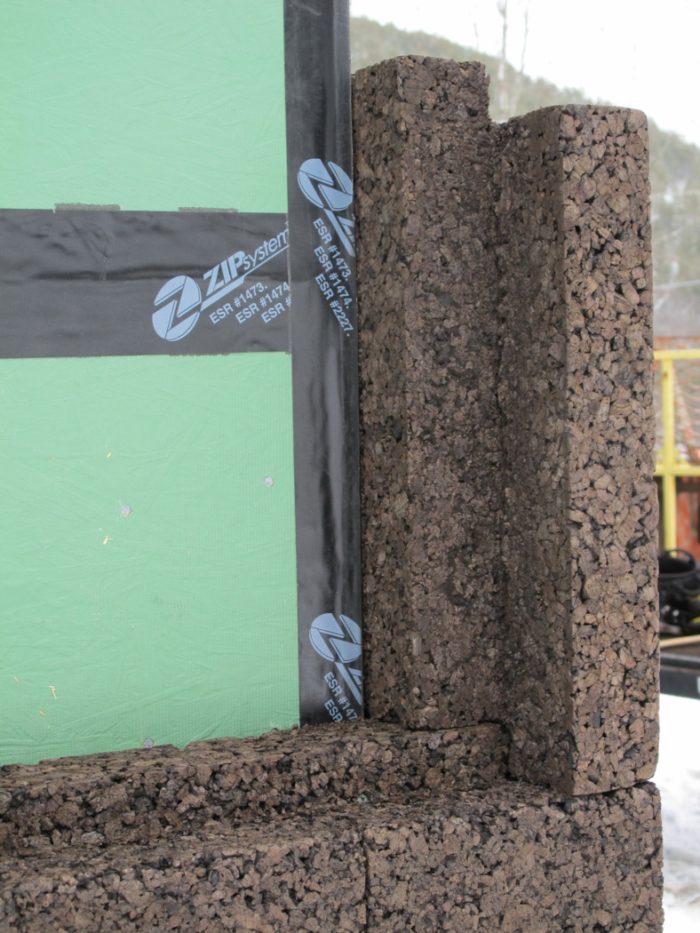
Image Credit: Alex Wilson Corner detail showing the overlapping shiplap joints
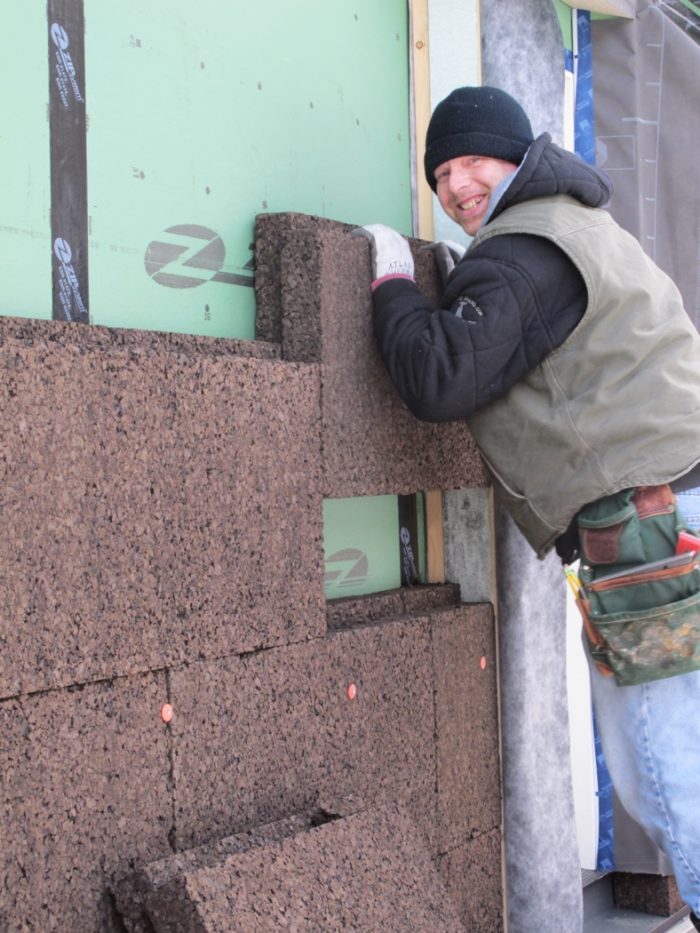
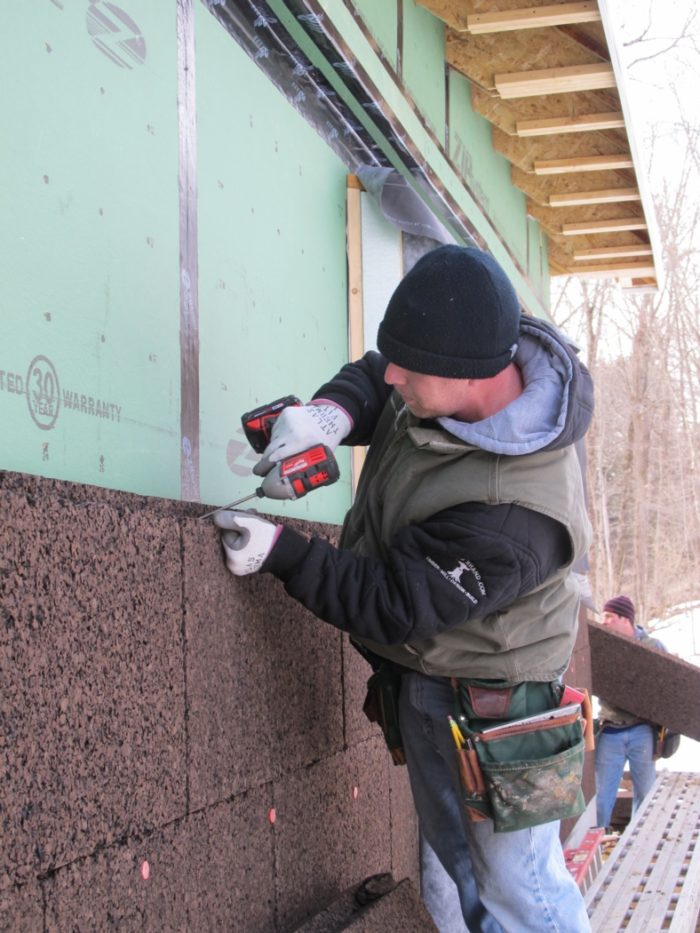
Image Credit: Alex Wilson To hold the cork in place we used angled screws through the thinner top of the panel. Strapping will be screwed into the framing to hold the cork tightly.
Image Credit: Alex Wilson In this photo you can see how the bottom course of cork insulation sits on the Foamglas shelf with a termite barrier between.
Image Credit: Alex Wilson Extending insulation up the wall.
Image Credit: Alex Wilson A nice feature of working with cork is that the sawdust from cutting it is biodegradable — maybe even a nice mulch!
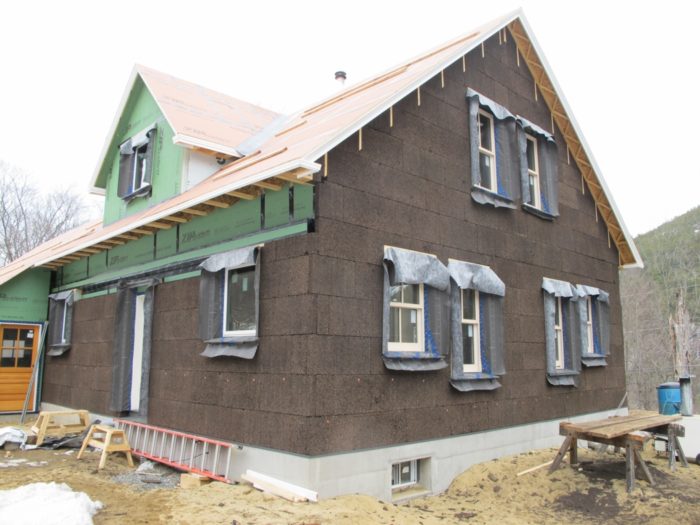
Image Credit: Alex Wilson Nearly completed cork installation.
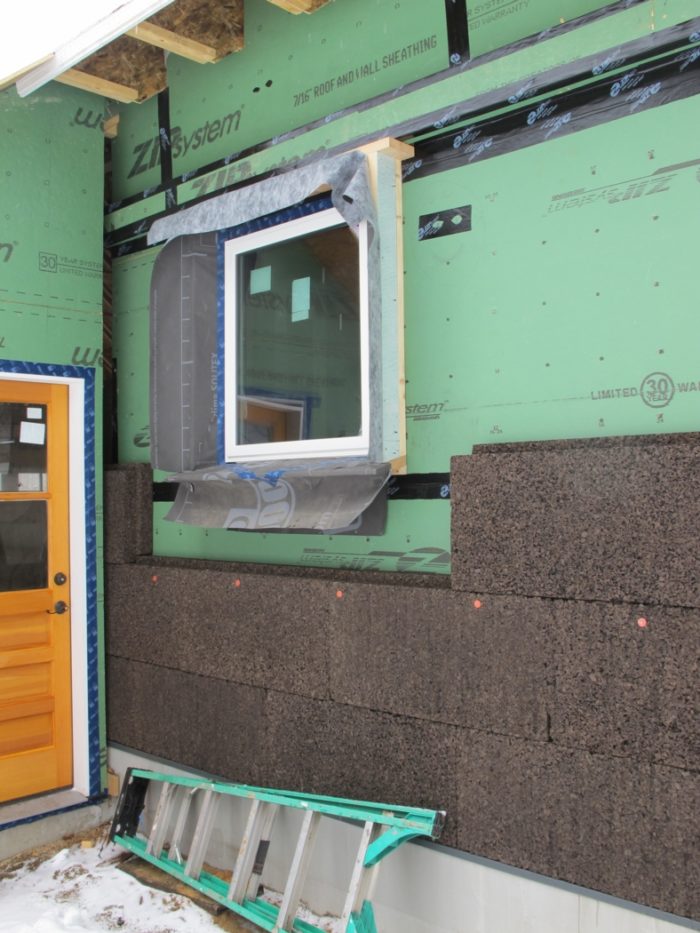
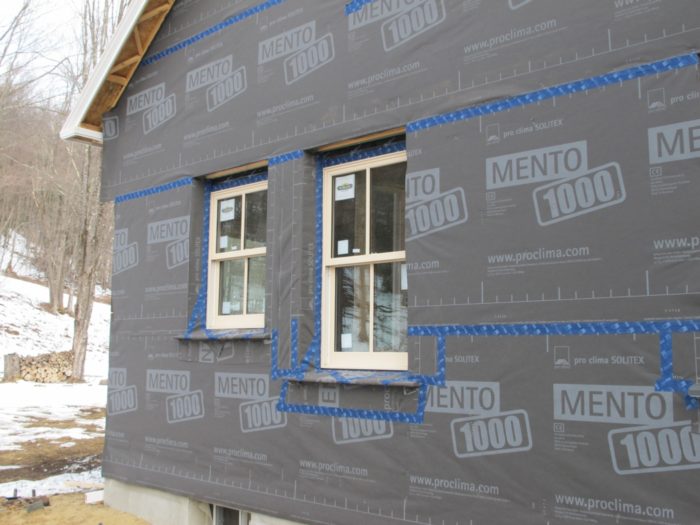
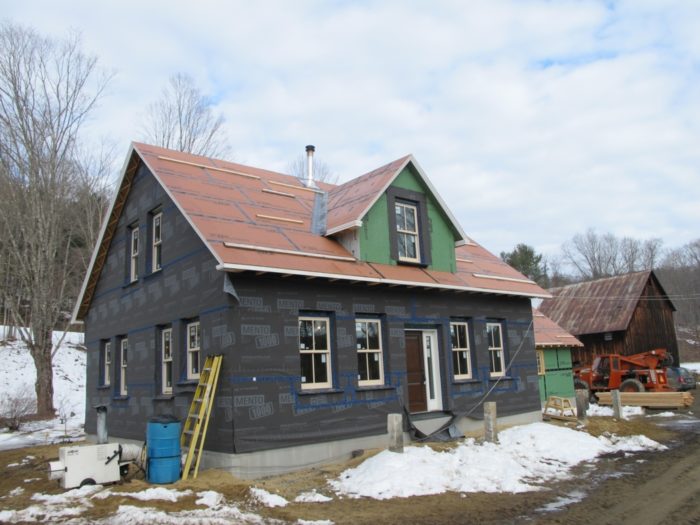
Image Credit: Alex Wilson We used Pro Clima Solitex Mento 1000 weather-resistive barrier (housewrap) from 475 High Performance Building Supply over the cork. The housewrap is taped with specialized tapes, also from 475.
Image Credit: Alex Wilson Vertical 1x3 strapping will be installed over the housewrap and screwed through the cork into the sheathing and frame. To that will be nailed the horizontal clapboard siding.
Image Credit: Alex Wilson
More Energy Solutions


What do you do if you’re a builder and your client (that would be me) hands you a material that no one’s ever heard of, let alone installed in this country, and asks you to insulate his house with it? A lot of smart builders would run the other way. Eli Gould, our partner in the Dummerston, Vermont farmhouse we’re renovating (really re-building), took it on as a challenge.
Last week I wrote about the cork insulation that we’ve installed — the last of it went up at the end of last week. Here I’ll review some of the installation details that Eli and his crew figured out — including such seemingly minor issues as how to cut the stuff.
Planning for the cork months ago
When we first started talking about expanded-cork insulation last summer, we requested some samples to work with. Along with being a designer-builder, Eli has an R&D company, PreCraft, Inc., through which he works on figuring out better building systems and how advanced building components can work together. This involves a lot of prototyping, and Eli jumped at the opportunity to get his hands on some cork.
Amorim Isolamentos, which manufacturers the cork insulation in Portugal, sent over several bundles of the boardstock insulation so that we — mostly Eli — could figure out how we would use it and exactly what we wanted to order. The material is available in thicknesses from a half-inch to about 12 inches and with square or shiplap edges. The exposed face of the cork we used is about 18″ x 36″.
From an energy performance standpoint we wanted to achieve at least R-40 in the house walls and achieve that with a combination of cavity-fill insulation in the walls and rigid insulation on the exterior. We planned to use Zip sheathing from Huber Engineered Woods as the air barrier (with all edges and joints taped), allowing the interior insulation system to dry to the interior and a moderately permeable exterior insulation to dry to the exterior.
Had this been new construction, we would probably have picked a very different insulation system that relied just on (less expensive) cavity-fill insulation, but we were dealing with an existing 200-year-old frame as out starting point, so we decided early on that exterior rigid insulation would be part of the system, and to meet our R-value goals we opted for 6 inches of cork.
Because we had installed 6 inches of another innovative insulation material (Foamglas) on the outside of the new foundation walls, continuing the 6-inch, non-structural layer upward on the wall made a lot of sense. The 6 inches of cork would add about R-21 to the wall system.
Shiplap edges
In experimenting with the cork samples we recognized that tight joints — as you can achieve with rigid foam insulation — would be hard to achieve with the product, so we wanted to avoid joints extending through the material. Installing two layers of 3-inch cork was an option, overlapping the joints, but we opted to order 6-inch material with shiplap on all edges so that through-gaps would be avoided.
Working up from the foundation, the bottom edge of the first course of cork was beveled to match the drainage bevel that we created with the Foamglas foundation insulation. That first course was installed on top of a metal termite-flashing layer that our roofer, Travis Slade, made up.
The shiplap was configured so that any moisture running down the outside of the cork would remain on the outside and not extend through it. At the corners of the building, the overlaps were tricky — but needed to ensure that no gaps extended through. Frankly, I’m not sure how Eli’s crew figured that out — but they did a great job.
Cutting cork insulation
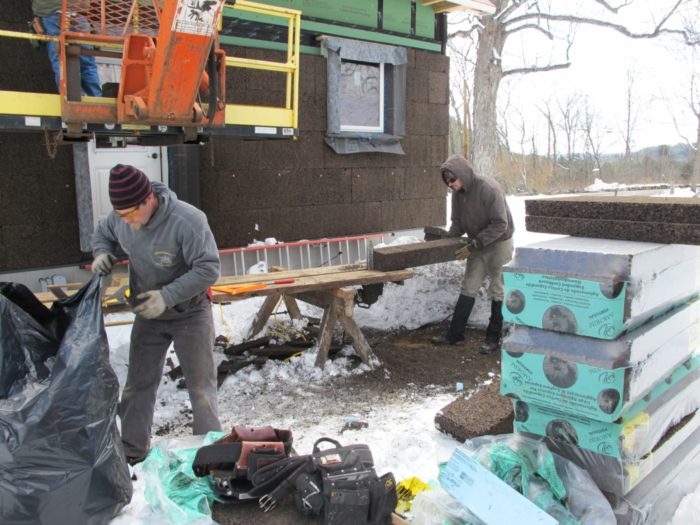
Just about every conceivable option was tried for cutting the cork: from tools our great-grandfathers would have used to high-tech timber-frame tools. The large teeth on a two-man crosscut saw proved very effective at minimizing the kerf thickness and keeping the kerf cleaned out as they cut, but a chainsaw-like timber-framing saw proved best for bevel cuts, though it created at fairly thick kerf.
One of the nice things about working with cork is that all the sawdust on the ground from the cutting is fully biodegradable. In fact, it may make a nice mulch!
Complicated angle cuts
There was really tricky detailing at the window surrounds. The bottom and top edges of the surrounds (see my earlier blog on window surrounds) are pitched, so the cork insulation had to be cut with a matching bevel and slid in. We wanted a fairly tight fit for energy-performance reasons, but they had to be able to slide the cork in. And in doing so, they had to make sure that the pre-applied Pro Clima Solitex water-resistant barrier (housewrap) on the window surrounds would remain exposed so that it could be properly overlapped and taped to the housewrap being installed on the whole house. Tricky detailing indeed.
Similarly challenging details had to be dealt with at the roof edge — both at the eaves and gable end, but the completed job looked great! Sadly, the cork is now hidden by the housewrap, but I loved admiring it before it was covered.
Securing the cork
As the sheets of cork were attached to the wall, the upper shiplap edge was screwed into the framing with angled screws. Once the housewrap layer is entirely installed, full-dimension, 1″ x 3″ strapping will be installed vertically and screwed into the framing with 8-inch Simpson Strong Tie screws. The screws will be countersunk into the strapping, providing a little over an inch of purchase into the Zip sheathing and framing. Horizontal clapboard siding will then be nailed onto the strapping.
Alex is founder of BuildingGreen, Inc. and executive editor of Environmental Building News. In 2012 he founded the Resilient Design Institute. To keep up with Alex’s latest articles and musings, you can sign up for his Twitter feed.
Weekly Newsletter
Get building science and energy efficiency advice, plus special offers, in your inbox.


9 Comments
Warmth!
You are going to be so toasty in your house. It looks wonderful.
Longer screws
I have to repeat what others have said,1" purchase into the sheathing and studs seems insufficient. Thats only 1/2" into the studs. BSC's exterior insulation document (RR 1204) assumes a minimum of 1.5" into the primary support member (I assume that means stud). I am not saying they are perfect or correct but they know a lot more than me and 1.5" into the stud is a much stronger and safer connection. You are going to a great extent to do this correctly, spending a little more time to find the correct screw only makes sense. You are using a belt and suspenders with the pro clima, at least use screws that are long enough. Fasten master makes a 9" headLOK flat head screw. I don't know if them meet your structural requirements though.
I thought that one of the
I thought that one of the main advantages of using cork was that it could be siding and exterior insulation in the same material. Since you're covering it up anyways, what made you choose this over mineral wool or XPS?
Just curious; it seems like a nice but expensive product which -- to me -- was offset by it being the finish siding as well... but you're forgoing that?
Cork as siding
I think (but am not sure) that when you spec cork insulation that will be exposed, you want a somewhat denser product. But, I am also skeptical that exposed cork would really hold up for the long term. We're targeting a 300-year design life for the house. I think protected cork could achieve that.
I wanted to use cork partly because it has a great story that I can tell in describing the house. But if I hadn't used it, high-density mineral wool would have been my choice as an exterior insulation.
Cork Facade
When creating a facade from expanded cork, a higher density expanded cork is used. The standard density used on Alex's Farm House project is "standard grade" 7lb/ft3. Facades are covered with "Medium Density (MD) Facade Grade" expanded cork. The chief differences between the two are both the density: 7lbt/ft3 vs 9lb/ft3 and the quality of the cork oak bark. The MD Facade grade uses a higher grade of bark harvested from more mature trees. A mature tree yields thicker bark with more of the "cork" and less of the "wood".
And... yes, the tree still stands and is unharmed; much like a sheep after shearing it's wool.
There are now many examples of cork facades in Europe. While I "think" they will last a long time, I really can't say how long they will. We have no experience yet with facades that are older than10 years. At least not any that I'm aware of. I've posted a picture that we took of a school in Lisbon. I'm not sure of the age of the facade. I think it was about 8 years at the time I took the picture. It looked great. Very dramatic.
The reason that I think that a cork facade will last is: It is essentially tree bark... and nothing else. It's not the heart of the tree like sawn or split cedar, but it's in a similar vein. While it's not a fair comparison because it's not using expanded cork, another project I was lucky enough to walk was the "Cork Convent". The convent was built in 1560 in the hills over Sintra Portugal, and is trimmed in cork bark both inside and outside. I'm not suggesting that the cork bark hasn't been replaced over time. I can't find any history that suggests anything either way. I'm only using this as an example that bark from the Cork Oak being used as "facade elements" has a history prior to our own US constitution.
It certainly bears further trial, example and study. (more facade pictures at http://thermacork.com/facade-cork/)
Facade Cork
Albert,
I think of Portugal as a generally dry climate. What concerns should there be for using cork as an exposed exterior facade material in wetter climates like the Pacific Northwest or New England?
Will it make a good growing substrate for mold or mildew, as an unfinished organic material?
California, the mountain West and the desert Southwest seem like great locations to install cork and have it behave similarly to Portugal, are there examples of performance in wetter climates?
Thanks,
Jesse Thompson
Wet facade
Jesse.
I don't know how it will behave in the extreme case of the Pacific Northwest. I'm interested to find out. We are working on a couple (perhaps now its it's a few...) MD Facade projects in the PNW. In researching the care and maintenance we are told by Amorim that to clean a cork facade: "brush it".
I'm sure that there will be some level of growth. I expect a little mold on the "dark side" as well as perhaps moss and lichen.
While I'll see what I can find out about wet examples. the one that I posted is directly on the cost of Lisbon. It's warmer than your and my climates, but being on the coast I can't say that its dry. When I took that picture, it had been in 4 days of heavy rains a couple of days prior. There were some spots that were still drying. You could tell because they were much darker.
We are in the middle of building a sample wall for a residential facade project. This is the most interesting case for me since the Architect is choosing to layer 6" of Thermacork onto an existing home with siding stripped off. For economies sake it's a layer of 4" standard Thermacork + Siga Majvest + 2" lapped joint facade grade Thermacork.
We are putting the Siga Majvest in the middle to act as a WRB and connect to window bucks. The bucks will be concealed behind the facade Thermacork. I think it's going to be a pretty awesome look.
Here is a quick snap of the first layer. The Plywood is the air and vapor control layer via taped joints with Siga Wigluv.
We are also developing a second detail with Prosoco fast flash & Cat 5. This works better for a simple single layer of Thermacork MD Facade.
I'll post a later pic of it as we get it done.
Cork for Cavity Wall Insulation
I practice in climate zone 2A ( San Antonio) where it's hot and humid. 2015 Residential code (ICC IRC) calls for only R-13 in cavity wall. Could we not use 3-1/2" of Thermacork (R-3.6/inch) in the cavity with taped Zip sheathing for skin strength & air barrier topped with a 6mm rain screen and exposed salvaged wood siding? Toward the conditioned space, I'd like to install 1/2" sheet cork (denser than Thermacork) and beaded board for a wainscot to protect cork lower than 36" above the floor. Neither the client or I want to specify fiberglass batts for the cavity. Being adjacent to a railroad makes acoustic performance critical as well. Am I forgetting anything?
Response to Stephen Colley
Stephen,
An insulation material that comes in rigid panels (rigid foam, for example, or cork) doesn't belong between the studs. The logical place to install this type of insulation is on the exterior side of your wall sheathing. That way, you'll address thermal bridging through the studs, and you'll get a much better thermal performance from your wall.
You are suggesting a cut-and-cobble approach with cork. I'm going to vote thumbs down. You could do it, I suppose, but it's a shame to cut the cork into narrow strips and stuff it between studs when you could instead install it as a continuous layer.
Log in or create an account to post a comment.
Sign up Log in