
Image Credit: Photos: BRINC Building Products
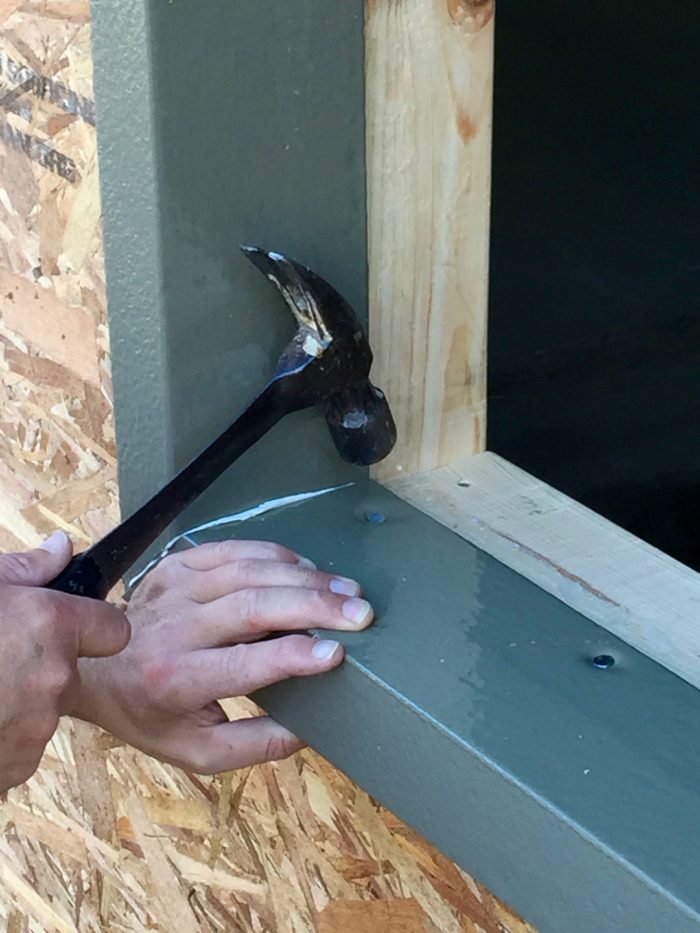
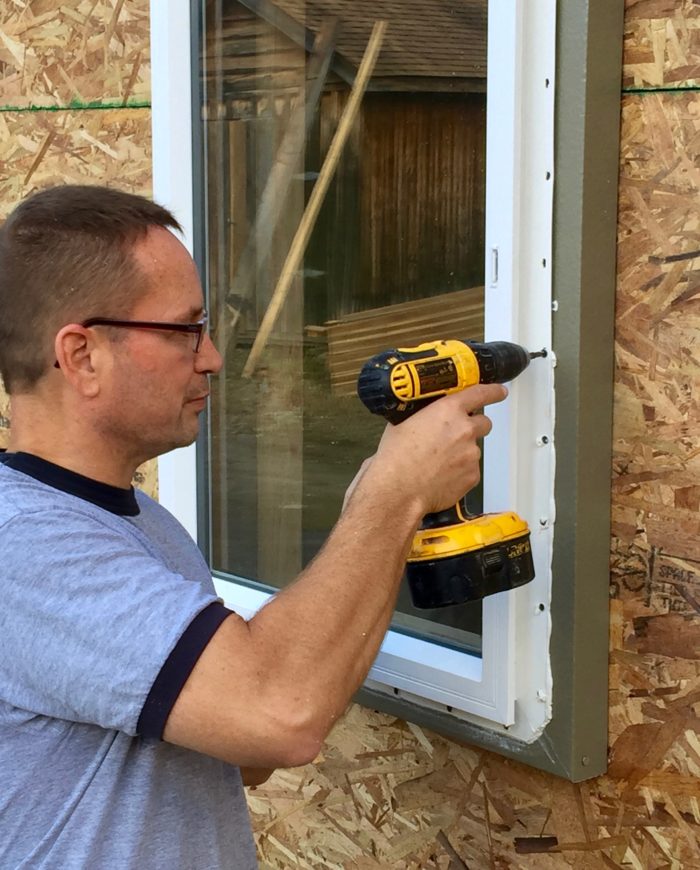
Image Credit: Photos: BRINC Building Products Once ThermalBucks have been installed in the rough opening, the window is bedded in a layer of caulk and attached.
More Green Building News


A Pennsylvania company has developed an alternative to wood window bucks, claiming the coated polystyrene bucks offer better thermal insulation, a more effective water and air seal, and better long-term performance.
Window and door bucks are used when exterior insulation, such as rigid foam, or a rainscreen is installed over sheathing on exterior walls. A buck (more properly called a Rough Opening Extension Support Element, or ROESE) ensures the window or door will be aligned correctly with the insulation or rainscreen.
Carpenters typically make bucks out of wood. But wood bucks have some drawbacks, says John Brooks of BRINC Building Products, including a tendency to warp and shrink. In addition, wood has a relatively low R-value, so wood bucks represent a thermal bridge in the building envelope.
So Brooks invented the ThermalBuck, an L-shaped component made from high-density expanded polystyrene encased in a blend of polyurethane and polyurea. ThermalBuck has a compressive strength of 52 psi and, according to the company, can handle hurricane force winds with “minimal permanent compression.”
Mitered pieces of ThermalBuck are nailed into a rough opening for a window or door in a bed of adhesive. (Brooks specifically recommends Dow Corning 758 adhesive.) Then the window or door is installed with the flanges caulked and nailed to the outside face of the buck.
Four sizes are available
ThermalBucks come in 8-foot lengths and in four versions, corresponding to insulation or rainscreen thicknesses of 1 inch, 1 1/2 inch, 2 inches, and 2 1/2 inches.
The tongue (the part of the buck that wraps around the inside of the rough opening) is 1/2 inch thick and extends into the opening 2 1/2 inches, no matter which ThermalBuck you buy. The other part of the “L” differs depending on the thickness of the exterior insulation. The bucks are pitched slightly toward the outside of the wall, and they are treated with an insecticide to prevent termite infestation.
Brooks rolled out ThermalBuck at the GreenBuild conference in Washington, D.C. last fall, where it won a “Greenest of the Green” award. ThermalBucks cost between $2.50 and $3.20 per foot. For ordering information, contact the company through its website.
Weekly Newsletter
Get building science and energy efficiency advice, plus special offers, in your inbox.


11 Comments
Response to Charlie Sullivan
Charlie,
I'm a little confused by your comment, "I am also a little puzzled that they didn't build in a little bit of a pitch on the bottom member to ensure water runs out."
Are you sure they didn't? Scott Gibson's report notes, "The bucks are pitched slightly toward the outside of the wall."
They are pitched!
Thanks Martin. I said I was a little puzzled but I was beyond puzzled, I was just plain wrong. Even their dimensional diagrams clearly show the small amount that they are pitched. http://thermalbuck.com/performance-2/product-dimensions/
Glad to see it!
This looks like a great product. Not only the fact that its thermal performance and rot resistance are better than wood, but also that it's pre-engineered, so that we don't need each carpenter to figure this out for each building. And it's cheaper and a more completely engineered solution than the Compacfoam alternative.
What I don't like is that cutting it on site will generate insecticide and fire retardant laden dust, which workers might breath and which might be left on ground. The cutting step photo in their installation instructions looks to me like it leaves dust on the ground.
It might be nice if windows could be sold with these provided pre-cut, both for control of potentially toxic dust and to save labor and simplify ordering logistics. But it seems that the intent is for them to be fit tightly to the rough opening with the slack between the window and the ROESE.
[Edit: the following is an mistake on my part that Martin corrects below] I am also a little puzzled that they didn't build in a little bit of a pitch on the bottom member to ensure water runs out, not back to the indentations made by the nails. Unless that happens naturally when it deforms with the weight of the window on it. [End of mistake]
Anyway, I think this is a step in the right direction!
Window sizing
Is there a limit to the size/weight of window that they can support?
I am thinking of a large triple glazed window.
Compacfoam appears to be much stronger.
I really like the ThermalBuck concept, but unfortunately, they don't seem to give so much in the way of specifications and such. I'm a bit worried about window weight, deflection, etc. For ThermalBuck, they say the combined "compressive strength" of the EPS with the "polyurethane/polyurea blend coating" is 52 PSI.
Compacfoam, on the other hand seems to have much higher numbers. For the CF100 density, it lists 203 "Compressive Strengh (PSI)" and 55 "Permissible Stress (PSI)". For the CF200, it lists 508 "Compressive Strengh (PSI)" and 146 "Permissible Stress (PSI)".
Of course, I'd love to hear more about real-world experience with these products. I would really like a good solution for mounting outie windows with Mineral wool that minimizes thermal bridging.
Response to Aaron Gatzke and Christopher Welles
Thank you both for your great questions and comments about ThermalBuck. We have found it to be mighty strong stuff that can handle a very large window, and the testing really proves it.
Handling sheer and wind loads has been a major focus of both design and testing. For sheer loads, we tested a simulated 8' x 8' triple pane window (simulated, made from wood so we could add extra weight and loading). We used two shims to support the 8' x 8' window.
In every test, the window and wall were the weak links, we never compromised the ThermalBuck. We even added 430 lbs. additional weight to the test wall, and it still showed no measurable compromise in the sill or elsewhere with the ThermalBuck.
We also tested ThermalBuck up to 350 psf negative and positive pressures, and had to stop at that point because we were concerned we might take the testing equipment past it's capabilities. (This was after the 2" x 6" walls we build broke around 130 psf, and we replaced them with 2" x12" walls.)
Please feel free to take a look at all of the performance reports from Intertek:
http://thermalbuck.com/performance-2/
Infiltration and Structural direct link:
http://thermalbuck.com/wp-content/uploads/2016/01/Infiltration-and-Structural-Performance.pdf
We will keep working on adding more detail to the specs - and thank you again for your insight and comments!
-ThermalBuck
Response to Charlie Sullivan
Thank you for your positive comments - and keen eye for all of the engineering that went into developing ThermalBuck. The "L" shape helps distribute the load two ways - and maintain a long-term air and water seal.
We did consider precuts, but since two window openings are never the same, we felt it would create more issues. We sure like the way you're thinking about simplifying the installation though!
In regards to the safety of the product, all of the properties of the EPS and coating are neutral. We had to do no special permitting through the DEP to manufacture the product. The dust from cutting ThermalBuck is no more harmful than dust of most other materials used on a job site, like wood or OSB.
The pesticide is nicotine based, and a small fraction of the ppm of the insulation. Testing has shown no harm from it to humans if cut or burnt.
All pieces of ThermalBuck have the same pitch, so you don't have to use different pieces for the sill vs. the jam vs. the head piece. Less waste, less time. Any rough opening can be tricky to make water and airtight. The slope does not run the whole width of the piece, so it can still lay flat on the miter saw bed for a square cut. The attached photos may help illustrate the slope a bit better.
Simplicity and constructibility were two key factors in the development of ThermalBuck, and it really does perform in ways wood window bucks just can't.
Thank you for your insight and comments about ThermalBuck -
Bee colony collapse?
Thanks for the response, ThermalBuck! At first a nicotine-based pesticide sounds no worse than a construction crew with a few smokers. But on second thought, that sounds like the neonicotinoids that have been implicated in wiping out honeybees. https://en.m.wikipedia.org/wiki/Neonicotinoid
Can you be more specific? Is there an MSDS available? How about making a variant without the pesticide available for people who live north of where termites have gotten to so far, or for people who prefer to take the risk that termites might get through the skin?
Tie in with building wrap and flashing
Looks like a good solution to an annoying problem. Your photos (and the website) indicate the building wrap and flashing are installed after the windows are in. How does this work with sill flashing? Do you assume the building wrap will be outboard of the rigid insulation, rather than directly over the sheathing? Some good sill, jamb, and head detail sections (or isometrics) would be greatly appreciated.
Response to Charlie Sullivan
Thank you Charlie for your comments -
ThermalBuck is a product with many benefits that save considerable natural resources, and improves IAQ. We must delicately balance the desired functionality of our products, and the continual need to be as "green" as possible.
In response to the termiticide, we weighed the options of keeping that feature in our EPS, or removing it. For now, we felt it would better serve our customers to include it. We will certainly consider the idea of a variant without the termiticide, for those customers who would rather take the risk of termites entering their structure.
Below is a link to the page that contains our SDS. You didn't miss it before - we are continually adding updates to our site, and this was next on the list. Our apologies -
Thanks again for your insight!
http://thermalbuck.com/performance-2/
Response to Michael Thomas
Michael - thank you for your great questions - we must apologize for not having more detailed installation instructions and photos on thermalbuck.com. They will be up soon - and we appreciate your patience!
There are multiple scenarios for flashing ThermalBuck. As you know, there are as many different thoughts on where to place water and air barriers as there are builders. We do not promote one over the other, as each climate zone presents it's own challenges.
The photos you refer to use the outside of the insulated sheeting as the barrier by taping the seams. If the WRB would be up against the sheeting, we do recommend that you place the WRB under the sill section only of the ThermalBuck. This would be the only instance that the WRB would come between the ThermalBuck and the structure itself. A bead of sealant would be used on both surfaces of the WRB where it would be used under the ThermalBuck. Then a bead of sealant will be applied running up the wall on each side where the ThermalBuck meets the wall and the WRB would be pressed into the adhesive. Next, apply a layer of tape to the area where the WRB meets ThermalBuck, extending past the buck on both ends, splitting the tape at the ends of the buck so the tape can extend in both directions - up and down the wall and also wrapping around the end of the buck.
Apply another bead of sealant to the head area of ThermalBuck and wall merger area, and the WRB would be pressed into the sealant with another layer of tape added just as it was on the sides. Add one final layer of tape (longer than the first one) to overlap the first piece of tape in the head area. This final layer of tape would be laid on the flat surface of the wall only.
If you would need to dry-in the house quickly, or your rigid foam also doubles as your WRB, ThermalBuck can be installed before the WRB. You would not be able to put the WRB under the sill area of the ThermalBuck, and you would seal it as you did the sides. Then when you install the rigid insulation, you need to seal the area where it comes into contact with the sill area of ThermalBuck as an added layer of protection.
Correct shingling is important, and the bottom of this area could be viewed as a reverse shingle, like putting tape on rigid insulation. This scenario would offer more protection than just putting tape on the surface of rigid insulation. We are comfortable with this scenario, since it has three layers of protection, and the moisture would not make it to the reverse shingle area.
Thank you again for your interest, questions, and feedback - we will get photos and video instructions, as well as detailed written instructions with drawings up soon - stay tuned!
ThermalBuck
Log in or create an account to post a comment.
Sign up Log in