
Image Credit: All photos: Alexi Arango
More Guest Blogs


As they set out to build a single-family Passivhaus on Potwine Lane in Amherst, Massachusetts, Alexi Arango and LeeAnn Kim asked themselves, “Is it possible to live without burning fossil fuels?” One measure of success would be meeting their goal of net-zero energy performance. This is the fourth blog in a planned series.
March 15, 2014: First floor framing
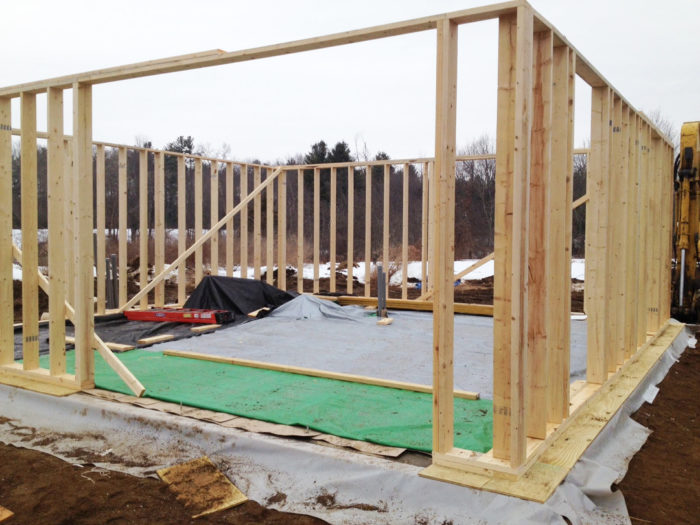
Don, the carpenter, was able to get a bunch of work done early in the week before the weather turned cold and stormy. He’s basically got most of the first floor framing done.
Interior framing first, then exterior walls will go up
Last time I talked about SIP walls — prefabricated walls panels. So now why is the carpenter putting up walls the old-fashioned way? Let me explain.
The architect has designed the walls to consist of two components: the exterior walls, which are the SIP walls, and the interior walls, which are constructed onsite with 2×6 lumber. The interior walls will contain extra insulation and provide a frame onto which the SIPs can be attached. The first-floor walls will hold up the second floor.
Once the first and second floor framing is complete — probably in 2 to 3 weeks — the SIPs will be installed with a crane and attached to the interior walls.
Why two walls?
The hybrid interior-exterior wall design seems to have a number of advantages. First, the interior wall increases the total wall thickness, boosting the R-value significantly. I’m assuming that it would be tremendously difficult and expensive to fabricate and install a wall panel that was 14 inches thick — the total thickness of both walls.
Second, the interior wall will accommodate plumbing, wires, outlets and light switches, so that the integrity of the SIPs can remain intact without needing to drill channels through the foam insulation.
Third, the exterior wall provides a continuous layer of insulation while being much easier to seal than a normal stud wall.
March 22, 2014: First floor framing
Don, the carpenter, got a lot of work done this week.
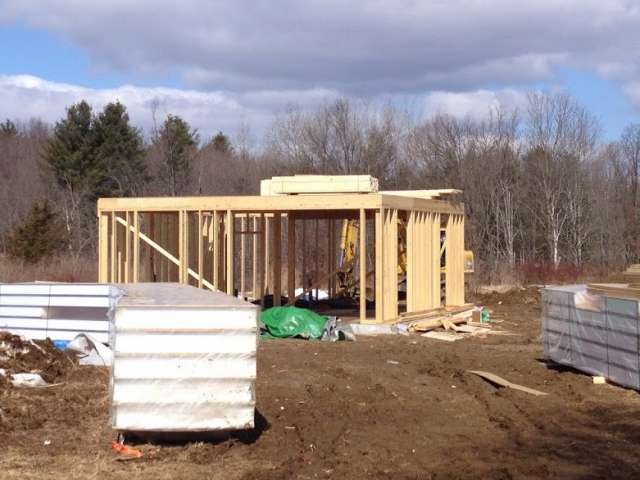
He said he had help for one day, but I’m impressed. The second floor subflooring is in place and you can see the boards for the second floor walls up on the roof. I forgot to ask how they got up there, but I’m guessing they used the excavator. I took some pictures earlier in the week as everything came together — it’s neat to see how the frame is set up.
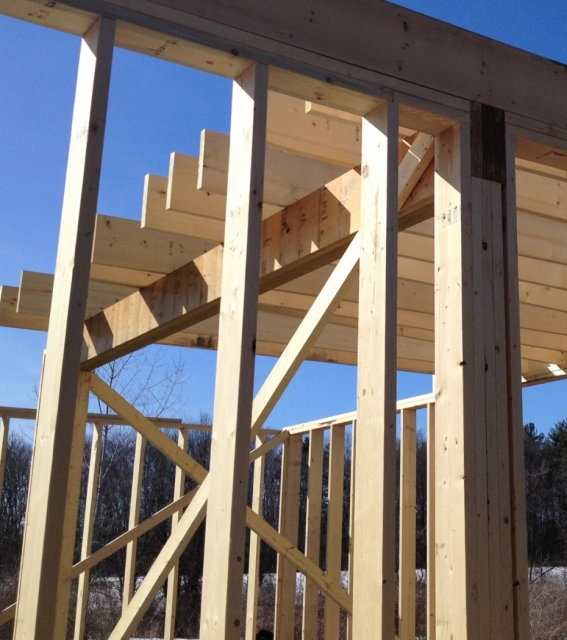
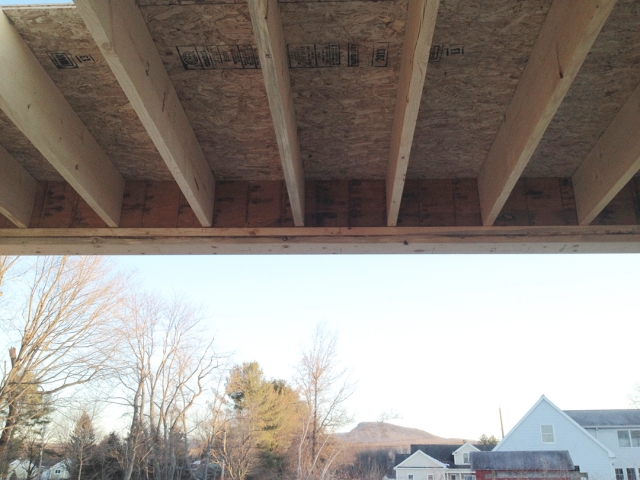
Beams and joists
Starting with the ceiling over the kitchen, a laminated veneer lumber (LVL) beam provides support for the horizontal 2x8s, called joists, onto which the second-floor subflooring will be placed.
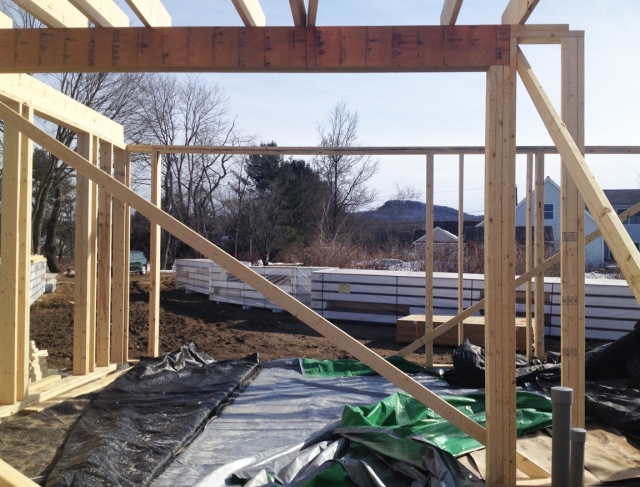
Looking from the front door, you can see how the LVL beam spans the width of the kitchen. Off in the distance, by the way, is Mount Norwottuck, directly accessible from the trail across the street. The diagonal braces are there for stability — they’re temporary.
Subfloor is done
By Tuesday, most of the joists were in place and Don was getting started on the subflooring, which consists of OSB panels. By Friday, he was all done.
Window header
Another LVL beam is placed over the large windows in the dining room, to keep pressure off the windows — you don’t want them to buckle over time and lose their seal.
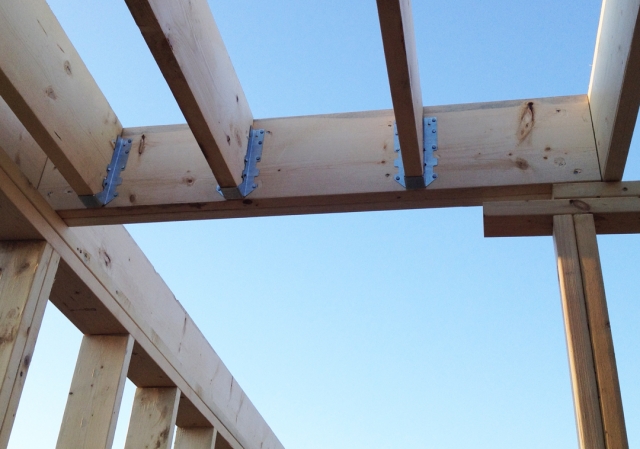
Joist hangers
Another way to support the joists is to use metal joist hangers, shown at left. This is right over the stairs. They don’t look that sturdy, but I guess they do the trick.

Double joists for the bathroom
The image above shows the double joists underneath the bathroom. See how the joists look thicker: there are two of them. If the bathtub is full of water, you’ve installed tile everywhere, and ten people are crowded inside to see how nice it looks, you want extra support under the bathroom. Also, bathrooms tend to have pipes under the floor, requiring holes through the joists, which can compromise the strength of a single joist.

Floor joist blocking
The short lengths of 2×8 lumber running perpendicular to the joists are called blocking. They prevent the joists from twisting, and serve to even out the floor load and to provide something solid to nail the upstairs wall into. Staggering the blocking allows you to nail straight through the joists into the blocking.
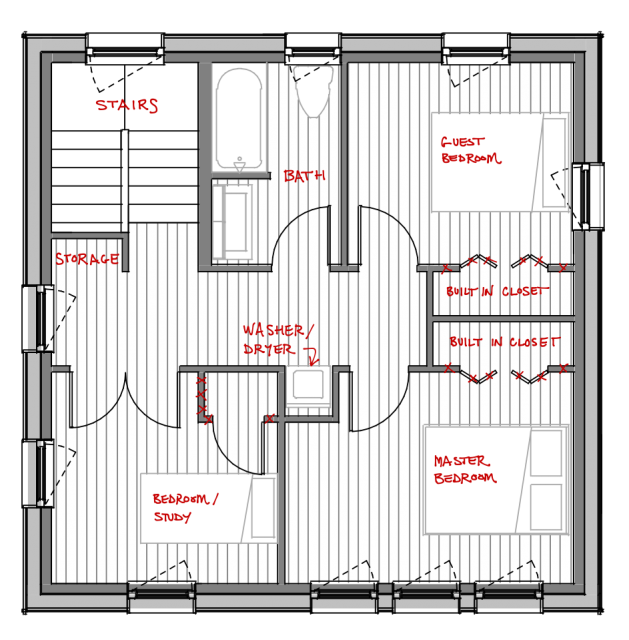
March 23, 2014: Floor plan discussion
In a previous post, we talked about how the design of the first floor layout helps make the home feel bigger than it really is. The upstairs is a different story — we need to fit three bedrooms, a bathroom, and a washer/dryer into a small space. There’s no way to open everything up: it’s going to feel tight no matter what. The question is whether we can arrange everything to use space efficiently while keeping the floor plan as open as possible.
Much like the first floor layout, GO Logic provided fantastic off-the-shelf floor plans, but I couldn’t help but to shift a couple of things around.
Double doors at the top of the stairs and a window
I love the feeling of walking into a well-designed home for the first time. Your viewpoint is obstructed by something — maybe stairs or walls — then, bam! You see straight ahead into an interesting space, wide open and well-lit. It’s a great feeling: emerging from a tight space to observe a striking view.
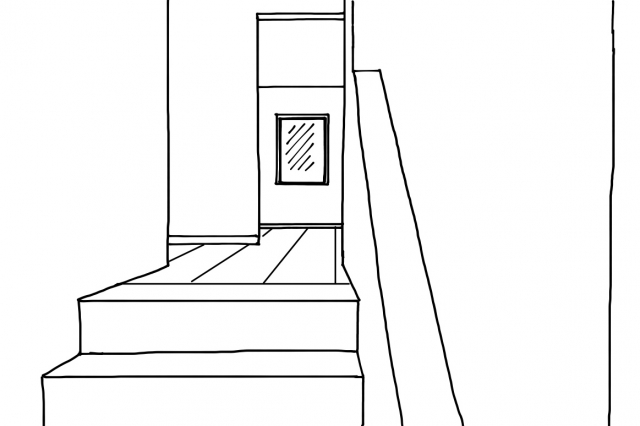
I wanted to go for a similar feeling with the stairway, in a much more modest way. The image at left gives the perspective as you walk up the staircase and look straight ahead toward the study. We added double doors to the study entrance so that the top of the staircase would feel expansive, with an unobstructed view out the window in the background. The small landing at the top of the stairs functions as an extension of the study rather than a closed-off space.
The view north overlooks an apple orchard, marshland, great blue herons, egrets, hawks, beavers and more — it’s awesome. The property is a rare treasure for its proximity to wetland, conservation land, and hiking trails. But north-facing windows are heat losers, with no solar gain, and should be minimized in a Passivhaus. Should I sacrifice the Passivhaus design principles in order take full advantage of the surrounding views of wildlife and conservation land?
Looking out over the property, the architect, Matt O’Malia, turned to me and said, “You know, we don’t have to build a Passivhaus. We can face north. It will be a house that performs well, but doesn’t meet the Passivhaus standard.” I thought about it for a bit. In the end, I couldn’t give up two things: the bragging rights of a Passivhaus and the wonderful feeling of having abundant sunlight streaming in.
Some north-facing windows are OK
As a compromise, we increased the size of the north-facing window over the stairs and added a west-facing window at the landing, but kept our adherence to the Passivhaus standard. Our Kneer-Südfenster windows are so good that these changes didn’t incur much of a heat demand penalty anyway.
The image at the left shows the stairway landing, as seen from the study. The west-facing window (on the left wall) will be a great spot for wildlife viewing and watching the sunset while also serving to illuminate the hallway. The north-facing window over the stairs is sufficiently large to provide a nice view from the landing.
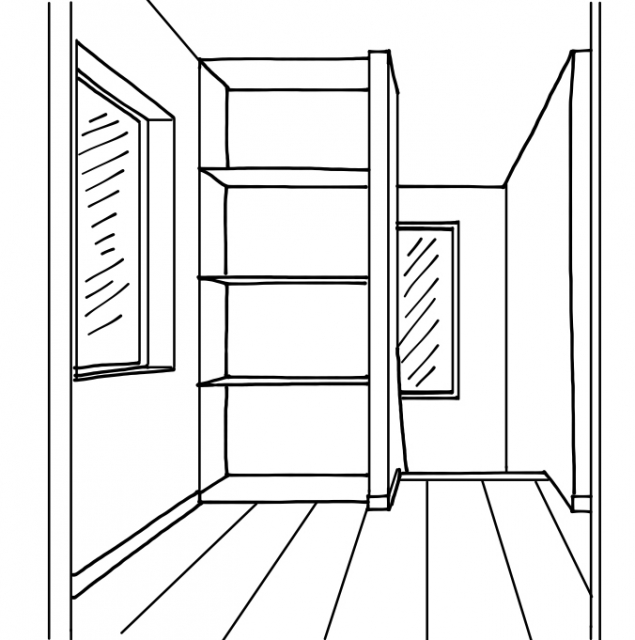
More storage or more views?
The built-in shelving is one aspect that I’m still on the fence about. On the one hand, storage space is limited and I’d like to use the space at the top of the stairs effectively.
On the other hand, the shelving is blocking the view to the north window from the landing and the study, and might be closing off the top of the stairs awkwardly. The compromise that the builder and I came up with is to wait until the second floor and the walls are up, then have a look around and see if we can come to a decision.
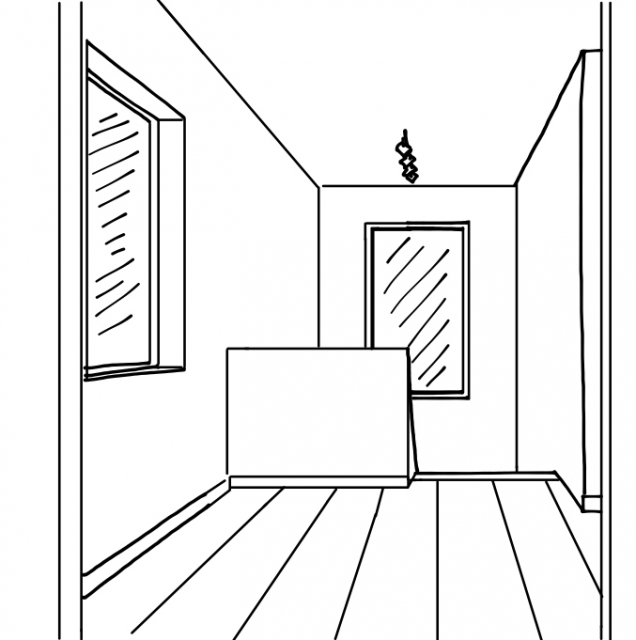
Here’s a look at the same perspective as above, but with the shelving removed, leaving a direct line of sight to the rear window.
What do you think? Why sacrifice the heat loss through a large northern window and yet not take full advantage of the view out that window?

Small washer/dryers save a lot of space
Go to Best Buy or Home Depot and look at the washer-dryers; they’re enormous! How am I going to find a place for these behemoths? Luckily, the Europeans came to the rescue, once again.
The photo at left shows a Miele washer/dryer combination. They’re compact, efficient, yet accommodate a surprising volume of laundry — and they look neat. They can fit right into a hallway without taking up too much space. The downside is that they are unbelievably expensive. I ultimately decided it was worth it.
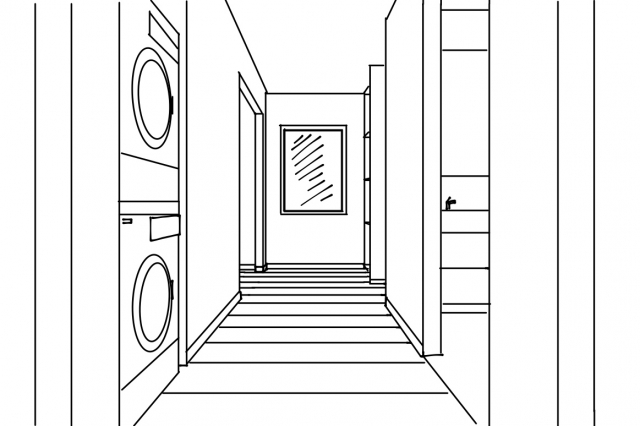
The image at left is looking down the hallway back toward the landing and the west-facing window. Notice how the washer/dryer stack is flush with the wall — no doors or a separate laundry room to needlessly take up space.
The bathroom is off to the right. Both the washer and the shower are fed hot water from a single on-demand water heat located in the utility closet on the first floor, right beneath the hallway. The close proximity of the water heater, the washer, and the shower helps reduce the length of the hot water pipes, giving instant hot water and reducing wasted heat.
I also love the fact that the west-facing window at the end of the hallway will let afternoon light percolate deep into the hallway. It’ll be a great spot to watch the sunset. In the summer, however, there will be a cooling load penalty: the afternoon sunlight will warm up the home somewhat. I think the window adds so much to the hallway, however, that I’m willing to use a little more energy in the summer to cool the home.
Extra windows for the master bedroom versus overheating?
The architect had originally planned for two windows in the master bedroom, having determined the right amount of south-facing window area needed to heat the upstairs while avoiding overheating. But I argued that overheating in the bedroom was less of a concern for me than to have a wide-open view, a more open bedroom, and more of a connection to the outdoors.
A midday nap in a warm bedroom on a sunny day doesn’t sound that bad to me, anyway. I don’t tend to use the bedroom during the day, though, so I think we’ll be OK even if overheating is an issue.
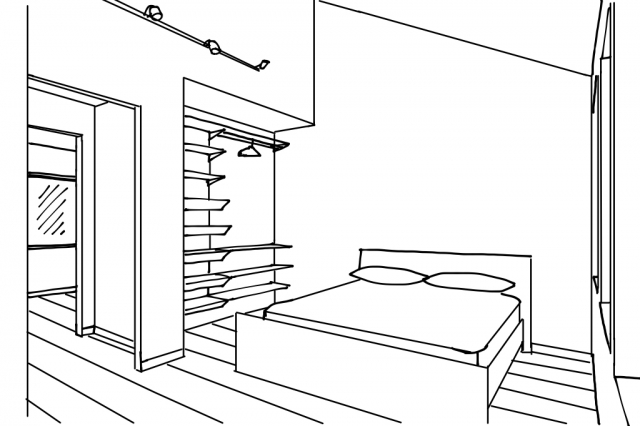
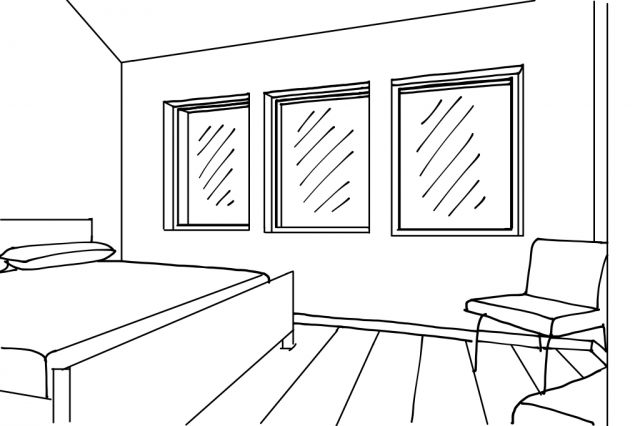
An open feeling in a small bedroom
A couple of neat tricks help make the bedrooms more feel spacious even through they are tiny (the master bedroom is only 136 square feet while the typical American master bedroom is 256 square feet).
First, vaulted ceilings provide extra space overhead and also look cool.
Second, the closet doors were removed in favor of an open closet with a closet system.
Third, the position of the door to the third bedroom across the hall allows you to peer across the full width of the home when sitting in the reading chair (the viewpoint from which the above image was drawn).
The walls on the second floor are going up this week, so it won’t be long until we get to see how it all comes together!
Alexi Arango is an assistant professor of physics at Mount Holyoke College in South Hadley, Massachusetts, where he and his students conduct research on next-generation photovoltaic cells. Arango teaches a joint physics/environmental studies course on renewable energy. Arango’s blog is called Potwine Passive House.
Weekly Newsletter
Get building science and energy efficiency advice, plus special offers, in your inbox.


7 Comments
PHds and joist hanger magic
say no more
Thick walls with no foam
We just finished a house with 11-1/4" walls we pre-fabbed, then dense-packed with cellulose. I don't think there's any compelling reason to use all that foam in new construction.
We used 2x12 top and bottom plates, 2x6 ext studs, 2x4 int, so 2-1/4" clear between the two layers. We also offset interior and exterior studs for greater break. All built off-site and craned into place. R-40 walls, all cellulose.
AJ
Wait until you hear his insights on drywall.
New idea to try
Large halls and tiny bedrooms. will have to float that by my next customer..
some thoughts
Miele equipment tends to last a long time - its just the up front cost that hurts. Although I might have skipped on the dryer and just hung my clothes up outside.
Will you have a ceiling fan in the bedroom ? Living in Australia getting ceiling fans fitted was probably the best investment I ever made ( we don't have an air conditioner ). And shading for the windows on really sunny days makes a huge difference - you can get shading which is effectively see through - http://www.concertinafoilbatts.com/renshade.htm is an Australian product.
Your clothes in your open closet may get a bit dusty - see through pull down roller blinds ?
For your landing storage I suggest a half height built in for two thirds of the width and for the other third (closest to the wall) full height - getting the best of both worlds. You could even consider the top part of the tall unit facing not towards the study but towards the opposite wall with the surface facing the study being a mirror or other shiny surface.
I like the smaller bedroom / bigger landing idea. The fact is a lot of folks have a bedroom which they just use to sleep in - why not borrow the landing just as we "borrow" next door's garden or the field over the fence to make our garden look bigger. With the main bedroom I might have gone two windows and then a highlight window high on the wall where the bed head is.
North facing windows.
Consider shutters over north facing windows. There are very neat powered shutters available in Europe - when open they simply disappear.
Extra windows in the Master
I don't think that you will have any problems with overheating because of the extra window in your super insulated house. In my experience, most of the overheating that causes problems in bedrooms comes from attic spaces that get overheated during the day and then radiate that heat through the ceiling into the room as you are trying to go to sleep. With a properly insulated attic, which to me means an insulated (but still cold/ventilated) roof, not ceiling, simply opening a window in the evening quickly cools the room for sleeping. Of course it helps if you live in a climate where it does cool off a little in the evenings.
Log in or create an account to post a comment.
Sign up Log in