
Image Credit: All photos: Alison Steele-Myers
More Guest Blogs


Rob Myers is building a timber-frame house in Ontario, Canada, at a site on the Bonnechere River an hour and a half west of Ottawa. The first installment of his blog series was A Timber-Frame House for a Cold Climate — Part 1.
A timber-frame house is generally more expensive than a regular stick-framed structure and often requires more materials; so why would a person build one? In my case, there were several reasons.
The first structure that I built (and lived in for 35 years) was a geodesic dome, and one of the things that I liked most about it was the open space with a very high ceiling. Because of the exposed network of hubs, a dome also has an inherently peaceful feel to it. Your eye travels upwards and then slowly from hub to hub across the ceiling and you are connected to the structure. With its unsupported spans, cathedral ceilings, and exposed framework, a timber-frame house shares all of these characteristics.
I also think that owner-built houses tend to reflect the personality of the builder, and since woodworking is one of my passions, the heavy timbers are a perfect match. An added appeal is that well-executed joinery is often invisible, and there is satisfaction in knowing what is under the surface.
Finally, I enjoy a challenge, and although timber-frame joinery can be as simple or as complex as you want to make it, a timber frame is always a challenging structure to build.
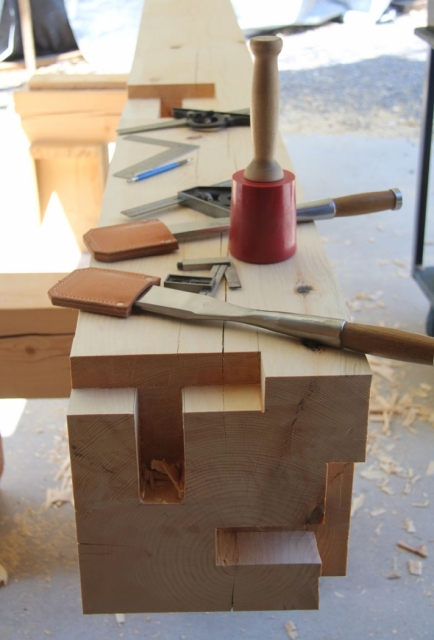
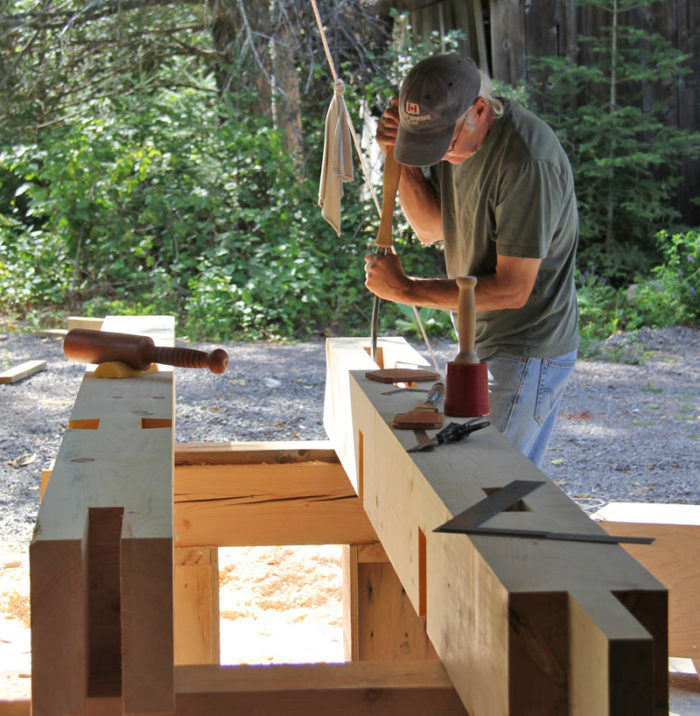
Setting up to work on one of the 12×12 posts.

This is the piece of wood that I use to support the timbers. It’s a good reminder that is always in view.
(During my course at Fox Maple, I measured and cut a brace pocket to the wrong side of the line and ruined — or at least defaced — a 20-foot timber. I have not repeated that error; but I did invent some new ones.)
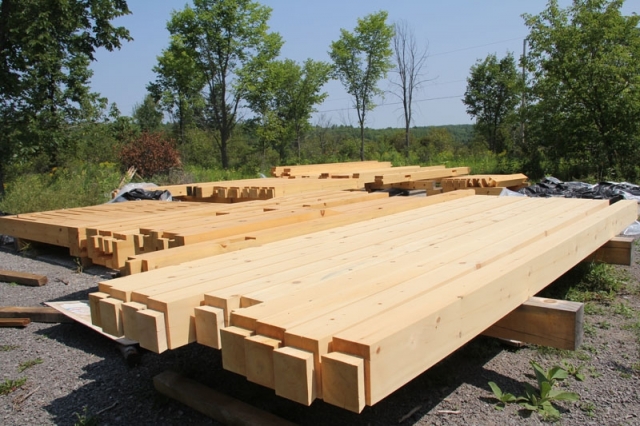
After cutting the joinery and sanding and staining the timbers, they are sorted into the order that will be used for assembly. It is critical that every step be worked out in advance — it is quite easy to box yourself into a corner where the frame cannot be assembled. For example, if a brace is left off, it can’t then be added later on.
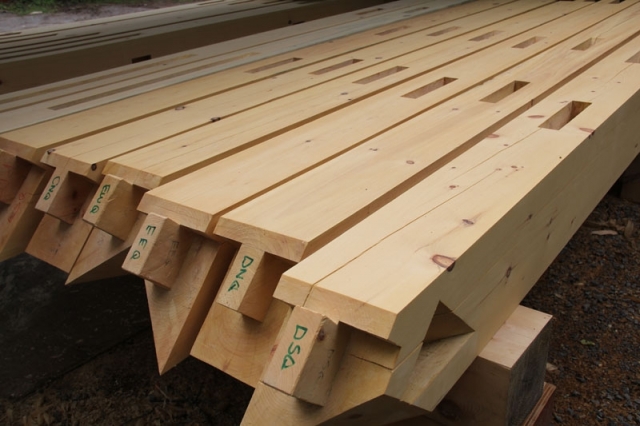
The principal rafters, sanded and finished. Each piece is coded as to where it is positioned in the frame.
Timber frames can be assembled piece by piece or in “bents” (where a section of the frame is assembled and then lifted into place using lots of manpower or a crane).
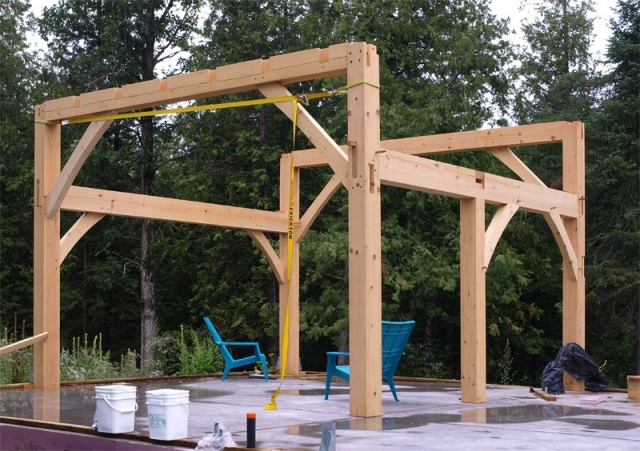
Since this was my first frame and it was not possible for me to test-fit the joinery (and I was working alone), I decided to assemble the base of the frame piece by piece. I built a scaffold crane to lift the timbers and adjustable tripod-type stands to support the ends of the timbers during assembly.
Ratchet straps were used to help pull the timbers joints into position and to hold them in place until they were secured. It was possible to do everything in a slow, controlled manner; these techniques help me avoid having a crew and crane ($200 an hour) stand idle while I tried to adjust a joint.
As it worked out, everything fit with only minor adjustment so I will probably use the full bent method for my next frame (a workshop).

In this example, both ends of the tie-beam, the two outside posts, the center post, and the two braces (a total of seven connections) all have to engage at the same time.
Once a bay has been constructed, the structure is stable, and it is much easier to add the next section.
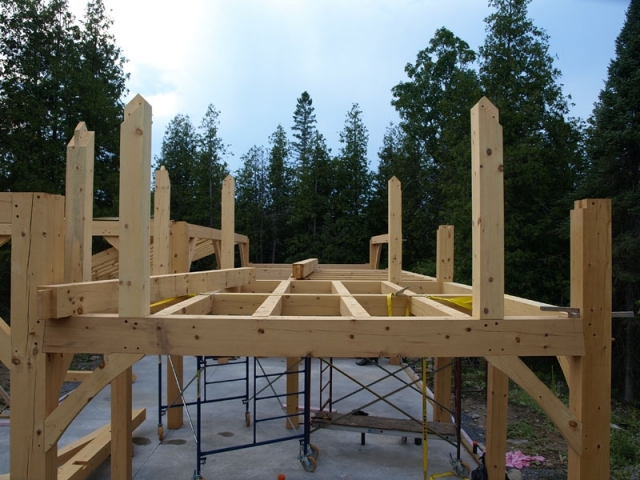
The lower frame has been assembled and the queen posts were set in place. The trusses will be lowered onto the posts using a crane.
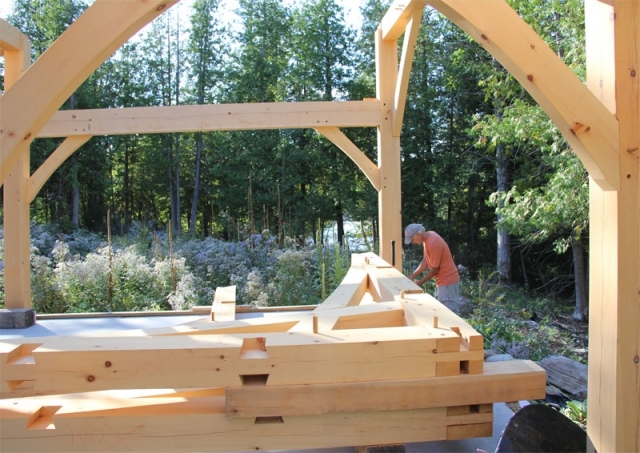
The trusses are assembled on the deck, ready to be lifted into place. Since the posts are already fixed in position, there is no room for error in the measurements — so I was hoping that I got things right! I used both scissor trusses and queen post trusses because I wanted to learn to cut both types of joinery.
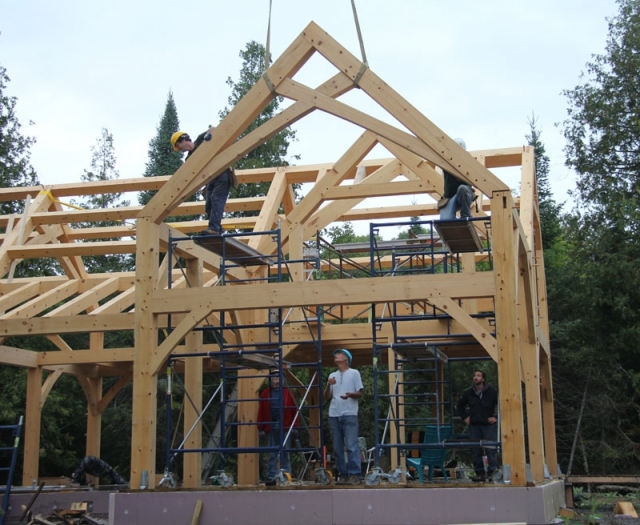
The final scissor truss is successfully lowered into position followed by a huge sigh of relief from all. The purlins were added and the frame was now finished.
Rob Myers has worked as an analytical chemist, high-tech manager, and purveyor of fiery foods, all of which served to support a lifelong love of woodworking and building (not to mention a wicked tool habit). He is currently on a (possibly permanent) sabbatical from any real job while he builds an off-grid timber-frame home near Eganville, Ontario.
Weekly Newsletter
Get building science and energy efficiency advice, plus special offers, in your inbox.


2 Comments
Gorgeous
How incredibly gorgeous. Thank you for sharing the construction photos. I'm sure the beams look amazing from inside the house.
My condolences
Sorry to hear about the "wicked tool habit": it can soak up a lot of space and funds. I haven't heard of a good cure yet... and most sufferers don't even realize they have a problem.
I find your joinery intimidating, beautiful, and wonderful. Many folks decorate their homes with art to add heart, but this art is practical as well. Very nice.
Log in or create an account to post a comment.
Sign up Log in