
Image Credit: All photos: Brian Post and Kyra Salancy
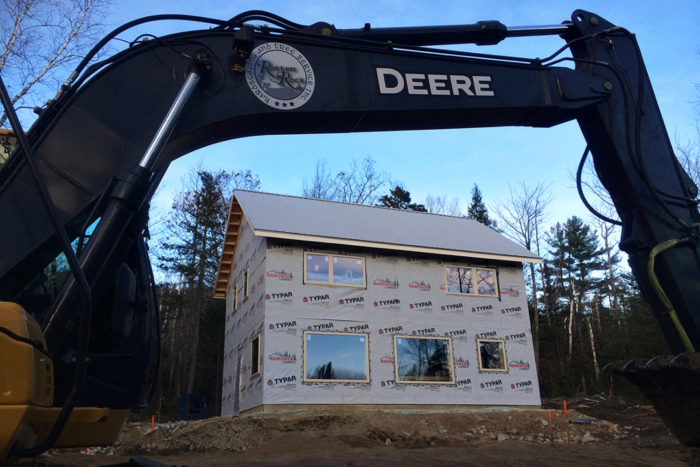
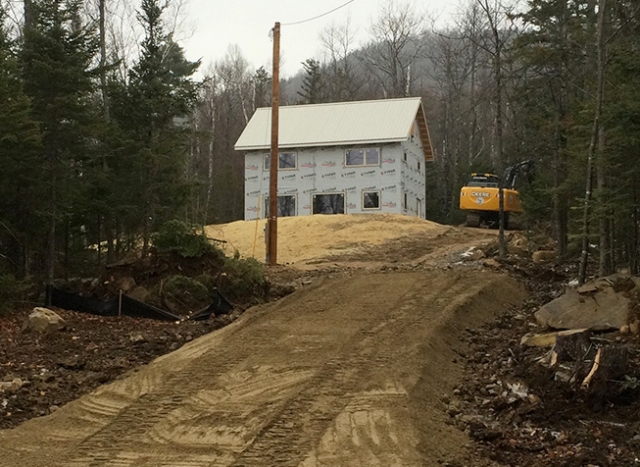
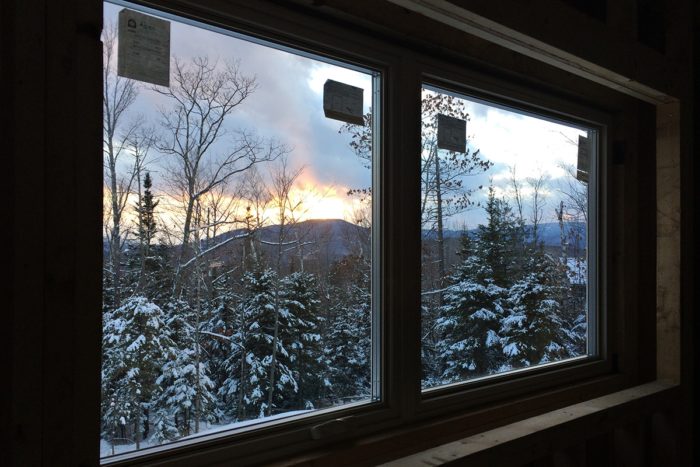
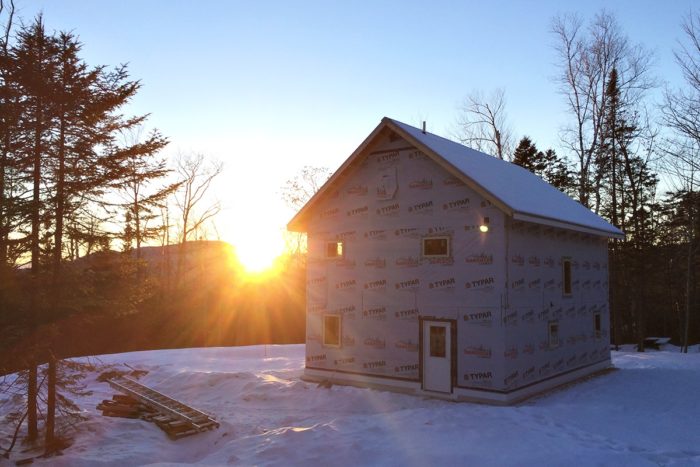
Image Credit: All photos: Brian Post and Kyra Salancy Our driveway was completed before our site was buried in snow. The view through our upstairs windows. The sun goes down after another busy day at the construction site.
More Guest Blogs


Editor’s note: This is the third in a series of blogs chronicling the design and construction of a house owned by Brian Post and Kyra Salancy. The first blog in the series was titled Building a Small House in the White Mountains.
With the framing and sheathing completed, our shell contractor installed the windows in mid-October 2013. Fortunately, based on a tip from the crew, we also had drywall for the second story delivered through a large upstairs rough opening before the final window installation.
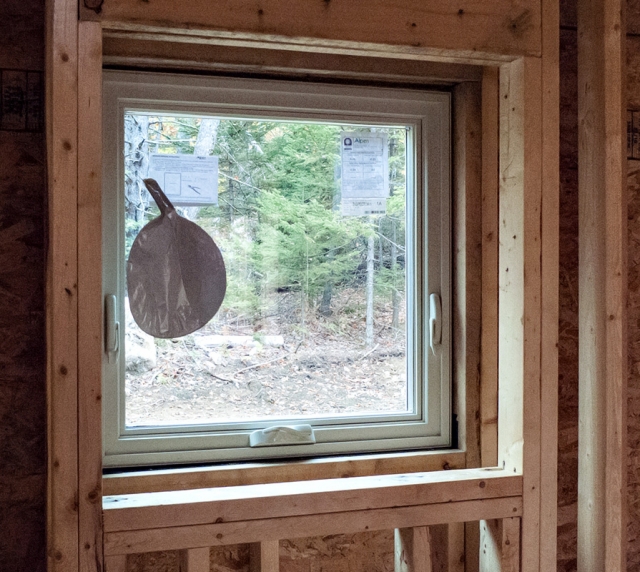
The Alpen 525 series windows came from the factory in Colorado with a tube and air bladder to allow for gas pressure adjustment. Our window dealer was generous enough to drive all the way from Maine to crimp the tubes and remove the bladders after installation.
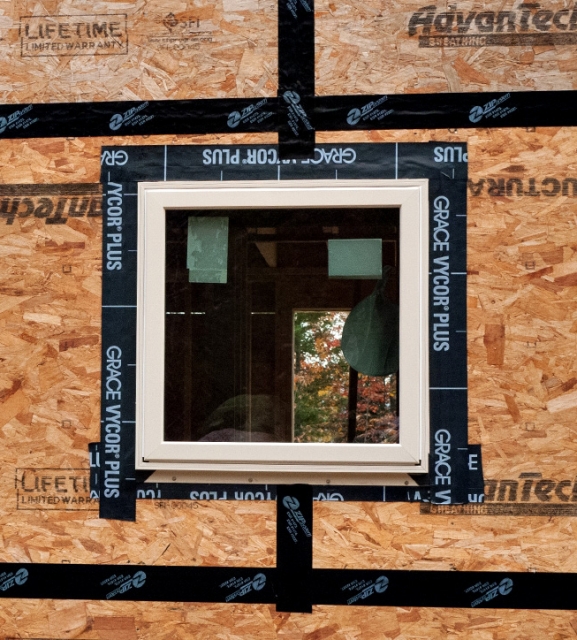
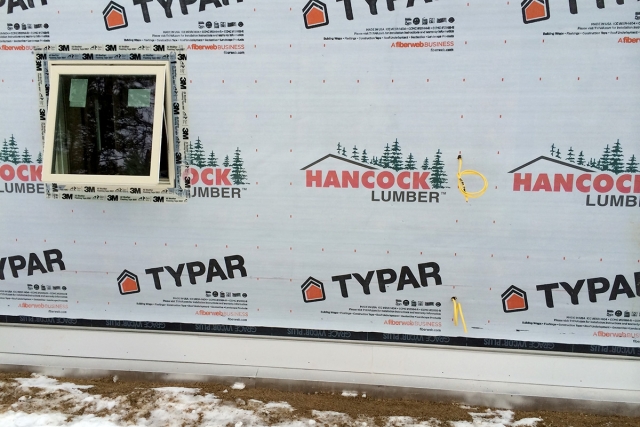
Zip System tape was used on the sheathing and Grace Vycor Plus peel-and-stick flashing was used around the windows. Vycor Plus is a heavy-duty tape, but I found its adhesion to be lacking compared to other tapes we used.

Typar housewrap was installed over the wall sheathing and a synthetic roofing underlayment called RoofTopGuard was installed over the roof sheathing. I knew we weren’t going to get the siding done before or during the winter, so I taped the housewrap openings around the windows; this would have to be re-configured during the siding installation.
The roofing underlayment installation looked a little sloppy to me, but our shell contractor said it would be protect the interior well until the roof was on.
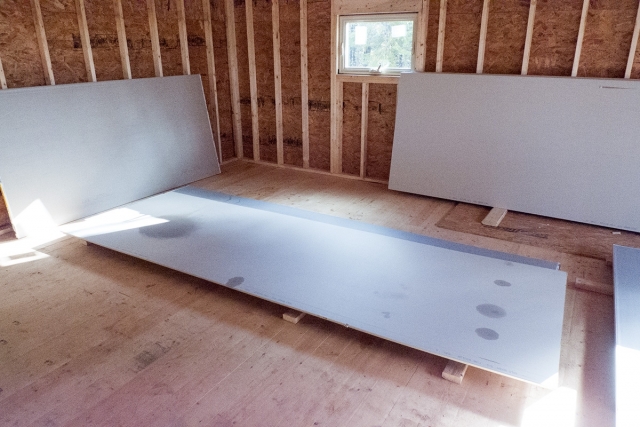
It did wind up raining before the roofer could get started and some of the drywall stored on the second floor got wet. Fortunately, the water didn’t soak any pieces and the drywall was easy to dry out with fans.
The roof
It turned out that I wasn’t the only one who wasn’t happy with the roofing underlayment. Our roofing contractor made a site visit for final measurements and was not pleased with the underlayment installation. To be fair, our shell contractor was working hard, but the installation was sloppy and haphazardly stapled. After some discussion, it was decided the roofer would rip off the synthetic underlayment and use standard asphalt felt.
In addition to this issue, our building inexperience affected us again because we hadn’t planned ahead for roof trim. Terms like fascia, rake, and soffit were still confusing to us. The roofer noticed this and we had him install primed pine boards for fascia trim on the eaves.
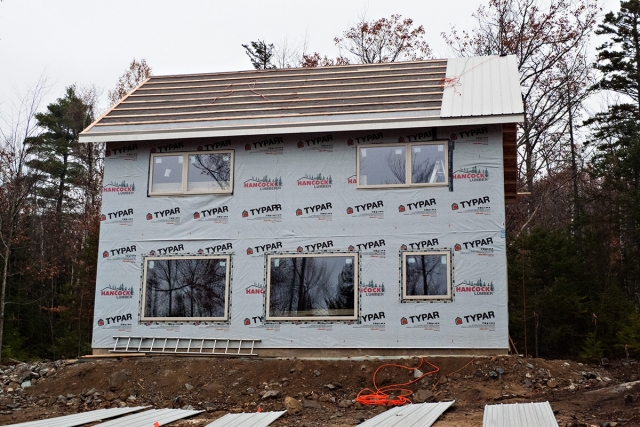
We knew we wanted a metal roof and while we considered standing-seam roofing, fastened metal panels were more in line with our budget. We chose panels from Everlast Roofing in an ash gray color. The roofing contractor first put down the asphalt felt and then strapping. The panels and eave/gable metal trim were finished by early November 2013.
The roof looked great, but it wasn’t a totally smooth install. It rained again before the panels were on and the asphalt felt was even worse than the synthetic underlayment for water protection. Fortunately, we were prepared for this and had covered the drywall with plastic and put down buckets for the heaviest drips.
Additionally, the roofer told us the roof framing wasn’t square. He said no new house is perfect, but ours was off square more than normal and he had to take off and re-install the panels on the north side of the roof partway through. Because the rough plumbing wasn’t done, the roofer installed the plumbing vent flashing (and cut the pipe hole) based on some specs provided by our plumber and we plugged the hole with a capped pipe.
While the roofer was always pleasant with us, the same can’t be said about his interactions with his own crew, and we were glad to not be present during most of the roof install. Ahh, the memories.
Attic ventilation
There is a lot of discussion on GBA about attic ventilation, a topic that is confusing to those without building experience. In the fall of 2013, when we had to make decisions about attic ventilation, we were completely confused about the choices and terms.
The plan for our house was a flat ceiling with drywall air barrier and then at least R-70 of loose-fill cellulose above the drywall in the unconditioned attic. Adding to the confusion, our shell contractor said we could do an unvented unconditioned attic because our house wouldn’t let much heat and moisture into the attic. It didn’t seem like the code or our building inspector would allow that, so we had to figure out how to ventilate. Soffit vents to a ridge vent with baffles seemed like a lot of work; we wanted something simpler. We also realized we wanted to be able to access the attic if/when necessary, which gable vents could allow.
While I was devouring building resources before and during our build, some of the best resources I found were web sites documenting other house builds. One of the best and most relevant to our house was the Up Hill House, a blog maintained by Larry and Jill Burks. (For more information, see this GBA review: Up Hill House.)
I saw that Larry Burks was only using gable vents for their unconditioned attic, and I reached out to Larry to ask why they made that decision and how it was working out. Larry’s answer encouraged us to use only gable vents and we would eventually finish the installation of these just after the attic was insulated. We sized the east-side vent to be large enough for a person to climb through, and purchased a hinged vent from Custom Gable Vents to allow access.
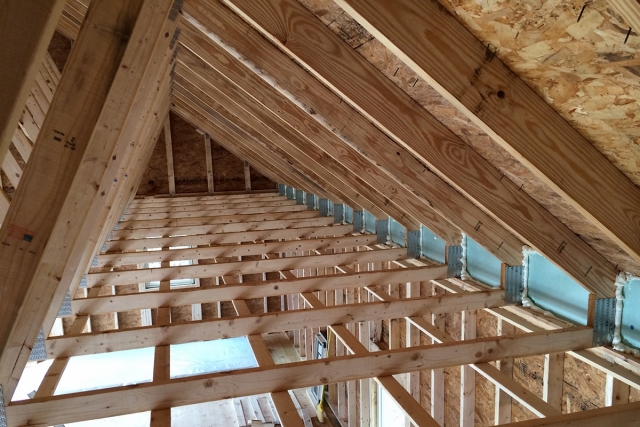
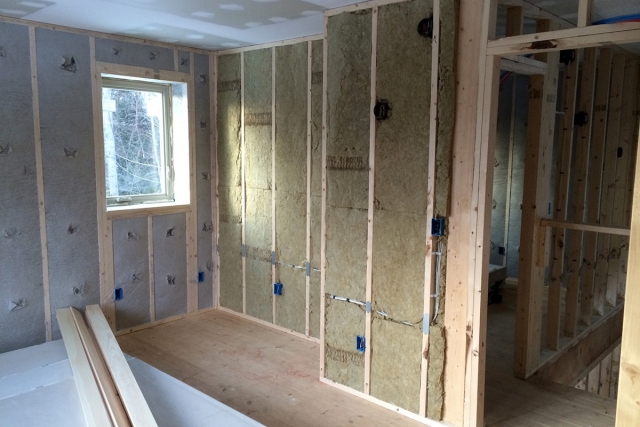
In the attic, our shell contractor installed vertical wood blocking between the roof trusses (above the top plate of the perimeter wall). Kyra and I decided to also add rectangles of vertical XPS on the attic side of this blocking, sealing the edges with canned spray foam. (The XPS rectangles are visible in the photo above.)

The first drywall
With the roof on, it was time for the drywall crew to complete the second-story ceiling. We were having them do this with â…” sheetrock before the interior part of the double stud wall and before the interior partition walls. This would create a continuous air barrier below the attic insulation. Continuing our focus on energy efficiency, we also decided to have no ceiling lights, no attic access from the interior, and no other ceiling penetrations except for the one plumbing vent pipe. After the drywall was up, Kyra also used 3M flashing tape where the drywall met the outer 2×4 wall top plate. Looking back, I think these decisions and steps helped a great deal for air sealing.
Septic and utilities
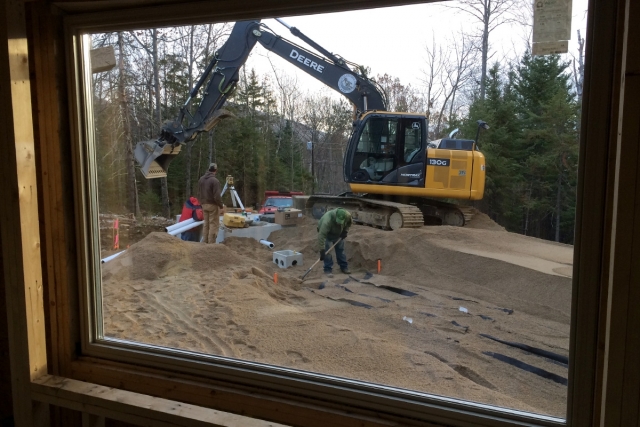
In early November 2013 we were able to schedule various contractors to install the septic system, the power lines from the meter on the new pole, and the well water line.
The lack of deep soil and abundant ledge near the surface would continue to complicate parts of the building project. Our site work contractor said it was going to be a matter of inches whether they could excavate deep enough for the septic tank. The plumbing waste pipe that exited below the slab needed to pitch a minimum amount to the tank. If we couldn’t get a minimum pitch, we might have had to blast or hammer out some ledge, adding significant expense.
It was another stressful time during construction, but the septic tank was delivered and they were able to excavate deep enough for a standard installation.
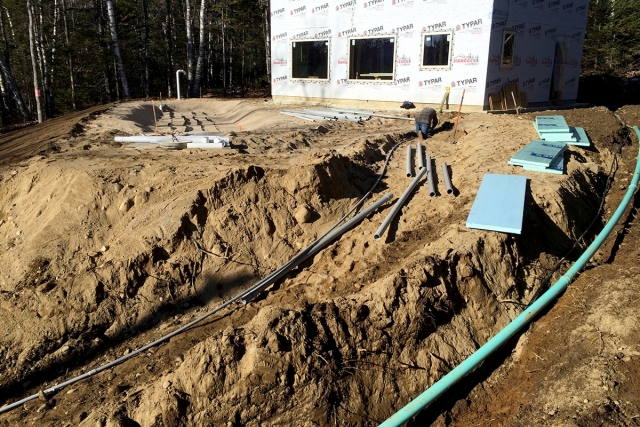
The ledge complications didn’t stop there: we also had the well water line to deal with. Ideally, we would have been able to excavate 4 feet or more to bury the well water line. That was going to be impossible because of the ledge.
The building inspector from our town of Jackson, New Hampshire, indicated that we might have to blast, excavate, or hammer a trench in the ledge. There was no way we wanted to do that because of the expense and danger of the slab cracking. I did a lot of online research about keeping water lines from freezing in shallow burial situations. I came to the conclusion that we would probably be OK by insulating the well water line with rigid foam and running a heat cable through the most vulnerable part of the line. This would add to our electric load during the winter, but was the only reasonable option.
I had grand plans of insulating the water line with two layers of 2-inch XPS in an upside-down U shape over the line, but we ended up just doing a 2-foot-wide strip of 2-inch XPS over the whole line. After a few attempts, the site work crew was able to pull and push the 1.25-inch water line and the 1-inch well pump electrical line through the 4-inch pipe we embedded in the slab. The other good news is that there were no issues with the electrical conduit installation.
We now had to wait for the septic designers to complete an “as built” septic plan, submit that to the town for approval, and then get a state inspection before backfilling the septic system. Easy, right?
Partitions, more slab insulation, and a blower door test
In mid November of 2013, our shell contractor returned to the site. The workers completed the second-story interior section of the double stud wall and the room partitions. They were also kind enough to point out that we didn’t have bedroom closets on our plans, so we had them frame those.
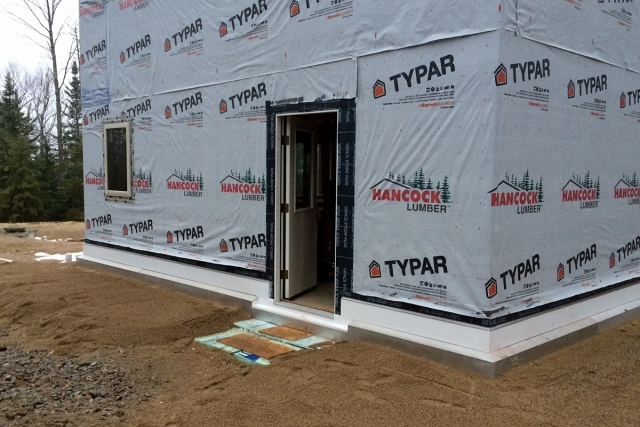
The two Therma-Tru fiberglass exterior doors were installed with Vycor Plus over the rough opening gap on the outside. This would hold up OK over the winter, but I later ended up completely resealing this area when doing the exterior trim.
During this time, Kyra took the lead on installing the slab wing insulation. We put down 4 inches of XPS at least 3 feet horizontally from the slab and went out to 4 feet on the northern sides of the house. We also hired one of the crew members from the shell contractor to help us with the slab-edge insulation and detailing.
We protected the bottom section of the sheathing with Vycor Plus and insulated the slab edge with 4 inches of XPS (beveled at the top), just overlapping the bottom of the sheathing. The slab edge XPS is protected by a sloped piece of pressure treated wood on top with metal flashing over all of this. An 8-inch section of PVC board is above this with a drip cap and more flashing tape.
Looking back, I think insulating and detailing a monolithic slab like this is complicated. We did a good job of protecting and flashing in this area, but I am slightly concerned about the lowest points of the wall sheathing being close to the ground and not being able to dry to the exterior.
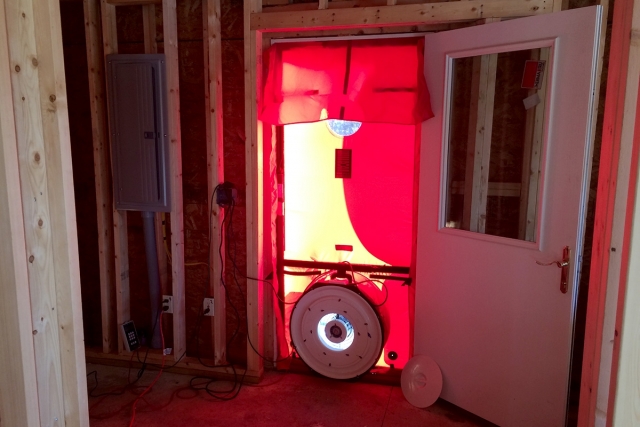
Kyra and I decided to go through the Energy Star program. We found out about it through our electric utility; the program paid for the HERS rater, so there was no cost to us. A blower door test is done at the final inspection, but we also had one done by the HERS rater after the building shell was complete and before insulation. The result was 0.67 ach50, which means that the building shell was very well air sealed.
“Drill, baby, drill”
As you’re reading these GBA posts, you might be thinking that we were experiencing some standard building issues and some related to being complete novices. It was certainly challenging and December 2013 would be no different.
When our septic system was designed back in the summer of 2012, the house was placed towards the back of our lot and very close to the town’s 25-foot setback from abutting property owners. After the septic system was installed (but not backfilled) in November 2013, the designer completed the as-built plans that would need to be submitted to the town and state for approval. Unfortunately, there was a problem. He told us that “our field survey of the building location shows that it moved toward the back line by 2.5 to 3 feet, and now encroaches within the setback by 0.79 feet (plus eaves).”
We sent the plans to the town engineer, but he denied our septic plan because our house was now 9.48 inches past the 25-foot setback. This meant we couldn’t get state approval and couldn’t backfill the septic system. Our only option was to apply for a waiver through the town of Jackson’s Zoning Board of Adjustment.
This was a very stressful and difficult time for us, but after reading the documents and guidelines, we felt we had a good chance of getting a waiver. Our hearing was in mid-December and we were approved in late December. This meant the septic inspection and backfilling could go through, but since it was now winter in northern New Hampshire, we had inches of snow already on the ground, so the work would have to wait until spring of 2014.
Our only option for drinking water would be a drilled well. The location of the well was dictated by the septic plan because the well had to be a certain distance from the leach field.

It was now mid-December 2013, and although we wouldn’t be moving into the house anytime soon, our well drilling contractor was now available to drill. We would have the well drilled and then have the pump installed and the water line hooked up in the spring or summer of 2014.
I had been keeping friends and family updated on our building progress through Facebook, so I’ll let my 12/13/2013 post do the talking: “There have been many difficult and stressful parts of this building process. Drilling the well is in the top few. We knew it would be at least 400 feet and braced ourselves for 800 feet based on other wells in Jackson. The crew went home last night to resupply the drilling pipe after getting to 820 feet with no sign of measurable flow. We were getting worried, but made the call to go another 100 feet, assess, and maybe go another 100 feet. We spent most of the day at the house anxiously awaiting any sign of water flow. Nothing until this afternoon when they finally got a solid flow of water at 1,043 feet. Hopefully the water will be decent quality. Please send donations.”
The well was way deeper than expected and was being billed by the foot. Consequently, we could see any discretionary budget money disappearing into a hole in the ground. We never considered a scenario where the drilling would go that deep and not find a minimum flow of water. Thankfully, we did find the water flow we needed, although at a much lower depth than we would have liked.
I look back on this and wonder whether an in-house water tank system would have made more sense considering the drilling expense and issues with burying the water line deep enough. It think it could make sense in a small house with owners who are willing to live with water restrictions.
Rough electrical, plumbing, and insulation
The recent issues with the zoning rules and well had taken their toll, but we kept our enthusiasm up and were enjoying the first big winter snowfalls.
The rough plumbing and electrical work went well and was straightforward, at least compared to earlier work. The wire for the ductless minisplit was put high on the north wall so that the outside unit could be mounted above the normal snow level. After the blower door test, the Energy Star HERS rater calculated our heating design load at 11.2 kBTU/hr, so the plan was to install a single ductless minisplit at this location.
With the in-wall plumbing and electrical work done, the cellulose insulation was delivered to the house site on pallets and we covered them with a huge tarp before our shell contractor could make it back. I don’t remember the exact amount, but I believe close to 15,000 pounds of cellulose was blown into the walls and attic.
The insulation work happened in January of 2014. Netting was first stapled to the wall studs and the cellulose was dense-packed into the 12-inch-deep cavities. The cellulose was loosely blown into the attic to a depth of at least 24 inches. These amounts would give us approximately R-40+ in the walls and R-70+ in the attic.
Kyra also installed Roxul Safe’n’Sound mineral wool batts in some of the interior partitions to help with sound transmission between rooms.
Now that the house was insulated, we started to run a couple of small electric space heaters to get the interior temperature comfortable. Equally important, we started to run a small dehumidifier to bring down the interior relative humidity.
Unexpected difficulties made 2013 a challenging year, but now that it was early 2014, some of the most stressful parts of the building process were behind us. The completion of the insulation also marked the end of the contract with our foundation/shell contractor. This was significant because although we were technically the general contractor, they had a “semi” general contractor role throughout much of the initial build. This transition was exciting because the house project was now completely in our hands and it finally felt like our house.
Editor’s note: This is Part 3 of a multi-part blog series on the construction of Brian and Kyra’s home in New Hampshire. Here is a link to Part 4: Siding and Interior Finish Work in New Hampshire.
Brian Post is a photographer and website builder. He lives in Jackson, New Hampshire with his wife, Kyra Salancy, and a fluffy black dog. When not working on their house, Brian and Kyra enjoy climbing and skiing in the White Mountains.
Weekly Newsletter
Get building science and energy efficiency advice, plus special offers, in your inbox.


0 Comments
Log in or create an account to post a comment.
Sign up Log in