
More Q&A Spotlight


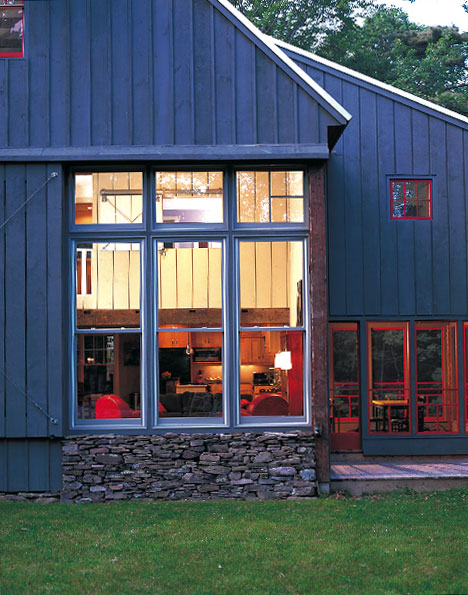
Claire Remsberg, an architect in the Rocky Mountain region, is working on a house where the main goals are to limit thermal bridging through the 2×6 wood frame and to beef up wall R-values. Plans call for vertical wood siding over a layer of rigid foam insulation.
If that sounds more or less straightforward, the details are not. The contractor has limited experience working with rigid exterior insulation, Remsberg writes, and has concerns that installing siding directly over the foam may not be a great idea.
Remsberg has explored a number of wall assemblies but admits that “nothing is looking quite right yet.” Her request for ideas on how to detail the wall is the subject of this week’s Q&A spotlight.
Create an air space with strapping
Wood, fiber-cement or plywood siding should not be installed directly over the foam, writes senior editor Martin Holladay.
“I wouldn’t hesitate to install 1×3 or 2×4 horizontal strapping, 24 inches on center, on top of the foam,” Holladay recommends. “Screw the strapping through the foam to the studs.”
Architect Jesse Thompson seconds Holladay’s idea of applying the siding over horizontal strapping. Reverse board-and-batten, he adds, is another option. Putting on battens first, followed by the wider siding, makes a natural rain screen and gives a “crisp, sharp profile that is very distinctive.”
Michael Chandler, a builder and GBA advisor, has used scraps of 1/2-in. oriented strand board as furring to separate a rigid foam exterior and vertical siding. The strips of OSB are held in place with galvanized ring shank nails rather than screws. The siding is nailed through the OSB and foam into 1-in. planking that is attached to the framing, creating a SIP-like foam sandwich.
But, Chandler says, be sure to add an insect barrier at the bottom of the…
Weekly Newsletter
Get building science and energy efficiency advice, plus special offers, in your inbox.

This article is only available to GBA Prime Members
Sign up for a free trial and get instant access to this article as well as GBA’s complete library of premium articles and construction details.
Start Free TrialAlready a member? Log in


25 Comments
rigid over floor assembly
i was just contemplating today a concern if I use 2-2" layers of foil polyiso and furr- strips/siding to extend a possible 5" horizontally past sheathing/floor assembly of house. It would seem the astetics of shadowing and potential for bug/aviary nests or other creatures to build underneath base of assembly could be a problem and I haven't seen it addressed in past. Am I missing something, or is there an alternate fix to keep basement/sheathing planes close to each other? I'm planning a poured superior type basement, and don't want to add insul. board to exterior of concrete.thots?
Basement/Sheathing Planes
The insulation board on the exterior of the concrete basement wall is advantageous. Of course, use XPS, and you then must protect it. But it helps capture the advantages of having the thermal mass inside.
It's not to difficult to install, because the backfill holds it in place, so you might not need fasteners except at the top, and then only if more than 12" is exposed. It sounds like you won't need to insulate all the way down to the footing, so the expense is minimal.
I used Board & Batten siding over 2" foam insulation
My new house has 2x6 wall framing with blown cellulose in the cavities and 2" of xps insulation on the outside of the osb sheathing. The horizontal blocking is 2x3" on top of 1" of xps foam for a total of 2.5" thick. This creates a 1/2" air space behind the rough sawn local spruce siding. This seemed like the best way to create a thermal barrier and a rain screen which is probably not required here in the Yukon with an annual rainfall of 10 - 12" (semi-arid climate). I furred out the windows by using screwing the nailing fins to 1/2" plywood with 1.5" xps underneath so everything lines up. Lots of tedious work putting it all together but the results are nice.
I went the XPS route 24 years
I went the XPS route 24 years ago, and it's required route maintenance( reapplications of fiberous concrete product) which never sat well with me! I was hoping this time for the concrete maint. free look, and besides, I'd need 4" XPS against wall to somewhat match the siding plane of walls with the 4" foil, which somehow just doesn't seem right. Not sure if floor assembly build with recessed shelf around perimeter of basement wall is good, since I'd be looking to get full surface support for house. I may need to put out specific question or when i go to architect.
Ventilation space behind the starpping
The horizontal furring is a challenge, but easily overcome. I have never personally used cor-a-vent, but have a few suggestions:
First, use strips of dimpled drainage mat (like Delta MS) there are various thicknesses and crush resistances available. I've used dimple mat all over a building. Cut strips of the dimple may and place between the furring strip and the foam sheathing.
Second, if that assembly is too bulky, use a layer of plastic mesh poultry/livestock fence. It will not create a very large airspace, but will be better than no airspace behind the furring.
And lastly, you can use horizontal bands of shorter furring strips that are set diagonally. It is a bit more work, but if the above options are not acceptable, this will let you use solid wood furring with openings top and bottom.
If you are committed to the concept of exterior foam board you will make it work. Period. Cavity insulation doesn't even enter my head anymore.
My new addition has 4 inches of polyiso on the walls, and 7 1/2" on the roof. No cavity insulation. The rest of the house is getting a layer of 2 " polyiso around the outside over densepacked 2x4 walls. We added 1500 sf (doubled the house) and gas bill increased by $50 per month in the worst month. Just over a 20% increase for 100% more floor space.
Existing home is 1840's era and has no exterior sheathing either, so some details get very interesting.
Vapor barrier and climate
Here in Wisconsin, we are struggling with the concept of where to place the vapor barrier, either inside or outside the walls. After a few years of wrestling with this myself, I think the answer depends upon the severity of your climate. If you live in an extreme Winter climate such as the upper Mid-West or New England states, then you need to place the vapor barrier on the inside of the house because condensation will take place inside the wall cavity when the outside temps surpass the thermal capacity of your insulation (remember, we need to plan for -30* F in the winter). Since the "moisture drive" is from the inside of the house in the Winter, then we need to keep the moisture from entering the wall cavity in the first place. As a remodeling contractor, I have been faced with the problem of what to do with old farm houses framed with 2x4 walls. The best solution I have found is to stuff the walls with blown fiberglass behind netting, then lay 1/2" of poly-iso foam on the inside of the walls and tape it completely, then hang the sheet rock. The 1/2" of foam provides a thermal break on the studs and the foil tape gives me a completely sealed envelope that prevents moisure from entering the wall, and any that may get in from the outside will still have a path to exit the wall before mold develops.
Stucco over exterior rigid insulation?
I am reading with interest these discussions regarding venting/drainage between rigid insulation and exterior siding. Has anyone had experience applying a cement-base stucco over rigid insulation? I am considering this application for a house on the Front Range of Colorado. I am looking for some measure of fire protection and a low-maintenance finish. It seems like the dimpled (Delta drain ?) product fastened with the dimples facing the rigid foam would prevent the cement stucco filling the small cavities between the dimples, thus preserving the ventilation and moisture drainage channels. Of course care is needed to keep the channels open at the top and bottom for full ventilation. My main question is: in the field, how practical is it to do this? With the concern for placing fasteners into the studs which are not visible behind the insulation and dimpled vent/rain screen, how likely is it that the crew will actually be able to accurately get the fasteners into the studs? Wouldn't it require careful transfer of measurements to locate each stud...involving extra time and labor? Then, how well do the fasteners hold the expanded metal lath or chicken wire to the plastic delta drain? Id appreciate any comment.
Foam on exterior
We built our 2x6 passive solar house over 20 years ago in sw Michigan with foam on ext. and 6mil poly on int., and fiberglass bats. After opening the walls from inside to out on many locations in recent years, for various reasons, we found no signs moisture problems at all. The foam has alum. coatings on both sides it to reflect heat in or out depending on the season. We have T111 sheathing nailed thru the 1/2 foam to the studs.
We are very happy with the very low energy costs and comfort. Highly recommend adding a heat recovery ventilator (HRV), like what we did, to bring in fresh air, vent polluted air and reduce interior moisture (humidity can be an issue even in 10-0 degree weather). HRV should be required on all new homes.
SIPS
Would SIPS eliminate some of these concerns in an addittion or new construction?
Double studding.
Has anyone considered that it might be better do double stud the wall and put the foal insulation in the middle of the wall?
Response to James Richard Tyrer
James Richard Tyrer,
As long as you understand the basics, there are many ways to build a wall. But if you deviate from tried-and-true wall assemblies (for example, those suggested by Joe Lstiburek in his various climate-specific books), you had better understand vapor drive and basic building science principles.
A thick, double stud wall with foam insulation in the middle might work fine, or it might be a disaster. It depends on the climate, the exact location of the foam, the R-value of the insulation on either side of the foam, and even on the type of siding you choose.
Such a foam layer might end up being a condensing layer in the summer, in the winter, or both. So do your calculations before you experiment!
For davars - Stucco over foam
Take a look at a product called K-Lath. You could use furring strips (1X4's) to create the air space and apply the K-Lath over the furring. I believe this is one technique they use in the Vancouver B.C. area, for a rain screen stucco application, after the leaky condo debacle.
Verticle siding with battens
I designed and built a house over ten years ago in the Pacific NW West of the Cascades. To those that don't know this translates into rainy winters and that means moisture but not real extreme cold. This location is also very close to Puget sound. I used green douglas fir (air dried) 2X6 framing with conventional high R fiberglass insulation. On the outside I used a five ply half inch plywood and not OSB. This had the Tyvex over it and then I used a 12" Hardiboard siding vertically applied.
I left about a 3/8" space between boards to keep each one straight and for a space to shoot in the batten nails. They were 1 1/2 finishing nails. Now at the time the Hardi product was not waranteed for this application unless I treated each board as you would a panel. Say a 4 X 8 foot panel. This means nailing all around the edges 8 or 12 inch spacing. Well now you know why I used plywood. I discussed it with a rep and I was able to shoot both staples and nails through the siding with just a dampening of the edge. The 1 3/4" battens covered the fasteners. I'll discuss painting in a moment.
The airspace under the battens between them and the Tyvex has proven to be worth the effort. I also used clear cedar for these battens as well as the trim. I'll back up. I was told that Hardi tested the siding in winds up to 90 miles per hour. You get this gusting on the Oregon and Washington Coast a few times during the winter. They told be they fastened the siding as per recommended spacing, horizontally applied, but didn't hit the studs as recommended, just the 1/2" OSB. The failure at 90 miles per hour was the flapping of the board pulling out the nails and breaking. Therefore this vertical application elliminates the flapping and applies way more fasteners plus battens.
On painting; first the Hardi siding was painted with a Luxon SW primer made for cement board. Then the battens were applied so that the SW A100 wood primer wood slop over the Luxon and not the other way around. Two coats of primer was used over the Hardi. Then two coats of their Super paint on top. Well just this year, ten years later I hand washed the house and painted one top coat again. After washing it looked new and I really did not have to paint. There was no moistur blowing the paint off like you find in a pine siding for example.
The inside of the walls have 6 mil poly applied before 5/8 sheetrock for a vapor barrier and as a sheetrock gasket if you will. This little poly layer does have a thermal bridging affect. If I ever had to insulate more I would sandwich foam between two layers of half inch plywood on the outside. Say 3/4" foam board. Then I could use four ply plywood.
The walls are double blocked, your welcome fire department, reducing some in wall airflow and all this wood does reduce the overall insulation value but I can say that this house does not show the thermal bridging stud patters through the siding like many on cold damp mornings do. Keep in mind too we expect earthquakes.
For this board and batten look I can say that this has proven an excellent alternative and the added wood for the framing still saved a few trees in that the siding didn't eat them up. If a stained wood look is required I would shoot the wood in with just a 1/4" batten. But I would treat the back of the wood first to slow the curl.
Riversong - Against Outsulation??
I do not understand why Mr Riversong is so against exterior insulation. He talks about bulk moisture (liquid water) being trapped inside the wall cavity because the resulting vapour cannot diffuse through the insulation panels to the outside. He states this will raise the likelihood of mould growth. But if this system is done right, this moisture can diffuse to the INSIDE of the dwelling and then be carried away by mechanical ventilation. What is the difference? How will one way prevent mould vs. the other way? As far as I know, neither system will be able to handle liquid water well and part of a healthy system relies on proper maintenance to ensure liquid water does NOT enter the wall cavity
Is it really necessary?
The REM Design modeling I did on a recently completed efficent 2700 sf home showed only $68 per year in energy savings in adding 1" of XPS foam over a R-22 wall assembly. The air leakage was assumed unchanged between the two assemblies. I do not think the added expense and effort combined with possible drying issues is worth the it with the exterior foam. I've done it before but exterior insulation is a major PIA to get the drainage, insect, drying, etc. details "right".
Foam board, batten, solid concrete block wall, moisture
I have two solid block (1950's) exterior (north facing and west facing) walls in a bungalow bedroom. These are very cold walls and often any attempt to warm the room results in condensation. The walls are plastered, semi gloss painted, in good condition and with no signs of damp.
This solution has been recommended:
25mm battens with K18 insulation boards fixed to them (K18: 25mm foam+12.5mm sheet rock)
My concern: Because there is a 25mm air gap between the insulation board and the wall, is this an invitation for moisture to get trapped in there and cause problems down the road?
Are there any precautions to take with this solution?
Response to PJL
PJL,
What's your climate?
Climate
NW Ireland. Wet windy etc. 'Nuff said?
Second response to PJL
PJL,
25 mm of foam is a little less than one inch. If it's EPS foam, that might be R-3.5. If it's XPS foam, that might be R-5. Such a meager amount of wall insulation wouldn't meet the energy code in any location in the U.S. -- even in Florida, where homes are barely heated.
Here in the U.S., building codes require much more wall insulation. I don't think your suggested wall has any problems having to do with trapping moisture; but it would certainly have insufficient insulation. What are the minimum requirements for wall insulation in Ireland?
Respond to Martin Halliday by PJL
Sorry, my misprint: the batten air space is 25mm and the foam + sheet rock is 62.5mm (50mm + 12.5).
Code insulation is only required here on new builds. (Not sure what that requirement is. A solid block concrete exterior wall would, obviously, be illegal these days.)
So you do not think this air space would eventually trap moisture and harbor mould? Would making it air-tight keep it "safe"?
Third response to PJL
PJL,
Your block wall is vapor permeable. It is therefore able to dry to the exterior. As long as wind-driven rain doesn't enter through cracks as a liquid -- in other words, as long as it is watertight -- you should be fine.
If liquid water is running down the interior of your wall, you have to address water entry before proceeding.
You want to add as much rigid foam as you can. 50 mm is better than 25 mm, of course, but 100 mm would be much better.
Seal the gaps between the foam panels to make them air tight; also seal the bottoms and tops. If you have any electrical receptacles in the wall, try to make your electrical boxes airtight.
response to Martin Holladay's third response
Thanks. Yes the block wall is in good condition outside and in. I am renting and the landlord does not have a big investment in this house. If I can get a few degrees from this treatment I'll be happy. The main problem I have is that when trying to add heat to the room, just to take the chill out, condensation forms on these cold walls. I sleep in this room which compounds the condensation problem. I have a dehumidifier in the room and wipe the lower half of the walls with bleach every 6 weeks or so to make sure no mold can form. To stop the condensation is the main goal. My main question is really: if I fix the board with pegs and adhesive directly to the wall would it be safer than using battens and an airspace. So I think you have answered the the 25mm airspace should not be a problem so long as it's airtight and the walls are not leaking from the outside.
Looks like the recommendation here is that there must be an airspace between the rigid foam and and siding, but GBA has several articles that cover installation of rigid foam on top of a roof, and in those articles, its just fine to install plywood directly on top of the rigid foam. Is there a reason why an airspace is needed for walls, but not required on a roof?
I do believe in the air gap as if one reads the manufacturer's recommended install, they state to have the gap with any engineered or composite siding.
My question comes to how to attach the strapping if you have 4" of foam. the screws would need to be at least 6 inches. Would the wall continue to hold the weight of the siding or at that distance is there enough sheer potential? looking to thoughts / comments.
AproLLC,
You may find this blog useful: https://www.greenbuildingadvisor.com/article/how-to-attach-a-thick-layer-of-exterior-insulation
Log in or become a member to post a comment.
Sign up Log in