
Image Credit: Dunktanktechnician / CC BY 2.0 / Flickr
More Q&A Spotlight


An owner-builder planning a new home in southern Ontario isn’t looking for a net-zero house, just one that’s well insulated and protected from moisture problems. The question is whether his proposed wall system is his best option.
“I’m unwilling to put foam board on the outside and vapor barrier on the inside,” writes User 6782048, whom we’ll just call Ontario, in a question posted on our Q&A page. “Just seems wrong.”
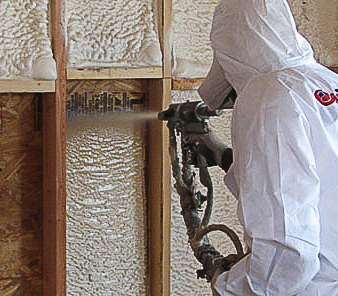
He does plan on some exterior foam — a 1-inch-thick layer over the studs, followed by plywood and then Tyvek housewrap. After rough wiring, the 2×6 wall cavities would get a 2-inch layer of closed-cell foam and then batt insulation.
The technique of combining spray foam with batt insulation is called “flash and batt”, and Ontario believes the total of 3 inches of foam would keep the exterior sheathing above the dew point in winter, thus reducing the chance of moisture condensation inside the walls.
“Thoughts, please!” Ontario writes. That’s the topic for this Q&A Spotlight.
(For more on how to change a user name from a number to a real name, a quirk in GBA’s registration process, follow this link.)
The downside of flash-and-batt
Filling a stud cavity with closed-cell foam provides an excellent air seal, but it’s expensive — and that’s why some builders advocate the flash-and-batt approach. But, writes Andy Chappell-Dick, it’s still costly, “it relies on the least ‘green’ insulation, and it’s interrupted (and thus substantially degraded) every 16 inches by a stud.”
The technique may be useful in tightening up an old house in an efficiency-inspired renovation, but for new construction it would be better to put all of the foam on the exterior of the house. Further, Chappell-Dick adds, it would be wise…
Weekly Newsletter
Get building science and energy efficiency advice, plus special offers, in your inbox.

This article is only available to GBA Prime Members
Sign up for a free trial and get instant access to this article as well as GBA’s complete library of premium articles and construction details.
Start Free TrialAlready a member? Log in


6 Comments
No rain screen required if you side correctly?
Isn't a major benefit to a rain screen the ability of siding to dry out, significantly prolonging paint life?
Response to Stephen Sheehy
Stephen,
Although the person referred to as "Ontario" doesn't feel that a rainscreen gap is needed, many building experts disagree. For a full discussion of rainscreens, see this article: All About Rainscreens.
It's certainly true that it's possible to install siding without a rainscreen gap (at least in parts of Canada where the building codes don't require builders to include the gap). That said, the many advantages of including a gap make the small investment worthwhile, in my opinion.
rainscreens
Within the past 50 -100 years (and before) clapboard siding was the mainstay for cladding in Newfoundland (I'm in Zone 6) until the introduction of vinyl. In Newfoundland, most if not all, houses were built without rainscreens using spruce clapboard and there are still many still standing with the original siding. People painted their siding with alkyd based oil paints and they always bubbled, chipped and had to be scraped and painted. It is likely that some (if not all) of this was due to the lack of a rainscreen cavity. I assume that moisture migration through the back of wet cladding caused the finish to release from the cladding surface. I would think that eventually this would lead to rotting clapboard and exterior sheathing. This being said, from my discussion with local people, rotting didn't happen that often...maybe because temperature extremes here didn't allow long enough for mould and rot to take over....or maybe a couple of wood stoves firing for 9 months a year in a house with empty wall cavities increased the drying potential so the exterior sheathing and clapboard remained fine. This being said, those houses always have a unique smell to them! likely due to moisture, mould, and mildew.
Rainscreens are a cheap addition....and a cheap insurance policy....there's isn't really any reason not to include it knowing what we know now about building envelopes.
Exterior insulation
Just finished building 2x6 with plywood exterior, 4" of reclaimed T&G roofing foam and 2" sprayed interior closed cell foam, roof 6" foam and sprayed too. Built in Ontario just South of Sudbury almost on Georgian Bay, zone 5+. Foam is strapped with 1" pine to provide rain screen and hold foam in place. Still doing interior and have to finish siding but haven't spent a full winter yet. Amazed at the comfortable feeling and stable temperature, heating easily with a mini split and fireplace usually the fire. All in all really happy with the build so far.
Drying to the outside?
This question is similar to mine, though hopefully without the hostility...
I'm having a home built in Ontario. I want to improve the thermal performance, and one of the easy ways to do this is to simply fill the existing 2*6 wall cavity with spray foam.
I think that would give me an R-35 wall assembly. 5" of closed cell, + 1" EPS rigid insulation in the outside. I'm worried about this assembly drying though. The inspector will almost certainly demand a polyethylene vapor barrier.
Would an assembly like this sufficiently dry to the outside? I guess through the osb and EPS? seems like if any water at all gets in your done. Thoughts?
This isn't a custom build, but they're willing to entertain my requests.
Response to User-6930437
User-6930437,
Care to tell us your name?
I really don't recommend the wall assembly you describe. (And putting polyethylene on the interior is especially nuts. Don't building inspectors in Canada know that 5 inches of closed-cell spray foam is a vapor barrier?)
The wall you describe would probably work (from a building science perspective), as long as the wall had good flashing. Needless to say, a rainscreen gap between the siding and the WRB would help.
The problems with this wall have to do with its high cost (that's a lot of closed-cell spray foam), its environmental impact (bad, because of the blowing agents in the foam, unless you choose one of the new closed-cell spray foam with a more benign blowing agent), and the fact that the 1 inch of EPS is insufficient to do much to address thermal bridging through the studs.
In Southern Ontario (Climate Zone 6), the best approach for a 2x6 wall would be to include thicker rigid foam (a minimum of R-11.25 of rigid foam, which means about 3 inches of EPS) and to install fluffy insulation (fiberglass, mineral wool, or cellulose) between the studs. This type of wall doesn't need an interior vapor retarder, but if you have an old-fashioned building inspector who is hard to educate, you can install interior MemBrain, a "smart" retarder, instead of polyethylene.
For more information, I suggest that you read these two articles:
Installing Closed-Cell Spray Foam Between Studs is a Waste
How to Design a Wall
Log in or become a member to post a comment.
Sign up Log in