Attic insulation quandary
Seeking advice on renovation plans for a 1910 house in ND – Zone 7.
HOUSE DETAILS:
– 2 1/2 stories above ground with full basement.
– 2nd story has ‘sun porch’ facing south.
– 2 layers of siding. Inner layer has lead paint (of course)
– Insulated in the 70’s with formaldehyde foam, holes drilled through exterior to fill cavities.
– High efficiency propane furnace, forced air.
– 2 chimneys.
– 1st in middle of house used for original oil-burner furnace and water heater. Now used by wood fireplace in basement.
– 2nd in the living room made of brick and field stone, chimney on east side exterior of house. An enclosed fireplace sits in the living room and uses this chimney. Current tenants use propane primarily but have used this fireplace to heat the house when the propane price spikes.
SCOPE:
– Will be replacing all windows except 2 large picture windows (south and east sides)
– Shingles are shot and will be replaced. 2 layers of asphalt and original layer of wood to be stripped.
– Current doors have large glass areas and will be replaced.
– Current plan is to add exterior spray foam insulation. Intend to use vertical furring strips suspended from the existing sheathing or siding so spray foam can make a thermal break under the majority of the furring strips.
– Vinyl siding over the vertical furring strips.
LABOR
– I’ll be doing majority of the window and door work myself with a helper. Spray foam and roofing would be contracted.
– Have a 40 ft boom lift available so ladder climbing and scaffolding work should be minimized.
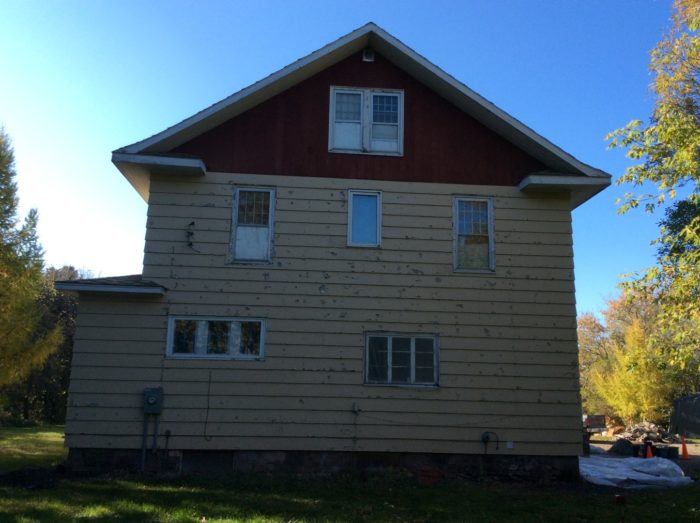
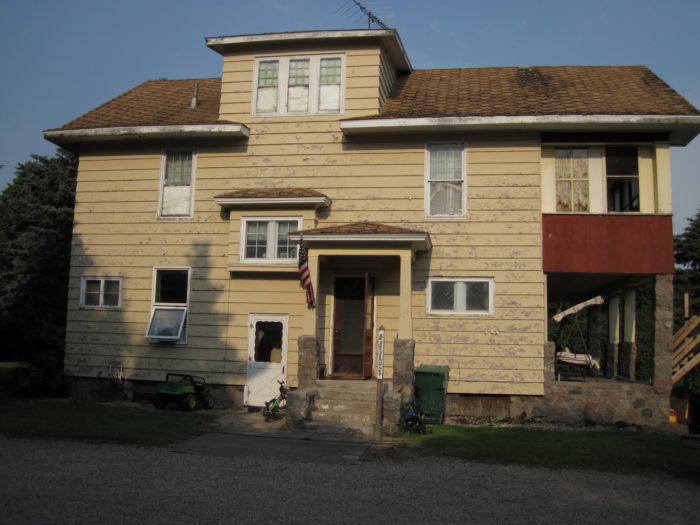
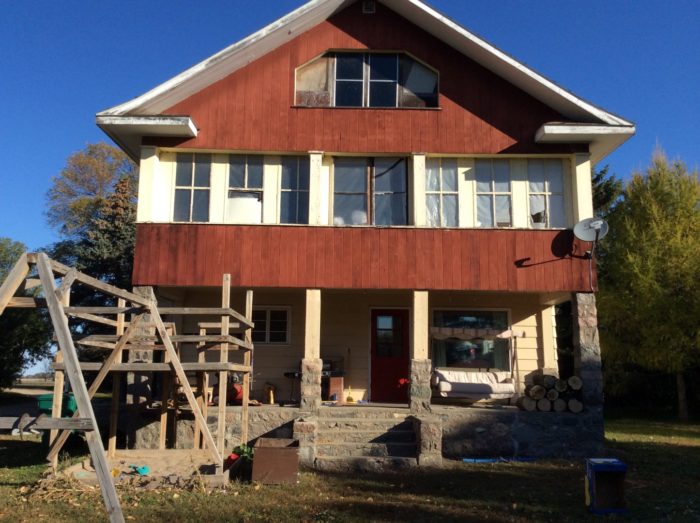
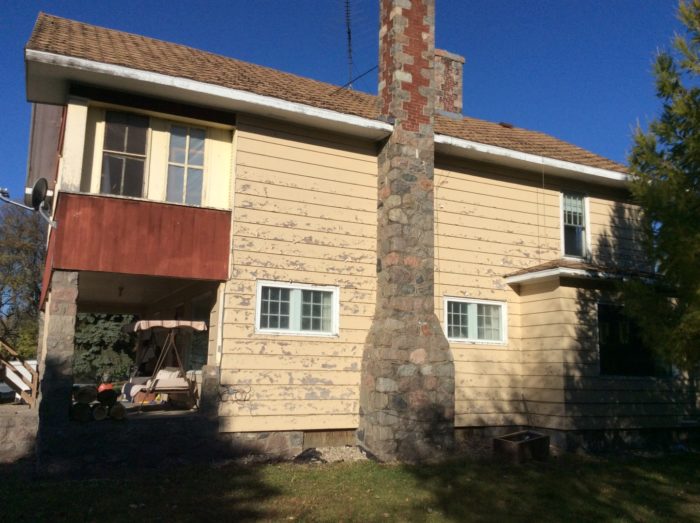
PICTURES:
1:4 show the north, west, south and east sides in that order.
I think I’ve got a good handle on the exterior insulation process – using window bucks to create a ‘outie’ style window is current plan. Similar process for the doors as well.
The 3rd floor and attic are where I need some help. Do I have any options other than adding external insulation to the TOP of the existing sheathing, after removing the existing shingles?
The ceiling space of the 3rd floor has 3 sections:
1) area behind the knee walls
2) sloped ceiling in living space
3) flat ceiling area
I think the rafters are 2×6 2 ft on center. Between these 2×6 is a 1×6 from the ridge to the knee wall only.
PICTURES:
5:6 Show the roof profile view when inside the west dormer looking north.
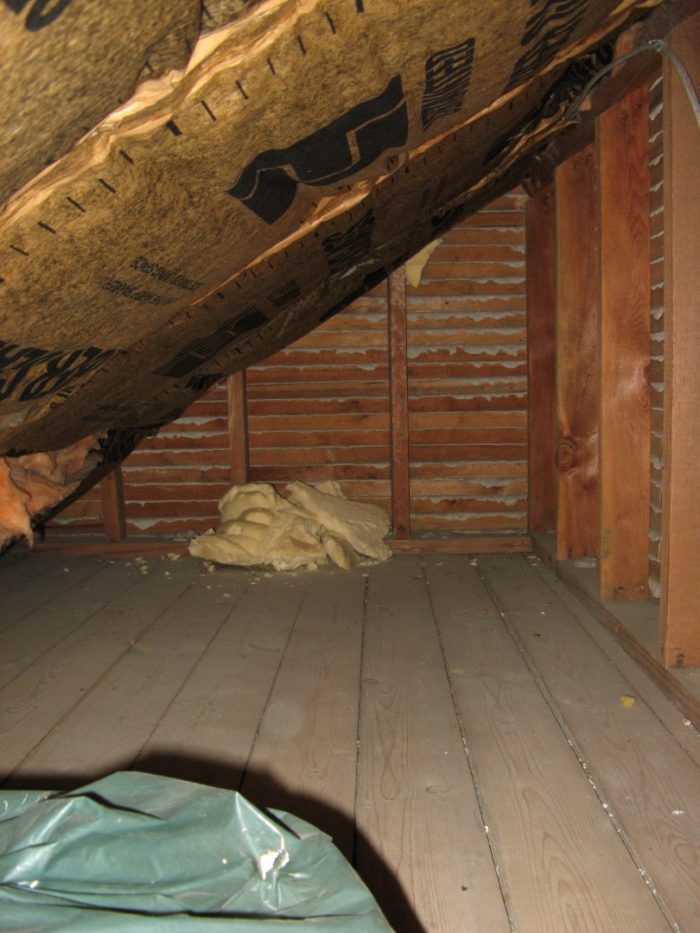
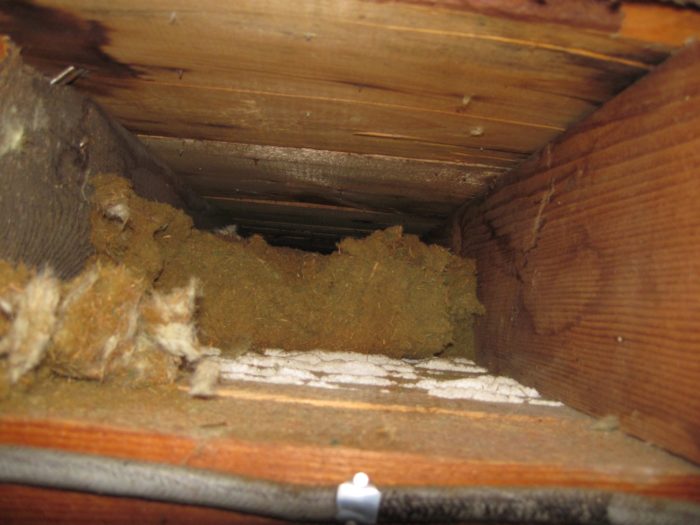
7:8 the access door to area behind the knee walls and the room behind the knee wall. Behind the knee wall, fiberglass batts stapled into the cavities between rafters.
9: The inside of the soffit viewed from behind the knee wall. Insulation normally stuffed in the gap between top plate and roof sheathing
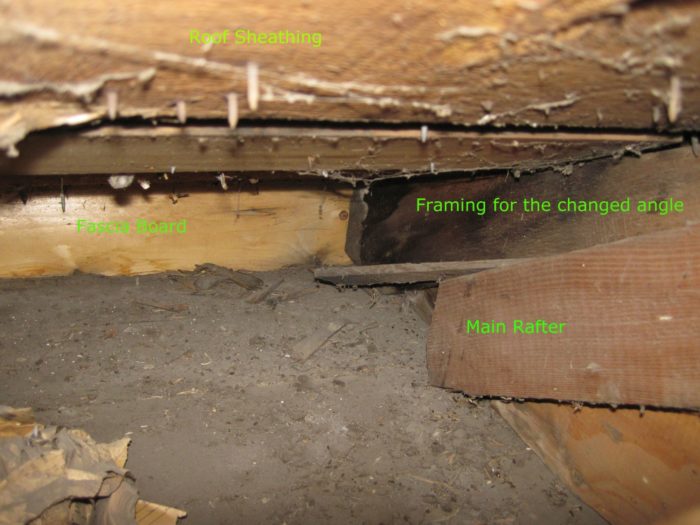
10: Top plate showing birdsmouth cut out of rafter
11: Cavity of sloped ceiling section. wood fiber insulation filled against the fiberglass that was stuffed between the knee wall top plate and roof sheathing.
12: insulation that is currently stuffed above the knee wall.
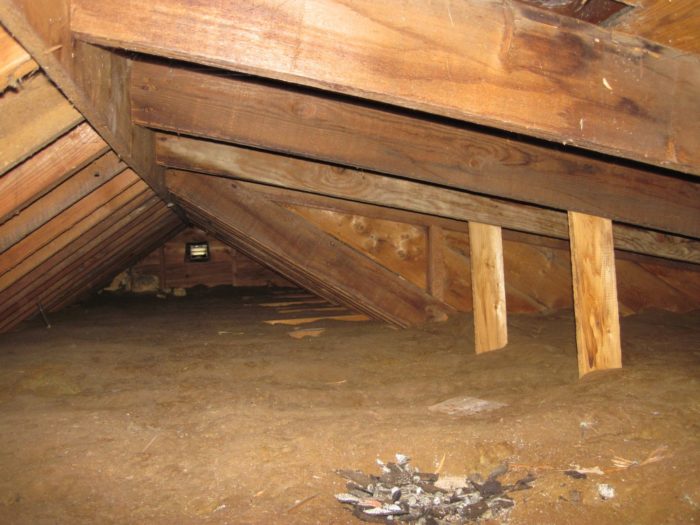
13: the inside of the main attic at the ridge, looking above the dormer.
QUESTIONS:
I’ve read the various articles on working in this ‘Devils Triangle’ as well as building a ventilated and no ventilated cathedral ceiling and they have certainly helped.
For the area behind the knee wall, one option would be to remove the fiberglass, add a layer of sprayfoam against the roof sheathing and finish with dense-pack cellulose to get the desired R value.
I don’t see a way to effectively insulate the sloped section of the ceiling. Just not enough room and can’t access easily. I suppose we could remove this part of the ceiling, fill the cavity with spray foam then sheetrock back over the foam. UGH.
One suggestion was to dense-pack the area behind the knee wall and in the sloped ceiling area and pile lots of loose fill in the main attic area. Not code compliant, I know. But they do it out east.
Based on this brief project overview, what you do?
Thanks in advance.
Tim


GBA Detail Library
A collection of one thousand construction details organized by climate and house part


Replies
Tim,
Your instinct is correct: by far the best solution is to install one or more layers of rigid foam above the roof sheathing, followed by an additional layer of OSB or plywood and new roofing.
These two articles will guide you in your work:
How to Install Rigid Foam On Top of Roof Sheathing
Combining Exterior Rigid Foam With Fluffy Insulation
On the walls, if you're using closed cell foam you'll need at least 2" for dew point control at the sheathing, if open cell, 3". In many ways 3" of open cell foam is better, since it preserves the ability to dry toward the exterior, and drying capacity toward the interior may be severely compromised by lead paint and urea formaldehyde foam. It's also cheaper (by about half), uses less polymer than even an inch of closed cell foam, and it's blown with water instead of HFC245fa, and it can be easily trimmed flush with the furring. Unlike closed cell you would also have to install a weather resistant barrier (#15 felt or housewrap) between the furring and the vinyl siding.
On the roof, 7" of polyiso above the roof deck and 5.5" of cellulose or open cell foam between the rafters gets you to cod min, but may have aesthetic issues with the extra thickness when viewed from the gable ends.
Followup #1. What if we gutted the plaster and lathe of the 3rd floor attic - ceiling, knee walls too. This would expose the underside of the roof sheathing. What approach would you recommend then? Options I see are:
1) Sprayfoam the underside of the sheathing to get R49
2) Sprayfoam 1" or so to seal the sheathing, then use dense pack cellulose or other permeable insulation to achieve the R49 or more overall insulation.
1 and 2 bring the attic into the conditioned space.
3) ventilate the underside of the sheathing by providing 1" air gap using foam board in the knee-wall and cathedral ceiling sections per articles here in GBA. The flat section would get cellulose as well.
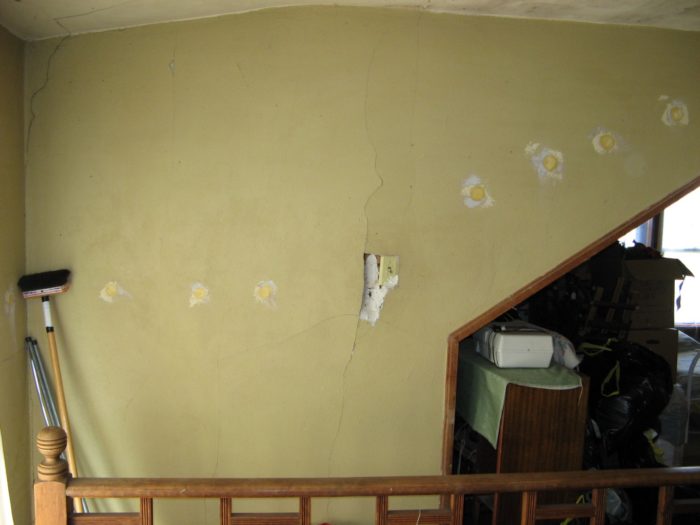
The existing ceiling has several areas where the plaster shows water damage, is cracked and separated from the lathe. Will take effort to restore a decent air barrier to keep warm air out of the unconditioned space above. See pictures.
Tim,
One of the solutions you suggested definitely won't work. You can't use 1 inch of spray foam plus cellulose insulation in Climate Zone 7 because the minimum R-value for the foam layer in this type of insulation sandwich is R-30. That would require 5 inches of closed-cell spray foam, at a minimum, not 1 inch as you propose, followed by enough cellulose to bring the total assembly up to R-49.
More information on this type of insulation method, plus a list of other methods you might want to consider, can be found in these two articles:
How to Build an Insulated Cathedral Ceiling
Creating a Conditioned Attic
Tim,
Of the three approaches you suggest, the third approach (installing ventilation baffles) makes the most sense -- assuming, of course, that your house has (or you can install) soffit vents and a ridge vent.
For more information on this option, see Site-Built Ventilation Baffles for Roofs.
With 2 x 6 rafters you can't get to the R49 code-min with insulation between the rafters.
As little as 2" of closed cell foam on the underside of the roof deck would be protective of the roof deck, but to do the rest in cellulose would require a smart vapor retarder on the interior or at least some exterior foam to keep moisture from accumulating at the foam/cellulose boundary over the winter. In Zone 7 a minimum of 60% of the total center-cavity R needs to be low-perm foam in that type of stackup. The 2" foam (R14) + 3.5" cellulose (R13) adds up to about R27. For minimal dew point control at the foam/fiber boundary it would take another R5.5 on the exterior, but to get to a code-min R49 would take R22, or 4" of rigid polyiso. The polyiso would under perform it's labeled R in winter, but it would also be thermally breaking the rafters so the performance loss isn't too terrible. For minimual dew point control a minimum of 2" exterior + 2" closed cell on the underside would be good insurance.
Tim,
Note that Dana's suggestion to use 2 inches of closed-cell spray foam instead of 5 inches would be a code violation. (For more information, see Section R806.5 of the 2012 IRC.)
My article, How to Build an Insulated Cathedral Ceiling, discusses ways to scab on additional framing members to deepen the rafter cavities when necessary. Of course, this approach necessarily lowers the ceiling, which you may not want to do -- in which case we're back to the approach I suggested in Comment #1 (installing one or more layers of rigid foam above the roof sheathing).
It's not technically a violation and will be pretty safe as long as there is also exterior foam, more of a gray area. The 2" of closed cell foam is a class-II vapor retarder, which is sufficient to protect the roof deck from interior moisture drives, and with a couple of inches of rigid foam (any type) above the roof deck there would still be dew point control at the first condensing surface, which is the interior side of the spray foam.
You would never opt to do it this way in new construction, which is probably why this sort of stack up is not addressed directly in code, but it's about as good as it gets in a retrofit with only 5.5" of rafter depth.
Even at R49 total the roof deck is reasonably protected in zone 7 with just 2" of closed cell foam see the "2" ccSPF + spray fiberglass " column and International Falls 7A row of Table 3 in this document:
http://buildingscience.com/sites/default/files/migrate/pdf/BA-1001_Moisture_Safe_Unvented_Roofs.pdf
This does not provide control at the foam/fiber boundary without interior vapor retarders though, but adding sufficient exterior foam does. Putting a bit more R on the exterior would also raise the average temperature at the roof deck, further lowering it's (already vapor retardency limited) wintertime moisture accumulation.
Limiting the interior side closed cell foam to 2" gives the roof deck at least SOME capacity to dry toward the interior, which gives it some resilience. Most 2lb foam would come in at about 0.5 perms @ 2". At 5" *(the most you can reasonably get into a 2 x 6 rafter bay) it would be about 0.2 perms. Roofs with asphalt shingles or an impermeable membrane underlayment such as Grace Ice & Water Shield pretty much never dry toward the exterior. A #30 felt + asphalt shingle layup runs about 0.1 perms, and with Ice & Water Shield it would be under 0.05 perms.
Great input. Thanks!
One thing that has been bugging me about using spray foam on the underside of the roof sheathing is seeing telltales of a roof leak in a timely manner. Will leaking shingles eventually allow water to drip through the spray foam and onto the ceiling below - giving notification that the shingles had a leak?
I'm concerned that the spray foam will hide a bigger issue and instead of replacing shingles, would then need to do shingles, sheathing and possible rafter fixes. I didn't find an answer with a few brief searches, so, asking here.
Thanks
Tim
Same question for adding exterior foam board insulation and new layer of sheathing. If the shingles are leaking, how does the owner notice this? Using the following article as an example...
http://www.jlconline.com/how-to/roofing/retrofitting-an-insulated-cold-roof_o
Seems a leaking shingle would have water running out of the eave vent. Any other telltale signs to look for?
Thanks
Tim
Tim,
If you want early detection of roof leaks, you want a house with a vented unconditioned attic.
If you decide to insulate along your roof slope, to bring your attic inside your home's thermal envelope, you lose the ability to detect roof leaks early.
It's your choice -- take your pick.
Thanks for all the input, helps a lot. I discussed the exterior foam option with some of the other decision makers and they were leery of screwing through 10" of foam and hitting a rafter. Not out of the question but I was asked to detail the steps to do the insulation from inside the house.
Please have a look and shoot holes. Also please see pictures if my description is confusing.
An option for insulating from the inside - spray foam and foam boards.
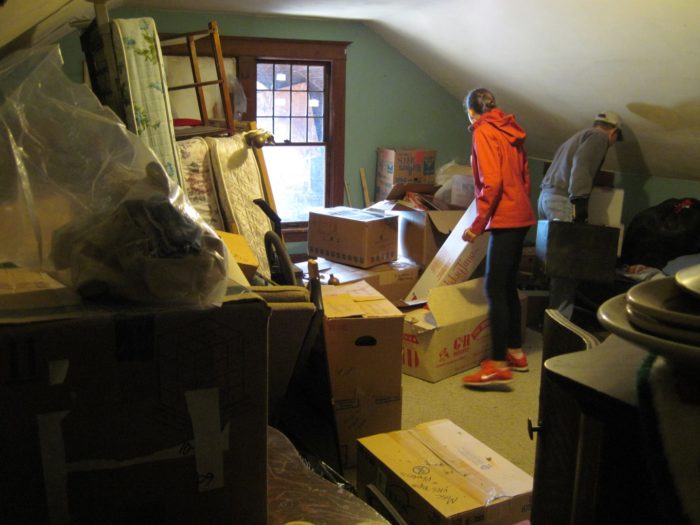
1) Gut the plaster and lathe from the entire flat and sloped ceilings and the knee walls. This removes all existing insulation in the ceiling as well as the fiberglass batts behind the knee walls (this will be easier to do once the plaster and lathe of the knee walls has been removed).
2) Provide a ventilation channel beneath the existing sheathing using 1” XPS panels cut to fit in the rafter bays, spaced 1” from the sheathing using blocks of XPS foam. See instructions on GPA for site-built baffles.
3) Spray-foam the remaining cavity of the sloped roof section. 5 ½” rafter minus 2” (1” for ventilation channel and 1” foam board) leaves 3 ½ of spray foam. The R-value of the insulated section of the rafter bay would be 5 + 22 = 27. Assume R6.5 for spray foam.
3) Need another R20 to get close to code. This can be achieved with 4” of XPS foam board applied to underside of the rafters in the cavity behind the knee walls and on the sloped, cathedral section of the ceiling.
4) Don’t want to give up any headroom in the center of the room. For the flat-section in the center and dormer, will install 4” of foam board on TOP of the horizontal stringers. The 1” foam board that forms the baffles of the cathedral-type sections will intersect this 4" layer of insulation such that the spray foam step will seal the two.
5) Sheetrock over the foam boards, texture, paint etc.
Option: raise the flat ceiling section. Once opened up, would replace the existing cross-members linking the east and west sides of the roof with new, higher members. This is fairly easy in the central part of the room. The dormer section has longer spans making a bit more difficult. Would still leave a cavity that is ventilated by gable and ridge vents.
I re-read the article on how to design a vented cathedral ceiling and I think this follows the guidelines pretty well. Adding the foam boards on the underside of the cathedral section and on top of the flat ceiling gives a thermal break to those framing members.
Thanks
Tim
Tim,
You wrote, "For the flat section in the center and dormer, will install 4 inches of foam board on TOP of the horizontal stringers."
Assuming we are talking about insulation above a horizontal ceiling, why not just use cellulose? You are planning to install about R-16 to R-20 of insulation. Why not aim for more R-value?
I missed describing a step on the horizontal ceiling. Foam boards on top then add spray foam below, in the cavities. My original thinking was to keep the R value somewhat uniform throughout the assembly so the spray foam here won't fill the cavity - only 3.5" thick to match the rest of the assembly. By using foam boards above, will still have a narrow crawl space for inspection. Will be key to make this access well insulated and air sealed.
I haven't estimated the material cost for this approach yet. One way to save is to switch from XPS to EPS and give up a little bit of R per inch but increase the foam board thickness (covering the cavities) in the side-attic and over the chords of the horizontal ceiling. Would keep XPS on the sloped sections or maybe switch to ISO to minimize the added thickness and keep the headroom.
Any other savings we should consider with this approach?
Thanks
Tim
Project Update:
After talking with the spray foam installer, we've decided to use baffles in the rafter bays to provide ventilation under the sheathing, from the soffit to the open space above the chords. This will be much faster than site-built baffles and provides room for more depth of spray foam and therefore more R-value with the trade-off of more spent on spray foam. They have done a couple jobs like this and only filled the cavity to within 1/2 inch of the bottom of the rafters (avoid having to trim before installing drywall). Providing a thermal break on the rafters wasn't considered.
Since we are going through such a big effort to expose the rafters, I did some investigation of how difficult and expensive it will be to provide a thermal break on the 2 x 6 rafters by suspending a furring strip from them and allowing the spray foam to fill that gap. For the area being sprayed, each inch costs $850. Using a 1" gap between rafter and furring strip, need an additional 1.5" of SPF to get one inch coverage over the rafters (1/2" planned space between bottom of rafters and surface of SPF + 1" to fill the added gap. So, $1275 just in spray foam to provide the thermal break of 1" of SPF. This 1.5 of SPF would be in addition to the 4 inches of SPF that is currently planned at a cost of $3400. Hard to calculate the ROI on this added insulation. Gut feel is do it, we have come this far. I'll be installing the furring strips, labor is basically free.
NOTE: between each 2x6 rafter is a parallel 1x6 running from the knee-wall to the ridge. So there will be 50% more thermal bridging in this section compared to a roof with 2x6 2' OC. Same for the chords - they are spaced 1' apart, not 2'. But, already have a strategy to install a thermal break on top of the chords.
Is 1" enough?
Tim,
You didn't mention whether you will be installing closed-cell spray foam (about R-6.5 per inch) or open-cell spray foam (about R-3.7 per inch).
Obviously, 1 inch of closed-cell foam would be more effective than 1 inch of open-cell foam at reducing thermal bridging through your rafters.
Closed cell.
Even with adding a 1" thermal break, the foam thickness will be 5.5". @ 6.5 per inch, 35.75 is the predicted R. Looking at the baffles, they have a lot of indentations that sit flush with the sheathing to support the baffle from the sheathing. Will have thicker foam in these places. I think of the R35 as a minimum due to the baffle not being a flat 1" surface. Doesn't meet the code requirement of R49. When discussing with the local building official, stopping the SPF at 4" was OK.
I calculated the roof assembly R with and without 1" of EPS furring over the rafter faces.
Without furring: R20.7
4" of SPF in the 2' oc rafter bays, asphalt shingles, 1/2" plywood sheathing, drywall finish. Used 15% framing factor (for 16" oc even though these are 24" oc)
With 1" of EPS furring strips: R29.6
Same except for 5.5" of SPF in the 2' oc rafter bays and 1" EPS @ R5 on the rafter faces.
Seems like a nice bump in R for the effort and cost. Especially when considering this is right at the eve where ice damming is most likely to occur; need to keep the heat away from the roof.
What would be the framing factor for 24" oc? Will have a little affect on the comparison.
The choice of EPS or ISO will depend on which compresses less when installing drywall over it. From what I've read, it can be done with a bit more care.
Tim