Lessons learned from exterior basement insulation retrofit
Hello,
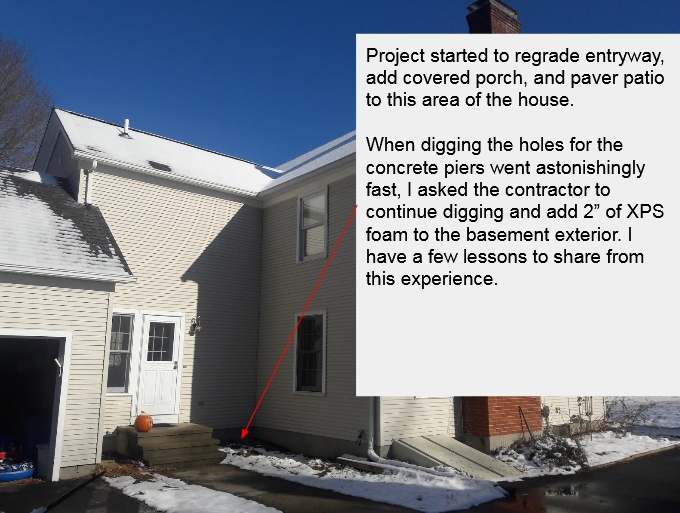
I’ve attached a link to photos and comments that I created to share my recent (last week) experience with an impromptu opportunity to add exterior insulation to a portion of my basement. Lots of things I could have done better here, but in the end I’m glad I spoke up and asked to make the house better.
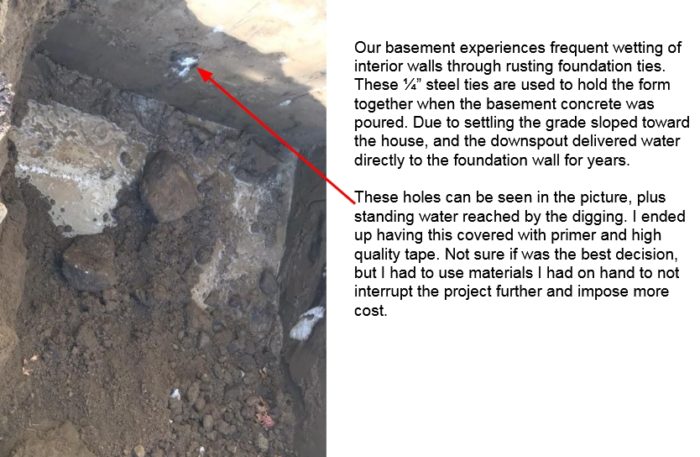
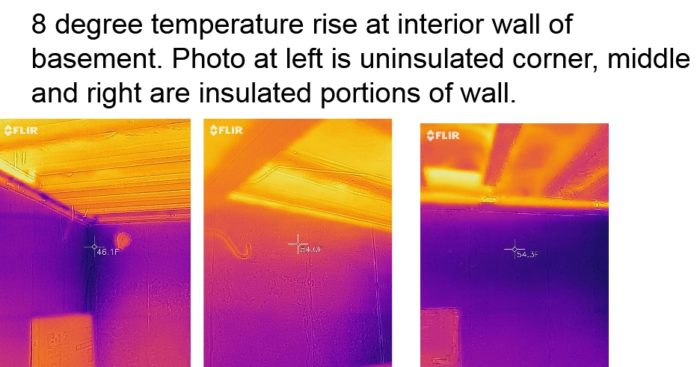
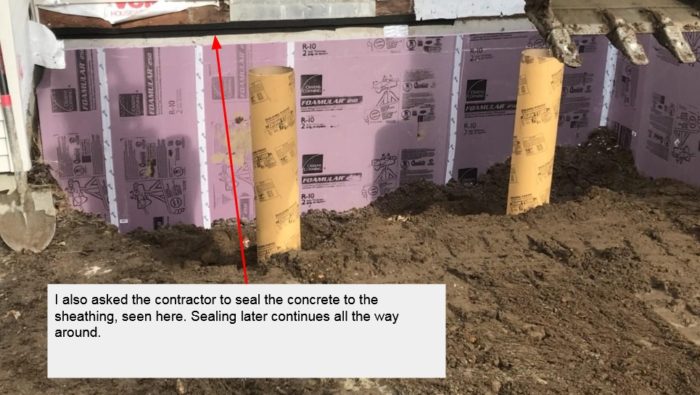
Climate zone 5A (CT), 1988 two story house over 8′ unfinished, uninsulated basement. Exterior concrete walls were not damp proofed, or if it was the finish has long worn off. Minor leakage at lower tie rods as they have rusted and hydrostatic pressure built up from poor drainage and grade that had settled toward the house.
I’ve been reading and keeping up with various keystone articles here, so knew the basics of what to ask for. Highly recommend:
https://www.greenbuildingadvisor.com/blogs/dept/musings/how-insulate-basement-wall
https://buildingscience.com/sites/default/files/migrate/pdf/BA-1108_Hybrid_Foundations_ed.pdf
Hope the pictures help those who are thinking of doing this on their own homes so you can see what is involved. Constructive critiques of my approach are welcome in follow on comments. I’ll post photos of the completed project (if Q&A functionality allows that).
Link to google doc since ppt/pdf size is too large:
https://docs.google.com/presentation/d/1TZuw2xqKMYiNvyhqP7rlu_rt4mjMgoduOqHb9QRNFj4/edit?usp=sharing
Wish me luck,
Mike
p.s. Spent 20 minutes trying to get the file size less than 2mb in an exercise of futility. Request site admin consider raising 2mb limit to permit .pdf/ppt with more than one photo.
GBA Detail Library
A collection of one thousand construction details organized by climate and house part


Replies
Mike awesome pictures. Thanks for those, did they do anything where the siding meets the XPs that rests above grade?
Mike,
Thanks for sharing details of your project. GBA loves it when readers like you share their experiences.
Good luck with the rest of the project!
#1: Chris-Appreciate the comment, thank you. I've worked with the contractor to bend aluminum coil stock in their brake to create a custom flashing that will both curl under the siding and lapped and taped under the tyvek, as well as hang over the XPS with a drip edge. I'll face the XPS with acrylic stucco like system recommended in Martin's "how to insulate.." article (TUFF II).
#2: Martin: Appreciate breaking out the slides into photos, I'll try that next time. I would never have been able to have the confidence to do this without your extensive documentation on this site. Glad to give a little back to the community. Thank you.
Was there mechanical compaction of the backfill or just the excavator bucket?
#4: T Carlson: Yes, gas powered compacting/vibrating machine ran over backfill. Hoping that is enough to prevent settling as before. Next steps are adding more stone, sand to grade away from house, then pavers. I expect that compaction will occur at each step as appropriate. Contractor has been great, real professionals.
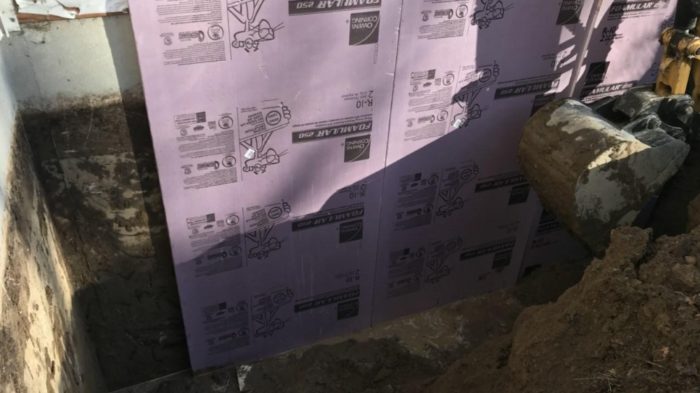
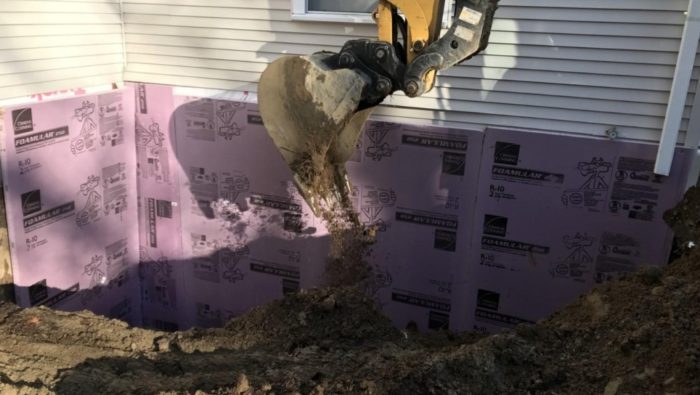
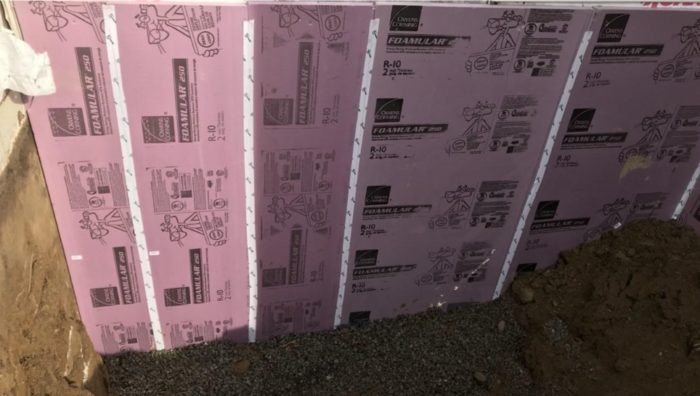
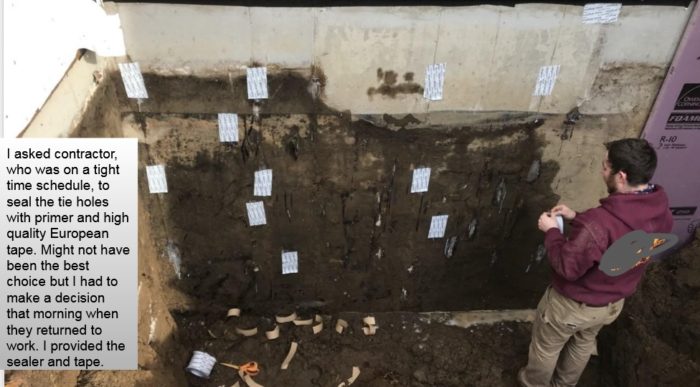
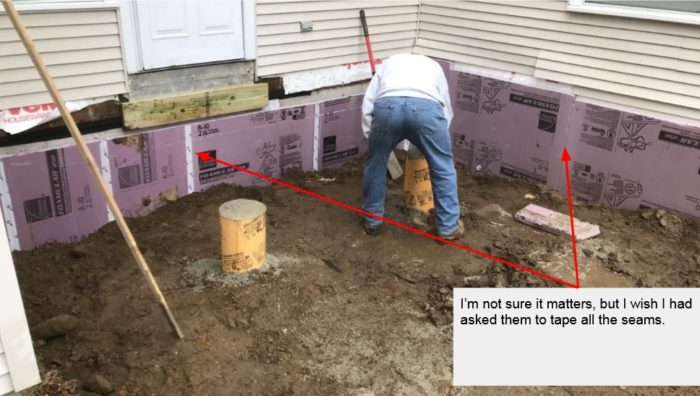
Update: At the time of the initial application it was well below freezing so it was difficult to adequately clean the foundation. This resulted in dirt pockets left over from the excavation clinging to the foundation and pushing the foam board away from the wall. This wasn’t going to work for finishing as the boards flexed around the dirt. I removed the board at ground level, scrapped off the dirt, hosed down and dried the concrete. I then used PL300 brand foam board rated construction adhesive and “Plasti-Grip” fasteners to secure the board to the foundation. I got the TUFF II delivered for free from a big box store website. The plastic fasteners took a little more research. I initially was looking for Hilti brand, but could only find 250 count orders and no nearby physical store. I found the "plasti-grip" on amazon in 50 count and ordered those, they worked great.
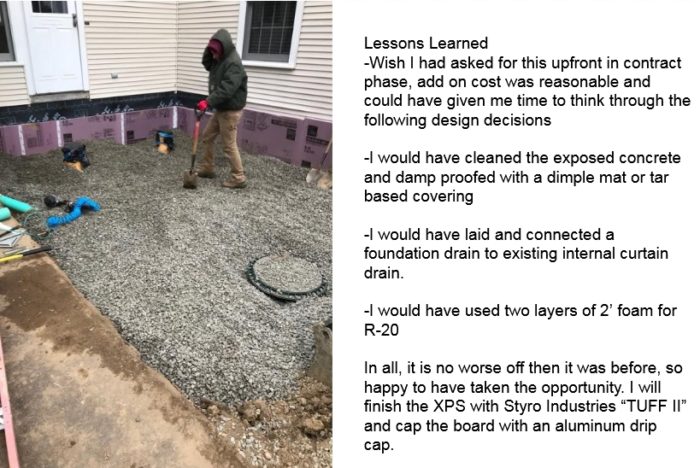
I also took this opportunity to double up the XPS at the exposed face of the foundation for a total of R-20. Application of the TUFF II was straight forward. If you have drywall tools and experience, it's not complicated. I need to apply a second coat, but the first coat alone is incredibly tough, very pleased with the product.
The contractor bent aluminum coil stock to act as the drip cover.
For more reading on thermal modeling of expected energy savings, nice publication by Univ. of Minn here:
https://bbe.umn.edu/sites/bbe.umn.edu/files/2._cold_climate_foundation_retrofit_energy_savings-the_simulated_energy_and_experimental_hygrothermal_performance_of_cold_climate_foundation.pdf
Also, seriously considering extending this project around the rest of my house using the method this study later executed in the field:
https://www.youtube.com/watch?v=wMcyAdsHK7M
Full articles explaining the hydrovac method here:
https://bbe.umn.edu/publications
Anyone tried this method of exterior insulation?
Mike,
Nice looking job! Thanks for sharing your experience.
Mike, keep an eye on the moisture content of your porch, it looks like you are going to have very limited airflow under there.
Pic is what happened to a 3 season addition that was sealed around the perimeter with bare dirt underneath, the water damage was from a poor window design and installation and flashing issues, but sealing off underneath and cutting off airflow inhibited drying. All the walls on three sides and entire floor system needed to be ripped out.
This happened in about 10 years, you would not have suspected it from the inside and couldnt really tell from the outside, owner found out at siding replacement getting it ready for sale.
T. Carlson,
For a porch like the one at Mike's house, remembering to install polyethylene above the dirt is even more important than ventilation (since ventilation is a double-edged sword -- during warm humid weather, ventilation can make things worse).
So, Mike: Did you remember the polyethylene?
In any case, the porch will probably be OK, because (a) it's roofed, and (b) there is outward drying through the porch floorboards.
Yes! For once I did something right from the start!
Once the backfill was placed in the excavated area, we laid ~6" stone, a poly layer, and LOTS more stone to help get the grade right for the pavers. So under the porch, from bottom up, is 1) backfill soil 2) ~6" stone (no fines) 3) Poly layer 4) ~12" stone (no fines). About 8" remain to the ledger. The three sides under the porch are all concrete foundation covered with 4" XPS. I am not abutting the wall assembly in the photo above. Behind the XPS, at the concrete to sheathing junction we taped with Siga Fentrim 4in tape with siga primer. Layered over that is grace ice and water shield and tyvek (or equivalent).
-Porch is south facing and will get lots of sun (for good or bad). The poly, downspout from new shed roof, and integrated drain all feed a drywell under the pavers.
Am I good!? I hope so, just wrote the last check tonight! I'm open to later modifying with vent ports on bottom riser and at back of porch under door which could also double as snow and ice drainage before i enter the side door. Open, but not excited about it.
Mike,
You're good.
Thanks Martin.
Mike,
This is one of the more helpful things I've seen regarding exterior basement insulation retrofit. Wondering if you'd looked into the hydrovac/poured foam approach at all? This has a lot of appeal to me as someone who doesn't really have the option of doing an interior insulation approach.