More Building Science


_This podcast series is excerpted from a two-day class called_ Building Science Fundamentals _with Drs. Joe Lstiburek and John Straube of Building Science Corporation. For information on attending a live class, go to BuildingScienceseminars.com
This week Dr. Joe talks about enclosure design principles of energy efficient buildings_ _______________________________
Let’s start with smart things The building enclosure has four functions. In order of importance, they are: 1. Rain control 2. Air control 3. Vapor control 4. Thermal control Thermal control is the easiest to specify, calculate, and measure, so that’s what codes focus on. Codes typically ignore the most important layers because they’re the most difficult to specify. The vapor control layer is easier to specify than the air control layer, so codes obsess over specifying the vapor control layer and ignoring the air control layer.
Video:
Video: Superinsulating a Home with Rigid Foam
Green Builder Won’t Compromise on the Envelope
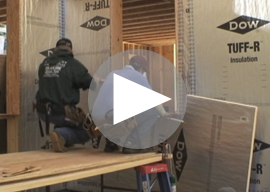
Podcasts:
![]() Podcast:Air Barriers vs. Vapor Barriers
Podcast:Air Barriers vs. Vapor Barriers
Insulation Retrofits on Old Masonry Buildings
RELATED ARTICLES
Insulation Overview Insulating Roofs, Walls, and Floors Installing Fiberglass Right” Insulation Choices Can Foam Insulation Be Too Thick? The Global Warming Impact of Insulation
CONSTRUCTION DETAILS Building Plans for the Energy Star Thermal Bypass Checklist Energy Star checklist details Insulating behind tub with rigid foam Air sealing behind tub Foundation/Floor Intersections Roof/Wall Intersections Wall/Floor Intersections
GREEN PRODUCT GUIDE
Insulation Blown Insulation Batt Insulation Board Insulation Foam Insulation
The most important factors are often not considered in design, construction, and regulation; and the unimportant ones tend to have an overly enthusiastic and detailed amount of specs associated with them. The Perfect Wall has all of the structure to the interior and all of the control functions to the exterior. Let’s start at the outside of the perfect wall with the cladding. Cladding provides three functions: 1. Aesthetics, 2. Protection from UV light 3. Physical, mechanical protection of the other control layers. Aesthetics matter because people don’t take care of ugly things. Ugliness is not sustainable. The longer something is around, the more resources it consumes, so the more resource efficient it is, and the fewer resources it uses over its lifetime. We want a beautiful building that lasts a long time and is ultra-efficient. Claddings should be completely open — we want air circulation behind the cladding system. The more air circulation, the better the system works. Sealants are purely aesthetic, they’re not functional. If the sealants fail, the primary air, thermal, vapor and rain control elements are not affected. If we take the perfect wall and lean it, we get the perfect roof. From the inside to the outside, the control layers are:
- Structure
- Vapor control membrane
- Insulation
- Cladding
Some of the old-timers will recognize this type of roof as an IRMA — Inverted Roof Membrane system. If you replace the ballast with dirt, grass, and a goat, you would get a green roof. (That was a joke.) Flip the roof and you get the perfect slab:
- Dirt and stones
- Insulation
- Vapor
- Concrete (structure)
The physics of a foundation, wall and roof are the same (this is an Ah-Ha! moment). When we look at a section of the perfect roof, wall, and slab, and we get the other Ah-Ha! moment — the important parts are the corners. You have to connect the rain control element of the foundation to the rain control element of the walls, the air control element of the foundation to the air control element of the walls, the vapor control element of the foundation to the vapor control element of the walls, the thermal control element of the foundation to the thermal control element of the walls… Pretty fundamental stuff. Most failures occur where roofs connect to walls _Tip: Buy multi-colored pens_ Whenever we do design reviews in our office, we tell the youngsters to take a colored pen and trace the rain control layer around the building enclosure. If the pen has to leave the paper, they’ve identified a discontinuity that needs to be addressed. Use a different colored pen for each of the control layers. Whenever the pen leaves the paper, you’ve identified a flaw. It’s as simple as that. We find that the flaws are concentrated at the connecting elements. Windows complicate the perfect wall Now these are pretty easy, but it gets complicated. In the real world, someone pokes a hole in the building and we call that a window. Windows have to do everything that a wall does, and more. It has to control water, air, heat, and vapor; you want to be able to see through it, and every so often someone is going to want to open it too. Windows can actually do all of that stuff, which is pretty amazing. No wonder they’re so expensive. All we have to do is connect the rain control element of the window to the rain control element of the wall, the air control element of the window to the air control element of the wall, the vapor control element of the window to the vapor control element of the wall, the thermal control element of the window to the thermal control element of the wall. The reason we’ve been having so much trouble with window-to-wall connections is because we’ve been relying on one person to do all of this: His name is “By-Others.” Mr. By-Others shows up on all of these specs and you have to make sure he is not going to be responsible for all of these connections. Someone has to be responsible. The window industry doesn’t do us any favors either — they don’t tell us in their window system which part of these windows systems are responsible for controlling water, air, vapor and heat. In the absence of guidance, we have to assume that the innermost component of the window is where all four of those functions collapse. So we wrap the window openings and make the connection at the back — so that if the window should fail, the water will go to the outside. That’s how you design a building: water continuity, air continuity, vapor continuity, thermal continuity. It can’t be that simple, right? Well, the answer is, “Yes it is.”
Weekly Newsletter
Get building science and energy efficiency advice, plus special offers, in your inbox.


62 Comments
Air control
Hey Joe and Betsy,
I enjoyed the podcast and am looking forward to more.
I am very impressed the Westford Habitat for Humanity House.
(The Architecture and the construction)
I also appreciate the documentation that you are sharing with the rest of us.
http://www.buildingscienceseminars.com/presentations/aci2009/Pettit-Greening_Affordable_Housing.pdf
Especially interesting to me is the "Gaps Analysis and Lessons Learned".
Concerning Slide 45 ... you note that the solution to improve the air barrier at the ceiling is to:
"move the air barrier from the interior gypsum to the roof sheathing"
Now.. Since the perfect wall and the perfect roof are so similar..why not apply the same logic to the walls?
Why not...move the air barrier from the interior gypsum to the WALL sheathing?
Why do you avoid structural sheathing on the walls if it is OK for the roof?
I realize you may lose a little r-value ... but consider the improvement in the air barrier.
The Westford house is 5 times as leaky as the minimum standard for Passivhaus.
It makes me wonder if the weak link is the wall ??? Perhaps the Rigid insulation is "burping" at the seams?(I do not mean the taped seams...rather all the other foam to foam and foam to framing interfaces)
Is my obssesion with the air barrier over r-value missplaced?
Obsession not misplaced
There is no reason not to have the air barrier at the sheathing. In terms of the entire issue of structural sheathing at the walls as compared to the roof - structural sheathing is generally not required at the walls but is required at the roof. The foam sheathing can be as effective an air barrier as structural sheathing and any membrane. Structural sheathing is not necessary to have an air barrier.
Yes, the Westford House is leakier than the Passivhaus standard. Two points: First, the Westford House could have met the Passivhaus standard had the interface at the roof dormers and wall to roof connection and wall to foundation connection been handled better.
Second, the Passivhaus airtightness standard does not make sense. It is not worth going there effort wise. It is far more important to set the ventilation rate correctly as most standards such as 62.2 result in over-ventilation. Until 62.2 gets fixed, it does not make sense to even look at Passivhaus levels of airtightness. And even if 62.2 gets fixed, I think Passivhaus is twice as tight as it needs to be.
Your obsession with the air barrier is not misplaced. It is far more significant than R-value. Don't give an inch on air barriers. I want to give you another obsession: over ventilation is also far more significant than R-value. Get obsessed on that as well. Obsessions like that are good.
Dr. Joe
Already Obsessing on Ventilation
Dr. Joe,
When you talk I try to listen.. I picked up the Ventilation Obsession from Your Southern top 10 list.
I realize that we can not have airtightness without healthy ventilation.
We need a ventilation strategy that is capable of achieving 62.2 and we need the ability to ramp the ventilation up or down depending on "conditions"
Last week the outdoor dewpoint was extremely high here in North Texas.
I shut of my outside air and activated my stand alone dehumidifier...
My "almost airtight" house is less than 2,000 s.f.
You told me that I would need a dehumidifier and by golly..you were right!
Keeping the layers in order and "burping"
"The foam sheathing can be as effective an air barrier as structural sheathing and any membrane. Structural sheathing is not necessary to have an air barrier."
Joe, I understand how the foam sheathing and a membrane can be an air retarder in cross section.
It is the interface between the foam sheathing and the framing where I see a weakness....
Where the sheathing is attached to the framing and especially where panels meet on framing members.(see the daylight in photograph 2 -Insight Westford House BSI-018)
Just imagine that you could not rely on airtight drywall as the air barrier....
If you pressurize the house... isn't foam sheathing more likely than structural sheathing to "burp" at the seams due to bellows effect ?
"the Westford House could have met the Passivhaus standard had the interface at the roof dormers and wall to roof connection and wall to foundation connection been handled better."
Joe, concerning the dormer interface ... why not treat the sidewalls of the dormer just like the roof... keeping all of the layers in the same order... structural sheathing outside of framing...membrane on top of sheathing and foam on top of membrane..etc?
Thick foam doesn't burp
The interface between the foam sheathing and the framing is no
different than the interface between the interior gypsum board and
the framing and can be handled the same way. Exterior joints are
taped just as interior gypsum board joints are taped. Daylight is
visible as there is no tape yet. Sheathing over 1 inch does not burp - not flexible enough to act as a bellows - we are not talking
housewrap. Yes, the dormer could have been handled the way you
suggest.
**Final thoughts -** there are many ways to achieve airtightness in assemblies. Often the "best" choice is based on
personal emotion based reasons. If you don't like exterior sheathing as an air barrier, that's ok with me. I typically ask for both interior and exterior air barriers and hope that I get at least one with some continuity. In commercial construction I prefer exterior air barrier sheathings by a wide margin. In residential construction I don't have much of a favorite.
Exterior Air barrier advantage
Dr Joe,
One big advantage of an Air-Tight eXterior Approach(AXA)...
we can do a blower door test and Correct Problems before it is too late.
There would also be less linear feet of cracks and joints to fill or "tape" than with Air-tight Drywall Approach
The exterior has fewer corners than the interior.
There would be less confusion about whose job it is (the Framer)
vs Framer does this and Drywall guy does that.
We could always get that "other guy" to do it.
Not saying to forget about ADA .. but rather make AXA the primary air barrier.
Residential or Commercial
Inside or outside can work
You can make rigid insulation work as an exterior air barrier. It might not be worth the effort. But it can be done. Similarly, you can make exterior housewrap work as an exterior air barrier - and it also might not be worth the effort. Same for plywood/OSB sheathing. On the interior the same issues work with gypsum board.
Everyone has their favorite approach. Let me tell you what my approaches are.
For a custom home for a rich client - or for me if I every got really rich my air barrier would be exterior plywood sheathing with a liquid applied mesh reinforced water barrier providing continuity at joints and windows. Over that would go insulating sheathing, furring and a back vented and drained cladding (cedar siding in my case). In the cavities would go high density spray foam. Done.
For a production home builder - the air barrier would be glued/caulked interior gypsumboard with lots of draftstopping and spray foam at the rim joists. The exterior insulating sheathing would be taped and flashed at windows to act as a drainage control layer.
Notice, I did not choose to use the insulating sheathing in either approach as the air barrier. Having said that - I COULD HAVE MADE IT WORK BUT I THINK IT IS NOT WORTH IT.
It would have been easy to run a heavy bead of sealant between the wall framing and the exterior foam sheathing to address your concerns. The problem with this approach - for me anyway - is that if I am not watching it be done I can not inspect it.
No problem with the questions - remember obsession is good.
Joseph
Aesthetics
Excellent point about the importance of aesthetics, sure it's nice to have a pretty wall, but it's more important to have a well-cared for wall. You are absolutely right when you point out how attractively designed building aspects are better cared for. It's a shame not more engineers embrace this salient fact!
Steve -The Tapestry House
Vapor Barrier
Just started reading your post "Excellent"!
My question is this, "I live in western New York State and most all of our weatherization is to existing buildings built over a 150 year span. My home is about 100 years old with plaster lath walls that were originally painted with dark oil paint. Once I took about six layers of paper off I painted all exterior walls and ceilings with vapor barrier paint. I believe it was called Insul Aid paint at the time. Is this a waste of money? Since most existing homes here North of Buffalo have had cellose (Sorry but they don't sell rocks here) I want to be careful that this does not pick up normal home moisture from cooking, showers or that guy that has six aquariums in his home. Yes showers and stoves should have exhaust fans but indoor humidity can swing from 10% to 50% even in the dead of winter. Your thoughts please.
No, it wasn't a waste of money
The use of vapor-retarding interior paint on old houses is not a waste of money. I would call it cheap insurance. It will slow the migration of interior moisture by diffusion through the plaster during the winter, without preventing summertime drying of the wall cavity. So it will work fine.
Some would argue that most houses will perform fine without special paint, and that's probably true. But as I say, vapor-retarder paint is cheap insurance.
Input needed for heating and cooling efficiency & air quality
I live rurally at about 6400' feet on the Colorado Front Range. It's quite dry and my unshaded and unbuffered home site is exposed to violent winter winds at times. I have this slow addition going up, being built by one good guy with decades of building experience, with a lot of changes as we go. I AM NOT A BUILDER. Our ideas about efficiency don't always match up. There is no architect; rather the builder does CAD drawing and did all the plans for the permit with the county.
It's about to be roofed and sided and I am feeling overwhelmed about the decisions I have to make along the way . There are already several things I regret. Anyway, I want a highly energy efficient space that requires no cooling in the blistering days of July and a space that holds the heat well in winter. It's a passive solar space in a loose sense, with large windows close to being south-facing, and the framed floor, which is over a newly framed garage, is designed and engineered to be able to pour a 3-inch concrete slab. The slab will contain hundreds of feet of hot water tubing so I can one day tie into a solar thermal array on the roof. I imagine that happening when some years of research dollars make these systems cost-efficient.
A few quetions....
The massive steel beam that spans the underside of the framed floor--it is exposed to the COLD garage space that lies open below it. How shall I best either protect the heat sink that is my three inches of concrete above the subfloor, from having all its heat robbed through that beam to heat my garage OR how--at this point--do I super-insulate the garage ceiling to include wrapping the steel beam in hopes of making the beam effectively a part of the concrete heat sink above it? The beam hangs down about another ten inches below the floor joists, which are hung from it. Or do I just run a "ridge" of some structurally sound insulation (what material and width?) over the subfloor which rests directly on the 29-foot steel beam, before pouring concrete over it? Would that changed depth of concrete along that strip be likely to crack? Can I put in tubing that could BOTH tie into my existing boiler for now, which is newer and has some untapped capacity, AND be able later connect into solar thermal panels? My understanding is that the tubing materials are different, as the boiler water runs at much higher temperature than solar-heated water systems.
The framing is 2x6, 16"o.c. It's sheathed in 7/16 OSB, and wrapped/taped in house wrap. The roof deck is real plywood. The siding will be a concrete-fiber lap like Hardie Board for its non-flammable properties in my remote location where wildfire is an ever-constant risk. The existing part of the house gets too hot to touch in summer on three sides as the sun moves across the sky. I want to wrap the outside in pink or blue rigid insulation, or poly-iso with its foil facing, between furred-out external battens, then install siding that has a small air gap (how big?) beneath it, so it doesn't touch the external insulation, and a gap for venting vertically near the roof. But a gap can be both a solution and a problem.
My intent is to prevent the extreme thermal conductivity in summer when the siding is nearly too hot to touch. I want to do the same in this roof about to go on. But everyone tells me different things, and one of my concerns is bees, mice, wasps, bats or any other creatures making a home in that air space and clogging it so it ruins the cooling convective flow which I imagine having behind the siding and under the standing seam metal roof with a ridge vent.
Also, wrapping the house in rigid insulation on the outside makes an external vapor barrier. I always learned to have an internal vapor barrier, to keep all the cooking and showering moisture out of the wall cavities. If I put a vapor barrier on the inside, won't that be a recipe for disaster when it comes to any water that might ever find its way in there, having no hope of escape and just rotting the house? We use swamp coolers quite effectively here, where humidity is otherwise quite low. But they crank indoor air humidity up in a huge way and I hate feeling damp. Wildly fluctuating humidity is not good for my cello or my piano either. The windows are open to dry out/cool the house at night. Wouldn't a swamp cooler used even moderately cause a big problem in a house with an external vapor barrier?
The fellow building is quite good, but we disagree at times, and of course I am the one who has to pay now, then pay again later if problems crop up. I want to be as proactive as I can possibly be, given how much is already built. The last thing I want to consider is what products are the biggest indoor-air offenders, so I can decide what is really worth paying extra for. I'm out of money and as as soon as the roof, doors and windows go on/ go in, it will be sitting for some time. For anyone who has read this far and has well-reasoned advice based on actual experience, bless your heart !
Walls and floors
Cheri,
You seem to have many very basic questions about how to design your walls and floors.
If you haven't done it yet, I suggest you start by reading the relevant entries in the GBA Encyclopedia:
https://www.greenbuildingadvisor.com/green-basics/structure-exterior-walls
https://www.greenbuildingadvisor.com/green-basics/insulating-roofs-walls-and-floors
There is also a wealth of information on these topics at the Building Science Corporation Web site:
http://www.buildingscience.com
To briefly answer your questions:
1. Don't use fiberglass batts to insulate the floor of your addition. Either closed-cell spray polyurethane foam or dense-packed cellulose should be used. The steel beam should be completely isolated from the conditioned spaces of your home, so surround the beam with a thick layer of insulation.
2. Yes, the PEX tubing in your proposed floor can be hooked up to your boiler.
3. Your plan to include exterior rigid foam on your walls is a good one — but don't cut up the foam into strips and insert the foam between vertical battens. Instead, install a continuous layer of foam over the wall, and then install your vertical furring strips with long screws. The furring strips will provide an air space between the foam and the siding.
4. The thicker the exterior foam, the better. Many builders are using 2 or 4 inches of foil-faced polyisocyanurate foam over their walls. If you install rigid foam on your walls, do NOT include an interior polyethylene vapor retarder. You want your walls to be able to dry to the interior during the summer.
insulation/walls/floors & ceiling
I am converting an attached flat roof garage to a wet room with toilet+handbasin and utility room for boiler, washing machine and tumble dryer separated by a single skin brick wall. I am planning to install under floor heating over the whole area approx. 5 x 5 meters. The floor will be rubble with sharp sand blinding with 1200 guage polythene over, with 75mm rigid foam over, u/f heating Pex pipe set into a 100mm layer of concrete screed with ceramic tiles laid over.
Question: Would it be better to increase the thickness of the rigid foam to 100mm and is it better to position the Pex pipes u/f nearer to the top by setting them up off the foam at the time the concrete screed is poured?
Secondly, the outer walls are concrete brick with with granite chip 'pebble dashed' over. I am planning to leave a 50mm cavity and then install a conventional timber frame interior leaf of 90 mm stud with OSB skin and breather membrane. On the inside te studs will be filled with fibre glass rockwool batts and qypsum plasterboard over with a plaster skim.
QUESTION Would it be be better to fill the cavity with foil backed rigid fam cut to fit, including openings for window frames.
Finally, the roof. As the garage had a flat roof constructed of 100 mm joist with 22 mm ply with tarred membrane over I decided to leave in place and have put a pitched roof over with fink trusses, with an insulation quilt over then counter battened with a breather membrane under a Burlington slate roof.
QUESTION: Would it be OK to insulate between the fink trusses on top of the 'old' flat roof?
Your comments would be greatly appreciated.
Rojon
Rojon, where are you building?
Rojon,
I'm guessing you are building in Europe, where available building materials are different from materials available in North America.
1. Of course, 100 mm. of foam insulation will always be better than 75 mm. of foam insulation.
2. It doesn't make much sense to cut rigid foam insulation into strips and insert the strips between studs. It is much better to detail your wall so that the foam insulation can be continuous, to stop thermal bridging through the studs.
A Layer of Foam SIPS for a 100year old Bungalow in MN??
Hello I have found these blogs and podcasts incredibly useful! Thank you to all who contribute!
I have a 100-year-old Bungalow here in wonderful Minneapolis. Due to many issues, structural, livability and performance issues, I have decided after consulting with a few local builders and engineer to cut the top off of my house and add a new livable second story. Because I don't have the funds to move out and would like the first floor and basement to remain as undisturbed as possible I have settled on using sips for the new 2nd story walls and roof. They are familiar to local contractors and are very fast to put up -- But!
How do they fit in with the perfect wall? I agree with the posts that an R60 roof and R40 walls seems minimum for this climate (I am going with Thermotech's triple pane fiberglass windows which I got a really good price on) but local SIPs max out at R48 for 12" and R24 for 6" wall. I am all for adding a 1.5" layer of polyisocyanurate to get almost to the R40/60, but is it better to add this to the inside or outside of the sips?
The inside (sandwiched between SIP OSB and 1/2" drywall) has lots of appeal because it would be easy to do myself, (potential to staple electrical to SIP face?), and then the exterior wall would stay in the same plane with the existing first story stucco. It also seams like this is where the vapor control should be. (The first floor walls are nominal 2x4s filled with 4" injected slow rise foam giving r-value of around 20).
However, would be better to have the foam sheathing on the exterior of the sips, sticking out 2" over the 1st story stucco? This would motivate me to add 2" foam to the first floor exterior and redo the stucco, sooner…unfortunately I won’t have the funds/time to redo the first story stucco for 3-5 years. What would everyone’s advice be?
I hope to write-ups, pictures and videos on a website so I can contribute back and share this project with you all this summer.
Thank you for your advice,
-Jason
Either way will work
Jason,
Either way will work.
Making a coat closet a walk-in closet
I need your assistance as to where to begin. I have a back wall already and I need to know how to frame out the rest. A coat closet is roughly 29 inches deep and off the back side of the existing coat closet I want to come out 24 inches and go about 8feet long with the door on the 8foot side and the new end wall would be roughly 5 feet long to cap off closet. Sorry for the confusion, you know things go, ou can see it in your head but when it come to paper or actually dong the project it seems impossible. I live in Berlin, MD and you would think I was asking for the impossible, the prices I'm getting it is no doubt that I would have to do it myself, but I need your help. Any question please email and maybe if I can get my scanner to work I could email to you what I'm trying to do.
Thanks.
Jeff Facello
I don't see a question
Jeff,
As far as I can tell, you don't have a question, other than, "Where do I begin?"
I think the answer is, "You begin by picking up the phone and calling a contractor."
Is "IT" worth it
Dr. Joe,
Love your stuff, and have been reading and trying to understand most of what you are saying when it comes to constructing the best walls and roofs. But I am having a little trouble figuring out the line of what to do when "Best" is not feasible...is there a point where "better" is not worth it, or even worse, causes more problems.
In my case, in central NJ, we are building a house and plan on doing the following, starting from the outside in: Hardiplank (fiber cement), tyvek wrap, plywood, open or closed cell foam over 2x6 framing, gypsum drywall. Was not planning on any exterior rigid foam or furring strips. On the roof, again, outside in, Asphaly shingles, paper, plywood, open or closed cell foam sprayed into 2x10 or 2x12 rafters. Plan on sealing all rims and connections between floors with foam.
My worry is, especially on the walls, that by not doing the foam and furring, I am leaving open the opportunity for condensation on the plywood from dew points etc...and that the thermal bridging by not having the foam, kind of negates the point of using spray foam. I have read the building science book for my climate, and just haven't been able to grasp if this is really enough. So, in this case is "Better" better, or worse?
Anyway, appreciate any help or guidlines in this direction!
A gap between the siding and the housewrap
Kurt,
Add a small gap between the fiber cement siding and the housewrap using 3/8 inch thick strips of foam (2 inches wide) installed directly over the top of the studs and relax. With the gap you will get yourself a "Lexus" wall. It's not a "Porsche", but then again nothing is. A "Lexus" is pretty darn good.
The logic for this small gap can be found at: http://www.buildingscience.com/documents/insights/bsi-038-mind-the-gap-eh .
Joseph
Minding the Gap
OK Joe, you have me convinced, I am going to add the 3/8 inch FOAM furring under the siding, and around the windows (I assume I need to put it around the window frame to give the window something to grab/hold agains). The article was great and easy to understand.
So can you offer me one last piece of advice and peace of mind? Sounds like I have the walls pretty well covered (again, Fiber cement, foam furring, COMMERCIAL Tyvek, plywood, 2x6 and Spray foam (is closed better in this application?). I will go around and make sure I have sealed as many openings as possible, and caulk the baseplates and top plates!
Now for the roof...Am I okay with doing the standard roof (asphalt, paper, plywood) and just applying the closed cell directly to the underside (making and UNVENTED space for mechanicals and storage)? being in Central NJ, in a mixed humid climate, I think your book said that this was appropriate.
Is there anything else you would really strongly recommend I do? I know I am not wrapping the whole house in rigid foam, but hopefully I am, like you said, driving the Lexus, which is a far cry from the chevy Nova parked in the driveway!
Thanks Joe!
More Kurt Samson,
The furring goes over the top of the window flange - never under the window flange. The window flange is part of the water control layer of the wall and must be sealed/flashed to the water control layer (drainage plane). The air gap must always be to the exterior of the water control layer.
In terms of the walls - both low density and high density will work. The high density gives higher thermal performance - but both will work.
In terms of the roof assembly - your approach will also work. And in NJ - both low density and high density will work. Again, the high density gives higher thermal performance - but both will work.
Thanks Joe, and all
Ok, i was wrong, I need another piece of advice...
if I am creating the wall talked about above (basically standard plywood sheathing with housewrap then a 2 inch by 3/8 inch furring strip on every stud and then the fiber cement ciding nailed into this furring strip. What happens at the top and bottom plates of the house? How do I keep that space at the roofline? I assume the idea is to allow airfllow under the siding...for instance if I have crown molding where the roof meets the siding and at gables, I do not understand where the airflow is going to come from.
And at the bottom, if I leave that 3/8 inch gap at the bottom where the lowest piece of siding is, am I inviting insects and rodents to climb up the wall underneath the siding? Seems to me like i will have at BEST case, most of the bees in NJ living under my siding? Worst case, some of the vermin to?
I am sure you all have a good way or some advice, so I really appreciate it! No one said going green was easy but sure is fun figuring this stuff out!
Thanks.
More for Kurt
Kurt,
Use a strip of Cedar Breather or Home Slicker to screen the openings
at the bottom of the wall. At the top of the wall you can hold the
crown molding out 3/8 inch creating a revel or hold the crown molding
down 3/8 of an inch or vent the gap into the soffit. Contrary to
some folks venting the wall into the soffit does not lead to moisture
problems. However, it can be an ice-dam problem (generating heat -
solar heated wall) where the ground snow load exceeds 30 lbs/ft2.
Joseph
Roof Ventilator
Ventilation is one of the basic requirements of a good house. As fresh air is a must to ensure the health of those who live in the house good ventilation is a must. In tropical climes it is not difficult to follow ventilation options when building a house.
Every home needs to be adequately heated to protect family members from getting sick or developing hypothermia. But too much heat can feel uncomfortable during the warm season or in tropical climates and promote the growth of mold or other bacterial invasions that require a warm, moist environment to grow and thrive.
Response to "Roof Ventilator" by nilyvn
Roof ventilation doe not provide ventilation to the occupied space.
It provides ventilation to the roof/attic assembly. That is why it is called roof ventilation.
Roof ventilation is not very effective at controlling heat transfer into the occupied space because it does not address radiation exchange which is the dominant heat transfer mechanism in a roof assembly. It is somewhat helpful in attics that are completely uninusulated or poorly insulated - below R-20 - or if you are not air conditioning and you have a leaky attic ceiling. See below.
If you have a leaky attic ceiling and roof ventilation extracts air out of an attic it also pulls air through the leaky attic ceiling inducing air change in the house. This is good if you are in a hot climate and are not air conditioning. This is bad if you are air conditioning because it pulls air conditioned air out of the house increasing your utility bill. In heating climates the effect is similar, heated air is extracted through a leaky attic ceiling increasing your heating bill and transporting moisture into the attic.
It is pretty clear that the best approach with enclosures that are heated or air conditioned is to construct an airtight attic ceiling and insulate it well and of course when that happens attic ventilation does not provide air change within the house or affect the heat transfer across the roof/attic assembly in a meaningful manner. But attic ventilation is effective at controlling moisture accumulation and ice damming.
Wall Cavity Insulation
Joe-I am doing a bathroom remodel in a Cold zone (Rochester, NY) and have a tiled shower that has 2 exterior 2"x4" walls. Planning to do 1.5 inch foil faced rigid polyiso on the exterior and vinyl siding over that. There appears to be many opinions on how to insulate the cavities. It is a small area so some say just add more sheets of the foil faced polyiso in the cavities and foam seal them. Others say just use unfaced fiberglass batts in the cavities. The shower area will then have Hardiebacker cement board over the studs. The rest of the bathroom ( 2 sides also on outside walls) will have Gypsum Gold Bond XP (purple mold resistant drywall) over the studs. Which of these cavity insulation approaches is best or what other option should be done?
Thanks.
Response to John
Best approach is to not install the batt insulation in the cavity. I like your idea of adding some more rigid insulation in the cavity and sealing the perimeter edges of the rigid insulation to the framing.
Leave approximately a one inch air gap between the inner gypsumboard lining and the rigid insulation in the cavity.
Question for Joe
Joe,
I'm planning on building a home in the Chicago-land area and I want to give my architect some guidance on what I want. I've spent hours reading your articles and I'd like your feedback on my proposed approach: (from the interior)
Latex Paint
Drywall
Open cell spray foam insulation 6"
2"x6" Advanced framing, 24" on center
3/8" OSB Sheathing
1" EPS rigid insulation (to reduce thermal bridging and make it more air tight, yet vapor permeable)
House wrap (with high perm rating)
3/8" Furring strips
HardiPlank Siding
Do you have any feedback on this approach or see some room for improvement? My goal is to have a wall both energy efficient (I'll be going for ENERGY STAR), air tight, and breathable.
Your comments would be TREMENDOUSLY helpful! I don't always trust architects so I won't feel comfortable moving forward without your feedback!
Response to Bill Filson,
You might want to consider installing the housewrap between the OSB and the insulating sheathing (EPS). Check out Figure 9 in the following link: http://www.buildingscience.com/documents/insights/bsi-001-the-perfect-wall?topic=doctypes/insights
Hey Joe
How about this variation on Chicago Bill's wall?
latex paint
drywall
NO cavity insulation
change the framing to 2x4(not-so-OVE)
upgrade the OSB to ZIP system
Crinkly Housewrap
2 layers Foil Faced Polyiso taped ... joints staggered
furring strips (or cladding structure)
Fiber Cement siding
Retrofit wall in a mixed-hunid climate.
I am going to reside my 1800 sq ft, tri-level in the Kansas City MO area. In doing so, I want to upgrade the wall assembly and would like to get it as right as possible. I am also replacing windows. The house was built in 1973 and has 2x4 walls with r7 fiberglass batt insulation, the interior is drywall and I have no idea what kinds of paint are on the interior walls. I have about 16" of roof overhang, so I am considering up to 4" of foam. The attic is cold.
proposed wall: old paint -> drywall -> cavity insulation -> new plywood -> housewrap -> exterior insulation -> furring strips -> fiber cement.
So my questions are;
1) What would be the best type of exterior insulation to use? and how much?
2) If adding around exterior insulation, will it make much difference if the wall cavity is insulated with dense pack cellulose or fiberglass batt? Or should it be left empty?
3) Am I at risk for condensation?
4) Where can I find details on sealing the transition from the wall to the roof?
I have also considering a curtain wall of 2x4 and rock wool. How would this compare with foam?
Thanks,
Fred
Response to Fred
Fred,
I hope Joe Lstiburek has time to answer -- but in case he doesn't, here are my answers in the meantime:
Q. "What would be the best type of exterior insulation to use? and how much?"
A. Rigid foam insulation or closed-cell spray polyurethane foam insulation would be best. Those who are concerned about fire-retardant chemicals and global-warming potential are favoring EPS or polyisocyanurate over XPS or spray foam.
You're in Climate Zone 4. According to Table N1102.5.1 in the 2007 Supplement to the International Residential Code, there is no minimum R-value for exterior foam in your climate; however, thick foam is always safer than thin foam. If your goal is to "to get it as right as possible," then your plan to install 4 inches of rigid foam is a good one.
Q. "If adding around exterior insulation, will it make much difference if the wall cavity is insulated with dense pack cellulose or fiberglass batt?"
A. Yes. Dense-packed cellulose will perform better than fiberglass batts.
Q. "Or should the stud bays be left empty?"
A. Only if you intend to put all of your insulation -- say, R-30 or so -- on the outside of your wall.
Q. "Am I at risk for condensation?"
A. Not if you do it right and follow the advice found on GBA.
Q. "Where can I find details on sealing the transition from the wall to the roof?"
A. Consult with an experienced home-performance contractor, weatherization worker, or home rater, preferably one certified by RESNET or BPI.
Retrofit wall in a mixed-hunid climate.
Thanks for the input Martin. Is it unusual to install 4" of foam in my climate (Kansas City, MO)? I have been calling around for pricing, and get the indication from sales people that they think I am crazy.
-Fred
Response to Fred
Fred,
Q. "Is it unusual to install 4 inches of foam in my climate?"
A. Yes.
Q. "Sales people ... think I am crazy."
A. Perhaps in 20 years, when climate change has brought us many episodes of extreme weather, and when the peak-oil crisis has caused energy prices to skyrocket, those sales people will remember your phone calls and think, "Hey -- Fred knew what he was talking about after all."
exterior insulation on a wall with interior vapour barrier
Joe or Martin,
I'm in Prince Edward Island, Canada and most of the homes in my area have walls that are built (from the interior): Latex paint --> 1/2" drywall --> 6 mil poly vapour barrier --> 2x6 wood studs 16" o/c with fiberglass batts --> OSB sheating --> housewrap --> vinyl siding.
Lately I've seen a lot of retrofits where people are removing the existing cladding, adding 1" or 2" of foil-faced EPS (joints taped) and installing new cladding over top. My question is... doesn't the foil-faced EPS create an exterior vapour barrier that effectively traps the moisture in the wall cavity? Should they be using un-faced EPS or XPS since these are at least semi-permeable for drying to the exterior? Any alternatives to this and still provide an increase in R-value?
Thanks,
PS: Love reading Joe's standing column in ASHRAE Journal!!
Response to Darcy Grant
Darcy,
Time will tell whether there exterior foam retrofit jobs on houses with interior poly develop problems. I spoke to John Straube about this question recently, and he speculated that these homes will probably be OK -- after all, Canadians have been doing these exterior foam retrofits for years, and we're not (yet) seeing widespread problems as a result.
The interior poly isn't ideal if you've got exterior foam, but it's hard to remove. If you're in doubt, keep your interior relative humidity under control (low) during the winter.
EPS or XPS alternative
Thanks Martin,
So would un-faced EPS or XPS be more appropriate to allow exterior drying?
Second response to Darcy Grant
Darcy,
EPS is slightly more permeable than XPS.
But if your foam is thick enough to significantly boost the performance of your wall, then the difference between the two foams is fairly insignificant. As the foams get thicker, they get less and less vapor-permeable.
Red Bacteria
Dr. Joe - You mentioned red bacteria growing on the coil. I wonder if that's our problem with red flakes coming out of our air ducts during the heating season. We experienced it last year after installation of a coated heating coil for stinky socks problem. The flakes started again this year, even worse. Is it a health issue? The contractor is coming to check it out again. Last year they analyzed the particles as being algae.
Wrapping the Perfect wall with a House Wrap
My question is this: Most house wraps on the market are either perforated or non-perforated. It's my understanding that both can be considered air barriers but only one allows moisture to pass through. From many articles I've read it seems as though the perforated products are being shunned as air barriers and considered inferior to the non-perforated products. I understand this well enough; however, what about adding the benefit of a radiant barrier to the housewrap material (the plastic)? Is that impossible? So it would be a plastic backed foil - but would it HAVE to be perforated? Or could it be solid? And if it WAS solid, could moisture really pass through solid plastic and solid foil? I'm thinking no...so it would seem you couldn't have a "superior" radiant barrier house wrap. Is that true?
Response to Faith
Faith,
1. Both perforated and non-perforated housewraps are vapor-permeable (that is, the allow water vapor to pass through them).
2. Most radiant barriers are not vapor permeable, although some perforated radiant barriers allow a limited amount of vapor to pass through.
3. It's risky to use a radiant barrier on the exterior of a house unless the radiant barrier is the facing on rigid insulation like polyisocyanurate. Without the rigid foam, an exterior radiant barrier can trap moisture during the winter.
HVAC Duct Run In Outside Wall
We live in Rochester, New York and did a house addition. A flat oval heat duct run had to go in an outside wall. It will also be used for air conditioning in the summer. What is the best way to insulate this cavity?
The outside of the house is vinyl siding then Tyvek wrap then half inch Advantech sheathing. The cavity is 2”x8” studs on 16 inch centers (had to add 2”x2” over 2”x6” studs because of a cement block at the foundation slab). There is about 3.5 inches of space behind the duct and about 2 inches in front of it. I was thinking of 3.5 inch high density unfaced R15 fiberglass behind the duct and then in front of the duct using Kraft paper faced 3.5 inch high density but removing about 1.5 inches of the fiberglass which would leave R8.5 in front. So, the duct would be sandwiched in between these.
Is this a good approach? Should foil faced be used instead of paper faced? What if any better approach is there to insulate this?
Thanks Joe!
I don't like it, John
John,
No one in Rochester, NY should be running ducts in an exterior wall. You should have built a chase inside of the insulation.
It's also too bad that you centered the duct in the duct bay instead of bringing the duct as close to the interior as possible.
Your only option at this point, I think, is spray polyurethane foam -- Ideally closed-cell foam. That gives you about R-23 between the duct and the wall sheathing. Not great, but better than nothing.
If you use fiberglass, any air leak in your walls will put your stud bay at risk for condensation during the summer, when your duct will be very cold.
Followup - HVAC Duct Run In Outside Wall
Martin, thanks. How about 3 inches of rigid XPS behind the duct and then unfaced fiberglass in front of it then drywall? I would foam seal around the edges of the XPS. Are there any fire code issues with XPS being directly against metal ducts?
Second response to John
John,
Several points:
1. Be sure that all of your duct joints (including longitudinal seams) are carefully sealed with mastic. You definitely don't want duct leaks in an exterior wall.
2. Your suggestion will give you R-15 behind the duct. In your climate zone (zone 6), the 2006 IRC calls for at least R-20 of wall insulation, so you are suggesting using below the code minimum. This is especially bad, because the duct will be warmer than the interior of your home, so really you should be using MORE insulation at this location, not less than code minimum.
3. Although it's not a good design, the XPS is better than fiberglass.
What to Put Behind Insulated Kneewalls?
Martin,
Another question from Rochester, NY. We have an attic bedroom with 2”x4” framed kneewalls. They have Kraft faced fiberglass insulation in them. I have put rigid foam between the floor joists directly under the kneewalls and foamed it in place. My question is what to put on the back of the kneewalls? Use 1 inch XPS rigid foam? Can it be left exposed in the unconditioned attic? Would it create a double vapor barrier? If need be, it would be fairly easy to remove the Kraft paper from the fiberglass and put it back in. What do you recommend?
Thanks again.
Response to John
John,
You definitely need an air barrier on the back side (cold side) of your kneewalls. Since you don't have an interior vapor barrier -- just a vapor retarder (kraft facing) -- installing foam will not create a "double vapor barrier."
You should install rigid foam on the cold side of your kneewalls. The minimum R-value of the foam should be R-7.5 (see Calculating the Minimum Thickness of Rigid Foam Sheathing to learn why).
You can use either XPS, EPS, or polyiso. Two layers of foam with staggered seams are better than one layer of foam. Be sure to seal the cracks between the sheets of foam with canned spray foam or caulk and housewrap tape.
Insulate Under Wood Tongue & Groove Ceiling
Martin,
Another question from Rochester, NY needing your expertise.
One of the rooms in our new addition has a cathedral ceiling using truss construction.
We were planning to put in kraft faced R38 fiberglass insulation. Ceiling is vented. There will be quite a bit of space above the fiberglass.
We want to add wood tongue and groove ceiling to that room. I don’t think tongue and groove is very air tight. Should we drywall and prime the ceiling before putting up the tongue and groove? Would it be better to just use unfaced R38 fiberglass then 1.5 inches of XPS and then put the tongue and groove against the XPS?
Thanks.
Response to John Metzger
John,
1. Fiberglass batts are the worst possible insulation for your application. If you decide to use fiberglass, be sure to install a tight air barrier between the top of the batts and the ventilation channel. Usually, this requires the installation of site-built baffles using a stiff product like thin plywood.
2. Yes, you need an air barrier between the T&G boards and the fiberglass insulation. Drywall will work -- don't forget to tape the seams -- although a layer of XPS or polyiso would be much better, because it will address thermal bridging through your framing. If you install the rigid foam, seal the seams with tape or spray foam. Hold it in place with 1x4 strapping, and then attach the finish ceiling to the strapping.
the perfect wall
I am working on a LEED platinum/net-zero project...very challangeing...lotsa fun...about the perfect wall...I get it...I really do...but if the CMU is NOT being used for bearing...and we put all of the insulation outside the sheathing/CMU...enough closed cell foam to get to R-32...then why the CMU?...we plan to put all of the structure inside the thermal envelope...my project manager tells me we are going to fur out the CMU with steel studs...so why not just forgo the CMU...use 6" steel studs...no insul in the cavity...CMU seems like a total waste of resources...not green to waste and a waste of $$...the only negative I can see is that the brick ties provide a thermal bridge thru the insul to the steel studs...I think we could eliminate or greatly temper that problem by spraying about 1" of the closed cell foam in the steel stud cavity...thank you in advance for your response
Response to Joe McNally
Joe,
Q. "Why the CMU?"
A. I dunno .. why? You're building the wall. If you don't need a CMU wall for bearing, it's obviously silly to include one. Or maybe there is more to your question than it appears at first glance?
Clearly, if your bearing wall will be built using steel studs, the steel will need to be designed to be load-bearing -- something that wouldn't be necessary if you had a load-bearing CMU wall. But I imagine that the cost of the beefier steel studs will still be less than a CMU wall.
Reply to Joe McNally:
I completely agree with you - the CMU is not necessary with the approach you describe.
Air barrier on metal roof deck
Hi, I am building a pre-engineered metal building for my home. I plan on building a roof in the same fashion as Joe's New Orleans Superdome roof done the right way. A metal corrugated 1 1/2" roof deck, air barrier, 2 overlapping layers of XPS or Polyiso, 1/2" densdeck and standing seam roof with clips mounted through foam into purlins.
My question is in Joe's diagram he shows the air barrier on the roof deck to be a membrane installed on sheeting as say densdeck. Both XPS and Polyiso says I can put insulation right on top of deck with no thermal barrier. It is my present thought that with a metal deck the air leakage would be at the seams every three foot. I would like to know if there is a way to make the metal deck the air barrier by painting or sealing the seams with liquid applied material, or taping the seams. Or would it be better to spray or roll the entire deck with a membrane? or something else so I don't have to use that first layer of densdeck. Or is the layer of densdeck used for something other than a thermal barrier or a flat surface to apply a membrane on? I will use the densdeck if I have to.
The same question is applied to my walls. Metal deck material is spanning wall girts, then air, vapor, drainage membrane, then 2" XPS then furring then metal wall panels. I have to have the metal decking to span the longer distances between wall girts but do I have to apply OSB or exterior gypsum to the metal deck? for a surface to adhere the barrier or can I apply a liquid membrane to the primed metal deck and use that as my barrier layer? The metal deck corrugations are running vertical by the way.
Another words I wish I could get a recommendation of the Perfect Wall with corrugated metal decking used to span the horizontal girts instead of osb nailed to wall studs. I will of course have conditioned attic so I will run this wall all the way up to roof and spray foam between intersection for continuity. By the way I live in Lake Charles Louisiana in Zone 2. I saw the Lake Charles house on Building Science. I am being led by that material.
Thanks.
how to convince my boss?
Joe,
I am working on a net-zero (goal LEED platinum) bldg. I have been instructed to achieve R-30 in the walls using steel stud framing. My past experience (and your guidance) tells me that little or no insulation should go in the steel stud cavity. I read where you thought insulation in such a cavity is a "thermodynamic obscenity" (nice turn of phrase that!). I suggested that we could get by with putting 25% max. of the R-value in the stud cavity...3 1/2" polyiso on the outside...2 1/2" fiberglass batt in the stud cavity. Any more than 25% in the cavity and we would surely get condensation in the stud cavity. My boss insists that we fill that 6" stud cavity with fiberglass batt and only use 1-2" of polyiso. I pointed him to your on-line article about the perfect wall. The irony here is that, early in the design phase, he instructed me to use the "perfect wall"...and then told me to fur out the CMU with steel studs and fill the cavity with fiberglass batt...so it got "perfecter"...impossible to make perfect better, right? Any guidance as to how I can convince him that batt in those steel studs is a bad idea. I think he sees that empty cavity and thinks..."why not fill it with batt and improve the R-value and lower the cost construction". help1
Response to Joe McNally
Joe,
It's hard to argue with ignorance unless the person is willing to learn. We're talking physics here -- it's not a matter of opinion. The steel studs are thermal radiators, a framework of conductors, and it hardly matters whether you fill them with fiberglass batts or leave them empty, because the steel-stud assembly won't have much R-value -- full or empty.
All of your R-value belongs outside of your building's structure -- if you want the building to perform well. This is 2011, not 1970. We shouldn't be having these conversations.
How can your boss be so ignorant and still be in charge of a net-zero LEED Platinum design team? It's time for the boss to go back to school.
Inside or outside can work
Hi Joe,
you write "...my air barrier would be exterior plywood sheathing with a liquid applied mesh reinforced water barrier providing continuity at joints and windows. Over that would go insulating sheathing, furring and a back vented and drained cladding (cedar siding in my case). In the cavities would go high density spray foam."
Wouldn't your insulating sheathing perform better if there were an air barrier on top of it (ie; under the furring)? Also you write "It would have been easy to run a heavy bead of sealant between the wall framing and the exterior foam sheathing to address your concerns." Do you mean caulking all the exterior framing that will contact the sheathing and then attaching the sheathing while the caulk is still wet?
thanks
Northeastern New York Wall Retrofit
Greetings,
I reside in Northeastern New York, roughly 150 miles northeast of Syracuse, an hour or so south of Montreal, Canada. I believe this would be considered Zone 6A, according to the zoning map I located on this site. I own a 1955 ranch style home and am in the process of upgrading the walls by adding additional insulation and installing vinyl siding. The walls are 2x4 and the stud cavities were filled with R-13 faced fiberglass batts. T-111 siding was installed over the studs. No vapor barrier was installed on either side of the wall.
I have purchased R-21 cotton insulation, which will fit in the stud cavity. Most of the T-111 is in good shape and I would like to reuse it if possible. At some point it was painted with what appears to be an exterior latex paint. Can I reuse the T-111 by installing it directly over the cotton batts? Would it be advisable to install a house-wrap over the T-111? Are there any issues associated with the T-111 being previously painted? Since I am already in the wall, I thought now would also be a great time to add 2" of rigid foam, with taped, staggered joint, seams. Is 2" enough? would it advisable to leave an airspace between the T-111 and rigid foam? I will be installing vinyl siding over the rigid foam.
My home also originally had a flat roof. Not real practical in Northeastern New York. Although soffit vents were installed, their was no air flow into the attic. Essentially, the soffit vents were only for show. I am in the process of remedying this situation. Ice damming has been an issue. With adequate soffit ventilation, will this problem persist? Would I still locate the soffit vents as far out from the wall as possible? Since I now have access to the eaves and walls, should I insulate all the way to the attic floor?
Roughly 80% of the project is as described as above. The remaining 20% is as follows: I have a 46’ of walls in the front of my home, 19’ of which is made of masonry block. It was originally installed with ½” furring strips on both interior and exterior, followed by T-111 (interior and exterior). I understand insulating a masonry wall will be a bit different than a stud wall and would appreciate the best course of action here. As I did not have enough serviceable T-111, I purchased enough Zip Panels to complete this 46' wall section.
I would like to take into account water, vapor, air, heat, and incorporate the materials I have at my disposal (if feasible).
Any feedback regarding how to go about completing this project correctly would be most welcome. I am also very open to suggestions as to which rigid foam to use.
Thank you,
Allen
Response to Allen Bradley
Allen,
Q. "Can I reuse the T-111 by installing it directly over the cotton batts?"
A. Most walls need sheathing, for several reasons. The most important reasons: for bracing (to prevent racking), and as an air barrier. So yes, you definititely need sheathing -- either carefully nailed T-111 with sealed seams or a new layer of plywood or OSB.
Q. "Would it be advisable to install a house-wrap over the T-111?"
A. Yes. All walls need a water-resistive barrier (WRB). WRBs are required by code. For more information on WRBs, see All About Water-Resistive Barriers.
Q. "Are there any issues associated with the T-111 being previously painted?"
A. No.
Q. "Since I am already in the wall, I thought now would also be a great time to add 2" of rigid foam, with taped, staggered joint, seams. Is 2" enough?"
A. Yes. For more information on this issue, see Calculating the Minimum Thickness of Rigid Foam Sheathing.
Q. "Would it advisable to leave an airspace between the T-111 and rigid foam?"
A. No.
Q. "Ice damming has been an issue. With adequate soffit ventilation, will this problem persist?"
A. Yes. For more information, see Prevent Ice Dams With Air Sealing and Insulation. Flat roofs should not be vented. You need an unvented roof assembly. For more information on unvented roof assemblies, see How to Build an Insulated Cathedral Ceiling.
Q. "Would I still locate the soffit vents as far out from the wall as possible?"
A. No. You don't want any soffit vents.
Q. "Since I now have access to the eaves and walls, should I insulate all the way to the attic floor?"
A. Your question is unclear. You want a continuous thermal envelope and air barrier, so that insulation and an air barrier totally surrounds your walls and roof, without any gaps or breaks in the insulation or the air barrier.
Q. "I understand insulating a masonry wall will be a bit different than a stud wall and would appreciate the best course of action here. As I did not have enough serviceable T-111, I purchased enough Zip Panels to complete this 46' wall section."
A. Include a layer of rigid foam to insulate the wall. Make sure that the thermal barrier is continuous at the perimeter of the wall.
Vapor Control
We live in Rochester, NY and are adding a shower to an existing room. The only place for it is on 2 exterior walls. From the outside in its vinyl siding, Tyvek housewrap, sheathing panel, and I filled the 2”x4” stud bays with foil faced rigid polyiso since it’s a small space. We are about to put on the HardieBacker cement board and then tile over it. I will be putting Redgard waterproofing on the cement board and then the tile over that. I am concerned about trapping moisture in the stud wall.
Do I need to put up 15 pound roofing paper over the entire stud wall before putting up the cement board? Should I do the Redgard waterproofing on the back of the cement board instead of the front of it?
Thanks.
Response to John Metzger
John,
Q. "Do I need to put up 15 pound roofing paper over the entire stud wall before putting up the cement board?"
A. No.
Q. "Should I do the Redgard waterproofing on the back of the cement board instead of the front of it?"
A. No -- just follow the installation instructions that accompany the waterproofing product you are using.
The Perfect Wall
In your article from 2008 entitled "BSI-001: The Perfect Wall", I really like the idea of Figure 7 "The Clever Wall." I am planning a residence close to Asheville NC and would like masonry walls. I have 2 questions. If I use 4" of closed-cell spray foam on the exterior of the block, what would you think of replacing the 8" concrete block in Figure 7 with 8" AAC block? I am thinking that it will increase my R value of the wall assembly, but decrease the thermal mass effect. Also, how do you create a framework in which to spray the foam and on which to attach the exterior cladding without creating thermal bridging? I have found lots of diagrams on the Building Science website that detail wood frame wall assemblies, but cannot find any for masonry wall assemblies, and I cannot find any reference to AAC block. Thank you for any assistance you can offer!
Log in or create an account to post a comment.
Sign up Log in