
Image Credit: Cathy Rust at BEC Green
More Q&A Spotlight


Ralph’s new home will be in Cleveland, Tennessee, not far from Chattanooga and solidly in termite country. And that’s the problem.
“I want to use [rigid foam] on the exterior of the foundation (full height),” Ralph writes in a post at Green Building Advisor’s Q&A forum, “but I have been personally plagued by termites and carpenter ants in every home I have lived in. Short of soaking everything in dieldrin (hard to come by these days but worked beautifully in my opinion and has some nasty side effects), what is the current recommendation for stopping the critters outside the foam/concrete interface?”
He’s hoping to start construction this spring. How does he balance his plans for energy-efficient design with the practical necessity of controlling these destructive pests?
That’s the topic for this Q&A Spotlight.
Make sure your local code allows the use of rigid foam
Building codes in some parts of the country don’t permit the use of foam on exterior foundation walls, GBA senior editor Martin Holladay points out. So the first step would be to check with the local building department to see if that’s an option at all.
“Regardless of your local code,” Holladay writes, “here’s my recommendation: If you’re worried about termites, install the rigid foam on the interior of your foundation wall (whether you are building a crawl space or a basement). Leave a strip of your foundation wall uninsulated at the top of the wall as an inspection strip; that’s where you will look for signs of termite activity.”
Although that strip of bare concrete will leak heat, he says, “that’s the…
Weekly Newsletter
Get building science and energy efficiency advice, plus special offers, in your inbox.

This article is only available to GBA Prime Members
Sign up for a free trial and get instant access to this article as well as GBA’s complete library of premium articles and construction details.
Start Free TrialAlready a member? Log in


12 Comments
Bugs and exterior foam in a warming climate
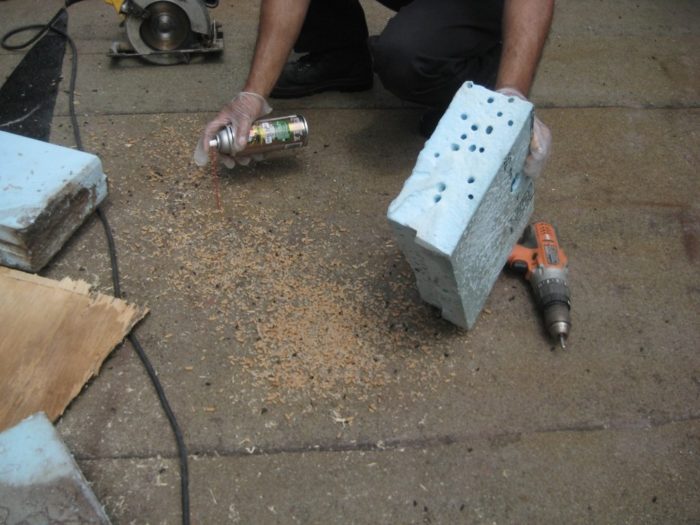
The issue of how to deal with bugs in rigid foam seems to be a big deal to me, and I rarely see any mention of dealing with it in the plethora of articles expounding on the virtues of exterior foam. Ants or termites or both appear in much of the USA, and their ranges will likely expand as the winters get milder. If you're aiming for a durable, resilient home, it seems you should use strategies to account for bugs. I would really like to see this explicitly addressed in articles that use foam. If you show a cross-sectional detail drawing of an insulated slab/foundation wall/exterior wall, show the anti-bug provisions.
In the north (I'm from Michigan, Canadians, Alaskans, et al forgive me), I'm even concerned about ants in roofs, as I've seen them myself. Many advise that you should always try to build so that materials stay dry, but plan for them to get wet. If you've got wet foam in roof or walls, what provisions are taken to keep the ants away?
I'm a fan of the exterior foam insulation concept as a potential alternative to double walls, assuming you can get rid of formaldehyde and use less damaging blowing agents. But insects remains a bugaboo for me.
Termites live in colonies
Termites live in colonies that exists in wood structures in your home. When they get into the foundation and walls of your house, they can cause extensive damage and cost you thousands of dollars. Be careful of them.
Mineral Wool
Sure seams like a lot of effort to go through when there are better options. Exterior insulate above and below grade with mineral wool and you make most of these problems go away. Roxul makes great products for this application. Now you are also vapour open which will benefit your design in many climates.
Price of foam vs. Roxul?
The final paragraph of the article implies that products like Roxul rigid mineral wool insulation might impose a price penalty over XPS foam. However, comments on various other GBA articles have indicated that Roxul is price competitive with, and perhaps even cheaper than foam for a given R-value. Prices vary with time and region, but I hope Scott will offer a few more details on his perspective on the cost question, including current comparisons in at least one location.
Info on termites
The Canadian Wood Council has a lot of information on termites and the information is for North America.
http://www.cwc.ca/index.php/en/design-with-wood/durability/durability-solutions/controlling-termites
bug-proofing exterior foam
Interesting to finally find the issue of bug tunneling in exterior foam addressed!
Short version: try a layer of aluminum window screen over the foam. Buy it by the roll.
Long version: Bug tunneling seems an obvious issue with the exterior foam approach to foundation insulation, and I was surprised to not see it addressed when I researched this insulation method. Exterior foam is used a lot here in Maine to retro-insulate concrete foundations - and insulate new ones. I saw plenty of evidence of the tunneling on another house I am working on (nothing was coated over that foam). I also did not see a satisfactory answer anywhere for the protective parging of the foam. When builders apply exterior foam here in Maine to concrete foundations, they apply a layer of structural skin (fiber reinforced cement coating used like stucco) over the abraded/textured foam surface and call it good. Sure, that's fine, until you bump it with the lawnmower or whack it with the weed whacker. Inevitably the obvious happens and the parging begins to flake off hither and yon. I see it everywhere. The builder doesn't, 'cause he's off working on the next job and probably not mowing your lawn.
Undaunted by both the bug and the parging issue, we still decided to insulate the OUTSIDE of the foundation of our house rather than the inside (that decision is another story, and relates to concern about possible foundation failure in winter in these dense clay soils; I asked some local concrete contractors, if they'd seen or had to fix such failure after interior foundation insulation was applied. One "yep" was enough). We took the most complicated approach possible, which arose from our own tortured minds. After the 2" XPS foam boards were applied against the sealed foundation, we applied 4' wide aluminum mesh window screen (bought by the roll) over the foam, folding it over the top edge of the foam boards, so that now the foam boards had an outer skin covering of wire mesh screening, from the top edge, extending down 4' which generally means 3' deep in the sandy backfill. Hopefully the screen mesh size is smaller than a fat carpenter ant's behind (like those munching away in the garage), and maybe goes deeper into the soil than they want to. (That particular scientific method is called "hopeful.") We "attached" the mesh to the foam with small galvanized nails hammered into plastic mollys pressed through the screen and into the foam. For the foam panels out of sight under the porch and deck, we're hoping that's enough bug tunneling protection. No parging.
For anywhere that would experience rain and water draining off the siding, drip edge was installed, up and under the bottom edge of the shingle siding, then out and over the top of the foam, which now of course extends beyond the surface of the siding.
For the foam exposed to the weather, sun & lawn implements etc, we decided to just plain stucco it, good and proper. (Rats, which we'd thought it through before applying the screening. Oh well.) So, next, we applied expanded metal stucco mesh sheets, attaching the mesh sheets by using those long 3" nail-and-plastic-molly-with-the-big-button-washer thingys ("insulation fixings"). Of course this gave us the joyful excuse of buying another tool for the collection: a serious hammer drill - to pre-drill into the concrete (did I say we chose the complicated approach??). Then a layer of structural skin parging (OK, maybe that was overkill. Shoulda just used stucco). Then, because that was ugly, showing seam lines at each application batch, next came a slathered-on layer of concrete sealant (sloppy concrete-like mixture from a bag), which, with neat vertical brush strokes, put a nice fake-concrete "foundation" look to the surface. Done. Bet that surface will last longer than my neighbor's.
OK, so it was a nightmare of work. But the "new"-old, now dry dry dry sweet-smelling warm basement beats the heck out of the moldy stinky wet horrible former basement. And I'm hoping we're keeping buggy foam tunnelers out of that exterior foam.
Right, we were supposed to be talking about bugs. Sorry. Got carried away.
What about using a solid
What about using a solid dimpled membrane over foam like the one from Cosella-Dorken ?
http://www.cosella-dorken.com/bvf-ca-en/products/foundation_residential/dimplesheets/products/ms.php/bvf-ca-en/products/foundation_residential/products/MSCLEAR.php
That should keep the bugs out, can be surimposed to push it up to the finish and then some
finish panels could be screwed on it etc.. ???
At least it serves another purpose compared to screen method ( what is the life of alumin screen in the ground ? )
Anita Brosius-Scott : for carpenter ants, i don't believe one would need to install screen more than 2-3ft of depth ..they do not dig deep within fill sand
what was your sq ft price for the alum mesh ?
peel stick is still probably
peel stick is still probably much cheaper than the Delta membrane tough ...
EPS Foundation
We have been using water base damp proofing and peel and stick.
Damp proof all styro. Then use 3m Hold Fast 70 to glue the peel and stick on. Tedious job but figuring it will work well. Also sprinkled borax everywhere under the footing styro.
Thoughts appreciated if there is any fails to this process.
Do like the aluminium mesh approach. Maybe we should use that before the damp proofing.
rigid foam versus Roxul insulation
I was just making my shopping list today for the roof at the cottage (inside). I removed all the old ceiling tiles and now I'm ready to insulate. I was thinking of using the rigid foam with foil to make the baffles for ventilation first and then add insulation before installing a tongue and groove wood product on the vaulted ceiling. But now after reading your comments about carpenter ants and termites (which I sprayed last summer) I am worried that they may come back again and nest in the foam insulation. Any comments or advice would be much appreciated. If I use the rigid foam for baffles do I still need to add Roxul to increase the R-value? Thanks!
Response to David Lucas
David,
First of all, if you don't want to use rigid foam to create a site-built ventilation baffle, don't do it. There are lots of other materials to choose from, including thin plywood, OSB, or fiberboard. You could also use a manufactured vent baffle if you want to.
Here is a link to an article that lists a lot of options: Site-Built Ventilation Baffles for Roofs.
Second, if you plan to use an air-permeable insulation like mineral wool (Roxul) or fiberglass to insulate your rafter bays, it's essential to include an air barrier on the interior side of the insulation. Tongue-and-groove boards don't make an air barrier -- they leak like a sieve.
The usual solution in a case like yours is to install taped drywall on the interior side of your rafters before you install the tongue-and-groove boards. The drywall is your air barrier.
Here is a link to an article with more information: How to Build an Insulated Cathedral Ceiling.
Durock B2000
For my home in Halifax area I insulated with 4 inches of type 3 (Canadian rating) EPS on the exterior foundation wall. The insulation is adhered with generous amount of Lepage C300 adhesive.
I used Durock B2000 which is a synthetic stucco meant to go below grade. I did that down to 12" below grade and up over the top of the insulation.. Like all synthetic stucco it goes on with fiberglass mesh. I used two layers of 5oz fiberglass mesh with a third layer around corners. I find it is rock hard and no problem with grass trimmers or any other unintentional damage. You can even get high impact mesh (11oz, 15oz, 20oz) that is even tougher. I kinda wished I did a heaver mesh just for that extra overkill but I see no issues with durability.
I sloped the EPS at the top to shed water. Durock has guidelines in their various stucco specs. That way I didn't have to do bulky Z-flashing. I then used a liquid applied flash on the foam to wood wall transition and a 2" L flashing with drip edge over that.
I then used an elastomeric paint - Dulux Decraflex.
Survived two winters still looking good. I think it provides a good barrier against ants.
Thought might be useful to someone else.
Log in or become a member to post a comment.
Sign up Log in