

More Guest Blogs


Editor’s Note: This post is one of a series by Chris Stratton and Wen Lee, a husband-and-wife team living in the Los Angeles area who are turning their 1963 suburban house into an all-electric, zero-net energy home. They chronicle their attempts at a low-carbon, low-cost, and joyful lifestyle on their blog Frugal Happy. This post was written by Wen.
There are few things more wasteful and useless than a grass lawn in southern California. Maintaining turf in a desert requires tons of time, water, and money. And after all that work, you can’t even eat it (unless you’re a ruminant).
The plan: Take out the lawn and replace it with xeriscaping and garden beds to grow veggies. We’ve never done anything like this before, but hey, that’s why this is exciting.
After researching the many ways to kill grass, we decided to go non-chemical and low-cost (but also labor intensive and slowww): sheet mulching. Cardboard and mulch for the win!
STEP 1: Dig out the perimeter of the yard. If you have sprinklers, stake the heads so you can find them later. (Note: You’re also supposed to mow the grass as short as possible before sheet mulching, but we don’t have a lawn mower so… we just skipped that part.)
STEP 2: Cover the grass with a crapload of cardboard (see the first image in the gallery). Seriously. A lot of cardboard. We dumpster dived behind strip malls. We asked (multiple times) CVS, Kmart, Office Depot, Super A, and the local bike shop. The cardboard acquisition process took weeks. It was astounding how much cardboard we needed. Over 100 boxes, easily.
STEP 3: Cover the cardboard with a crapload of mulch. Like with the cardboard, we were surprised by just how much mulch we needed. We utilized free city mulch giveaways and borrowed my cousin’s pick-up truck. We shoveled mulch for hours, over three different days. In total, it must have been about eight truckloads of mulch. According to the interwebs, you should cover the cardboard with 5-8 inches of mulch. Ours ended up more like 3 inches. Good enough.
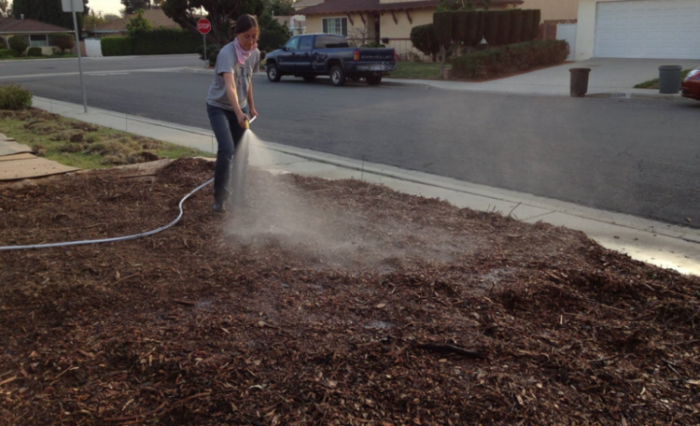
STEP 4: Wet everything down (see image #2 in the gallery). Hose down the mulch once every 2-3 weeks (or hope that it rains). Even in the hot and dry SoCal climate, mulch is amazingly good at holding in moisture.
STEP 5: Wait two months (or maybe more?). With cardboard blocking out sunlight, the grass will slowly starve to death. Little microbes, buggies, and worms will go to work under the mulch, devouring the dead grass and the cardboard. Allegedly, in a couple of months, we’ll be able to stab a shovel into the mulch and find healthy, rich soil underneath. Magic!
First round is a limited success
That was back in March. Life was good. Until May, when we discovered the grass was trying to return (see image #3 in the gallery).
Nooooooooooooooooo $#@%!
Now to be fair, most of the yard is still looking pretty good. Overall, the mulch is holding. And under the cardboard the grass is clearly hurting.
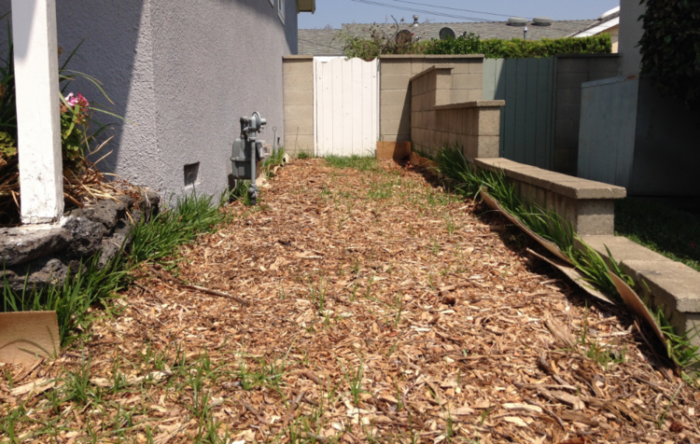
It’s just that, for whatever reason, the side yard looks like hell. Why did this happen? I really don’t know, but I have a few theories.
The side yard receives more shade over the course of a day compared to the rest of the lawn. So maybe with less sun, it stays more moist, and the grass is more likely to grow back? Or maybe the cardboard is more wet so it decomposes faster so the grass can break through? Or maybe we didn’t put a thick enough layer of mulch on top? Or maybe the mulch itself had grass seeds in it? I’m not sure.
There’s a whole lot of tall grass growing along the perimeter, and I know exactly why that happened. Back in March, when we were prepping the lawn for sheet mulching, we dug out the perimeter of the yard… except we skipped the parts next to walls. Because, well, we were tired of shoveling. And we rationalized that the cardboard would lean up against the walls and smother the grass. So we called it a day.
Bad idea. Thanks to us trying to cut corners, the grass is now 2 feet tall along the walls. Brilliant. The moral of the story is to not be lazy about digging out the perimeter. Dig it all out in the beginning.
Besides the forest growing along the edges, there is a smattering of grass popping out all over the mulch. It used to be just a couple here and there where the cardboard pieces had gaps, but about a week ago I started seeing this happening, and it was freaky.
The cardboard is disintegrating and somehow the grass below is still alive! I knew if we didn’t do something soon, it would all be over.
It’s time for battle
This afternoon, I went out front and started pulling out the grass by hand. One bunch at a time.
It took a long time, but it was also kind of relaxing and therapeutic. The grass comes out very easily, roots and all. There’s something very satisfying about weeding.
I spent the whole afternoon yanking out grass and filled my bucket three times. Victory is mine!
The other kind I call “dragon grass” because it’s long and green and looks like it’s got legs (think a Chinese dragon). You pull on one tuft and realize it’s connected to another part, and another, and another, and next thing you know you just pulled out 5 feet of one crazy long grass. This is likely kikuyu grass, I am told.
The biologist in me is fascinated by how well adapted these grass species are for survival. They are totally bad-ass and have my respect. But the gardener in me hates them. I wish they would be bad-ass somewhere else.
After today’s marathon weeding session, the comeback grass is gone and the yard is looking peaceful and mulchy again. I’m hoping that’s the last of it, but only time will tell. If the grass keeps coming back, we may need to cover the side yard with more cardboard (ugh). At the very least, I think getting more mulch and thickening the mulch layer may be a good idea.
Now we’re ready to do something useful with our huge plot of mulch: grow food.
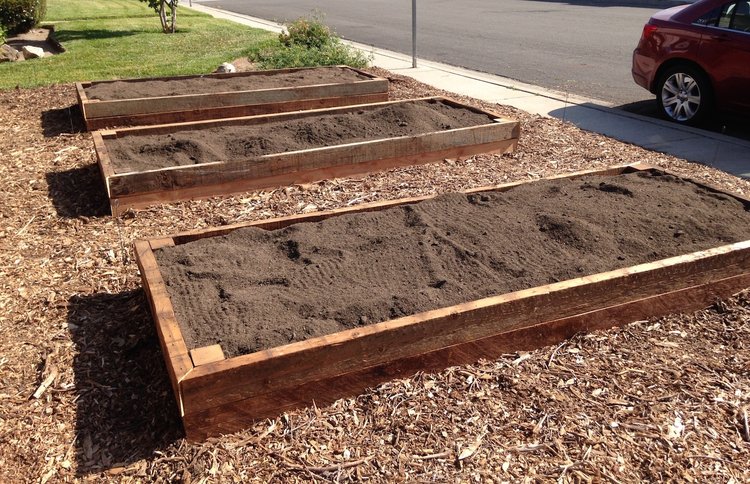
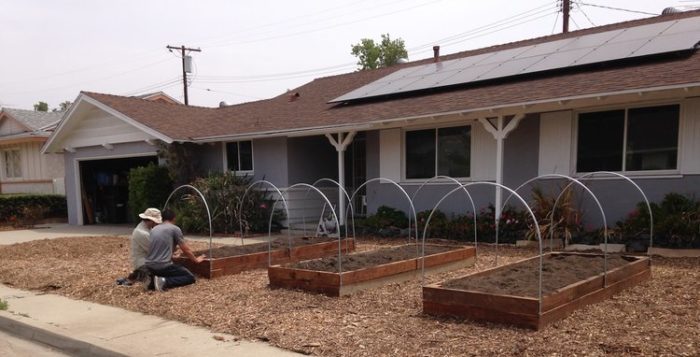
Making raised-bed gardens
Chris got to work building raised beds. He found a place in Los Angeles that sells salvaged wood and loaded up his bike trailer with long boards of Douglas fir. Then he skillfully cut them and assembled them into three awesome planter boxes in the front yard.
We filled the beds with two parts garden soil (purchased) and one part compost (free from city giveaway!). Now they look like giant litter boxes. Cool.
With the hoops (see image #4 in the gallery), our garden is starting to look pretty farm-esque. Got some curious looks from neighbors driving by.
Now for the big question: What should we plant?
What yummy food crops can withstand 100-degree temperatures, extreme drought, and merciless full sun? After doing a lot of web research (more #googleskills), we decided to try out:
- Summer squash
- Tomatoes
- Green beans
- Okra
- Eggplant
- Bell peppers
- Cantaloupe
- Watermelon
Let the experiment begin!
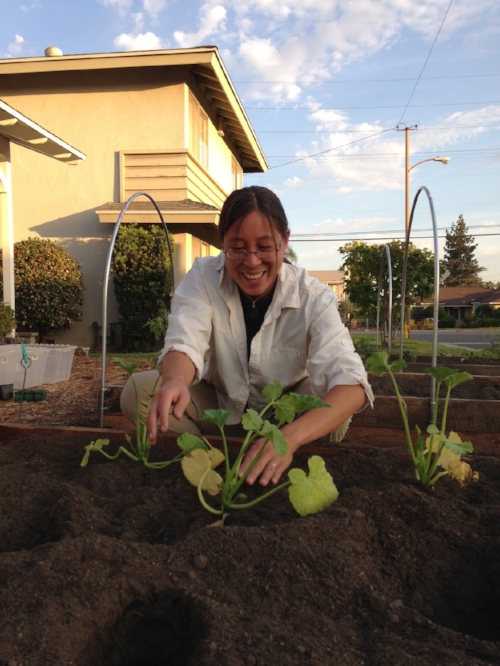
One evening in June (yes, we know that’s late to start a summer garden), we planted our new babies in the fresh soil. Image #5 in the gallery shows me planting zucchini (which thrived). Chris planted green beans (which fried).
To help the plants survive the brutally hot days, we covered the soil with a thin layer of mulch. The hope is that the mulch holds moisture in that otherwise would evaporate in the blistering heat.
It’s now been over two months since we first planted the starts, and I would say that overall they’re doing… okay. I’d give our garden production a B-, maybe. The okra got infested by aphids, the green beans straight-up failed (scorched and chomped), and something is eating the crap out of the eggplant leaves. Pretty much everyone looks a little thin and grungy.
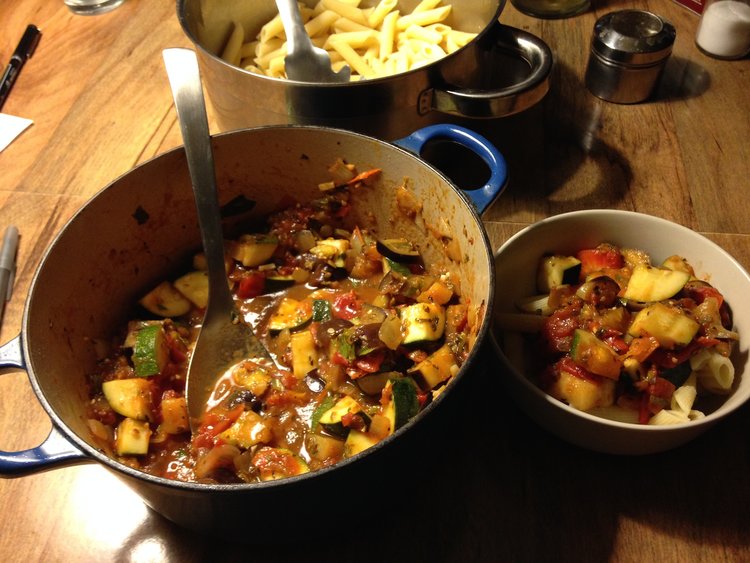
Despite these challenges, our garden is producing. Our squash and melon bed is particularly robust. So far, we’ve enjoyed a half dozen summer squash, two cantaloupes, four eggplants, five tomatoes, and about 10 okra. A medium-sized watermelon (our only one) is growing steadily, numerous green tomatoes are lying in wait, and we have many other veggies that continue to come in (including baby peppers!).
We may not have the most beautiful or productive garden, but we are still proud of it given that it’s our first try. This fall we’ve signed up for a community gardening class which should help develop our green thumb for next season.
The front yard used to be all grass and now look at it! Tell me this isn’t more interesting.
Part of the point of this whole experiment was to demonstrate how a lawn could be transformed into something more useful and less wasteful. And I’d say we’ve accomplished that.
Other posts by Chris Stratton and Wen Lee
Weekly Newsletter
Get building science and energy efficiency advice, plus special offers, in your inbox.


8 Comments
Chris and Wen,
As someone who has planted a vegetable garden every year for the last 44 years, I salute your plan to grow vegetables in your front yard, and I wish you the best of luck.
When it comes to the listed steps to kill your grass, I was with you until I came to Step 4. What's with the watering? Watering everything does two things: (1) Helps the cardboard break down. (The cardboard eventually turns to compost -- i.e. soil.) (2) Keeps the grass roots alive.
What's with that? Isn't water precious in California?
It would have been much better to let the soil dry out. The cardboard would last longer, and the grass roots would eventually wither. Since you live in a desert, grass probably isn't going to grow without watering.
Of course, once you created your raised beds, filled the beds with soil, and planted vegetable seeds (or planted seedlings), watering the beds made sense. If you had used less water on top of the mulch, and more water on the raised beds, you might have had better results.
Out of curiosity, why was it necessary to kill the grass? If it required watering to survive, would it not have died on it's own? If it did not require watering, why do you hate it?
Was it that it was ugly when not watered, but still not dead?
I would have expected a 'stone lawn' given the hot sun of Southern California. I presume that the mulch will have to be replaced annually or so? Otherwise it looks great and will definitely be greener than a lawn (except for the color of course...).
In the Southwest is common to have a xeriscaped gardesn in front of the house, using native plants, with no need for watering, plus developing swells for rain water, which could be planted with native flowers that bloom every time it rains.
Our HOA wouldn't allow veggies in our front yards, but I don't know that I would like to see vegetable gardens in front of houses in my neighborhood. Maintaining harmony in a neighborhood keeps property values in check.
It makes me think of people that paint their houses all black, Denver Broncos blue and orange, or totally pink... just because they can.
Armando,
You wrote, "I don't know that I would like to see vegetable gardens in front of houses in my neighborhood."
Maybe you don't know, but I do. I'd like to see that. My brother lives in Roslindale, a neighborhood of Boston, and he grows vegetables in his front yard. Neighbors often stop by to compliment him on his garden.
Kudos to Chris and Wen on making this jump. My wife and I made similar changes to our small suburban lot at our former house, eventually converting almost all of our 1/8 acre lot into food production and habitat for pollinating insects. We kept grass/clover pathways, and had 16 raised beds similar to yours, along with filling every other nook and edge with food-producing plants, trees and vines. We found that the soil in the raised beds dried out much faster than ground-level soil, but the wooden frames were handy for attaching trellises and covers of various sorts.
There was no HOA at our place, but I'm sure our activities raised eyebrows with some of our neighbors. Others caught the gardening bug and credited us with their inspiration. I don't think any of them tried growing squash and beans in the front yard, as we did, though. I don't understand why a plain, boring, resource-sucking lawn is considered desirable, when a productive, interesting, vibrant garden is an option.
Mulch over cardboard stimulates a lot of biological activity in the soil, which contributes to healthy soil in the raised beds, as long as the bottom of the beds is open to the ground. It's a great way to up-cycle cardboard waste.
Nice ! Whereas it's a piece of cake to grow a "natural" lawn in the East and SE US I never understood the draw to having a lawn in arid, semi-arid climates.
Q: What do you guys indent to do with the mulched area? Add small stone? Let it go naturally?
Mulch is ok, but on a slope it's just asking to be washed away into the street.
Congrats on making the jump to no lawn. We've reduced our lawn to just a postage stamp nod to the neighbors in front, with everything else being beds of native ornamentals in front. in back, we've got tall raised beds for food surrounded by fruit trees and vines. There is a special joy in eating what you grow that too many of us have forgotten.
Being in CA, you can start thinking about your winter crops. Try those beans again. And green, leafy vegetables love the cooler weather. Radishes, peas, a whole different palette of veg is available all winter long where it doesn't freeze. We used to live in southern CA, and I still miss the fresh citrus anytime you want it. Those of us in cold country will be jealous when you post your blog showing your February harvest.....
Log in or create an account to post a comment.
Sign up Log in