

More Building Science


Here’s a funky, but cool little timber-frame house, built in 1987:
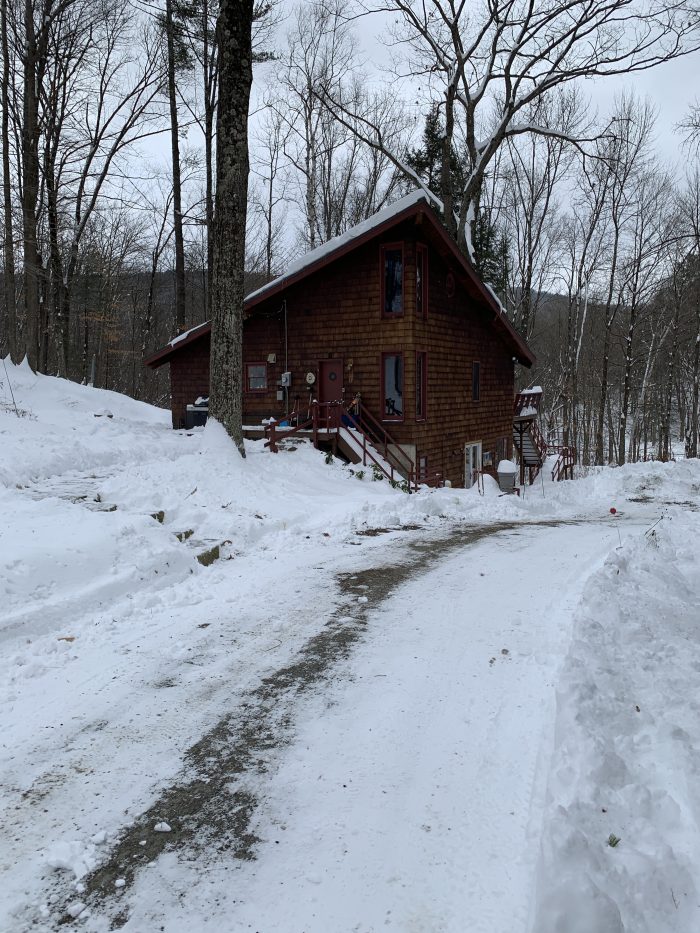
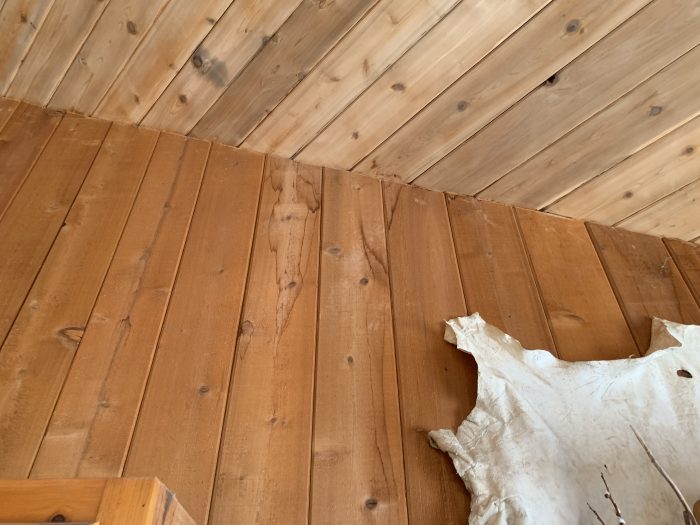
Being a full cathedral timber frame, the roof deck provides both structure and interior finish with all the rigid roof insulation topside.
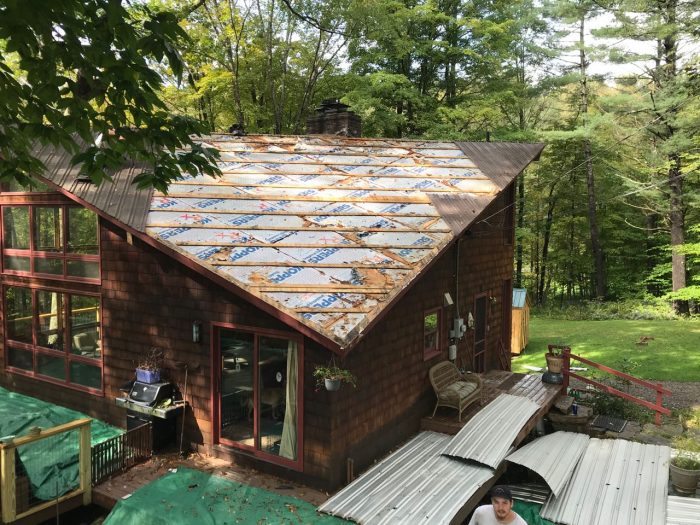
Critters drove the roof retrofit
Nesting mice and squirrels were the problem. The roofer promised to close off all places the critters were getting into the roof assembly but suggested that while they were at it, the homeowner should beef up the roof insulation, which was looking just about as shabby as the old roof cladding.
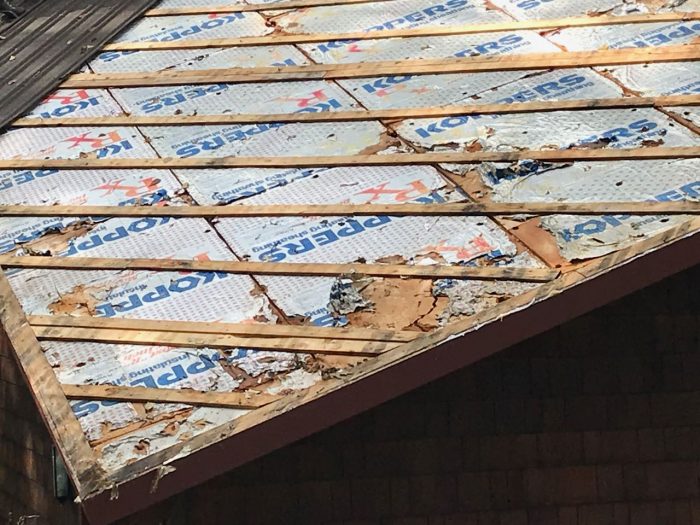
The insulation job involved taking out all the rigid insulation at the roof perimeter and then using spray foam to fill the perimeter and over the whole roof to the depth of the new 2x sleepers (see the image at the top of the page).
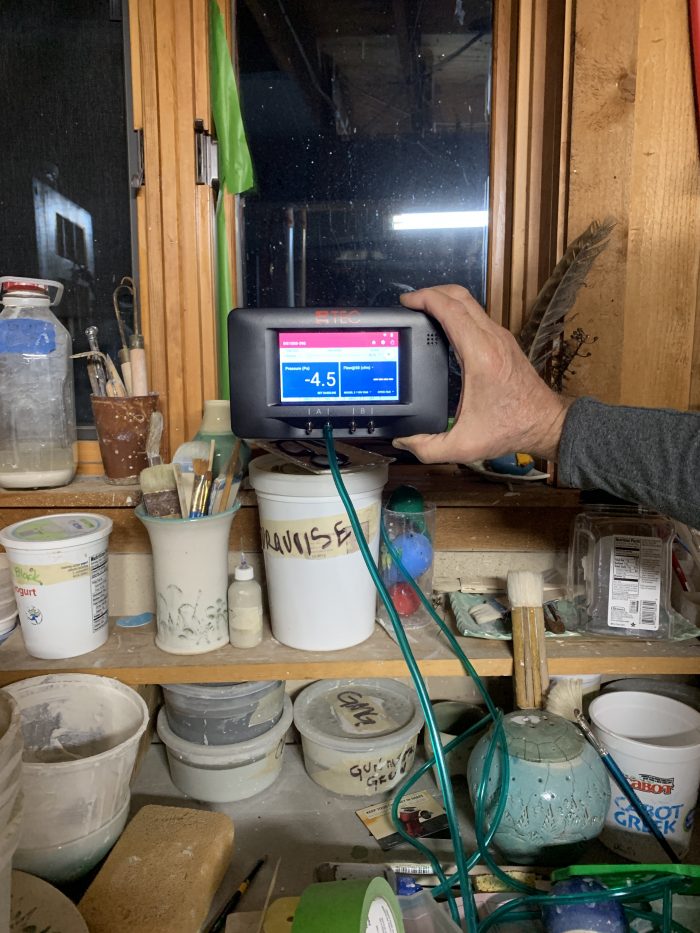
The insulator did a blower door test before and after the spray foam insulation was installed, hoping to get the Efficiency Vermont rebate if the home tightened up 10% or more.
Initial blower door test results: (9-27-18): 998 cfm50.
Trouble is, the building was leakier after the roof retrofit was complete.
“After” blower door test: (10-16-18): 1130 cfm50.
Water stains bring me in
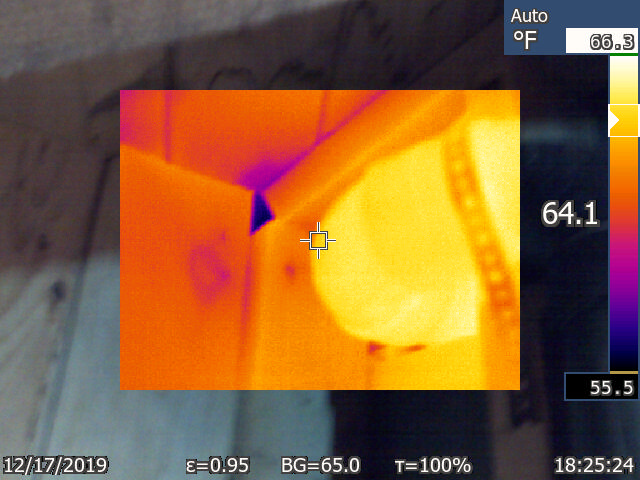
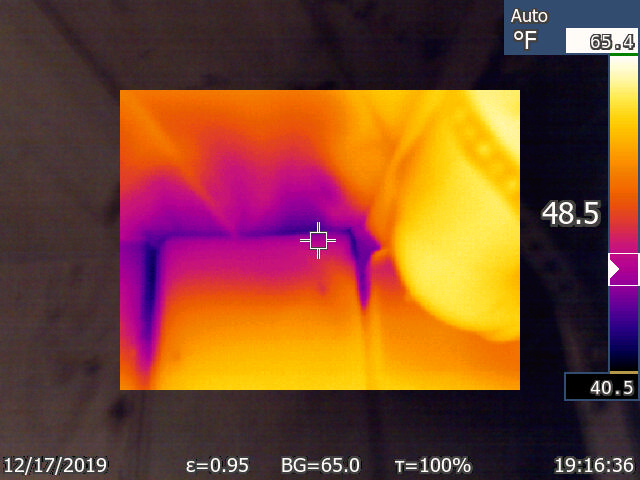
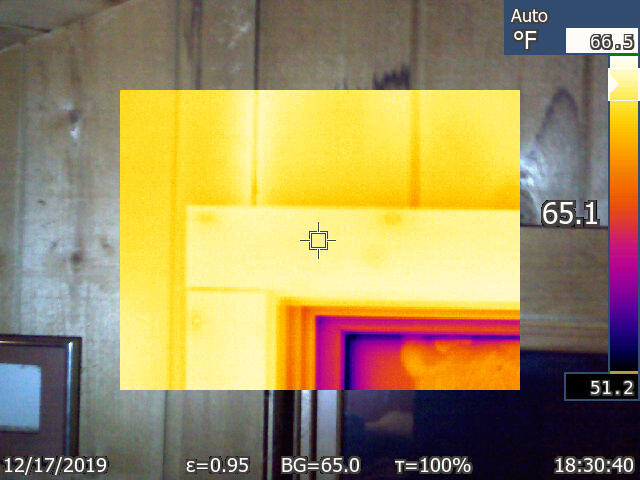
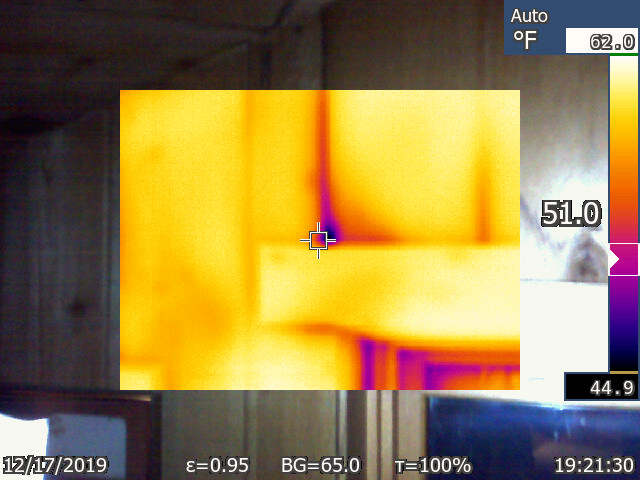
More than a year later, I got called in because the homeowner sees what appears to be new water stains on her interior finish on exterior walls. Lots of them, and mostly up at, or near, or connected to where exterior walls meet the cathedral ceiling.
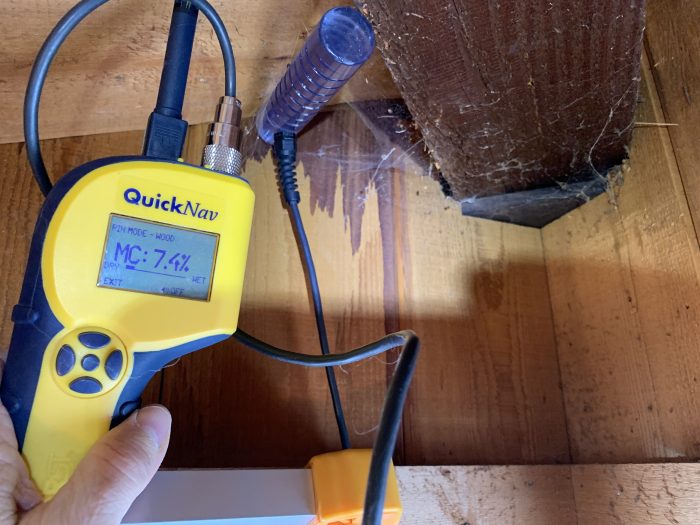
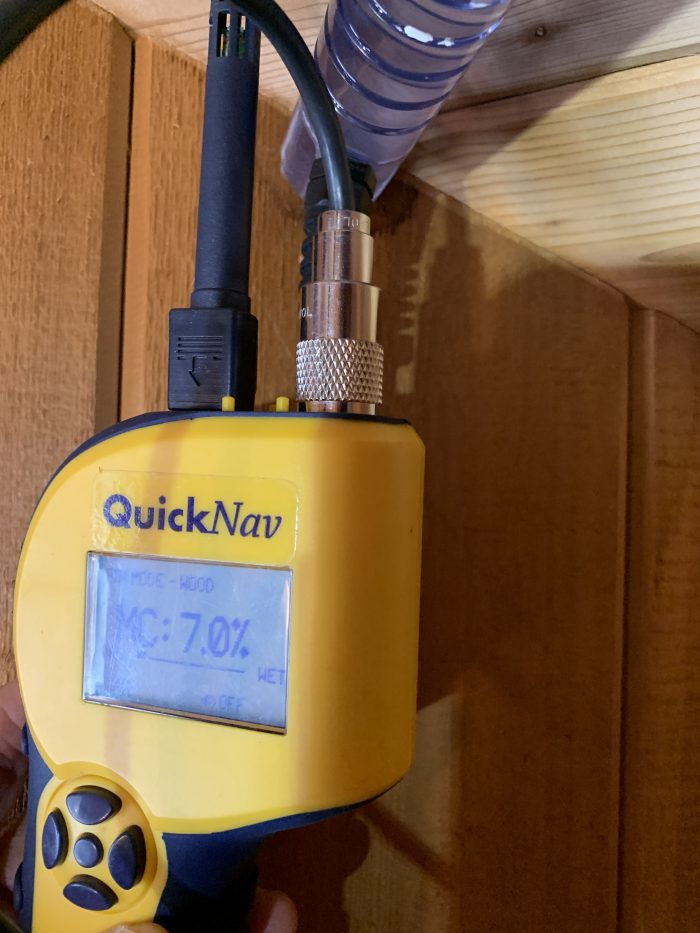
Time to measure moisture content
I took moisture content readings where there is water staining, but the results showed that the wood is quite dry.
A bit more background information
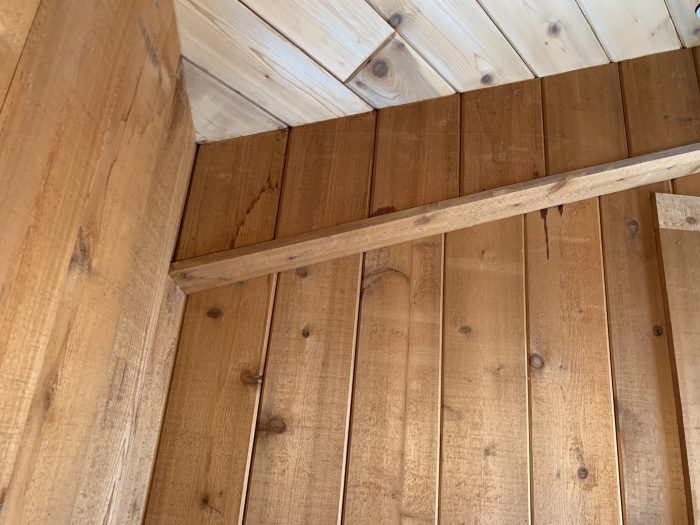
At this point, to be fair, here is info on the exterior wall assembly:
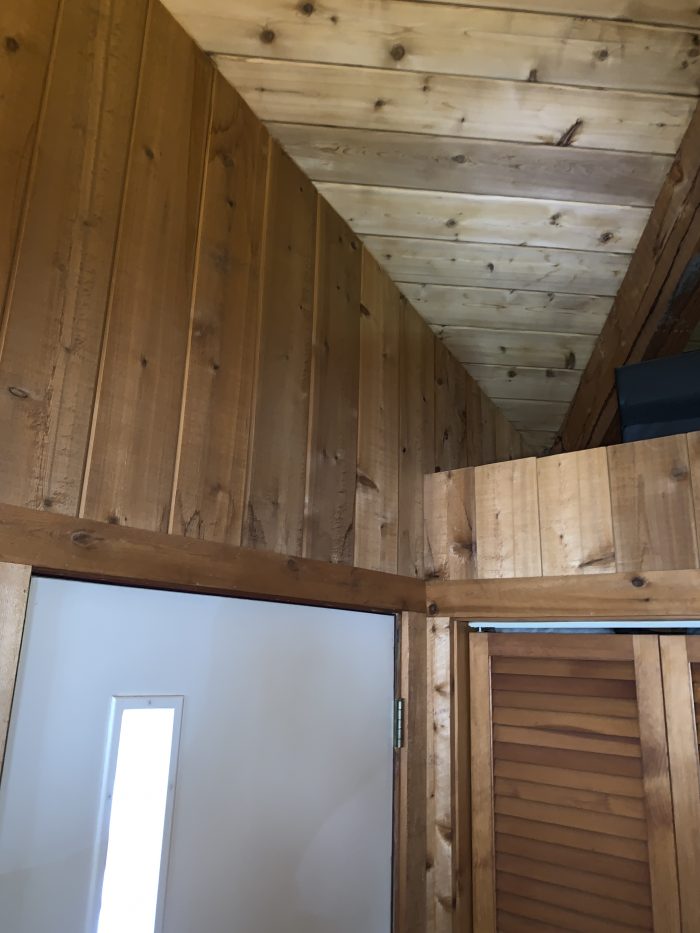
- Interior finish is vertical 1×6 V-groove unfinished boards
- Then some horizontal blocking and fiberglass batt insulation
- Then sheet good structural sheathing (either OSB or plywood, according to the homeowner)
- Sheet good water-resistive barrier (WRB; again, according to homeowner)
- Maybe skip sheathing for cedar shingles
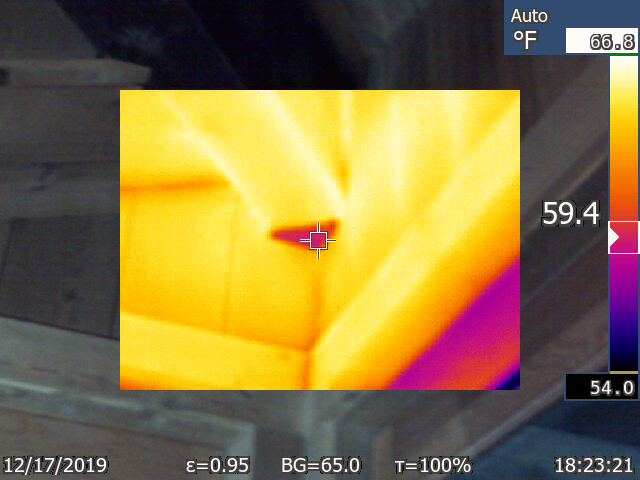
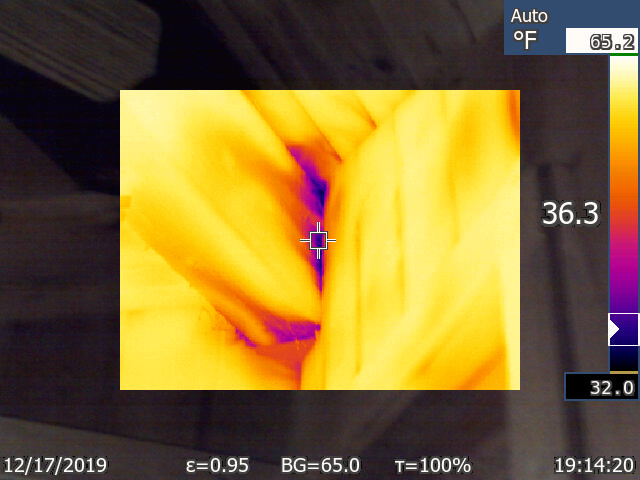
You are probably thinking right now what I thought on Dec 17 2019: the timbers and V-groove roof deck run from inside to outside the building and despite the air sealing at the roof, including the perimeter, there is no air seal where the ceiling meets the exterior walls. The entire house leaks like a sieve with that V-groove on the walls and the ceiling, but stack effect in the winter means more air leakage up high in the three-story home.
Why more visible/more recent condensation up at the cathedral ceiling? My best guess: the roof retrofit intensified certain air leakage pathways, focusing the wintertime condensation, and/or the homeowner is running relative humidity higher this winter than last.
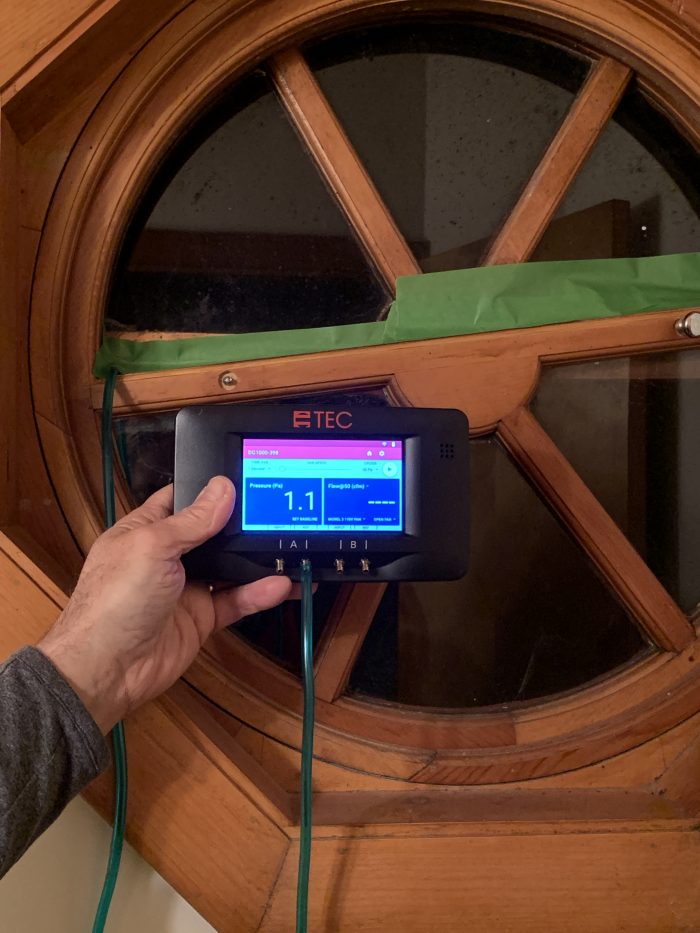
I took a slew of infrared camera (IR) images on Dec 17 before doing a blower door test and taking a second set of the same IR photos, knowing we will see a ton of air leakage, including right where the water stains are.
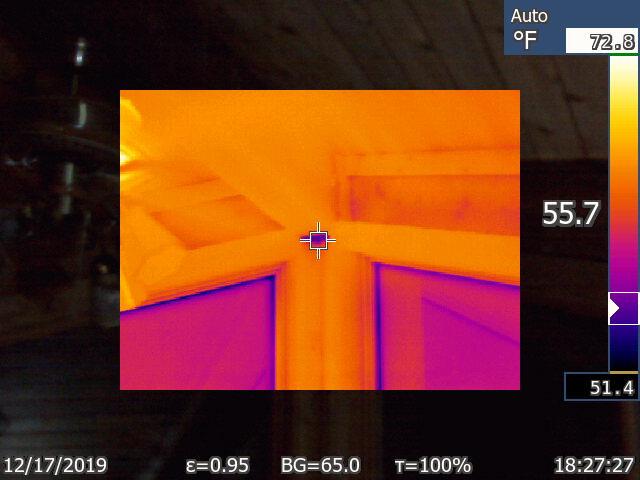
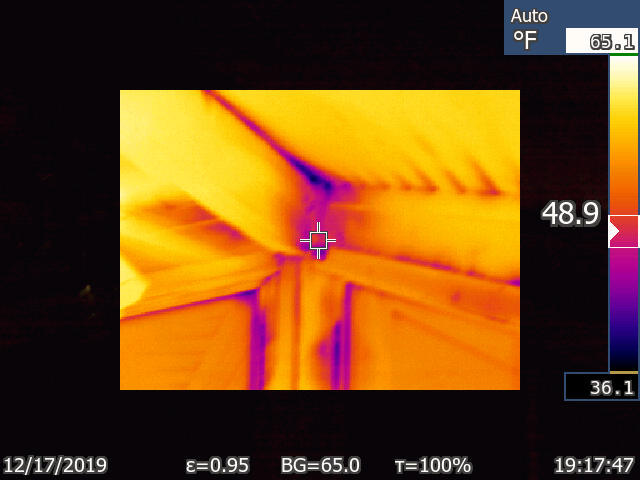
And then the real surprise, the 3rd blower door test: (12-17-19): 1335 cfm50
A jump of 130 cfm50 between the 1st and 2nd test, and then another jump of about 200 cfm50 with my test? I grill the homeowner on what might have changed with the house in the last year…nada!
Correcting blower door results for temperature-induced air density change
Aha, tests were done in September, October, and then December—I need to correct for air density differences related to temperature! (See TEC blower door manual page 17 )
1st test 9-27-18 @ 55°F: 998 cfm50 x 0.986 = 984 cfm50
2nd test 10-16-18 @ 38°F: 1130 cfm50 x 0.971 = 1097 cfm50
3rd test 12-17-19 @ 27°F: 1335 cfm50 x 0.957 = 1278 cfm50
These corrections don’t really change the relationship among the three tests at all; the % increase is still more than 10% between test 1 and 2, and nearly 30% between tests 1 and 3.
It’s not the heat, it’s the humidity
What else could be different for the three blower door tests? I thought back to late summer/early fall 2018 and it hit me: That was the tail end of a remarkable, nearly continuous period of really high dew point temperatures in our area. So I searched weather history and came up with this:
Test-in (9-27-18)
Insulator’s report temp: 55°F
Rutland recorded weather data:
-Average outdoor temp: 57°F
-Average dewpoint temp: 51°F
-Outdoor relative humidity: approx. 80%
-Outdoor air moisture content: 56.5 grains/lb
Test-out (10-16-18)
Insulator’s report temp: 38°F
Rutland recorded weather data:
-Average outdoor temp: 45°F
-Average dew point: 29°F
-Outdoor relative humidity: approx. 50%
-Outside air moisture content: 22.5 grains/lb
Building-Wright test: (12-17-19)
Rutland recorded weather data:
-Outdoor temp: 27°F
-Dew point: 27°F
-Outdoor relative humidity: 100%
-Outside air moisture content: 19.5 grains/lb
-Measured interior air temperature: 68°F
-Indoor relative humidity: 35%
-Indoor dew point temp: 39.4°F
-Inside air moisture content: 36.3 grains/lb
Wow, the materials in the house were probably loaded with moisture in September 2018, drying out in October 2018, and bone-dry for December 2019.
Wood shrinkage calculator
How much would the v-groove wall and roof board change in width with moisture content?
According to the wood shrinkage calculator:
- Eastern White Pine 1×6: 8% – 19% = 1/8-inch change in board width
- Eastern Hemlock 1×6: 8% – 19% = 5/32-inch change in board width
Maybe, just maybe, the increase in air leakage in this house is related to just how much the exterior walls and ceiling finish change in width with changes in moisture content: completely swelled and tight to each other during that really damp summer/early fall 2018 to bone dry with a gap by winter 2019.
How to know?
The homeowner is game to let this project and its resolution slide till this summer, especially since we have reassured her that while the staining is unsightly, the wood is cycling—getting wet and drying out—and more of a cosmetic problem than what she thought could be a structural one.
We will blower door test the home this summer when the boards are wetter and tighter and see if this corresponds to more airtightness, particularly, what percent tighter. And we will “spot-fog” the cathedral ceiling to confirm/identify the air leak pathways at the building perimeter ceiling/roof deck.
How we seal these ceiling leaks is the real question, since whatever we use to seal them will need to tolerate a lot of wood movement and be visible inside and/or outside the house. The solution will likely be a high performance silicone liquid sealant with backer rod (for durability and its tolerance for movement) and then some sort of cove trim detail to hide the sealant if the homeowner can’t handle looking at the silicone sealant beads and backer rod.
Let me know if you can think of other explanations for the change in airtightness or if you have also had air tightness change mysteries.
-Peter Yost is GBA’s technical director. He is also the founder of a consulting company in Brattleboro, Vt., called Building-Wright. He routinely consults on the design and construction of both new homes and retrofit projects. He has been building, researching, teaching, writing, and consulting on high-performance homes for more than twenty years, and he’s been recognized as NAHB Educator of the Year. Do you have a building science puzzle? Contact Pete here.
All photos courtesy of the author.
Weekly Newsletter
Get building science and energy efficiency advice, plus special offers, in your inbox.


10 Comments
Very interesting article and a difficult house. I had similar staining issues with a Deck House, but those ended up related entirely to the changes in insulation during a reroofing job that led to major condensation on the underside of the sheathing.
Perhaps this house would be a candidate for midwinter application of Aerobarrier?
AeroBarrier candidacy: good thought Peter. I had this same one so I called AeroBarrier headquarters and asked about this situation. Two challenges: the really absorbent surface of the unfinished raw softwood 1 by 6 v-groove wall finish and movement in these boards that will likely exceed the 20% contraction/expansion of the AeroBarrier sealant once in place and cured.
Stay tuned though. I will do an update on this project as we proceed, especially with a possible solution that the insulator came up with.
I have lived in my similarly assembled 1970 Deck House[2 1/4" T&G with iso over] for 10 years and have not similar moisture issues. I wonder if the existing iso should have been stripped[as we did]
It looks to be poorly gapped and single layer, meaning that even after spray foaming above the gaps below continue to exist and provide air channels to the edges, and to the spaces between the T&G.
I think I have mentioned previously that when we had the roof stripped I drilled a 1/4 hole at every T&G joint at the exterior wall and injected canned spray foam into the hole and the gap. Maybe it worked, maybe it didn't, but I certainly don't have water staining.
re: moisture expansion. the whole house is wood, is it not, so the expansion would be limited to the difference between width and length expansion, I think.
What surface are we presuming the water is condensing on? The new spray foam?
It'd be interesting to know what time of year the moisture presents itself, and whether the wood itself adsorbs or if it's collecting on another surface.
Its tough to 'make the connection' between roof and wall when the wall lacks an obvious plane to connect to.
We only know at this point where the condensation shows itself on interior finish. I am counting on fogging to connect the interior holes with the exterior ones so we know as much about the pathway as possible, without taking things apart.
Peter - Thanks for posting this. I've performed before and after blower door tests on hundreds of VT homes in the past 10+ years in conjunction with the Efficiency VT program. I also have observed after tests being higher on a few projects. After a lot of head scratching, fan setup and note checking, I too deduced it was related to the moisture content of the building assembly. I've asked colleagues and searched for published reports but didn't find much except others scratching their heads and 2 ORNL papers from the early/mid 80s. So I really appreciate your account and look forward to your reporting on the summer blower door test. Be sure to test it following a similar period of really high dew point temperatures. I tried the same on one of my head scratchers and I think I missed it (too late) due to vacations, scheduling conflicts, etc.
Terrific to hear from you Brent. Exactly the sort of electronic "reach" and "reply" i was hoping for. I will certainly do an update on this if and when I can test this summer in the height of our humidity! I say if but the client is almost certain to want this follow up.
Hi Peter, a couple of questions if you have the info handy:
* The existing foam insulation board looked like it was foil faced polyiso, (or perhaps phenolic?) - when the damaged areas were removed, how clean was the demo line and the removal of the inside facing foil facer?
* What was the actual name of the new spray foam product? I would be interested to see the manufacturer's published D2126 results, if there are any
Hi Jon -
I don't have that info but will see if I can get it from the insulator. They are a good local firm with which I have done work in the past to good result for all.
I am nearly certain that the existing roof rigid insulation was polyiso and not phenolic.
I encountered this problem several years ago in Philadelphia. We had done 100+ homes thru weatherization program. Over time the buildings became leakier. The answer::
If the spray foam is not stored & applied within the proper temperature range for the product, the chemistry of the product is altered and the spray foam prematurely fails. If the foam is stored properly, but is installed on a surface that is too cold (early in the morning) , it may prematurely fail.
Our solution was to change the procedure for storage of materials overnight so that the materials were always kept within the proscribed temp range.. Also installation crews were given laser temp guns and had to take and certify temp reading of the materials to be foamed.
Log in or create an account to post a comment.
Sign up Log in