More Best Practices


Remodeler Josh Oduin and his crew have been working on a renovation project in Oregon, and one of the first tasks they needed to tackle was replacing old aluminum windows with new, more efficient ones from Marvin.
There are a few reasons to replace the old windows on this house. First, condensation is building up in between the window panes, which shows that the seals have failed and the argon gas has escaped. The second reason is that these windows are really poor performers to begin with. And the third reason is that they were not installed correctly to be properly air-sealed and waterproofed.
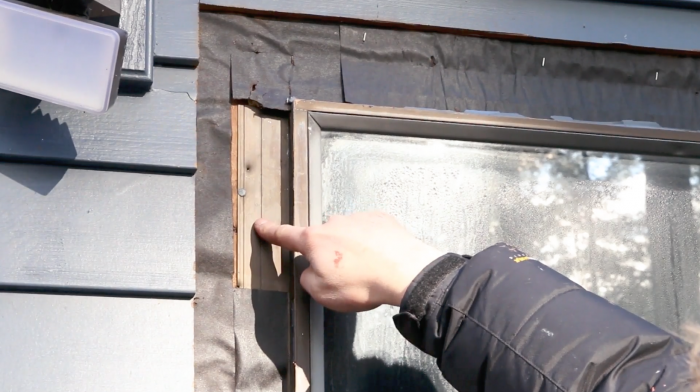
The first thing we noticed is that the previous installer set the windows directly on the house sheathing and did not apply any seal-in at all. That’s a great spot for air and water to get behind the window flange and leak into the house.
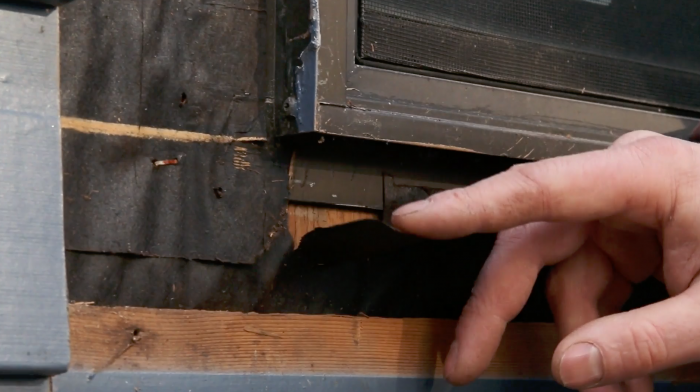
The second and more important issue we saw was the way that the original builders lapped their housewrap over the flange. At the bottom of the window, the paper is sitting over the flange when it should be underneath. In that situation, if water penetrates into the trim or the siding, it will want to run down and get right behind the paper. To properly flash a window, the bottom course of house wrap should be installed before the window and wrap into the sill. That way, when water gets behind the siding or trim, it’ll roll down and not get behind the housewrap.
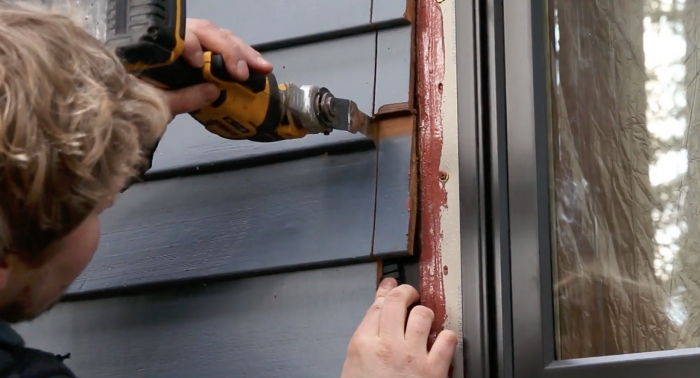
To remove the existing windows, the first thing we do is run a Skilsaw around the window to expose the window flange. Then we pull the siding, nails, and the window to prep the window opening. After making sure the opening is free of debris, we apply a liberal bead of Prosoco Fast Flash, making sure the sill has a slope to it. Once the Fast Flash is applied, we spray it down with a bit of water, which helps it set more quickly so the windows can be installed in a couple of hours.
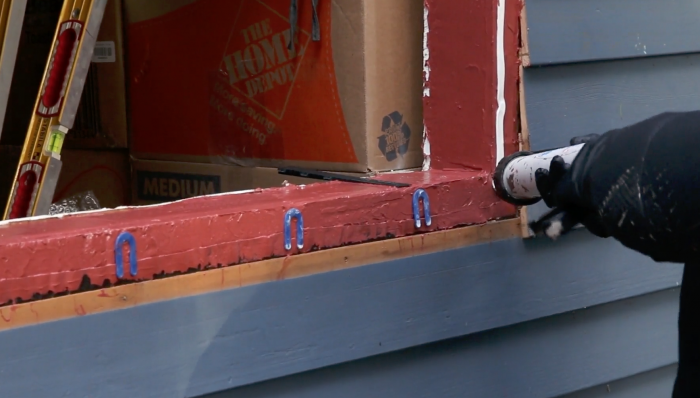
Once the Fast Flash has set, we apply a bead of Prosoco AirDam sealant on three sides, but skip the bottom, and then use blue horseshoe wedges to create a gap at the bottom so that the sill can drain if water ever gets in.
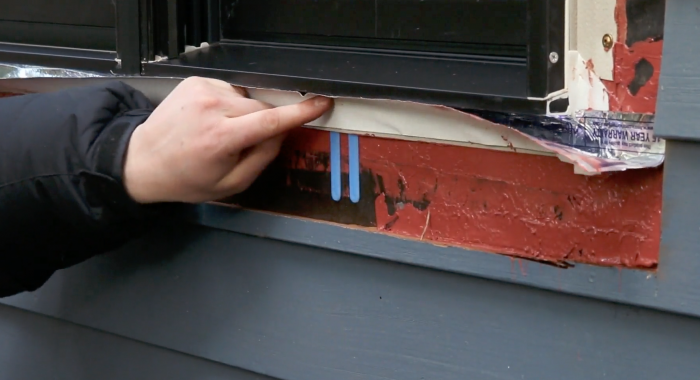
After the window is installed, we work on the last bit of flashing details, which are crucial. First, we add a piece of Henry FortiFlash 365 peel-and-stick to create a little apron for the window to drain. We peeled the top part and bonded it to the flange, but left the backing on the lower part of the tape so it doesn’t bond to the housewrap. This allows a gap so if water ever pools underneath the window, it has a place to escape. The little blue horseshoe wedge creates a gap there for water to weep out. When we go ahead and put the trim on this piece, it’ll protect it from any wind-driven rain that gets underneath the sill and keep it from driving up and underneath the window, and it’ll allow it to drain out onto the old housewrap.
We aren’t replacing the siding, and we’re able to accommodate that by adding trim to the windows. Over the course of the project I made two cuts on the siding. The first cut was made with the short side of the Skilsaw base to get access to the flanges and remove the old window. The second cut was made with a wider side of the Skilsaw, which is conveniently just the right width to make space for our 5/4 x 4 trim.
When cutting, it’s really important that the tar paper stays intact. First we make a shallow pass, less than the depth of the siding, with a Skilsaw. The siding is still intact after that pass, and to finish the cut without damaging the housewrap, we took a composite shim, slid it behind the piece of siding, and finished the cut with an oscillating multitool. To finish, we flashed the window flanges on the top and sided with more Prosoco and let that set before installing the new trim to complete the job.
_________________________________________________________________________
Josh Oduin is a remodeler based in Portland, Oregon.
Weekly Newsletter
Get building science and energy efficiency advice, plus special offers, in your inbox.


4 Comments
Nice piece. Vinyl inserts account for something like 90 percent of the work in my area due to the prevailing cladding choices of brick, stucco, or cement siding.
Did I miss the air tightness at the sill step? They left a small gap for drainage at the bottom, is that not an air gap as well? The window frame should have drain holes in the bottom of the frame to move any water out of it, water should not get behind the nailing flange unless the flashing is incorrectly installed. Should you not insulate the gap between the window frame and Rough Opining with rockwool or spray foam, or slow expanding foam tape from the inside? What about connecting the vapour barrier on the inside to the window frame or WRB?
Frank,
The air-sealing is best done at the interior face of the window frame.
The gap below the window is to allow the sill-pan to drain to the exterior. It hasn't proved adequate to rely on the window and its integral drain holes to protect the sill framing - although I'm not sure the shims are necessary, as long as the bottom flange is left un-caulked.
The video concentrates on the exterior replacement sequence. On the interior the face of the frame should be made air-tight with caulk or tape. At the jambs and head insulation can be used in the gap between the framing and window frame. Some builders like to limit it to the interior half of the frame to allow pressure equalization at the outside face. If the corners of the rough framing are sealed it isn't necessary to connect the interior air/vapour barrier to the window frame.
This is a very interesting article for me. I live in a 1930s home which still has the original wood window frames. Stucco exterior with felt paper behind. There are 1990's-era vinyl insert windows in them, like what @JC72 is describing, which are extremely drafty and build up condensation in winter.
I've been trying to figure out how to install full replacement windows without having to breakout and patch/paint the stucco. Locally, all the window companies just knock out the wood frames and slap in a new unit with a wide brickmould. Waterproofing is just a thick bead of sealant on the back-side of the brickmould, sealing against the stucco. No additional flashing. Obviously this is a terrible solution and a sure way to have a leak. I've watched a few neighbours have their windows replaced this way.
Seems that the approach in this article is a good solution for me.
Cut through the stucco 1/2 way with a diamond blade, then break it clean with a hammer. Snip the wire lath. Use the same fluid flashing to waterproof the rough opening - this is particularly nice as my felt paper is 85 years old and very brittle. Then install a new window with a nailing fin, flash it to the felt paper and integrate a drip cap, then fill the gap between the window and the stucco with some kind of composite trim. Caulk the top and sides of the trim.
Does this sound like a reasonable approach?
Log in or create an account to post a comment.
Sign up Log in