
Image Credit: Eric Whetzel
Image Credit: Eric Whetzel The section of sheathing at the bottom of the wall is not in the same plane as the adjacent piece. Lengths of 1x4 cover the joint between pieces of sheathing. By driving screws above and below the joint into the 1x4 from the outside, the sheathing could be brought into alignment. Sealing any potential air leaks from the inside, such as the vertical joints between 2x6 framing, added another layer of protection. This mocked up wall section helped subcontractors understand how best to maintain the air barrier. In this case, holes bored through the sheathing were easiest to seal when they fell in the middle of the stud bay rather than near an edge or corner. Installing the electric meter required drilling a number of holes through the sheathing. Each was sealed on both the inside and the outside. The big gap between the meter housing and the sheathing is for a layer of exterior insulation and siding. Gaskets and flashing tape sealed penetrations on the outside of the wall. On the inside of the wall, gaskets and more tape complete the seal. At the center is the electrical conduit that will feed the main panel.
More Guest Blogs


Editor’s note: This post is one of a series by Eric Whetzel about the design and construction of his house in Palatine, Illinois, a suburb of Chicago. The first blog in his series was called An Introduction to a New Passive House Project; a list of Eric’s previous posts appears below. For more details, see Eric’s blog, Kimchi & Kraut.
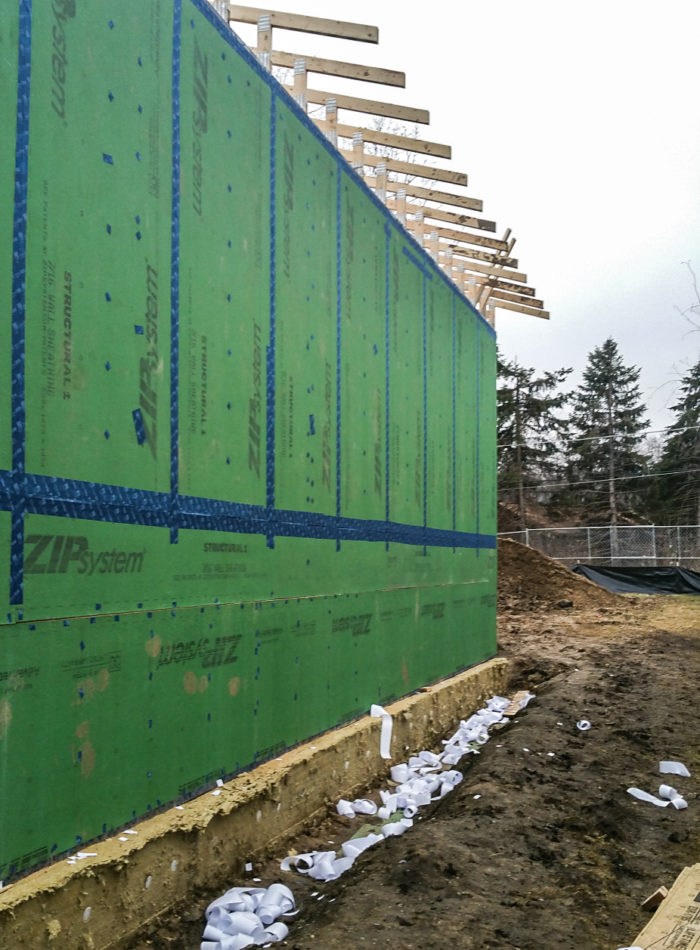
We used Zip System sheathing as our water-resistive barrier (WRB), sometimes called a weather-resistant barrier, based largely on Hammer & Hand projects we had seen and various jobs featured in Fine Homebuilding magazine.
As the 7/16-inch Zip sheathing went up, I taped most of the seams with Pro Clima’s 3-inch Tescon Vana tape (available at 475 High Performance Building Supply) as well as 6-inch Contega tape, which I used mainly for outside corners.
My wife and daughter also cut up Tescon Vana into small pieces in order to cover all the nail and screw holes in the sheathing. Initially, the nail holes had been sealed with Contega HF sealant, also available from 475, thus giving these penetrations double coverage.
Many WRB options are available
If I had it to do over, I think I might be tempted to use 1/2-inch exterior grade plywood as my sheathing; there are many WRB options these days. The plywood could be sealed on the exterior side with either a liquid membrane, such as Prosoco’s Cat 5, or a peel-and-stick membrane like Henry’s Blue Skin, or even another 475 product, Solitex Mento 1000.
The green skin of the sheathing held up nicely during construction, even as it sat exposed for nearly 10 months after we fired our GCs and struggled to keep the project moving forward. Nevertheless, it is little more than glorified OSB, which comes with certain inherent weaknesses.
Matt Risinger does an excellent job of delineating the costs and benefits of using either OSB or CDX plywood as a sheathing material in this video. And if you’re interested in a video about how WRBs have evolved over time you might enjoy this one, which features Joe Lstiburek of Building Science Corporation.
Fixing misaligned seams
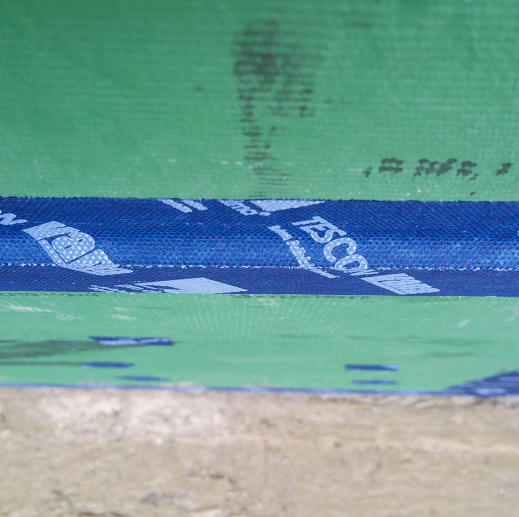
Once the Zip sheathing was fully installed, it became readily apparent that some of the seams, especially near the base of the first floor where a horizontal seam ran around the entire structure, were out of alignment and would need some adjustment (see Image #2, below). This seemed to be a problem in areas between studs.
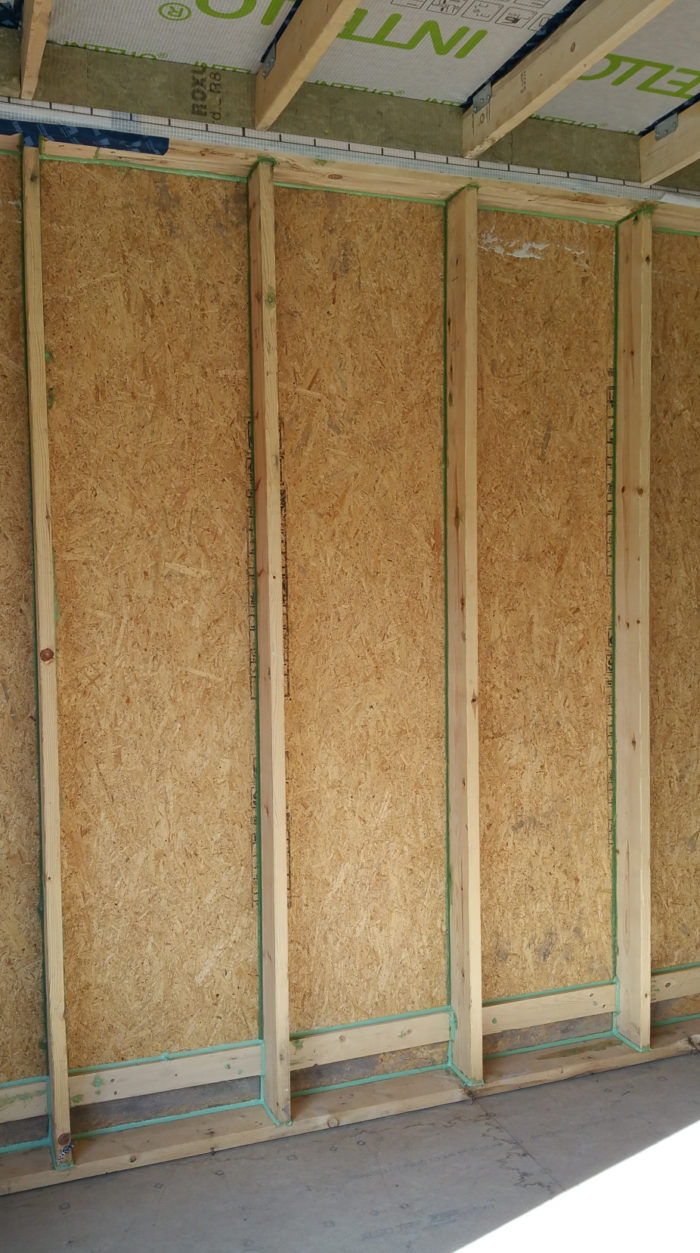
Using a 1×4 in each stud bay, I was able to pull the seam together. It wasn’t always perfect, but the improvement was visibly significant and in most areas well worth the effort. After placing a length of 1×4 into position over the seam on the inside (see Image #3 below), I drove a couple of screws from the inside to the exterior to hold the board in place.
With the 1×4 securely attached from the interior, I went outside and drove several screws into the sheathing, both above and below the seam, to bring the two sections of sheathing into alignment. At that point, I could go back inside and remove the two screws that had been driven towards the exterior.
Air-sealing on the inside
In addition to air sealing the exterior side of the Zip sheathing, I also invested some time in air-sealing the interior side of the Zip sheathing as well (see Image #4 below).
Sealing on the interior side with HF Sealant, even between vertical framing members, means that even if there are any weaknesses in either the Zip sheathing or the Tescon Vana tape at these points, air won’t find an easy way in, since it will be blocked from the interior side as well. (There won’t be a difference in air pressure to help the outdoor air make its way indoors.)
I held off on using the sealant at the connection between the wall sill plate and the subfloor until just prior to installing the Intello membrane on the walls since this area constantly attracts dirt and debris.
This kind of redundancy in air sealing should give the house long-term protection against air leaks, thereby aiding the durability of the structure, as well as making it a much more comfortable environment to live in.
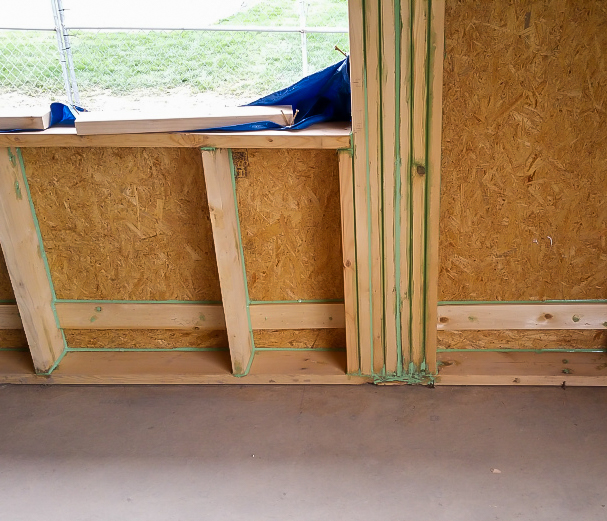
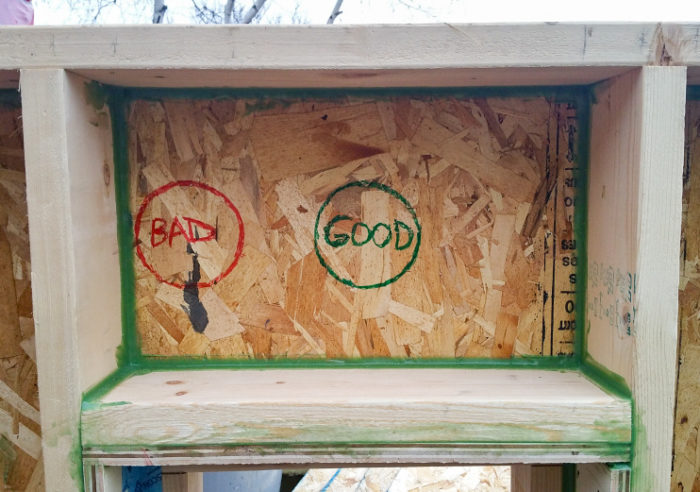
Keeping track of air barrier penetrations
Before construction began, I made a mock wall assembly (see Image #5 below). This proved helpful when explaining to the various subs how to help me protect the air barrier — especially when it came time to drill holes through the Zip sheathing. Of particular importance was locating any holes closer to the center of a stud bay, as opposed to hugging a corner or side of one of the 2×6 framing members. A hole cut too close to a stud or a roof truss is much harder to air seal properly.
Our original plumber was the only trade contractor that managed to screw this up. (It’s no coincidence that he was also the only sub that we had to fire.)
In effect, any time a sub had to make a penetration through the air barrier we discussed the details, and once the cut was made I immediately air sealed the penetration both on the exterior and interior.
By sealing each hole in the sheathing on both sides, I hope to ensure the long-term durability of the structure. The main argument for this strategy assumes that the exterior side of the sheathing will face more extreme temperatures and fluctuations in humidity, and presumably even wind-driven rain if and when it gets past the siding and 4 inches of Roxul insulation. By taking the time to seal the interior side, it just gives the overall air barrier, and therefore the structure, a better chance at avoiding air and water intrusion. That’s the goal, anyway.
For air sealing I used a mix of tapes, HF sealant (later, even some Prosoco products), EPDM Roflex gaskets, and duct seal.
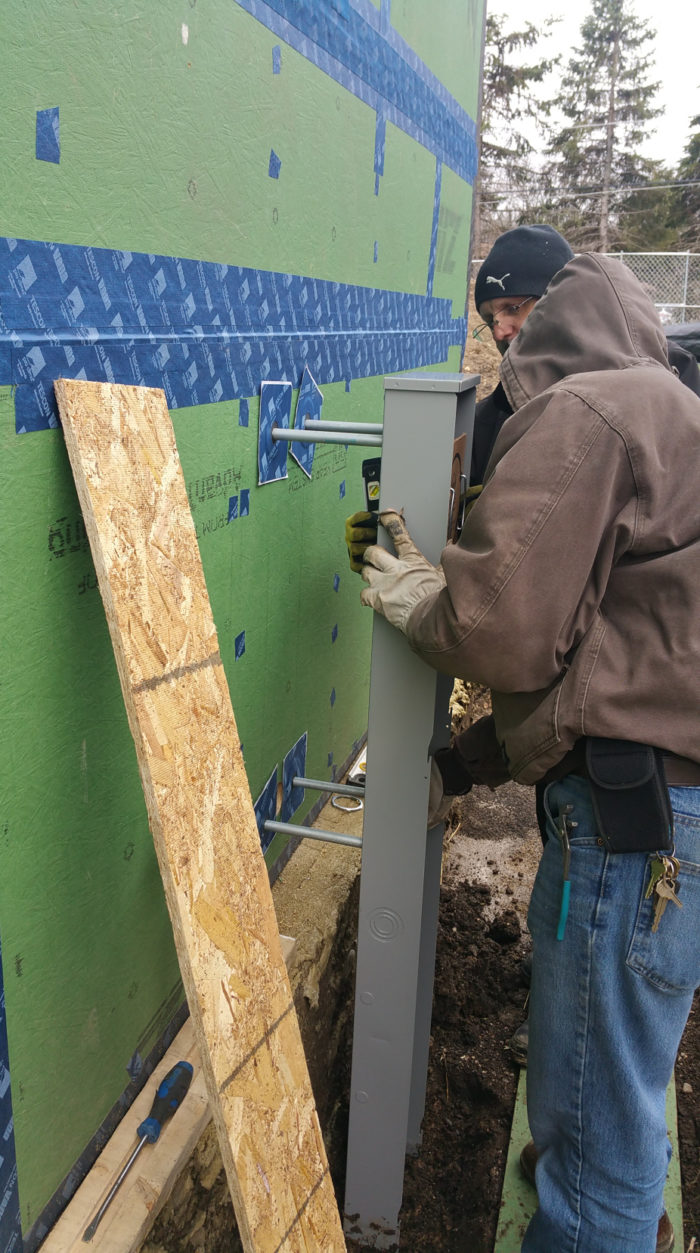
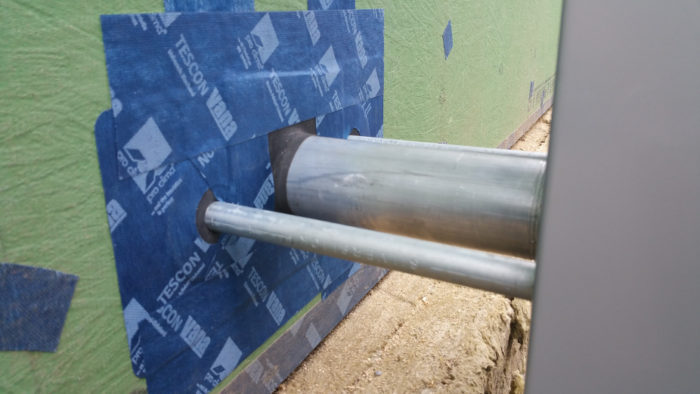
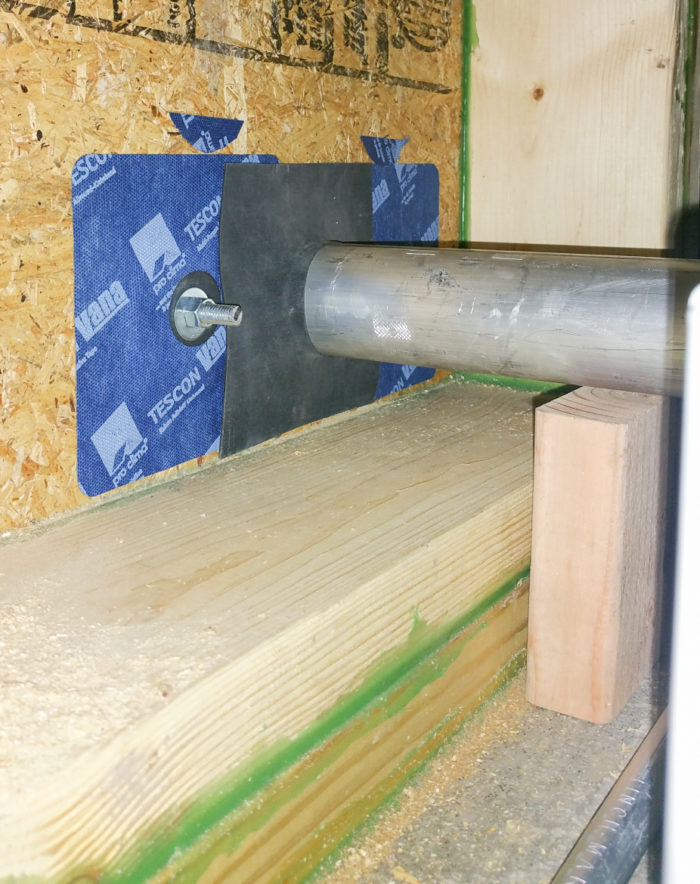
The penetrations for the electric service were my first go at using the Roflex gaskets (see Image #6 below). The smaller diameter Roflex gasket comes with its own Tescon Vana tape, which makes installation straightforward. See Images #7 and #8 below for interior and exterior views of sealed penetrations.
It was a big moment when the electric panel went in. The house is ready for power.
Weekly Newsletter
Get building science and energy efficiency advice, plus special offers, in your inbox.


6 Comments
Framing
In figure 4, is there a good reason why there are six studs grouped together? From an 'advanced framing' perspective, isn't this use of more wood studs than needed something to avoid? It certainly will increase thermal bridging in that area. It looks like someone went to great effort to air seal between these studs, but what I'm asking is why they're all there to begin with.
Exterior Tape
Why the use of the Pro Clima tapes and not the Zip System tapes?
Framing and Tape
Bill, good question.
Early on in the design phase I tried to explain the benefits of advanced framing techniques to the two GC's we eventually fired, even showing them some illustrations from Fine Homebuilding, but they didn't get it, so rather than fight them on it, we unfortunately ended up with an excessive amount of framing members. I had to pick my fights carefully.
Gordon, the Pro Clima tapes are supposed to be more vapor open than the black Zip tape, so at least in theory if moisture were inside the wall cavity, it could more easily escape through the Tescon Vana than the Zip tape. I assumed early on that I would be using either the Pro Clima tapes or the Siga brand of tapes, largely based on their long track record of use in Europe. Arguably, then, my decision to use the Pro Clima tapes was based in part on prejudice --- I felt more comfortable using the European products, although there may be no scientific basis for this, simply because they've been utilized for Passive House level projects for so long.
Thanks
Eric, I really enjoy reading your articles. You obviously care a lot about the details. While I am sure it is occasionally frustrating, I appreciate hearing about when things don't entirely go to plan, or you might have chosen a different solution.
Hi Eric,
Whenever I read about this approach, the only thing that worries me is how you are attaching your cladding. I assume that you are strapping on external installing and then cladding that the straps. Are the fasteners going to poke holes into your air barrier sheathing? in other words, you went to the detail of taping every nail and screw that is fastening the sheathing but what about the insulation and cladding that is fastened onto the sheathing afterwards?
I am considering this construction method as well but I am stuck on this point, thoughts?
David, sorry for the delay in responding; I didn't get the normal email letting me know a question had been posted.
I had the same concerns, but the short answer is it wasn't worth worrying about.
For our first layer of Rockwool (2" Comfortboard 80) we attached it with plastic cap nails, 4 for each piece, trying to hit over studs when possible (in effect, marking studs and making hitting the studs for the second layer of Rockwool easier), although there were plenty of areas where the nails only hit the Zip sheathing (we oriented the Rockwool long-side horizontally for the first layer). We chose the length of the plastic cap nail so that it was embedded into the 7/16" Zip, but not penetrating it. I think we ended up with only 3-4 nails that actually made it inside, which I covered with a dab of HF Sealant, although this is overkill.
For the second layer of Rockwool, another 2", we used a sturdier black screw/metal cap, with the siding guys trying their best to hit only studs. Apart from a handful of misses, it again worked out really well. The second layer of Rockwool was oriented long-side vertically, mostly in line with our studs (24" oc), weaving the seams of the Rockwool so air and water wouldn't ever have a straight shot through the 2 layers of Rockwool to the Zip sheathing.
In the end, it's the furring strips, or strapping, that's really going to be doing most of the work keeping your insulation pinned to the structure, while also holding up your siding material.
Even for our first layer of strapping, using Fastenmaster Headlok screws, there didn't end up being that many misses. I think there were under a dozen total for the whole house, and most of those were near misses that I easily and quickly hit with the HF Sealant on the interior.
If memory serves, I think there's an article quoting John Straube who tested this wall assembly and he notes that even with a significant amount of misses the wall still ends up showing very little deflection (obviously you want to hit only studs if you can).
As far as air or water making its way past these fasteners, and the layers of Rockwool, not to mention the Zip sheathing itself, it's pretty unlikely. I went to the trouble of using the HF Sealant as insurance, and because it was fast and easy to do. We had a blower door test before and after siding, and there was no evidence of any increased air leakage.
I hope to have a lengthy blog post soon about all of the details of our continuous insulation/siding installation with plenty of photos, hoping it helps others, like yourself, who want to tackle this type of wall assembly.
Let me know if you have more questions.
Log in or create an account to post a comment.
Sign up Log in