
Image Credit: All photos: Stephen Sheehy
Image Credit: All photos: Stephen Sheehy Bracing called for a little ingenuity. Temporary diagonal braces to keep walls straight and plumb would normally be nailed to a wood subfloor. In this case, the framing crew had to improvise. Linking the air barriers. This view shows the exterior stud wall, with the green tape attaching the white interior membrane to the concrete slab. The membrane is vapor-permeable. The view from the inside. The air barrier membrane, visible from the inside, won't be compromised as wiring and plumbing lines are run through the interior stud wall. Unavoidable penetrations for vents and mechanical system connections will be sealed with tape.
More Guest Blogs


This is Part 4 of a blog series describing the construction of Stephen Sheehy’s house in Maine. The first installment was titled Pretty Good, Not So Big Maine House.
Not much going on while we waited for the roof trusses to be fabricated. Once the trusses were on schedule to arrive, Tom’s crew started framing. Then, just as the framing started, we had a week of heavy rain that pushed everything back. The delay was more than just a week, since the crane that was scheduled to lift the trusses had to be rescheduled.
While it rained, the Intus windows arrived from Lithuania. Tom and crew unloaded them and we’ll store them in the barn until we’re ready for them to be installed. They are extremely heavy and were very well packed for the trip across the Atlantic.
This week, with the rain finally over, we’re back in action. The exterior house walls are all framed. There are four different truss designs for the roof: one for the garage, one for the steep roof sections (8/12 pitch) and two for the section over the living/dining areas (3/12 pitch.)
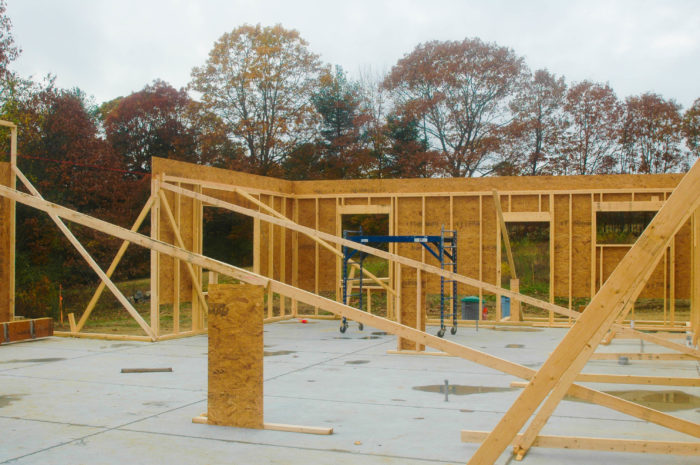
The walls need to be perfectly straight and perfectly plumb (vertical) so the trusses fit, along with everything else.Typically, braces are attached by nailing wood to the subfloor and then attaching bracing to the walls. Since the floor is 4,000 psi concrete, it is difficult to attach bracing to it. The guys used their imagination and considerable experience to figure out how to brace the walls without putting any holes in the concrete.
Now that we have some walls, we can get an idea of what the house will look like from the inside.
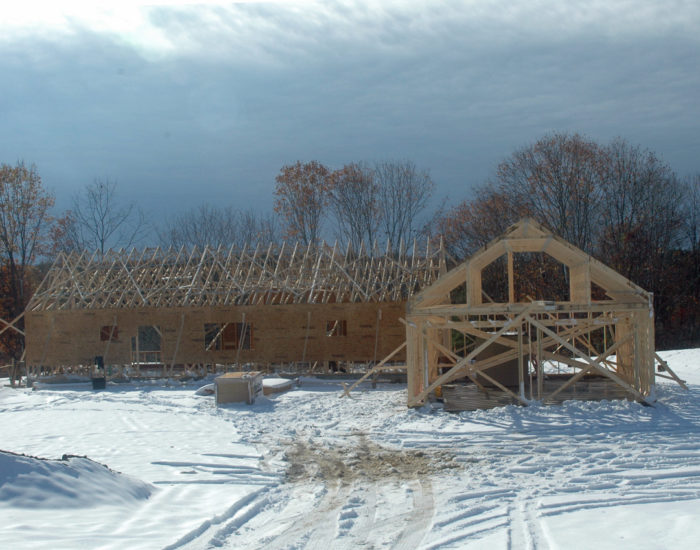
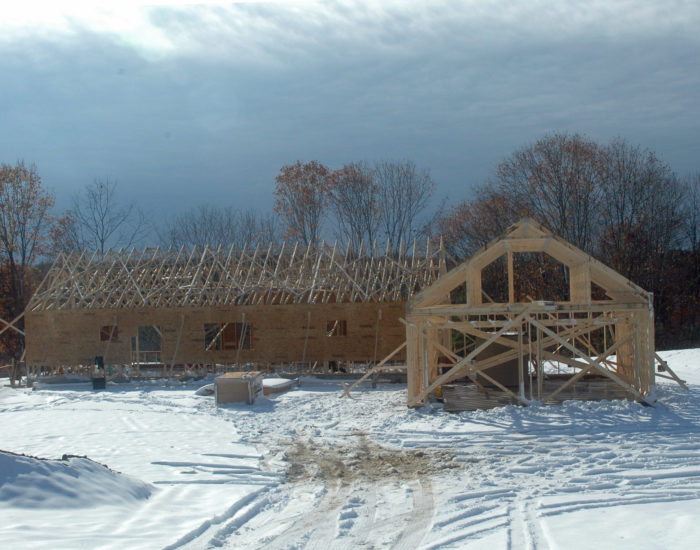
Adding the roof trusses, and a descent into winter
The trusses went in on Halloween. The following Sunday we had eight inches of snow accompanied by 50 mph wind gusts. I guess the guys did a good job bracing the structure, because it didn’t budge.
The next step was to sheathe the building, and that’s almost done.
Tom’s crew will also frame and sheathe the room for the hot tub and the porch on the south side. Both rooms are outside the conditioned space, but will be insulated and have pretty good (double-glazed) windows.
Establishing and protecting the air barriers
November and December have been rainy, snowy, cold, and wet. Still, things have progressed. The house will have two distinct air barriers. This is essential, since a great deal of heat can get wasted if air flows through the building envelope. Modern houses are as airtight as possible. Ventilation is provided by mechanical means. (More on that later.)
[In this double stud wall design, there is a 5-in. space between inner and outer framed walls. The 2×4 studs in both walls are 24 in. on center. The cavities in the outer wall, and the space between the two stud walls, are insulated with dense-pack cellulose. Cavities in the inner wall are insulated with fiberglass batts.]
On the outside, the sheathing seams are taped so that the sheathing layer acts as an air barrier. The house was covered in housewrap, carefully taped as well. We left off the bottom two feet or so of sheathing so the crew could tape the interior membrane to the top of the foundation.
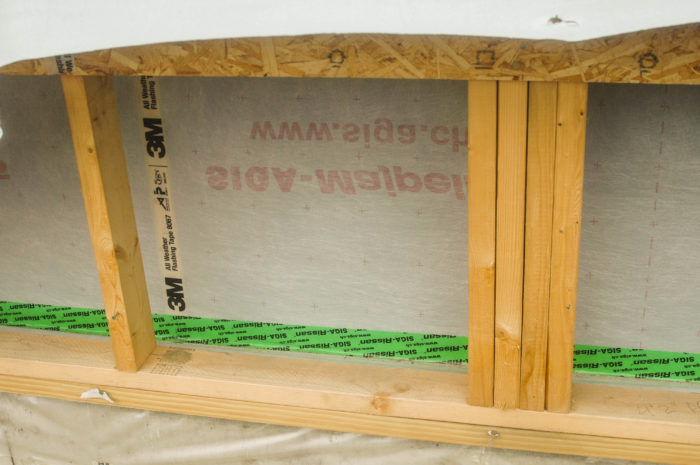
While it was open, Jeremy, our electrician, ran wiring for exterior lights and receptacles from the outside. This minimizes the need to penetrate the air barrier created by the taped sheathing. In Image #3 (below) you can see the exterior stud wall and the green tape that attaches the white interior membrane to the concrete slab.
The membrane is the second air barrier. It is designed to block air flow, but will permit water vapor to pass through. If any moisture gets inside the framing, it can dry by passing through the membrane to the interior or it can pass through the sheathing.
Here’s a photo of the membrane from the inside (see Image #4, below). Note that we will be able to run wires for interior lights, receptacles, and pipes for sinks, showers, etc. without penetrating the air barrier. The fewer penetrations, the better, since every penetration needs to be carefully taped.
Still, some penetrations are unavoidable. We’ll need to run vents to the outside for the ventilation system, wires and pipes for the heat pumps we’ll be using for heat, and so on. We also will need to carefully cut lots of holes so the insulating subcontractor can blow cellulose insulation into the cavity between the outside frame and the inside frame. Those holes will all be taped after the insulation is blown in.
Once all of the rough wiring and plumbing are installed, more insulation will fill the space between the membrane and the interior finish drywall.
Framing the porch, and on goes the roof
While we waited for the roofing sub to install the standing-seam roof, Tom’s crew framed the porch that runs almost the entire length of the front (north) of the house. Originally, we had planned a simple framed roof, but we discussed it and decided to do a post-and-beam style porch roof, with exposed pine boards as the sheathing under the roof.
We used hemlock beams milled locally. As I’ve pointed out, a Pretty Good House should use local materials if possible. We specified 7×7 beams, planed smooth. The 2×6 decking was also obtained locally. The ceiling in the tub roof is the same 2×6 decking. Even though the room isn’t heated, we’ll insulate the walls and Tom’s crew placed 2 inches of foam insulation on top of the 2×6 decking.
After the porch was done, the roofer arrived to install the standing-seam steel roof. The steel comes on a big roll and each piece is individually cut to fit. The roofer brought a big crew, so it took less than three days to finish. Fortunately, the bit of snow that fell during the installation could be swept off easily. Each seam is folded over to make a tight seal, using a special tool that runs along the seam, folding as it goes.
Next up is window installation and concrete floor polishing. Let’s hope the weather cooperates.
Here is a link to Part 5 of this blog series: Windows and Floors at a Pretty Good House in Maine.
Stephen Sheehy is the author of a construction blog documenting the process of building a Pretty Good House in rural Maine. GBA has been publishing a serialized and slightly condensed version of Sheehy’s reports. The first installment was published June 15.
Weekly Newsletter
Get building science and energy efficiency advice, plus special offers, in your inbox.


6 Comments
Interior Air Barrier
Hi Stephen,
The siga membrane was fastened to the outside edge of the inside stud wall. I see 3M flashing tape, was this used on each stud to seal the staples - which keep the membrane taught for densepack installation?
Was the membrane fastened to the inner stud wall before it was erected? Then return and tape to slab by the opening in the sheathing.
Did you drape the membrane over the top plate for future connection to ceiling air-barrier/membrane?
Do you have a wall cross section you are willing to share?
Thanks, I look forward to these blog updates.
Ryan,
Improved Air Tight Walls
You should check out the new Air Tight Electrical Box (ATB) from Fastcap. It offers a ton of great, easy to use features that will make building an air tight home a lot easier with less work. It will also offer you a nice, flat wall where existing boxes push the drywall of the stud. Check it out at Fastcap.com and search ATB to watch the videos.
Reply to Ryan
"Was the membrane fastened to the inner stud wall before it was erected? Then return and tape to slab by the opening in the sheathing."
That what we did.
"Did you drape the membrane over the top plate for future connection to ceiling air-barrier/membrane?"
Yes. We also ran the membrane long at each wall corner. We were able to fold the two pieces together after the walls were raised to maintain air-tightness. We ended up with a pretty good blower door test result: .59ach50
Stephen
What strikes me as the biggest contrast with many of the previous house building blogs is the lack of drama. No worrying about meeting programme requirements, nothing (so far) but constructing a better built house. Good stuff!
Reply to malcolm
We have worked with Tom Greenleaf, our contractor, for years on various projects, so we were confident that we'd be able to do the project with a minimum of hysteria. Not having to meet specific criteria for certification has made it easier as well. There was some anxiety when we did the blower door test, but that came out fine.
Great concept. I cannot believe there are only 5 comments on this great idea.
Do you recall how good of job your guys did air sealing the sheathing outside?
My question really is. do you think it was critical to have the air barrier mid wall (which is the outside of the 2x4 fiberglass wall).
Also, Gusset plates connecting the inner and outer walls probably were not possible? except at window and door opening?
From the few cellulose contractors I have spoken with so far.....they want vertical web separation every 4 feet to create smaller cavity's for blown in. Do you recall this being done?
Thanks for your reply in my other post.
Log in or create an account to post a comment.
Sign up Log in