
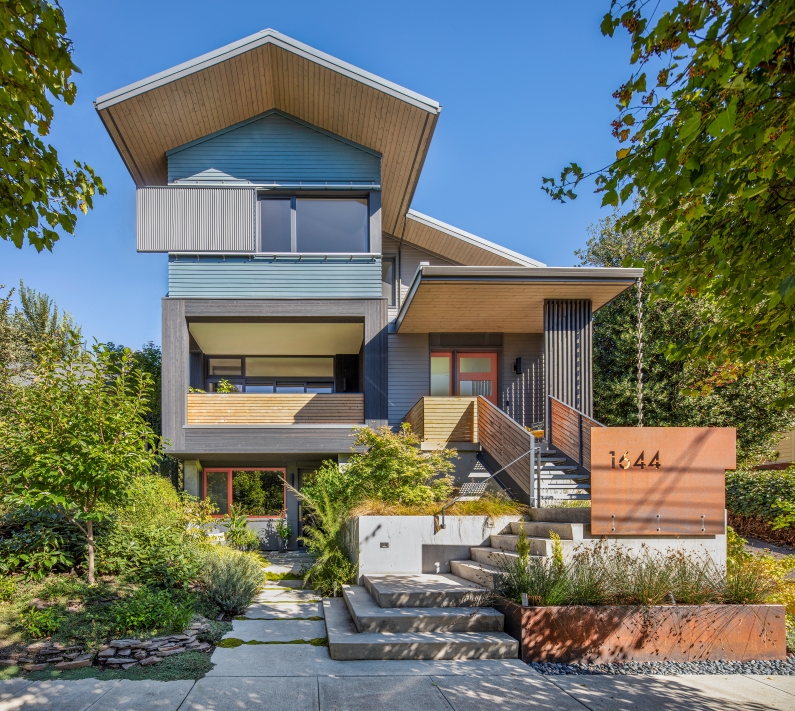
When Portland, Oregon, architects Keyan Mizani and Alexia Zerbinis set out to design a net-zero house to serve as their home and office, they had one additional mission in mind. They wanted to use their new home to show potential clients that, with clever design and modest materials, a net-zero house wouldn’t have to cost them more than any other custom home.
“We were really committed to putting our money where our mouth was,” Mizani says. They set their target at $240 per sq. ft., which is considerably more than a code-built spec home, but still less than you’d typically spend for a custom built, zero-energy home in the Portland neighborhood where they and their firm, eMZed Architecture, is based. The house would include 2510 sq. ft. of living space, with a 600-sq.- ft. finished home office/ADU in the basement.
Strategizing priorities
To make this budget work, Mizani and Zerbinis decided early on to eschew expensive finishes and rely instead on clever design moves to enhance both sustainability and aesthetic appeal. That would enable them to devote the lion’s share of their budget to a high-performance envelope, durable materials, energy-efficient mechanicals, and the 9.6 kW solar system needed to meet their net-zero goal.
“We wanted our takeaway to be that you can do a high-performance building that has a tight budget and is still a beautiful thing to live in,” Mizani says. They designed the house’s interior to be simple and economical, with special attention paid to the quality of light as it moves through the space. Windows are positioned for cross-ventilation, with 3-ft. overhangs on the…
Weekly Newsletter
Get building science and energy efficiency advice, plus special offers, in your inbox.

This article is only available to GBA Prime Members
Sign up for a free trial and get instant access to this article as well as GBA’s complete library of premium articles and construction details.
Start Free TrialAlready a member? Log in


8 Comments
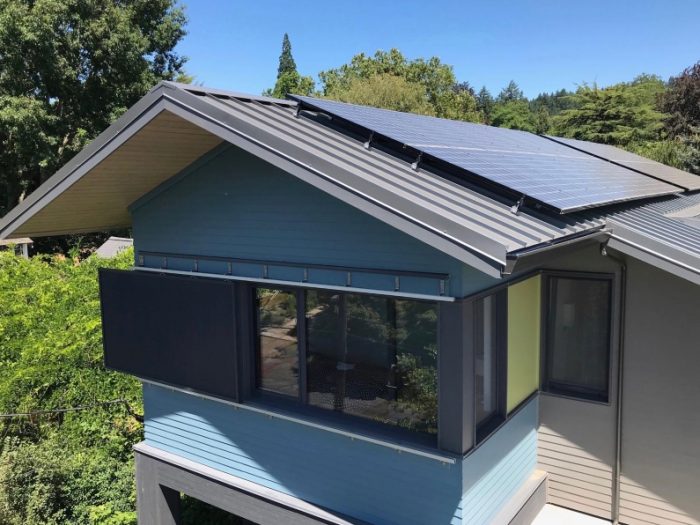
I like the concept of the low-tech manually operated exterior shade. But I don't understand how it's operated. Do you open the window and slide it a bit at a time?
My other question is the cost: there was a target of $240/sq ft. Did they hit that target? And does that include what they would bill for the architects' time in all of this smart problem solving and project management?
Charlie, I'll reach out to the project team to ask these questions.
Charlie,
Yes, to operate the shade one just opens the window (to the interior, it is a tilt/turn) and moves the shade over manually. Usually it is pretty easy to move it over in just one motion. Its certainly not a big deal.
IRT to sqft costs. First off, the project was bid in 2017 and completed in 2018, so things are very much different nowadays-- we couldn't likely come close to this now with the price increases in our industry since these pre-covid times. Our cost per sqft to the client was slightly less than $240 per sqft, and I'm guessing the difference is some of the work the client/architect took on themselves (minor finishes, a built in, etc.). Included in this cost is the time we spent prior to construction (a line item labeled 'preconstruction services' on our budget) and the project management is also included as a line item in the project bid. Hope this helps!
Thanks, that does help. And that is an impressively low cost for this project. The fact that the architect and the client are the same party does confuse things a bit, but we can take that as the cost to build exclusive of the architect's fees.
And I'm glad to hear the shade works easily.
Hi Charlie,
Josh covered it all well. To add to that, yes the $/SF number was for construction hard costs, and did not include architectural fees, survey fees, geotechnical + structural engineering fees, and building permit costs. We often look at projects specically based on hard costs, since professional service and permit fees are just a necessity. But they do add up! IRT design fees, we used this project to experiment with a number of details and techniques that we wanted to try, knowing that we were investing heavily with our own time and practicing on ourselves so that we can be more efficient when employing the same or similar approaches with clients.
Also as noted In the article, we were fortunate to get some great deals on windows, SIGA products, and some other materials. That certainly helped us achieve our budget goal, in addition to being sparing with more expensive materials and finishes. Sadly, as Josh noted, in the current construction economy, we would not have achieved the same cost/SF for this house. But the strategies we used would help achieve savings along with a higher performance home for any project.
You have two different roof details. Over the Main Bedroom, you’ve brought the exterior air barrier across the top plate to the interior OSB air barrier. Over the stairs, you’ve brought the exterior air barrier to the top of the rafters then added overframing and rockwool. Why the difference? Did you consider using the stair detail in the bedroom roof, by wrapping the air barrier on top of the trusses then adding overframing?
Hi Adam,
Great question. The reason we had 2 systems is because the north and south sides of the house differ in massing/ volume. The north side has pre-manufactured trusses that were a more economical solution for framing over that taller part of the house. The south side continues the slope of the trusses down (with a shed dormer for added height where needed), to help scale the house down to the neighborhood. So the south side is stick-framed, using the south end of the trusses as a starting point, and this necessitated the double rafter with sandwiched air-barrier strategy shown in the article. But where we have trusses, it is just a simpler solution to run the AB on the underside of the trusses, rather than overframing on top of them. The one complexity was transitioning the AB between the 2 systems, which was another area of focused detail, and perhaps a subject for a follow up article!
“[Deleted]”
Log in or become a member to post a comment.
Sign up Log in