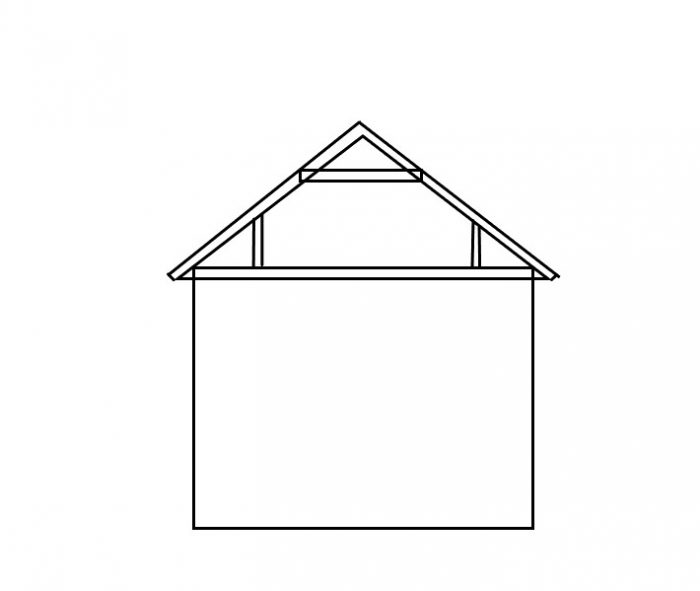
Attic Venting Condensation
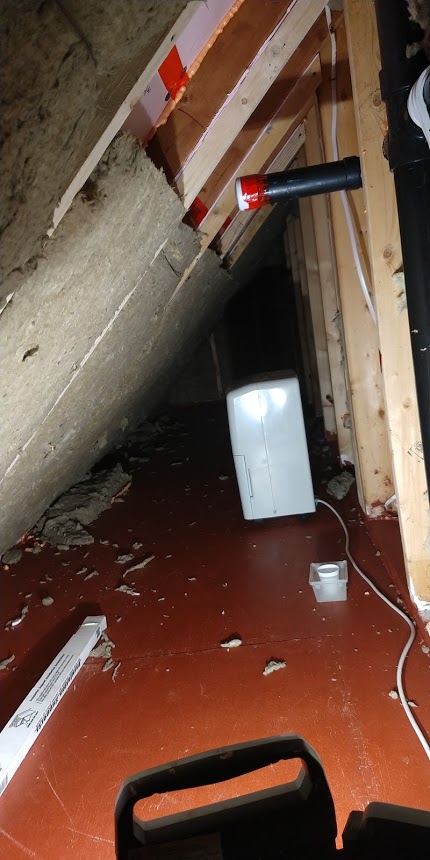
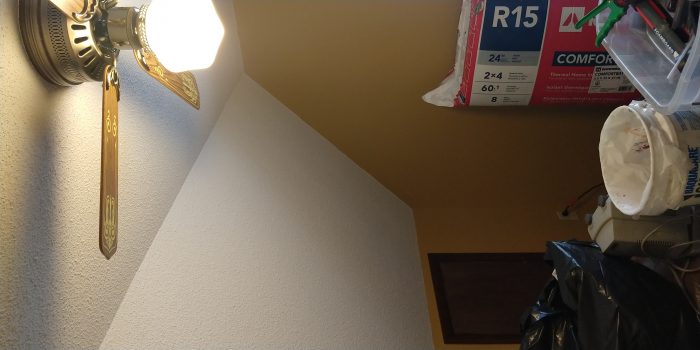
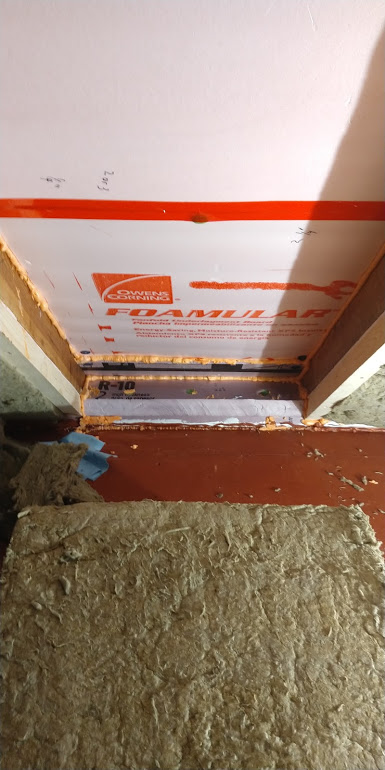
I have read several articles on GBA and other trade and building sites and still have concerns how to solve my issue. I have the classic wisconsin 1-1/2 story house build in 1980 with vaulted ceiling (12/12 pitch) with knee walls. The rafters are 2×6 24″ on center with rafter collar ties appox. 10′ long creating an 8′ tall room with a 5′ slant walls and an accessible upper attic. The shingled roof was very recently replaced. All the old fiberglass insulation in the 2nd story slant wall, knee wall, and upper attic was removed with the exception of the cathedral living room where the insulation is not accessible. Below rafters and rafter collar is 2″ EPS white foam and then 5/8″ drywall. The drywall and foam is in good condition and I am not planning on changing or removing any of this existing finish. So my partially completed plan was to air seal all the ceilings, electrical, plumbing drywall seals, wall plates, etc in the ceiling plane and knee wall attic. I understand I cannot get to R50 in the 2×6 slant wall rafters and adding on top the roof sheathing isn’t an option on a new roof so the best I can do has to be good enough. In the 2×6″ cavity slant wall I installed 1/2″ XPS on top the existing 2″ EPS and then 3-1/2″ R15 rockwool leaving approx 1-1/”2 air space between the rockwool and roof sheathing. The soffit has continuous vents as does the attic ridge. The rafters in the knee wall will now become the thermal envelope and be as follows -roof sheathing-2″ airspace- 1/4″ dow XPS or 3/4″ EPS foam field built vent channel(sealed to joists) -rockwool R23 (2×6″ rafter extension to accommodate the insulation). – and lastly 1″ polyiso foam sealed and taped joints. The upper attic will be R23 rockwool between the collar ties and either r30 fiberglass rolls perpendicular or cellulose blown on top. I also insulated the rim joist in the knee wall with sealed 2″ XPS and R50 rockwool, painted and sealed the 3/4″ plywood floor in the knee wall. I understand this isn’t perfect but as good as possible with what I can DIY and not break the bank. Everything has been going good until this week. The rim joist and floor of the knee wall is completed and as I was installing the R25 in the knee wall rafters the weather turned bad. The last week the temp in the 20’s and 30’s with very high exterior humidity and will remain this way for the next week. The indoor temp is 64 with 73% high humidity. Condensation is already showing up on the 1/4″ XPS rafter air vent channel and the 3/4″ EPS rafter vent channel above the rockwool before I can get the 1″ ISO foamboard up. NOW WHAT??? do I have to remove the rockwool and dry it out or replace it? Should I poke holes in the site build sealed vent channels to allow the rockwool to dry into the vent channel space? Should I do something different in the knee wall rafters? Sorry for the long rant but The more info maybe the better understanding.
Lefty
GBA Detail Library
A collection of one thousand construction details organized by climate and house part


Replies
Note on style: Paragraph breaks are useful, making it easier to read. This is nearly impossible to follow quickly, despite the good grammar & spelling.
Comments on the approaches taken:
High density batts don't need an exterior side air barrier to function well, so it's fine to have the R15s adjacent to the air channel. In zone 6 as long as at least half the total R is on the exterior of the first low-permeance layer there won't be any condensation accumulating in any fiber insulation on the interior (warm side in winter) side of the assembly.
The foam vent channels are aren't really essential for R23 or R15 rock wool. The reason visible condensation is forming on the thin foam channels BEFORE installing the batts and the other layers is because they're colder than the dew point of conditioned space air, and in contact with that air, a condition that won't be happening after the interior foil faced foam is installed.
If the channel foam were fatter foam the interior facing surface might stay warm enough to not see visible condensation now, but it's nothing to be concerned about as long as the final interior foil faced polyiso layer is AIR tight. Even if the vent baffle foam is foil or plastic faced and water-vapor tight, the drying path through the rafters is adquate when there is a continuous air and vapor barrier (taped foil faced polyiso) on the interior side.
Another point: XPS is more vapor tight than unfaced EPS, and it is by far the least-green foam insulation product in common used today, since it's blown with extreme greenhouse gas HFCs. Both EPS and polyiso are blown with low-impact hydrocarbons (commonly isopentane, often others in the case of polyiso), which deliver less than 1% the climate damage per R. This makes XPS is about 8-10x worse than EPS on a lifecycle basis, even though it's the same polymer.
Polyiso is a somewhat more friendly polymer than polystyrene, and at 1lb per cubic foot density (typical for foil faced goods), making it about half as damaging as HFO blown closed cell polyurethane (similar chemistry, but half the polymer per R), and slightly less damaging than EPS.
This is just one easy reference chart comparing the lifecycle greenhouse gas footprints of several common insulation materials:
https://materialspalette.org/wp-content/uploads/2018/08/CSMP-Insulation_090919-01.png
Note that it doesn't show polyiso (which is very very similar to polyurethane), nor does it show half-pound open cell polyurethane, which uses about half the polymer per R of HFO blown closed cell polyurethane, and an even more benign blowing agent (=water). It's safe to assume that 1lbs polyiso and half-pound polyurethane are both greener than EPS, and WAY greener than XPS or HFC blown closed cell polyurethane.
Thanks for the response and sorry for all the run on wording. So I will leave the install as is except I may cut holes where possible in the vent channel to expedite any drying to the vent channel of the somewhat damp rockwool.
Do you think I need to wipe down the condensate on the vent channel and also dry the somewhat damp feeling rockwool before I install the polyiso over it? Or will it dry well enough when the weather changes and drys up a bit. Right now I have a dehumidifier running at 35% in the knee wall area to keep it dryer. Running the humidifier all day only removes about a pint of water in that area.
Lefty
Heating the space will probably do more short-term than running a dehumidifer, but do both.
Start with dry, UN-installed rock wool, and install & seal the interior polyiso the same day that the rock wool gets installed. If the rock wool gets installed and a week goes by before the polyiso goes up there will be substantial moisture building on the cold side of the rock wool. If it goes up the same day there won't be much trapped moisture at all.
I would wipe off the condensation if it's easy enough to do. My thinking is always to not start out with any extra moisture INSIDE of a building assembly. Start with as dry of an assembly as possible for least potential for any issues down the road.
Bill
Being you’re in WI, if you start heating a space before the insulation and vapor retarder is complete this time of year and later, things are going to frost up. It will dry out on its own. Insulate, lower your indoor humidity, get your vapor retarder layer up and sealed, then heat the building.
The dry air season has already started, your 73% indoor humidity is out of hand. I would get a handle on that now.
Another thing to consider, some frosting of the underside of the roof deck is very common at thinner insulation points, usually the eaves. People don't freak out about it because they don't know its happening. It thaws and dries out during the spring/summer weather.
It’s typically only an issue when there is a substantial thermal bypass like an open kitchen soffit, can lights close to the roof deck, gaps around a chimney, unsealed chase, a really overdrilled plumbing vent pipe or any type of hole dumping warm, moist interior air into attic spaces. Some years of that and you start to see the sheathing damage start, but if it’s really moist interior air, like when a bath fan vents into an attic or a soffit you’ll see the sheathing in the area of vent termination get destroyed much faster than the other trouble spots.
To further illustrate, when I go into a house to add attic insulation the exterior walls are usually windwashed to some degree. I can usually see the backside of the drywall ceiling at the exterior wall in at least some locations. Maybe a square foot more or less per location. The R value is whatever drywall is...basically zero. The drywall may or may not have water staining visible at the attic side and most of the time ZERO indication on the inside that there is R0 above that portion of the ceiling. Roof deck is usually fine. This could have interior side poly or not have poly. Water staining is usually worse without poly. If this condition is above a bathroom, with the tub typically against the exterior wall, the damage will usually be more pronounced on the backside of the drywall and the roof deck. Ive seen this time and time again, controlling interior moisture levels is so important in our climate.
So quite important to really air seal the warm side of your assembles to minimize interior moisture laden air into the cavities. Keep in mind I still want an air barrier at the exterior sheathing plane, that is for outside air infiltration. We fight 2 battles here.
WI energy conservation code is chapter 322, if you look this up they have a very good commentary explaining not just code requirements but the how and why useful to anybody, not just new homes.