How to Avoid Wavy Look on Hardie Siding
walking around my neighborhood at night, I saw some wavy hardie siding. It was likely the lighting that emphasized it, but i felt alarmed by how bad it looked. I don’t have a photo, but have questions.
My situation:
I have framed some walls at 16″ o.c. and others at 24″. I’m putting up housewrap now, and will add strips of wood for a rainscreen (about 1/4 – 1/2 inch, maybe plywood strips?).
I plan to staple the furring strips up on top of the studs (locating the studs using a studfinder which hopefully can ‘read’ through my 1/2″ cdx plywood sheathing and the housewrap. (Before putting up the top layer of housewrap, I can see where the stud layout is above and start the furring strip install by plumbing down.) I know it’s critical to hit the studs when installing the hardie plank siding.
I haven’t decided on a width for the hardie. Was planning to install with hd galvanized 8d nails (2 1/2 inch) with a pneumatic nailer.
I did find one article that said using galvanized screws improved results, though not sure why. I also did see that some of the wavyness was caused by improperly crowned studs. I think I did a pretty good job making sure my studs were all “crowned out”, but I guess this may be the moment of truth!
1. Are the wider planks are more prone to waviness? I’d be ok with a 6-8 inch reveal.
2. I’ve appreciated the look of the 16″ wide stuff that is applied flat with z flashing above each strip (can someone tell me what that is called)?
Anyway my concern is that installing the siding over 24″ spacing will create that wavy look.
3. Should I add extra rainscreen strips to help support the hardie?
4. Consider the thicker artisan hardie (2-3x much more expensive as I recall)?
I’m not getting the prepainted hardie, not using the woodgrain textured, in case that matters.
I would hate for it be obvious where the studs are and aren’t!
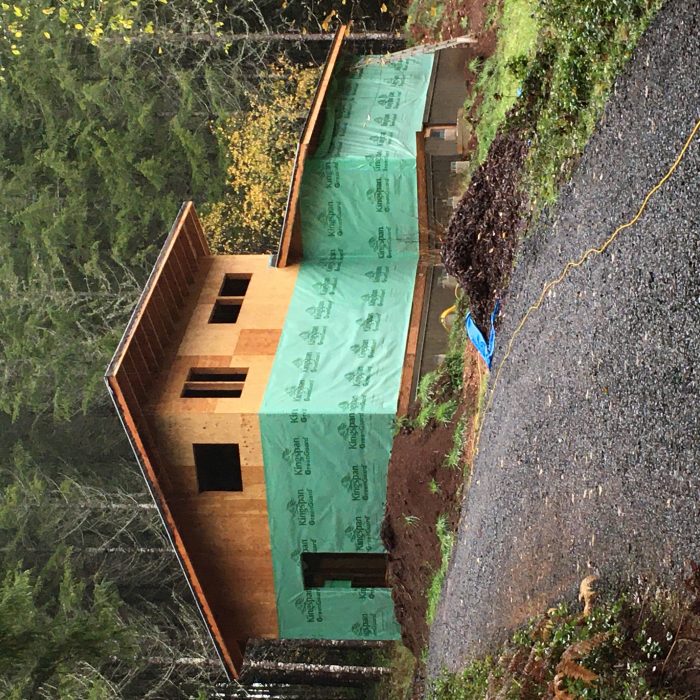
Thanks for any advice on this. I’m attaching a picture of the house I built this summer…
p.s. I used metal to cover the exterior crawlspace insulation (rockwool comfortboard). Pretty happy with how that turned out although it was tricky to figure out the entire assembly.
GBA Detail Library
A collection of one thousand construction details organized by climate and house part


Replies
I have no comment on the main question, but I do have a comment on the 2-1/2" nails. I have Hardie on my house, the installers used 2-1/2" nails. It took me years to find all of the places they hit the plumbing (assuming I've found them all). Sometimes the leak wouldn't develop until the nail rusted away. I imagine they hit the electrical too but so far that hasn't caused problems. Driving a 2-1/2" nail into the wall of a finished house is asking for problems.
My recollection is that the installation instructions for Hardie siding allows for roofing nails. That's what I would use.
The fasteners that are approved vary depending on circumstances. Roofing nails aren't going to be sufficient to go through a rain screen and embed deep enough in the stud. 2.5" doesn't seem overly long to me. The planks are 0.75", the rain screen 0.25-0.5". That only leaves 1.25-1.5" embedding in the stud. You shouldn't have plumbing that close the exterior. Electrical is supposed to be 1.25" away from the stud edge, according to code. If that is the case, going with a 0.5" rain screen will give the 1.25" clearance.
I think it's unlikely you'll detect studs through plywood using a standard stud finder. You can buy special ones that detect metal, which will detect the nails or screws under the house wrap.
I would recommend stainless nails vs galvanized.
The installation instructions are here:
https://www.jameshardiepros.com/getattachment/513223b4-054b-4112-ab6b-38974c62c9cb/hardieplank-hz5-us-en.pdf
For attaching to wooden framing, they recommend:
• Siding nail (0.09 in. shank x 0.221 in. HD x 2 in. long)
• 11ga. roofing nail (0.121 in. shank x 0.371 in. HD x 1.25 in. long)
For attachment directly to OSB they recommend:
• Siding nail (0.09 in. shank x 0.215 in. HD x 1-1/2 in. long
• Ribbed Wafer-head or equivalent (No. 8 x 1 5/8 in. long x 0.375 in. HD)
I wouldn't hesitate to nail to the sheathing. If you've ever stripped roofing or siding you know that the nails hold far better to the sheathing than they do to the shingles or siding.
Back to my house: I don't have a rainscreen. The siding is 3/8" thick at the nailing point and the OSB is 7/16". A 2-1/2" nail is going to go in 1-11/16". My framing is 2x6 and I have 3" PVC drain pipe running in the exterior wall. The PVC has an actual dimension of 3.5" and the fittings are 4". So the pipe is 1" from the stud surface and the fittings are 3/4". The plumbing never had a chance.
Thanks for the reply, DC Contrarian. I have not yet installed the plumbing, and the majority of my plumbing will not be in the exterior walls, since I have a conditioned crawlspace. However it is worth considering using shorter fasteners in the walls that will contain plumbing (only a few locations).
I didn't quite understand this comment: "I wouldn't hesitate to nail to the sheathing. If you've ever stripped roofing or siding you know that the nails hold far better to the sheathing than they do to the shingles or siding."
I plan to aim for the furring strips which hopefully will coincide with the studs, although I've missed the studs plenty of times in the past. If I nail to the sheathing between furring strips, that seems like it would increase the waviness, so I guess I could increase the number of furring strips, especially in walls where I have 24" spacing between studs.
Finally, thanks for your observation that the waviness is possibly worse on wider hardie planks. I haven't yet chosen a width so going a little narrower at this point is an easy way to get a better effect. Does anyone else have similar observations to share?
Finally, I do have walls that are either 18 feet or 24 feet long, with plenty of interruptions for windows, so hopefully the shorter runs will help with the overall look.
Everywhere you nail has to be the same distance away from the wall, so if you want to nail in between studs, then yes you need furring there. Since you're nailing onto furring, you need to either have fasteners that go through the furring deep enough for solid attachment in the underlying substrate, or the furring has to be more soundly attached than by staples. I think there's a more detailed Hardie document on substrate requirements, including rain screens, than the one linked above.
I've only installed factory painted hardie clapboard, and it was ten years ago, we did a bunch in a new subdivision in Maine. It is a funny product imo...
I think the wavyness would be reduced to non visible by the shorter runs your dealing with, not to mention your vantage point like you said... I was siding 70ft runs on 2 stories..
Keep that siding dry and off the damp ground, bottom of the pallet was usually floppy like compared to the top pieces which has a noticeably more solid integrity.
Thanks for the reminder to protect the hardie from moisture. I was advised not to get it delivered until I was ready for installation, and to keep it protected from the rain. Thanks for the reminder, James.
Just an observation: when traditional cedar siding is installed, it curls slightly when nailed over the layer below. While the pieces are floppy, that curl is enough to make it much more rigid and to make it lie in a straight line. While Hardie is also floppy, I don't see it curling the same way.
I know the wavy look you're talking about but I don't know how to prevent it. It seems more pronounced on wider planks.
The easiest way to avoid wavy fiber-cement siding is to use a different product. I prefer natural wood, but when clients insist on something with petroleum in it, I spec LP Smartside.
Why would LP Smartside, a wood fibre product, be less prone to waviness than fibre cement?
It is stiffer.
Fiber cement boards don't have any petroleum products as far as I know, I even double checked the SDS and didn't see any.
LP Smartside does though.
I didn't say it did, but I could have been more clear. I try to spec natural wood and other unprocessed materials. When clients insist on something other than wood, I have always been able to talk them out of fiber cement for aesthetic reasons. But that leaves either metal siding, which I have done occasionally, or siding with petroleum (vinyl, Boral TruExterior, LP Smartside, probably others I'm forgetting).
Fair enough. The indefinite article strikes again.
Cedar siding will last a very long time if it is oil primed on all sides and ends before installation. I have had some jobs that did not need a repaint until 20 years later. The oil back priming is the key to wood siding longevity. I prefer cedar rabbeted bevel as it is thicker and nails flat against the exterior.
I'm pretty set on hardie as I live in a high fire danger area. Cedar siding would have been my first choice otherwise, and I did use it on the smaller woodworking studio I built a couple of years ago. I used the 'lifetime' wood treatment and am pretty happy with how that looks so far.
Can anyone comment on artisan hardie (much thicker) as opposed to the regular hardie plank?
A mesh rainscreen will provide better horizontal support to the siding than an air gap.
Not clear to me that if you have nails/screws into the studs that you can't also put a midpoint nail/screw into the sheathing - providing better vertical and horizontal support.
When you install your furring strips, use a string line and shim out your furring strips to make the wall as flat as possible. It will take a bit of time but the wall will look much better. There are some examples on youtube if you want to see how it's done.
Thanks Alex. That sounds tedious but probably would go a long way to improving the end result. Do you agree that wider hardie plank will make the problem worse?
Paula,
There are two things that can cause waviness in Hardi-siding. The first is the distance between supports, that you have already got advice on. The second is the gapping between the bottom edge of the boards and the piece below, and that is a function not only of the frequency of fasteners, but their correct placement.
Thanks Malcolm! For example if I put the fasteners up too high on the board, it might not lay tight to the board below it? That makes sense. I"ll be sure to follow the installation recommendations for that detail. I didn't mind the exposed fasteners when I did cedar (I used stainless nails). But here I was planning to use blind nailing since that seems to be recommended. The only place nails are also recommended is where I am butting two boards together. I have seen exposed nails lower on the boards in that case.
I would skip the exposed nails on butt joints, you could always add them after if needed. Consider a small piece of 15 lb tar paper or aluminum flashing behind each butt joint, if you haven't already.