Comparing Two Wall Assemblies Based on Costs
Hello,
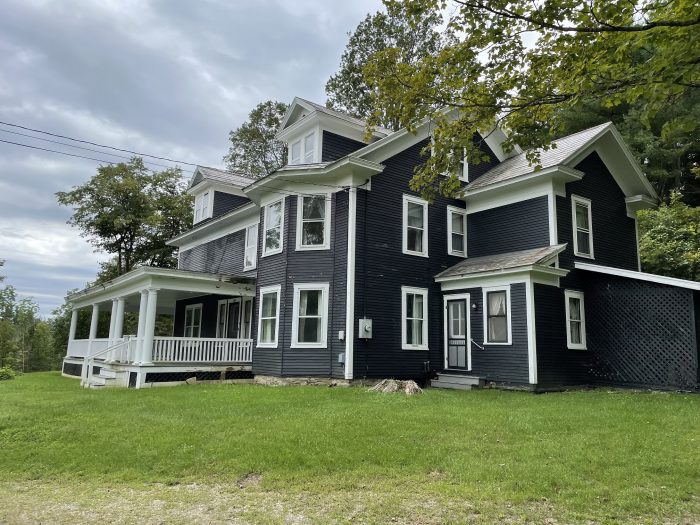
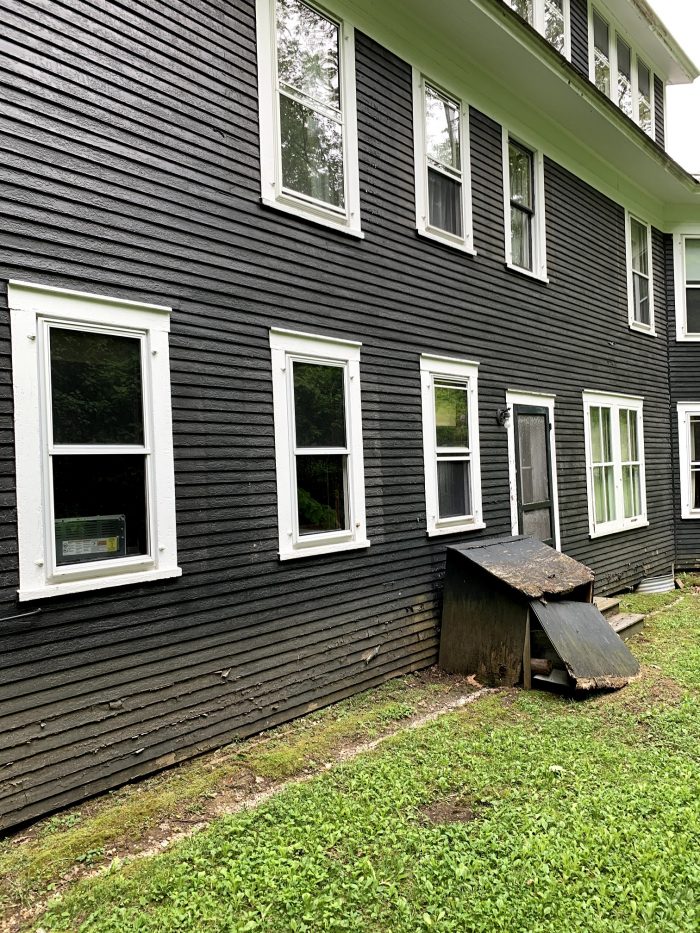
I’m planning a renovation for a 110 year old house in Southern VT (zone 6). The house has cedar clapboards with board sheathing and no WBR. Exterior walls are 2X4 7/8″ studs and have never seen insulation.
I’m looking for advice on the relative costs (material & labor) for two potential wall assemblies for general comparison, plus any thoughts and feedback on these options in general.
In either scenario interior surfaces and windows will be replaced. We’d inspect for major water problems and fix them. Old window weight pockets will be foamed in. New windows to be <=U0.17 and don’t represent an outsized % of the wall area. We’d add flashing, etc. at the windows as feasible. 3 stories – 3rd floor under the rafters. Nice big overhangs at the eaves so we have some protection of the siding if we keep the exterior as is or room to add exterior continuous insulation if we go that route.
Option 1 – use spray foam and avoid major exterior work
Outside to inside:
Keep the existing clapboards and sheathing.
Install dimpled house wrap on the back of sheathing, stapled to studs, for some moisture management/insurance… maybe help the paint stay on.
2x2s furred to interior of studs horizontally to extend existing cavity depth to 6 3/8.
HDSF to fill cavity and 1″ in front of the old studs for a thermal break. Foam depth of 5 7/8″ with the last 1/2″ of the cavity as air assumed behind the drywall since it’s HDSF.
No additional vapor barrier.
5/8″ drywall
I believe this total wall assembly (excluding windows) ends up around R29 (U 0.34) and would meet alternative path code requirement of U0.45 or less. (~R14 framing path, ~R39 insulation path, 20% framing factor).
Pros: One solution for air and vapor control. Avoids complexity with exterior insulation. Retain historic character.
Cons: Higher risk of water issues. Paint retention may be a concern. Lead paint still there to deal with.
Option 2 – No-spray foam route with exterior insulation
Replace the clapboards and trim, freeze boards, etc. and add exterior CI and proper WRB/AIR barrier, flashing, etc.
Outside to inside:
New fiber cement or cedar clapboards
3/4″ rain-screen gap / furring
3″ of Rockwool comfortboard 80 OR recycled EPS
WBR (Henry blueskin)
Existing sheathing
Densepack / spray cellulose in the existing 4 7/8″ cavity.
Vapor retarder? – maybe smart membrane, maybe just paint the drywall and call it good? (Seems like I can use a class III VR since the mix of interior and exterior CI should provide the right hygrothermal management and this assemble can dry both ways)
5/8″ drywall
Perhaps… we also use aerobarrier before we fill the cavities to improve the air barrier vs. relying only on the blueskin with an old structure and tricky details at transition points.
I think total wall assembly (excluding windows) ends up around R24 or 25 (~U 0.4) and would meet alternative path code requirement of U0.45 or less. (R17~18 framing path, R27~28 insulation path).
What do you think of these options?
Can you suggest sources where I can find information to estimate per sq ft install costs?
Thanks!
Scott
GBA Detail Library
A collection of one thousand construction details organized by climate and house part


Replies
Scott,
If you haven't already, be sure to check out this article on deep energy retrofits (https://www.greenbuildingadvisor.com/article/a-practical-look-at-deep-energy-retrofits).
Thanks Steve. I'll check it out.
Hi Scott,
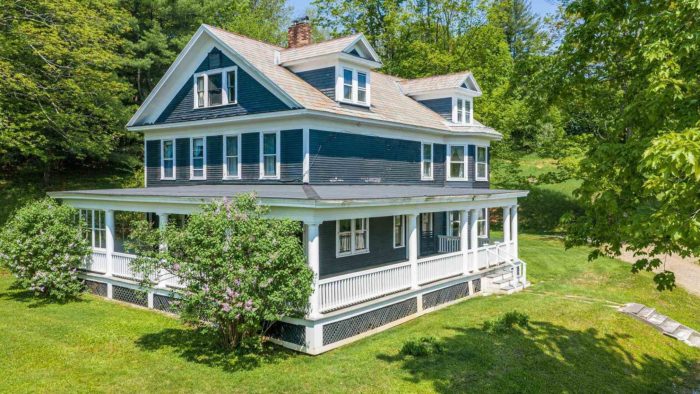
This is such a fantastic looking house and project. It puts me in mind of one Mason Lord of Hudson Valley Preservation did: Deep-Energy Retrofit of an Old Timber Frame, Part One and Deep-Energy Retrofit of an Old Timber Frame, Part Two. The house is in Washington Depot, CT, zone 5. Mason could be a great contact for you. I imagine he could certainly talk costs.
Kiley, thanks. I appreciate the information.
That is a lot of siding. The only way any exterior insulation work is worth it is if you need to replace the siding as well. If the siding is in decent shape, interior only is the lower cost option.
Your option 1 sounds like you have most things covered well. A couple of tweaks I would recommend. Go for a drainable WRB with real thickness something like Slicker HP to have a decent air gap. More is always better, stapling 1x1 to the corners and stretching standard housewrap between it would be even better but more labor.
There is no need for closed cell foam in your walls. Instead of cross strapping, I would go for foam strips like this:
https://www.finehomebuilding.com/project-guides/insulation/breaking-the-thermal-bridge
Instead of foam+1x3, simpler option is to rip R9 ZipR and nail that to your studs. The foam strip + oc SPF in the cavity would get you close to an R22 assembly (VS R26 ccSPF) but would allow for moisture to move through the wall, use significantly less polymer and be much cheaper.
With half story construction and dormers your roof is complicated, I think the simplest there is closed cell foam against the roof deck. Make sure to carry the SPF down all the way to your wall top plates for air barrier continuity.
Akos, Thanks! Love the idea of extending the cavities with strips of ZipR on the studs. Great suggestion.
I agree with your thoughts about SPF for the roof. I'm in 50~60 psf snow country, however, so we need a cold roof or we might invite ice dam trouble. Third floor living space is directly under the rafters. Our thoughts for the roof are to make soffit to ridge vent channels with something like accuvent baffles to give us an ~1.5" of airflow under the roof, extend the cavities, and fill them SPF. We'll lose some space at the sides of the rooms by extending the cavities, but it shouldn't be a big deal. How the details work around the dormers and whether we can effectively ventilate under the roof there is something we'll need to figure out once we open up the walls and ceiling to get a good look at what's going on.