Attic Baffles
stevedavis
| Posted in General Questions on
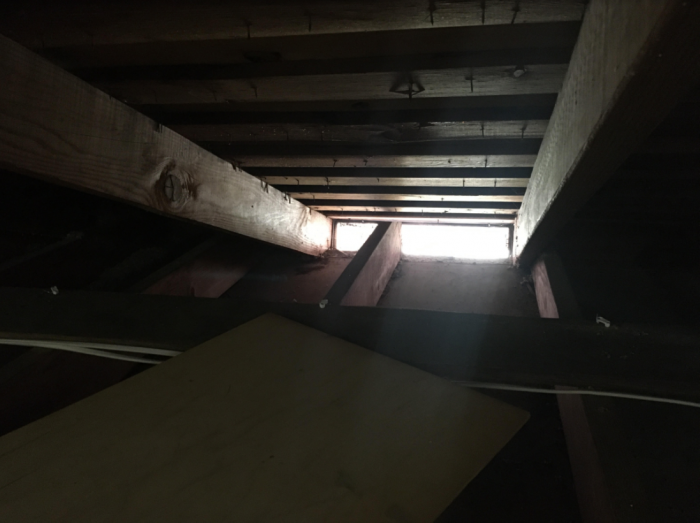
I’m working on getting the attic prepped for insulation and just want some quick feedback if these baffles look up to snuff.
Baffles are 1/2″ foil-faced EPS. I’d of liked to use polyiso but couldn’t source 1/2″. Plywood would have been better but getting these to fit would have been a nightmare.
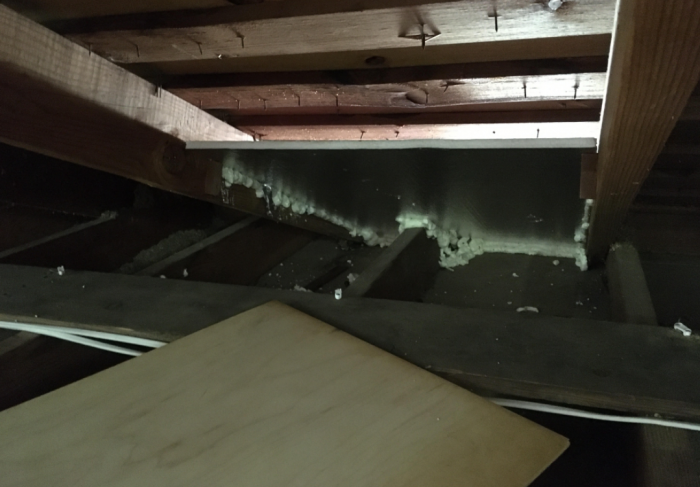
Simple sheet cut to fit. 2 wood blocks on either side hold it in place and then I foamed around it. I placed the outer edge of the foam about 1/2″ from the vent (hopefully getting some insulation over the top plate while not blocking the vent itself.) I am skinny with long arms and I wish I was skinnier with longer arms. Anything look off here?

GBA Detail Library
A collection of one thousand construction details organized by climate and house part
Search and download construction details


Replies
From what I can see in those pics, your baffles look ok. The basic goal here is to ensure an open vent channel from the soffit up to at least a little above the insulation that is in the area of the eaves. As long as you do at least a somewhat decent job of sealing the baffles in place, you should be ok.
Bill
I probably would have gone with 2" thick polyiso myself. There is still 1.5" inches of vent space to the roof deck, which is plenty. It's a pretty available thickness, though more expensive. On my house I justified the extra expense because I do not have a raised heel design and need the extra insulation because of the scarceness of floor insulation on the perimeter. So it served double duty and that was how I justified it. You may not have that requirement depending on the construction.
I actually intentionally went thin so I could get as much batt insulation in there as possible. In retrospect, your comment probably makes decent sense though if my main concern is R-value. Too late for me but hopefully helpful to someone else.
Eric,
I'm in the process of designing my roof trusses. Are you saying that the raised heel is a must have? The designer is working a 13" heel into the model, but I don't like the way it looks. However, if it is needed to meet the R-Value then I'll have to go for it.
I read that insulating the roof line is recommended if you plan on finishing the attic space later. What stumps me is how can you meet the requirements if the top chords are only using 2x4's and 2x6's. Am I missing something here?
I'm only speaking as a DIYer who owns a 80 year old house without a raised heel attic. But I follow advice given here and other places pretty closely. Without a raised heel design and only 4 or 6 inches of height at the perimeter polyiso as baffles at the perimeter was the best I could do. Even with that extra foam insulation and 12" of loose blown cellulose on the attic floor everywhere else there's still a temperate difference of about 3 or 4 degrees F when measure with an IR sensor all along the perimeter of ceiling. If I was in a situation like yourself with new construction it is well worth going for a raised heel design to get that extra insulation for the perimeter.
I did something similar, as follows
1. Measured width of rafter bay
2. Cut a strip of insulation as follows: width of rafter bay - (2x thickness of insulation)+(2x height of air vent). In my case I used 1/2" foil faced polyiso (R-max brand from the big box store), and did 2" vent spaces. So for a 22" wide rafter bay, I cut a 24" wide piece.
3. Score each side of the resulting piece to the height of your air vent on the foil side
4. Fold up polyiso at the score (ie break the foil side, but NOT the other side). You now have a short, and very wide U shaped piece.
5. Go to attic and insert piece into rafter bay. The sides folded up will ensure the correct air space. Foam at the score, which is parallel to the rafter - the foam acts as glue to hold the foam in place and glue it to the rafters, and reinforces the foam where you scored it by filling the scored gap with foam
The above was much easier for me because I did not have to worry about any blocking. Seems to have worked quite well.
That seems really reasonable too. We can do so much better than the premade baffles they sell at the big box store.
Steve,
You've done a good job.
When you are planning to add baffles to an attic - existing or new - it's worth being clear on what the goals are. The two primary ones are to keep the vent channel clear, and contain the new insulation. If there isn't much height, an important secondary one might be to maximize the R-value at the exterior walls, and finally to minimize wind-washing. Depending on the circumstances, the Labour intensive work involved in site-building baffles and sealing them may or may not yield any appreciable gains, and pre-made ones will do the job just fine.
Deleted