LED Retrofit Lights – caulking the trim ring
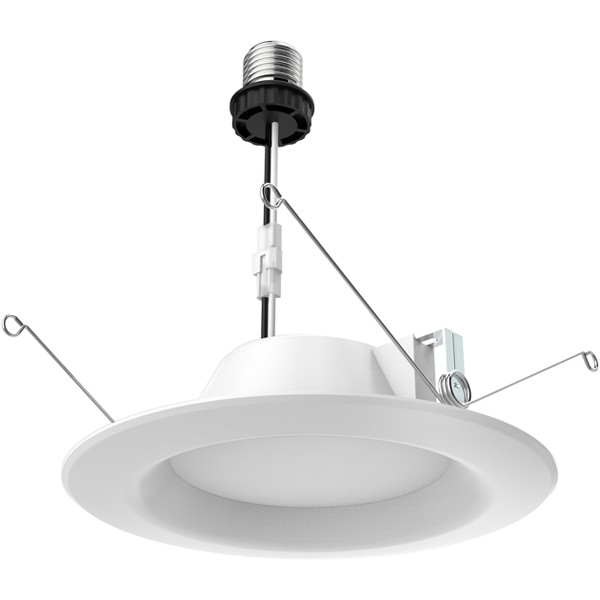
We bought a home with a lot of recessed lights with incandescent bulbs. I just completed installing Tenmat rockwool covers over the accessible lights. I am retrofitting LED lights now and bought three samples of Satco S29313 retrofit kits with E26 base adapter (photo below). The kit does not come with a gasket to seal the ring/light to the ceiling, probably because there is no way those friction springs could apply enough upward force to form a good gasket seal to the ceiling.
I want to caulk the trim ring to the ceiling to get a good air seal, but I’m concerned about possible future failures of the LED requiring replacement. So a permanent caulk is not a good solution.
Has anybody tried using “temporary” caulks such as Dap “Seal ‘N Peel Removable Caulk” to air-seal the LED trim ring to the ceiling?
Are there other solutions to air-sealing the LED trim ring to the ceiling but being able to remove it in the future for repairs? (Martin — other than ripping out the entire recessed lighting fixture, that is)
GBA Detail Library
A collection of one thousand construction details organized by climate and house part


Replies
Rope caulk seems to stay pliable for a long time and should peel off fairly easily in the future.
Thanks, Joel. I was unaware of rope caulk. It does seem promising. Doesn't look like my local stores stock it, so I'll have to order on line.
Joel, I used your rope caulk idea with (I hope) great success. I used it in conjunction with the foam gasket supplied by Halo. I provide more information below in my reply to Zephyr7 (Bill) with a couple of photos of the installation.
Thanks so much for pointing me to this material. I think it is working very well and I hope I have a less drafty house this winter.
Halo makes a foam ring with adhesive on one side, it's like a circular piece of weatherstripping. It's a bit of a pain to install properly, but it works. If you need a different size, you could buy sheets of the thin (~1/16") foam and use a spray adhesive like 3M 77 to tick the foam to the ceiling, or to the trim ring itself. The foam gives you a gasket between the LED trim and the ceiling.
In my own experience using the Halo gaskets, I don't think they seal as well as caulk would since the fixture doesn't clamp with enough force to really compress the gasket much. I'm sure the gasket is better than nothing though.
Bill
Thanks, Bill. Joel's recommendation for rope caulk seems like something worth trying. The springs on these Satco retrofit trims are obviously not going to provide any compressive force on any gasket. Plus, I'd like the trim ring to be flush to the ceiling and not stand proud. Any compressible gasket will probably cause the trim ring to stand proud of the ceiling.
Yes, the gasket will raise the trim off the ceiling a little. If you're standing a distance away from the light it's not very noticeable, but if you're right next to it you certainly can see that it's not quite flush.
Bill
I bought both Frost King F4 Mortite Caulking Cord (the original rope caulk) and M-D Building Products 1/8 in. Flexible Caulking Cord and used both on my LED retrofits. Both are very similar, but I like the Mortite better - it is easier to unroll, doesn't seem to stick to itself as much as the M-D material, is easier to cut with scissors, and is slightly larger diameter. It worked perfectly - a ring of the rope caulk fit between the lip on the flange and the foam gasket. I used both the rope caulk AND the gasket. I pressed the light to the ceiling and maintained pressure on it for about 30 seconds hoping to achieve a good connection between the caulk and the ceiling sheetrock.
Between the Tenmat covers over the light and these Halo LED retrofit lights with the foam gasket and rope caulk, I hope to have very little air flow from the conditioned house to the attic.
Below are a couple of photos showing the rope caulk installed on the light between the lip on the flange and the foam gasket.
PS. I really like the Halo LED retrofit lights. They are affordable and come in three different light output ratings for ceilings up to 9 feet high; up to 12 feet high; and up to 15 feet high. Some of the retrofit lights have a selectable color temperature which is very handy.
Hi Steve, I’m contemplating the same retrofit project as you completed.
Question: do you think you could have gotten enough air seal with just the rope-caulked Halo retrofits, without also installing the Tenmat can covers? Or are both required? I’m not looking forward to crawling around in the attic:).
Hi, TJ. I'm impressed with the complete air seal of the retrofit LED units. They really cut off the air flow through the housing. Jonathan B wrote in #9 "There are products with better springs at the big box store." -- I bought the Halo retrofit units which have been around a while. The spring design that holds the unit in the can is not very strong and doesn't pull the unit up tight against the ceiling. My units have the Vee shaped torsion spring, not the long conventional spring you sometimes find. That Vee spring design has been around forever and has always had that problem. Frankly, none of the springs hold the fixture tight to the ceiling.
The caulk is a bit problematic because you have to press the light hard against the ceiling for maybe 30 seconds to effect a seal. Even then, the flange tends to pull away from the ceiling in some locations.
How effective is the foam gasket + rope caulk alone vs in combination with the Tenmat "hats"? That's hard to say. I'd guess that you would get 70% to 90% of the air leakage improvement with the retrofit light + foam gasket + rope caulk.
We sucked all the old cellulose insulation out of the attic to build new OSB baffles in each rafter bay at the eaves and do some other improvements, so retrofitting the "hats" was a lot simpler with a clean attic. Doing that with an attic filled with insulation would definitely be a miserable job with questionable benefit.
Perhaps try the retrofit LED units + foam gasket + rope caulk alone and see if you are achieving the benefits you seek. You can always go back and retrofit the Tenmat hats next year if you think you need them.
UPDATE ON OUR PROJECT
I had 2 inches of closed-cell foam blown into the attic to provide a complete air seal between the living space and the attic.
I completely revamped the attic ventilation -- ripped out the two small, undersized ventilators at one end of the attic and installed "cupola-style" ventilators from Ventilation Maximum from Canada (see https://www.ventilation-maximum.com/en/). These stick up above the typical snowfall depth and don't get choked off like ridge vents or low turtle vents. My objective is to get the attic within 10 degrees of the outdoor temperature, so I cannot count on heat flowing through the attic vents to keep them free of snow.
Blown-in fiberglass to bring the attic up to R60 is the final step to reduce heat loss. That should be done in a few weeks.
Right now I am rebuilding the attic hatch with a weather-stripped 1/2 inch plywood hatch screwed up from the room; 2 x 9 inches of fiberglass batts get pushed into the opening from below to provide R60 before the hatch gets screwed on. A decorative hatch cover is applied from below after the air-seal hatch is screwed in place. I'm essentially copying the commercial "Tru-Seal Attic Hatch" (see http://www.trimritemfg.ca/tru-seal-attic-hatch.html). The nice thing about this approach is you can install a properly weather-stripped and insulated air sealing functional hatch, then cover it with a light decorative hatch cover from below. It separates the insulation/air sealing function from the decorative appearance function. It's very clever.
I'm also going to install some thermocouples in the attic so I can remotely keep tabs on the attic temperatures and see if we are getting into ice-dam conditions.
So far, the house is a lot more comfortable, definitely not as drafty, and a lot quieter on the second floor. In fact, with the furnace turned down to 60F at 9 PM, the upstairs is so warm that we have to sleep with a window cracked a couple inches on 25F nights. We travel a lot, so it's hard to evaluate savings on utility bills yet.
Nick Lehto published an article last August in the Journal of Light Construction titled "Air-Sealing the Lid" (https://www.jlconline.com/how-to/insulation/air-sealing-the-lid_o). He described exactly the approach I had devised last April, so it was good to know others are using the same approach I selected.
I strongly recommend you insulate the hatch cover with a stack of rigid foam panels glued to the cover and not with batts. I used to have batts over my attic hatch cover and I rebuilt it a few years ago with a piece of 3/4” MDF as the cover itself and about R30 worth of leftover XPS glued to the back. I also built a Shute around the hatch in the attic using some more leftover rigid foam. The new hatch built this way is MUCH easier to use and seals better too! I’ll never use batts in the attic again.
Bill
Thanks, Bill. I insulated a vertical wall hatch into our first floor attic using a sandwich of 3 sheets of 2 inch XPS.
I initially planned to use an XPS sandwich for the ceiling hatch to the second floor attic, too. But pushing the XPS sandwich up from the room is not possible because of the cleats I am going to attach to the joist and cross-member framing for the hatch to seal to. Then I watched the Tru-Seal Attic Hatch video and changed my mind to using fiberglass batts cut to fit snugly.
The other problem is the insulation dams in the attic don't line up with the inside edge of the framed opening for the hatch -- the dams sit back a bit. So, using an XPS sandwich would leave some vertical gaps without any insulation.
Considering the problems of getting XPS to fill all the gaps from the hatch/framing/insulation dam structure, I figured it would be easy to cut fiberglass batts to fit snugly and push them upward from the room below.
I also used an XPS sandwich to temporarily fill in our dog door during the winter. The previous owners installed a commercial plastic dog door with external and internal clear vinyl flaps and a very flimsy plastic "security" sheet on the inside. They had a big Lab who knew how to go in and out on his own, but our little guy (20 pounds) hasn't figured out how to use the dog door on his own yet. So I plugged that opening with the XPS and put a weather-sealed MDF cover on the inside.
Wow, and I thought I was becoming obsessed with sealing off my attic! :)
In addition to 30 non-IC cans poking into the attic, my upstairs furnace is up there. With fiberglass bat everywhere I like the idea of trying the LED retrofit first (though that's going to cost me $1000!).
My plan for the furnace is to build an insulated room around it to make it more part of the conditioned space than the attic. The plan includes my hatch to be inside the 'furnace room' to stop that leak.
This is all to stop the yearly ice dams, and hopefully if the house is more comfortable my wife will be happier!
Thank you for the reply, Jim
Those LED Retrofit Kits will also save you money on your electric bill, and keep you from replacing light bulbs for years. They have other benefits besides just the better air sealing :-)
Get some foil tape and duct mastic and seal all the ductwork in your attic. That will help with energy efficiency too.
Bill
We did a complete duct sealing job last summer, too. I forgot to mention that.
I did 37 can lights! The house was built in 1991 when people were going nuts putting them everywhere. I think I spent an average of $28 each on them, so I am at $1,000, too. We prefer table and floor lamps, so the ceiling can lights don't get used a whole lot and our energy savings won't be much. But the extra comfort is well worth it.
We also have an insulated furnace room in the garage (has the gas fired water heater, too). The furnace has a sealed combustion air system with concentric PVC pipe through the roof to bring in combustion air and exhaust the flue gases. But the water heater is NOT sealed combustion, so it needs fresh air makeup for combustion.
There are two combustion air inlets, one in the floor (to the crawl space) and one in the ceiling (open to the attic). The utility room stays around 65F to 70F in the winter with the two appliances running. The 6 inch combustion air duct to the attic was dumping HUGE amounts of hot air into the attic when the WH wasn't running (which is about 98% of the time). I went into the first floor attic last winter and could feel lots of warm air flowing into the attic.
I had our HVAC company extend the ceiling air duct to a sidewall about 25 ft away and put a hood over it (no louvers). This prevents it from getting covered in snow, brings in cold outdoor air for combustion, and also ventilates any combustible gases that may accumulate in the top of the furnace room if there is a natural gas leak.
Our place also built in 91 :) Two stories so the 30 cans are only the ones in the attic that pierce the envelope. Many more throughout the house :)
Jim, do you have enough room in the attic to enclose your attic furnace? You will need maintenance access for future repairs. And you need to leave appropriate distances from the wood framing and the furnace. Plus you probably have to use sheetrock on the inside of the room around the furnace. That sounds like a real difficult retrofit job in an attic.
Our main furnace is in a furnace room off the garage. When the previous owners added onto the house, they found that the original garage furnace wasn't large enough to keep the new addition warm. So they installed an auxiliary furnace in the first floor attic over the addition.
The attic is the worst possible place for a furnace in snow country - it dumps a huge amount of heat into the attic and contributes greatly to ice dams.
Many builders here in North Idaho have come from warm climates (no ice dam problems) and are used to putting furnaces in attics. They are bringing that approach with them. It also has the benefit of providing more usable house square footage at no additional cost as there is no longer a need for a furnace room. Guys I have talked to here say they are creating huge ice dam problems in the new houses they are building. It's surprising that code allows furnaces in attics in cold climates.
There are new products coming out all the time. Keep shopping. There are products with better springs at the big box store. I would skip the can covers unless adding insulation is a problem.
If you are stuck with ducts in your attic make sure they are not leaking the way 99% of attic ducts do.
I like the foil tape for steel ducts but you must clean the duct for it to seal, mastic is more forgiving with old ducts.
Walta
I forgot to mention I also did complete duct sealing with mastic, too. The second floor attic only has return ducts, but there's no point sucking in cold outdoor air. The first floor attic has both supply and return ducts in the attic and we sealed those up with mastic, too.
Steve, I don't know how much space is 'required' around my furnace but the room I'm considering will be larger than my previous furnace closets, and as large as the one in my cellar. Room to almost stand, to work, and the room will include the hatch to the house. I was just thinking plywood for the room construction so I'll have to find out of drywall is required (I assume for fire reasons, thought the furnace is just sitting there now exposed to 2x4 trusses and fiberglass bats!). I'll have to get whatever material I use into the attic in 24" wide sheets as my attic opening is only 34" diagonal.
The furnace exhaust is vented to the roof, and the attic has nice 12x16" vents at the top of the east and west gables so I'd guess heat gets removed, yet my ice dams were 12-14" thick last year with huge ice columns off the roof to the ground, and it's already started this year!