Radon vapor barrier as part of crawlspace encapsulation
I’m beginning the process of installing a radon vapor barrier in our vented crawlspace (radon level ~ 6 pCi/L, so not terribly high).
House was built in 2015 in IECC zone 4C. A 6 mil vapor barrier was installed during build. It was attached to the foundation walls just by hooking it on the concrete stays (IOW, in no way sealed). Seams were taped with normal duct tape, it appears, and are largely failing. We do have a radon pipe that was stubbed off into the crawlspace (so we could activate it with a fan if needed).
I’m planning to redo it right, but want to make sure I don’t omit a step or make it more difficult to improve the space going forward; I’d like to eventually encapsulate it fully.
So my current plan is to:
1. Remove the concrete stays and patch the holes
2. Caulk the cold joints and all penetrations
3. Lay 3 or 4″ perforated pipe around the perimeter of the crawlspace and connect it to the existing radon pipe (which is 3″)
4. Put down a much heavier vapor barrier, seal the seams better (was looking at using acoustic caulk + tape made for the purpose), and attach tightly to the walls.
My questions are:
1. Are there steps I’m missing or that I should consider doing first? If I eventually want to encapsulate, I’ll probably want rigid foam on the walls, right? Should I consider doing that *first* and then attaching the vapor barrier to the insulation? Is that a better sequence?
2. For the radon pipe, is it okay to just lay it on the surface? There is gravel but I’m not sure how deep it is. Should I try to dig a trough, put in the pipe, and cover with gravel? Just wondering how much of a difference that might make to get communication across the entire expanse. Would love it if we didn’t have to run a fan to get the levels down sufficiently.
3. Is there any compelling reason to remove the existing 6mil plastic? I’ve seen youtube’s where it’s removed, but unless there’s a compelling reason, I was thinking I’d just flatten it out and put the new vapor barrier over it.
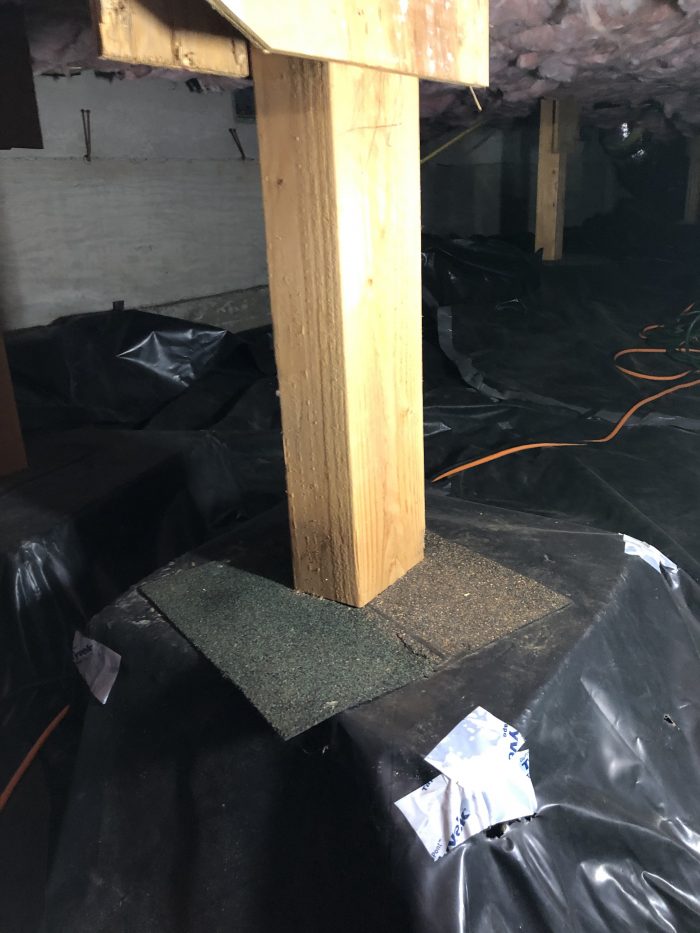
Will attach some photos. First photo is showing one of our pillars. We have dozens of those. You can see the plastic was tented around it, and so it’s failing at the corners. You can see in the background the concrete stays that were holding up the sheeting along the wall.
And thanks for all the previous help in these forums. It’s made a world of difference to us.
GBA Detail Library
A collection of one thousand construction details organized by climate and house part


Replies
Hi, Maurice. I’m actually just wrapping up my own encapsulation project and can offer a bit of advice. I’m in CZ5b, and my crawlspace is relatively dry as I’m in Boise, so a few things may differ slightly. And, I used StegoCrawl for the products, but I would image most liners are similar.
Question 1: I would say that putting in the liner first would be best. Additionally, lining the walls to within a few inches of the top of the wall would be preferable as well. Because the liner needs to be mechanically fastened to the wall, doing the insulation first means that you’d have to use much longer fasteners if you’re trying to go through several inches of rigid foam. There are alternative details that allow for liner over foam, but all seem to have the foam stop 8-10” short of the top of the wall.
If you sequence the liner first and line the entire wall, you can use PolyIso. If you only run the liner up the wall 6" then EPS is the way to go.
If you do go with the latter, then you can seal the EPS against the liner with canned spray foam. I spoke to the StegoCrawl product manager and he confirmed that Dow’s Great Simple foams were compatible for direct contact. Additionally, the OSI Quad and OSI 300 sealants we’re compatible as well. Both these products were stocked at my local big box stores which was helpful as I really had no idea how much I’d need, which made special orders challenging.
Question 2: I didn’t get super far down the radon mitigation road as my tests came back super low, but if I remember correctly you do not need to bury the pipe for it to be effective. This link shows the detailed drawing: https://www.greenbuildingadvisor.com/cad/detail/retrofit-for-radon-vent
Question 3: The only compelling reason to remove it that I can think of is if there’s some sort of contamination issue. I had remnants of my 6-mil liner that I was unsure about removing; my thinking being that it’d somehow be incompatible with the new liner and cause a premature failure. I asked the rep about that and their engineer said they had no concerns. I only removed it where it was interfering in some way, usually around the pier block footings or where it was so bunched up that it kept the new liner from laying flat.
Hope that helps, and good luck with all those pier blocks; I had 32 of those in the field and another dozen on the perimeter so I feel you pain.
https://www.greenbuildingadvisor.com/article/building-an-unvented-crawl-space
Thank you, Brian. Incredibly helpful! I was looking at Stego too.
What do I do with this low point drain? Sorry if that's a dumb question, but should it go under or above the vapor barrier? It's got a flip valve in it (not sure what the correct terminology is).
I assume it's not air tight, so that would suggest it should go under the vapor barrier and I flag where it is if I ever need to access it again? Or should I be looking to replace it with something different?
No problem; glad I could help. If you do go with StegoCrawl, you might reconsider their term bar. I found it to be unnecessary, and after doing a bit of digging found out that it’s typically for commercial projects where tape isn’t used.
As for the drainage valve, I’m a little unclear on its current purpose. Is it connected to an outside drain in some way?
> As for the drainage valve, I’m a little unclear on its current purpose. Is it connected to an outside drain in some way?
Yes, I believe so. I think the idea is that any standing water will just migrate to that point and flow out that valve. It might be connected to our downspout drain pipes. Note sure.
If the space is fully encapsulated then we'd have no standing water, I'd hope, so I guess I'll encapsulate over it unless someone knows better.
And yes, I was wondering about the term bar. So what did you use to mechanically fasten the vapor barrier to the wall? You used the concrete nails with the washers?
Thanks.
It seems reasonable to me to cover that given that it is likely not air tight. The only downside would be if there was an internal leak; shortly after I sealed my liner I had a small water issue (a water softener line worked it’s way out of the drain and two regeneration cycles made their way into the crawlspace) that was pretty eye opening in terms of how quickly you could flood that area. It’s effectively a pool liner. Short term, I’ve put several leak detectors down there, and in the future I may add a small sump pump just to buy me some time in the event of a catastrophe.
And yes, I used powder actuated nails with a 1” steel washer every 18–24”. I bought a $90 Ramset with a .22 load that worked really well at the top of the wall where there was less aggregate in the mix. Its worth noting that I used the gun in conjunction with the grey stego tape. I’m not sure how it’d work out with a bead of sealant due to the weight of the liner. At 15-mil thickness it was heavier weight-wise than I had anticipated.
Sounds like I have a plan, thanks. So you went with the 20-mil Stego wrap? That's the yellow version?
Maurice
If you ever have a plumbing leak, especially in a sewer line, you'll wish that drain was open. If the drain pipe is sealed (i.e. joints glued and tight) - as it's supposed to be - then it should not be a source or radon.
Thanks for that. What about at the point of full encapsulation? You also wouldn't worry about the drain being an air source? Or maybe there's a way to make an air tight low point drain?
I found this page:
https://energyhandyman.com/services/sealed-crawl-spaces/
"A properly SEALED crawlspace has no wall vents, or the wall vents have been sealed permanently. 100% of the ground is permanently covered with a sealed vapor-barrier which is sealed to foundation walls and piers. All gaps and seams are taped or sealed with foam. Exterior grading moves all rain-water away from the foundation. The main point is keeping ambient air out of the crawlspace and actively drying and monitoring the space. A low-point drain, will release water if plumbing fails but no exterior moisture in any form, Humidity, Rain, or Irrigation can get in."
So that sounds like at least they don't worry about the low point drain being an air source...
Sorry about that, Maurice. It’s the white 15-mil barrier found here: https://www.stegoindustries.com/products/stego-crawl-wrap
Hi mla12!
Did you ever finish your project? What did you use for the radon exhaust pipes under the encapsulation? I have a similar project upcoming. Located in OR.
Unfortunately, we encapsulated before finding out we have a radon problem. Hoping I can retrofit without a lot of digging or ripping out the existing encapsulation.
Any input would be really helpful.
Hey @webbexpert. This is probably way too late to be useful to you but I *just* received notification of your message.
Anyway, I have not finished the encapsulation. We placed the corrugated pipe around the perimeter, under the existing 6mil plastic and connected it to the radon pipe that was stubbed out during the build. That gave us a significant drop in radon level to below ~ 2 pCi/L, even being completely passive.
I was interested in your post. I wasn't clear if the original 6 reading was above the crawl space vs just inside the crawl.
It would be interesting if you had it at 6 in the crawl, what was it directly above and if now 2 in the crawl space, what is it now above the crawl.
The reading was in the living space above. It varied, of course, but periods of 4-6 were not uncommon.
We're currently at 1.24 7-day avg and almost never see it above 2 now.
Thank you for the follow up!
Hi @mla12
Thanks for the kind reply!
Did you dig out room for the corrugated pipe (so the top of the pipe is at grade or below grade), or, did you just put the corrugated pipe underneath he existing encapsulation (on top of the grade)?
I'm curious if it latter method will work for a retrofit. I'm considering just putting a radon soil mat under the existing encapsulation, on top of the soil, making the connection(s) to the exhaust pipe, then sealing it back up.
Thanks!