Slab Insulation at Door Threshold
arnoldk
| Posted in General Questions on
Hi,
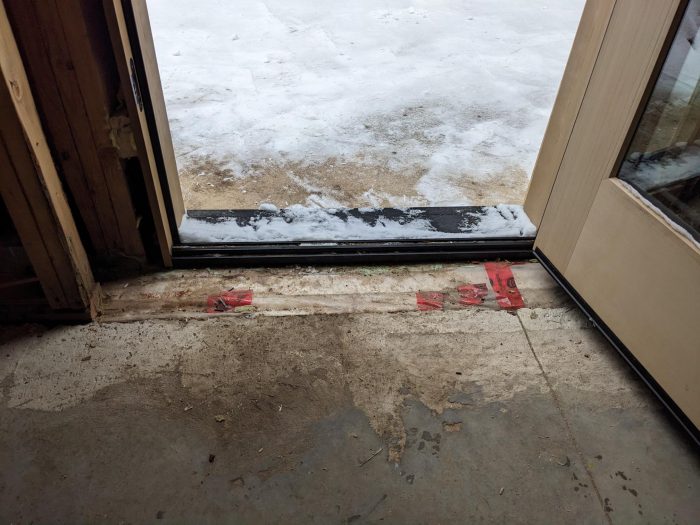
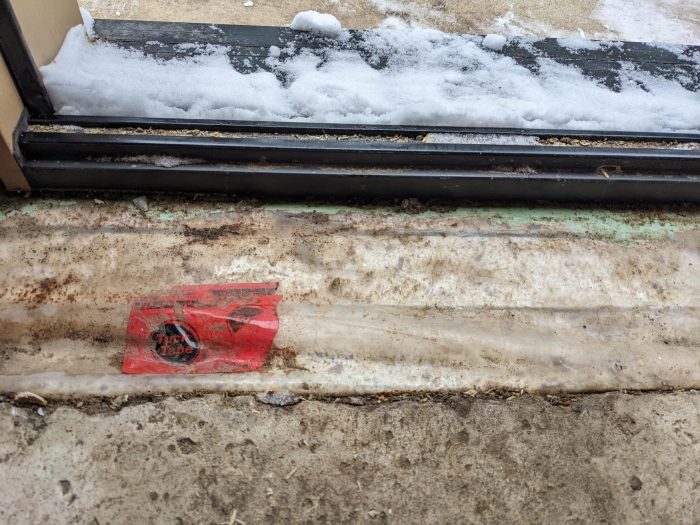
I am hoping someone may have a solution for my issue with how to cover the slab door threshold insulation. In hindsight, I wish I had simply cut a bevel in the insulation all around the perimeter of the slab on grade and accepted the insulation lost.
At the moment I am looking to find a way to create a more solid floor over the 7-1/2″ EPS foam at the two doorway for when tile is installed. My first thought is self leveling concrete but I am not sure it will be strong enough given it won’t be very thick at around 1/4″ thick.
Any suggestions?
Thank you,
Arnold
GBA Detail Library
A collection of one thousand construction details organized by climate and house part
Search and download construction details


Replies
arnoldk,
Can you provide a cross section sketch to show slab, foam, perimeter pour and door sill placement? I can think of some options that might be sufficiently strong though your tile choice may not be compatible. If you could also explain your tiling plans, there may alternate paths. Plan on some fussy hand work.
I must admit to be a bit baffled by the 7+" perimeter foam. The one photo seems to show double wall construction that barely meets the interior slab.
Unfortunately I don't have a detail drawing of the door but here is a drawing of the wall assembly.
The interior double stud wall does not meet the interior slab due to the concrete company providing us with the wrong foam thickness, 2-1/2" vs 2" which is why there is a total of 7" of EPS (2-1/2" x 3 layers).
Thank you,
Arnold
Is your door resting entirely on the foam? If so, I would move it inboard so it's over something more solid. I'm fine with foam under structural loads but doors are so finicky that I would not locate them directly over foam. Then I would do something like my "formed recess" option here: https://www.greenbuildingadvisor.com/article/how-to-install-doors-in-thick-walls. (I realize that shows a door over foam, but it's a thin layer of high-density foam directly over concrete, which is different than locating the weight of the door over exterior insulation.)
Edit: now I see your comment #3, which does not show exterior foam but a foam gap around the slab perimeter. more like the "elevated slab" option in the article I linked to, except you probably have the concrete stem wall poured flush with the top of slab. In your case, I might cut out 2" of foam and fill it with concrete, leaving just 1" or so of foam as a thermal break at the door.
Hi Michael,
You are correct that the slab is level with the stem foundation wall. The door sits entirely on the foundation wall except for maybe 3/4" of the interior door threshold.
I did think about cutting out the foam 2 or 3 inches deep and leaving just one or so inches in-front of the interior door threshold. I'm glad to see my thought weren't to crazy.
Thank you,
Arnold
Arnoldk,
Sounds like the door threshold overhangs the foundation to the inside by 3/4". This still leaves almost 7" of foam to float your tile over. I don't think that excavating and filling a pocket in front of the door will be a safe process without one more detail. (The fussy hand work I mentioned.) Trusting the foam underneath over a long period is unwise in my opinion. I have replaced tiles that cracked due to an underlying slab crack of very small dimensions. Same for tiles that spanned a transition point from old house to new addition. A different source of movement, but still came through the sub-floor.
My suggestion is pinning the "mini-slab extension" to either the interior slab or both. Providing pins for the extension from only the interior slab is thermally optimal. For maximum strength under the tile, I would span between the perimeter foundation and interior slab and take the small thermal hit. It may seem like your first step in the door will always land far enough in to put weight on the slab, but over time the "soft" spot will see traffic. A large format tile could break at the transition between slab and the in-fill if only relying on the foam's compressive strength. Small tiles may finally give way at the grout lines.
I would propose excavating down 3" or more to expose the interior slab edge and foundation under the door threshold. The inch or inch and half you want against the foundation can be replaced after setting the pins. If you only want to pin on the interior side, get a 12" long or longer 3/8 masonry drill bit, so the drill chuck won't hit your door threshold. Put some thin plywood on threshold while drilling to prevent scraping.
From the open door side, drill holes at as shallow an angle as you can muster about 1 1/2" down from the slab top. (Hopefully no radiant tubing in the slab.) Drill 2 1/2" deep and blow clear. Set common 3/8 x 8" steel bolts in epoxy and when cured bend down the head ends to below the new pour surface. The number of bolts depends on your door width. At 36" , I would go every 4" because that's the way I am. If you are a gambling man, you could just do enough to cover the 2/3 of width from strike side of opening. Set the foam gap against the foundation and pour the extension.
If you are paranoid like myself and want the maximum support, reverse positions of the holes and drill into the foundation wall under the door, again as shallow an angle as possible. You could fudge the hole depth to shallower but the bending gets trickier. If you are able to find stainless rod material, you could shave the thermal hit by using 1/4" rod. I said 3/8" bolts because 1/4" ones don't usually come in lengths above 6". You may have better sources.
Get 10 or 12 " bolts and cut the heads off. After drilling the foundation holes, test the bolt positions and mark where the bolt falls on the interior slab edge. Grind 1/2" wide slots where marked and then set bolts in epoxy, wait for cure and bend down the bolts into the slots. A tight radius conduit bender might be helpful here. Set foam bits around the foundation side of the bolts and pour the extension. Set tile with more confidence.
A big PITA to be sure, but your tile will thank you. If this is all too overboard for you, the down and dirty fix for the extension pour would be 15 or 20 long-ish concrete screws. Set them high-low-high-low across the slab edge. The cantilever effect will be greater, so I won't promise a crack free future. The main problem is drill access with small diameter bits. My Tapcon bits are only 4+" overall. I don't think right angle hammer drills exist.
onslow,
That's what I'd do - although maybe it would be safer to just pin to the slab, as there might be differential settlement between it and the stem-walls, and they aren't connected anywhere else.
Maybe leave an inch of foam against the stem-wall when hogging out the rest?
Thanks for the information. I'll have to tackle that in a few weeks once the walls are insulated so I can keep the house warm enough for concrete the cure properly.
Arnold
Would using a 1/4" thick piece is steel plate work? I could even cut a small lip in the slap to support it on that side.
Thought?
Thank you,
Arnold
I would prefer to see something like onslow's approach. Is there a reason you don't want to do it that way? I might scale back to using 1/4" all-thread at 6" on centers, but the basic approach is time-tested. Even 3/16" all-thread would probably work fine.
Changing materials often results in differential movement, and 1/4" steel would flex a little--possibly enough to crack tile.
No reason. Just trying to explore all option.
Arnold
Could you make a sill extension work?
https://absupply.net/pdf/Draftseal/DraftSeal-SILLEXT_prodinfo.pdf
Even it means raising the door a bit, still less work and keeps the tiles off the foam.
The insulation is on the interior of the house and not the exterior so I am not sure how the sill extension would connect to the door that's already installed.
Arnold
It could be a metal ramp or just a flat plate, or even a wooden board that sits on top of the foam instead of extending the tile all the way to the door. I don't think it would look as good as tile, but it would be easier.
The outswing doors I've used had the sill extension mounted to what would be the interior side of an inswing door. I never looked at the details of how they go together, but it is something you can look into as I think they use the same threshold for inswing and outswing doors.
I contacted the door manufacture and they don't offer sill extension for the interior side of their doors. Even the exterior sill extension would be to short.
Arnold
There are a lot of different profiles available: https://www.zoro.com/kbmt/pemko-threshold/?. Sometimes they just butt against the door sill, sometimes they integrate with it, sometimes they have to be cut down to work.