Sound insulating: drain pipes and noise from first floor in basement
Hope I did not miss an answer to this elsewhere.
We’re finishing the basement. I’m still framing. I notice that the main plumbing drain is pretty loud when someone flushes a toilet upstairs. I read about using old carpet pad scraps to wrap the drain to insulate it. Seems like a good reuse. Make sense?
Also, planning to install Rockwool Safensound in floor joist bays of first floor AND in walls between basement rooms to keep the main basement room, which will serve as guest room, as quiet as possible. The room abuts the laundry/mechanical room, so will have the safe n sound in that wall too. Will also have weatherstripping on door between guest room and “experimental” space.
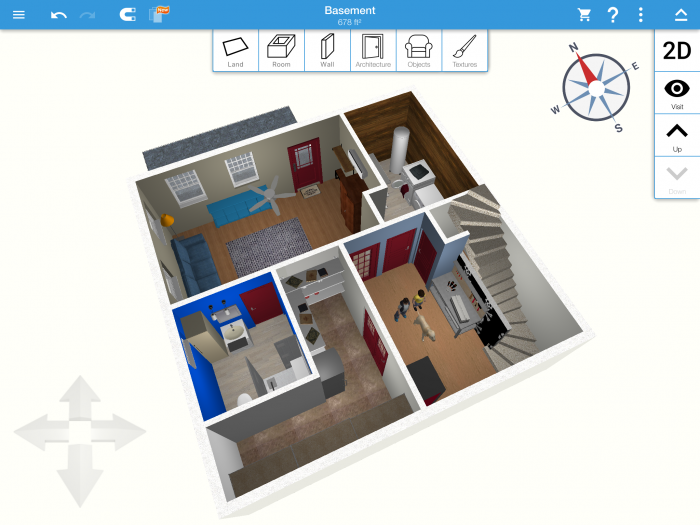
In the attached sketch (NOT to scale), the main room has the fan modeled in it.
Planning a drop ceiling, as there are now some good designs and I like being able to access things in the basement ’cause there’s a lot there. Is that better for sound than drywall? I’m an inexperienced drywall DIYer, so drop seems to be a better DIY option.
Since I may be hanging the drywall myself depending upon this pandemic, the idea of doing the ceiling myself with limited experience is daunting. I can already hear myself cursing wildly trying to tape & mud walls, never mind a ceiling.
Thanks for listening, and hope you’re well.
Wayne
GBA Detail Library
A collection of one thousand construction details organized by climate and house part


Replies
Wayne,
Unfortunately PVC and ABS drains are is a lot louder than cast-iron. Wraps, either home made or those sold in BB stores, reduce the sound by maybe 3-4 dbs - in other words not much. If you want a significant reduction your options are either replacing them with cast iron, or wrapping them in mass-loaded vinyl.
You will get better results in the ceiling if you can surround them in thick mineral wool batts. Try to completely fill the cavity the pipe is in right down to the dropped ceiling. That still leaves you with the vertical drops to deal with. Maybe a hybrid approach using both methods? Mineral wool in the ceiling, and vinyl in the walls?
Malcolm;
Thanks. Of course, a thread about this topic popped up AFTER, I composed this question.
The pipes are only vertical in one corner of the space, and not even in the wall, so, that’s good. Even if I can’t eliminate the noise completely, I can limit its intrusion into the guest room.
The mineral wool between floors is more for the regular noises of living. The guest room is below the kitchen, so, want to reduce walking noise and dishwasher.
Thanks again.
Wayne.
Drywall is much better for sound blocking than a drop ceiling. If you put up a drop ceiling, use good quality tiles that are heavy. You can also lay mineral wool batts on top of the tiles to help with sound. The batts get in the way of future work, but they do help a lot with sound.
Use 5/8” drywall instead of 1/2”. 5/8” drywall is better for sound attenuation and gives a flatter, more solid wall. The cost different is minimal and finishing is the same either way. If you want even more sound proofing, use a double layer of 5/8” drywall with the joints staggered. Another step up would be green glue between the layers. About the best you can do for sound without really getting fancy is to hang the drywall on resilient channel.
For those drains, the best option is to wrap them with thick mass loaded vinyl (MLV) sheets as Malcolm suggested. The material isn’t cheap, but it does a good job and you won’t need a lot of it.
Bill
Hello:
Thank you for this guidance. Really helpful.
As a DIYer, am I fooling myself that a drop ceiling is easier than drywall? I've NEVER done drywall...it already takes me forever to do stuff.
Wayne
If you get a self adjusting laser level on a tripod, a drop ceiling isn’t difficult. My guess is that for a first timer, drop ceilings and drywall will both be about the same amount of effort and time. Get a lift if you go for drywall, get a laser level on a tripod (which will put a red line around all the perimeter walls automatically and will make it much easier to put the ceiling up properly). Use a piece of white card stock with a mark on it to set all the suspension wire for the “middle” of the drop ceiling, put the card stock against the ceiling grid and adjust the wire until the laser is at the mark on your card.
For drywall, if your joists are even just put sheet after sheet up. If the joists aren’t even, put up some furring strips first.
Bill
I think most of the sound in drain pipes comes from the vertical sections that have higher velocity. Using cast iron pipes in just the vertical sections should make a big difference. Matt Risinger did a video on this a few years ago. If you pick up a cast iron pipe and compare it to a similar size plastic pipe, you'll see that the cast iron pipe is already "mass loaded".
Just install an outhouse.....no indoor sound or smell...
Thanks everyone. Great tips on the laser level, though I'm getting quotes on having someone hang and tape the drywall, as I've been told that they'll do it in 1/4 of the time it'd take me and do a better job.
OK. Now I'm on the resilient channel with 5/8" drywall train. Thinking that I'd mount resilient channel to the bottom of the first floor joists around the entire floor (with the exception of the equipment room), use 5/8" drywall, and then add safe 'n' sound over and around (in walls) the room we'd like to keep quieter. This is partly to save some $$$. Will also need to use GreenGlue around ceiling penetrations for lights and stuff, right?
Since there is no impact noise from the mechanical room (well, shouldn't be!), I was planning to just use safe n sound in that wall and NOT install resilient channel on the wall.
That said, noise travels all over the place, so I'll likely find "sound leaks" after the fact. I can tell that carpeting the basement stairs and using weather stripping around the main door to the "quiet space" will help too.
I'm planning to use a 1 3/4" x 3-0 x 84 1/2" custom mahogany door I found at a local salvage place with laminated glass. It's really nice, someone messed up a custom.
Thanks again. There are too many freakin' choices to make in projects like this. Now I see why people hire professionals for guidance!
- Wayne
Unless well air sealed RC+5/8 without batts doesn't do much for sound. It is still significantly better than standard drywall though. Getting a proper air sealed assembly is a lot of work so make sure you are up for it. A 90% air sealed assembly might as well not be air sealed at all when it comes to noise.
RC also doesn't do much for impact sound, you'll always hear foot fall sounds with it. There are no budget ways of dealing with impact noise with light weight construction. Getting two layers of 5/8 up on furring channel and isolating clips does a decent job but is a lot of work.
Where RC works quite well is for high frequency noise, so for your utility room, you do want it on the walls.
A solid heavy door with outdoor weather stripping does make a big difference.
P.S. Make sure you use the right green glue for your fixtures. You want the SEALANT.
To add to what Akos said the usual “green glue” goes between layers of drywall to create a sound deadening layer. The sealant is for use around gaps like you’d use caulk for — they are NOT the same product!
I would put the safe n sound in all wall cavities and ceiling cavities around your quiet room, except for any masonry walls. The insulation makes a big difference. BE SURE to PROPERLY seal ALL fixtures and penetrations too — leaks leak sound as well as air and “short circuit” all the other work you’ve done to try to block sound transmission. This is what “acoustical caulk” is made for.
Bill
Jeez...Thanks again. Are these the clips? https://kineticsnoise.com/isomax/sound-isolation-clips.html
this? https://www.resilmount.com/products/a237r-metal-furring-channel-resilient-sound-isolation-clip
AHHHHHH! Information overload!
Yup, any of those will work just as well. You want a complaint part (foam/rubber) between the hat channel and the joist above. I've used something similar to the resilmount and was a pretty easy install. You do loose about 1" of ceiling height.
Not information overload. For light weight construction sound control is simple:
-isolate (air seal)
-decouple (RC, clips or double stud)
-add mass (layers of drywall or OSB)
Air seal is the most important one that take a lot of care. Without proper air sealing an STC55 assembly might only come out as STC40, so pay most attention there.
The dual layer 5/8 with clip+hat channel works decent but it still won't eliminate foot fall noise. It reduces it from a sharp thud to a low frequency thump. Properly air sealed, it does wonders for air borne noise though.
Thx again. I see what you mean. I'm planning to have the drywall installed by pros, but I'll put up the isolation clips and hat channel. I'm guessing that I'll need to be very specific with them about NOT screwing into the joists.
Taking the time to get this room right will make it a more pleasant space to be in long term, I have to keep that in mind.
My information overload stems form the whole project. I'm no construction pro, and as a consumer there are many choices to make that we have zero background in.
Make sure they don’t screw through the channel into the joists. Any rigid connection between the drywall and the joists will “short circuit” the channel and allow more sound to transmit through the assembly. Think of the channel as a springy buffer between the drywall and the structure of the home. It’s hat springiness that reduces sound transmission.
The other things to be careful of are any ceiling penetrations (ideally you don’t want any at all), and corners. Corners are a weak spot in soundproof assemblies, you need to keep those corners isolated from the framing too.
If you do everything correctly you’ll get a good result, you just need to be careful. Make sure you’re using 5/8” drywall everywhere too — you want the mass of it, so 1/2” is not as effective due to the lower mass. If you go with two layers, you need the inner layers taped and mudded too, it’s just the sanding that doesn’t matter there. I’ve seen contractors skip the taping/mudding step on inner layers in the past but it DOES matter. The same goes for fire rated walls.
Bill
Hello again!
Hope you had a good Memorial Day Weekend.
Thinking this through, and discovering all the things I don't know...yet.
I have a drywall installer coming to take a look at the space today. What do I need to tell him to prepare for installing on the Isomax & hat rail?
Also, the main carrying beam for the house runs through the middle of the basement and will be in the corner of the space I'm trying to keep quiet. It protrudes into the space a bit, so will end up as a bump out. I was not planning to frame around it, just add drywall. For sound, should I just do two layers on 5/8 or add the isomax clips as well? See attached image.
Thanks again.
Wayne
You don't need to do anything special around the beam. Just end the ceiling as normal at the beam and wrap the beam with drywall the same as the wall bellow.
What you do need to do is add in blocking above the beam. You want to prevent flanking sound from getting into the space above the ceiling. This can be some lumber ripped to size and sealed in place with canned foam. A bit of fluffy insulation on the outside of the blocking also doesn't hurt.
P.S. If you are putting RC on the wall bellow the beam, than you should put also RC on the beam itself. Make sure the ceiling drywall does not touch the beam.
Cool. I connected with a gent in Massachusetts through the Isomax site that's been super helpful. Thinking about sound "leak paths" has helped me visualize it.
I'm dialing in the quantity of safe 'n' sound I need. My floor joists are 19 1/4" OC, so the bays are ~18" wide. I'm thinking I could get the Steel Stud 24" (610mm) on center: 24.25" x 48" which are slightly wider than the wood stud version. Then trim the batts to the correct width for my joist bays and stack the remaining "strips" up in the wall stud bays to minimize waste.
That said, this may not be their proper orientation, so I may need to get more creative to hold them in place.
Just seems silly to have these ~6" strips leftover from the 24.25" batts and then buy 16" batts for the stud bays.
- Wayne
Sometimes you end up with more cutting waste than you’d like. You can run the batts the “wrong way”, perpendicular to the joists, which will mean less waste but more installation work. I’ve done this before myself when I have some oddball stud cavities to fill. The resulting installation doesn’t look quite as nice, but it performs the same if you fit things properly.
I save my mineral wool scraps for commercial projects where it gets used as fire stop material stuffed into holes and conduit stubs, then sometimes getting covered with intumescent sealant. If my own guys don’t use it all, I give it away to electrical contractors I work with. Since this application just stuffs it in holes, any scraps work fine. This way I don’t have to throw anything but the smallest trimmings in the trash.
Bill
Bill:
That makes a lot of sense.
Is it better to install the safensound closer to the bottom of the floor above so there's space along the bottom of the joists in the basement ceiling to access plumbing and electrical?
I'm assuming the safensound typically goes in after the plumbing and electrical rough in. Though in this case, I could see installing it up in the joist bays after plumbing and before electrical.
- Wayne
Well, looking at the budget and the level of sound attenuation that's really necessary, I've come back to using resilient channel on the ceiling with one layer of 5/8" drywall and fiberglass insulation on the floor joist bays overhead. This 19" OC spacing makes everything a PITA.
Are foam panels a possibility in joist bays for sound? I can see installation being a PITA, with the chance for more gaps around wires and such.
Planning to use fiberglass insulation in the walls along with QuietRock on both sides of the one wall between the family space & mechanical/laundry room.
Planning to use 5/8" drywall throughout.
I know it won't be perfect, but better than baseline.
Also, drywall installers around here are busy, and any special requests are met with crickets.
- Wayne
Rigid foam won’t work for sound blocking nearly as well as fluffy insulation. You need mass and “squishiness” to block sound — the mass dampens the sound by resisting movement, the squishy stuff absorbs the sound as the sound tries to make its way through. Rigid foam doesn’t have much mass, and it isn’t very squishy, so it isn’t a very effective sound blocking material.
What you might want to do is get 23” wide batts and cut them to fit “sideways” in the joist bays. The 23” width is a standard, so easy to get, and it will mean less pieces to install compared to cutting 15” wide batts to install sideways. Mineral wool is SLIGHTLY better than fiberglass for sound, but it’s easier to install because it will stay in place on its own without any support wires. This might make mineral wool a better choice in your application.
Bill
Bill:
Thanks for that. If I'm feeling lazy, could I just cram the 23" wide batts into the ~18" bay? I know this compresses the material somewhat, and for this application, it might be fine.
Otherwise, I'm making a crap load of cuts and worrying about adding little retaining wires to hold it up.
Also, I'm planning to use canless LEDs. If they're not IC rated, I'll want to be sure I have something above them to be sure the insulation does not sag and rest on them, correct?
- Wayne
You’re not going to be able to stuff 23” wide mineral wool batts into an 18” wide cavity — they are much too stiff for that much stuffing. You can usually only realistically squish maybe an extra 1” to 1-1/2” of mineral wool batt into a cavity before the batt starts to get pretty deformed from all the force of squishing it in. Mineral wool is much less sauishable than fiberglass is since it is a much denser material (which is why it’s a bit better than fiberglass for sound reduction).
If you are using non-IC rated cans, then you can’t have them in contact with insulation so you’ll need to air gap them somehow. Usually this is done by boxing over the cans on the attic side so that there is an air gap all the way around the can. The thing that makes an “IC rated” can IC rated is a thermal switch to shut off the light of the can gets too hot. LEDs make a lot less heat than the old incandescent light bulbs did, so you do have less of a heat issue with LED fixtures. Code still says no insulation can touch a non-IC rated can though.
Bill
Bill;
Thx again. I meant squish the fiberglass.
Yeah, I was thinking I could build a little “box” with strapping I have lying around to keep the insulation off the tops of the lights.
Also, there’s a large closet adjacent to the room I’m aiming to keep somewhat quieter.
- Wayne
Most people build the boxes by gluing pieces of rigid foam together. It’s important to do a good job air sealing these boxes so use some care assembling and installing them. There are some purpose made products out there to cover recessed cans too, but I’ve never used any of them myself.
Bill
Thx again Bill.
In case I left it out, or it’s buried in this thread, this install is between a basement and first floor.
Good point about Air-tightness of the box as the canless light will become the sound leak-path through the drywall between the basement and the first floor.
Wayne.
What I did is selective application of this Amazon cheap sound deadening pads - knockoff of the stuff used for cars. I still have some left. Cut into pieces and applied to my ABS waste pipes and exposed metal plenum/return on the HVAC. Just that alone helped with resonance. Then I put some Roxul S&F where I could, then rocked the walls/ceiling. Can't hear the waste pipe at all.
Good idea. I’m planning to use Quiet rock on the one wall surface adjacent to the mechanical room, will wall insulation and 5/8 drywall. We’ll see how that does for the pipes, boiler, washer & dryer, and go from there.
Resilient channel, fiberglass, and 5/8” drywall on ceiling. All that the budget will allow.
Planning to use acoustic sealant in places. It’s low $$$ and I can do the detail work.
Wayne.
Pipes that don’t get hot are best sound insulated with a spiral wrap of MLV (mass loaded vinyl) sheet. Pipes that do get hot are more difficult, and your options are probably only rigid fiberglass pipe insulation which is unlikely to do a lot for sound, or a wrap of lead sheet which is sold for sound insulating purposes.
Bill