Strengthening Existing Floor Joists in Dropped Floor
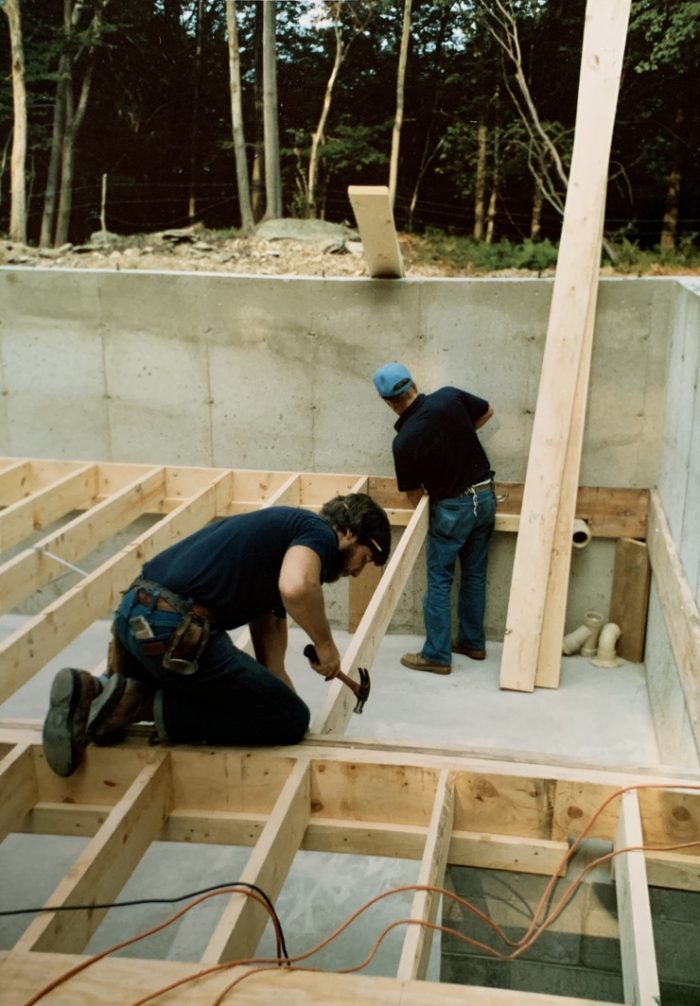
The first floor of my house is a dropped floor with 2×12 band bolted into the concrete foundation walls with a sill/ledger board that is nailed into the band. The joists rest on the sill/ledger and are nailed diagonally into the band.
I have been told that this is not up to code now, and I am wondering what my options are to improve the strength of this setup. For example, when I run the front loading washing machine on the first floor it shakes the house despite rubber dampening.
Option 1 – I looked into joist hangers, but with the sill/ledger board I would not have access on the underside to use.
Option 2 – Similar to #1 but without the bottom piece. Something like the Simpson Strong Tie Framing Angle A34 or A35 though I am not sure which is more appropriate.
Option 3 – Install additional joist blocking or bridging along with Option 2 as it seems that they used only minimal metal bridging every so often.
Any direction would be greatly appreciated!
GBA Detail Library
A collection of one thousand construction details organized by climate and house part


Replies
The house shaking may have little to do with this connection. Depending on the spans and other details, this connection can vary from "not too bad" to "already failing." Between the ledger strip and the toenails, this connection can be pretty strong. It's just hard to do well, so it's not really allowed in modern codes. That doesn't mean your is bad or going to fail. If the joists are not overspanned, one way to reinforce the connection is to make sure the ledger strip is well connected to the band, as it sounds like the band is well-connected to the foundation. Often, the ledger strip is only connected to the band with one or two nails per bay (or less). Adding nails or structural screws will help to keep the ledger from slipping off the band if the toenails fail.
An alternate repair involves cutting away the ledger strip, leaving or installing the small block of wood in the notch on the joist, and then installing hangers. If this is done well, it can provide a better/stronger connection than you've got now. But it's a bit finicky and not approved by the hanger manufacturers, so not warranteed. If there's no sign of slipping of the ledger strip or cracking at the root of the notch, I'm not sure I would do anything.
If the area below the laundry room is unfinished, supplemental support of the floor under the washing machine may be the easiest solution for the shaking. A couple of screw jacks and a wood beam could do it. That's cheap and easy.
Thanks, Pete. Do you have any recommendations for structural screws? The area below the washer is the small crawl space pictured. Is there an appropriate way to design the jack/beam combo?
https://www.grkfasteners.com/products/rss-rugged-structural-screw
I agree with Peter that the shaking is unlikely to be affected by the connection. Looks like there is a slab on grade only 3 or 4 feet below the floor in that picture? If you are not using that space for anything you could just build a little 2x4 wall with top and bottom plates at the middle of the joists. That would take out any “bounce”. Hard to get snug tight to the underside of the joists but could work with some shims.
For better vertical rigidity, consider some strategically located 4x4 posts down to the concrete floor. Jack up the floor slightly (like 1/8") to get a tight fit. Glue and bolt, remove the jack after the glue dries.
Our code allows for ledgers, they are relatively common in older houses. As long as it is nailed up properly (ours is 2 12D nails per joist), it is a solid connection. Looks like you have a 2x4 ledger which is way more solid the typical 2x2.
Strengthening the floor joist connection won't do much for shaking washer, what you want is to carry the load from there directly into the slab bellow. You can put an adjustable jack post under with a 2x6 triple ply header directly under the machine. This would would do way more to limit vibration through the structure.
The easiest way to stiffen the floor is to add some columns, and possibly a new beam too, somewhere midspan of the existing hoists. I'd add some columns under the existing beam first, since that's easiest, and see if that makes your floor solid enough for your liking. If it's still too bouncy, add another beam at the midspan point along the joists, and new columns to support it. You can use screw jacks and adjust them to be tight, or just cut a 4x4 a bit long and pound it into place. Either way works if you're careful, the idea is to get the new column just long enough (or adjusted tightly enough) to level out the floor. You don't want to overdo it and cause the floor to bow upwards.
Regarding the shaking, I agree with the other posters that it's probably not the connection to the foundation. I'd visually check the connections in the immediate area of the washer just to be safe (look for signs of seperation where the fasteners are at each connections), but my guess is they're all fine.
What I would do to make the washer more solid is to frame out a square under the washers, using something like 2x4 or 2x6 "sideways". Do the same thing on the slab directly underneath, and fasten that one to the slab. Put columns at the corners (unless one side is against the foundation wall), then run diagonal braces from opposite corners of the top square to the bottom square. This will transfer sideways forces to the slab and should make the floor much more solid and resistance to vibration, with the columns providing additional vertical support to reduce up and down movement of the floor.
Bill
Is there proper blocking between the joists? Blocking distributes the load and reduces bouncing.
Just to add on to what everyone else is saying, floor bounce is usually caused by undersized floor joists -- too small for their span, or too long for their width, depending on your perspective. If the end attachment is inadequate that usually fails catastrophically or semi-catastrophically -- the end sags. Joists can sag a lot without being in danger of breaking, the standards are very conservative. But bounce is annoying, it's disconcerting and it can lead to floorboards coming loose and drywall cracking or popping fasteners if there is a ceiling below. There is also a slight risk, you never want the framing members in your house moving because it tends to loosen the fasteners and over time they can fail.
You haven't told us what size your joists are, how long they are and the spacing between them. With that you can quickly tell if they are undersized. The easiest way to fix undersized joists is to reduce the distance they span, as several others have noted that can be done by supporting them in the middle. You can also reduce bounciness by tying together the joists, using blocking or a beam below.
Several posters have mentioned screw jacks, they generally aren't approved for permanent installation. What I've had good luck with is using a screw jack to lift a joist maybe a quarter inch past horizontal, get a support in there and then lower the joist onto it.
I have figured out why the washer may be having trouble...
The vertical waste pipe daylights from the upper floor into the crawl space just past the washer gray water pipe labeled in the photo below. The washer gray water pipe goes drains into the elbow of this sewer pipe.
The sewer pipe continues towards straight towards back wall, and then makes a left with a downward slope the whole time. As such, each one of the joists heading towards the back wall has a cutout at the ledger to allow the pipe to pass through, and after the pipe heads left it runs parallel to the joists until it exits the house (green arrows).
It appears that to allow for this pipe to pass, the builders went back and cut these joists at about 1/3 of the way, and added a perpendicular joist to connect the two sections. The rightmost portion of these shortened joists are also cut out at the ledger to allow the sewer pipe to pass through. It appears they built that 2x4 square support member to hold up this portion, as well as the bathtub at the corner of the wall on the floor above.
All joists around the perimeter appear to be tight on all sides, with the exception of this section where these spliced joists appear to be separating from that perpendicular joist as well as that perpendicular joist appears to be on the edge of the 2x4 support box. I can't imagine these joists are doing much especially given that they are separating from the middle perpendicular joist, and are cut out at the ledger.
Separately, I noticed one of the ledger boards has a significant gap at the base of it compared to the other three walls. Is this a cause for concern, or remedy besides air sealing?
Plumbers hacking up joists is not unheard of, and is a problem. There are rules about how big of a cut can be made in a joist, and where along the span it can be made. These rules are CRITICAL on TJI joists, and there are videos on youtube of DIY people chopping the chords on those to do plumbing (this is very dangerous, BTW, and can cause the joist to fail -- the chords are what carry all the load, not the web).
Luckily, you have regular lumber joists. Unluckily, they didn't do the "fix" correctly -- that extra "perpindicular joist" should be more than a single piece (normally would would be sistered with at least two members), so my guess is this fix wasn't done by the original framers, but who really knows. You'll want to brace it. There are various ways to do it, but the easiest is proabbly to run a new beam under the existing perpindicular piece, and support that beam with new columns. You could potentially also use a new column under each joist connection. If the joists are seperating, I would tack some steel strapping underneath to tie them together (run about a foot onto each joist on either side of the perpindicular piece) to limit how much they can open up in the future. If things are sagging, you'll need to preload things first, which is best done with a jackpost -- raise things a little, then insert a new column high enough to keep things level when you remove the jack post.
The broken piece probably means enough force was on it to cause it to fail. This is an indication that you have a problem. When doing the repair work, BE SURE to put in some temporary supports BEFORE you begin work. These temporary supports are normally enough to support the ENTIRE load, and this is typically done by building what amounts to a small studwall. You don't want anything to fail and come down on you while you're working on it, so BE SURE the supports you put in place BEFORE starting work will protect you. Do not take chances on this -- structural work can be very dangerous if not done correctly.
Bill
Thanks, Bill. Is the best person to first seek out to do this repair a structural engineer? I am am not sure if I am qualified to execute something of this scale.
It's probably not complex enough to need engineering, a competent framer or carpenter should be able to do it. If you want to be 100% sure everything is handled correctly, then have an engineer produce a set of drawings for you, then have your construction contractor build the engineer's design.
Bill