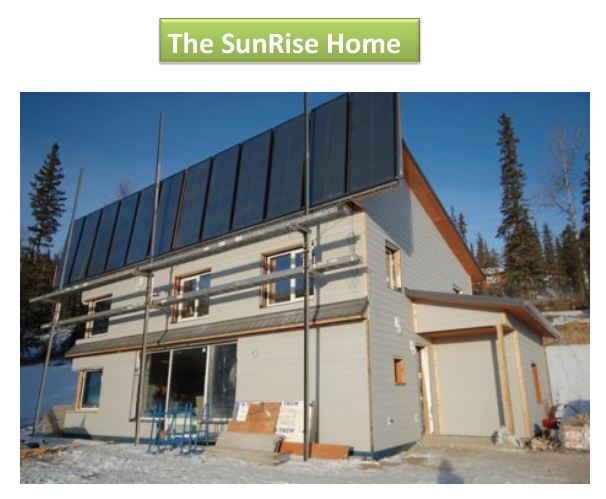
The SunRise Home.
user-757117
| Posted in General Questions on
I have been cruising this presentation by Thorsten Chlupp and wanted to see if anyone who might have actualy seen it, might have some comments.
http://passivehouse.us/passiveHouse/2010_Passive_House_Conference_Presentations,_November_6_files/2010%20Conference-Passiv%20Haus%20Alaska-Thorsten%20Chlupp.pdf
GBA Detail Library
A collection of one thousand construction details organized by climate and house part
Search and download construction details


Replies
My first impression is that the SunRise home would be not-so-affordable...
The quantities of materials used seem amazing to me...
The Bituthene... is that a standard detail for his FPSF foundations?
Is its primary purpose to provide a drainage plane or does it help secure the "wing" insulation to the vertical insulation?
Unfortunately, the PDF presentation isn't in very high resolution...
I like Thorsten's attitude about making "ultra-tight" "simple".
Is the redish line I have high-lighted representative of the "continuous" air barrier?
Does anyone have specifics on what materials were used to make the air barrier?
How about specific air-sealing details - types of tape, gaskets, locations, special techniques?
What is going on here?
Are the corners of the window boxes taped only to the Tyvek?
Are the boxes also taped to the sheathing layer behind the Tyvek as well?
Is that tape or strips of ice&water shield?
Lucas,
I thought you would find the project interesting.
I started up a thread over at JLC
http://forums.jlconline.com/forums/showthread.php?t=55640
All I know is from observing the presentation.
I think the pressure boundary at the plywood makes a lot of sense.
It looks like the note says the plwood is taped...
check out the panel orientation and the sun shadows in the photos ;--)
John, I find it very interesting. Thanks.
I noticed the panels too. Crazy. I wonder what that 12000 Gal. R60 tank in the Sunset Roost home cost? They kinda loose me there...
John, it appears Thorsten is using some type of plywood gusset to create a type of Larsen truss over the plywood sheathing.
Do you know how these gussets are attached to the sheathing?
There appear to be little "stubs" nailed over the Tyvek... or do they project through the Tyvek?
Are the gussets nailed to the sides of the "stubs"?
Lucas,
My reverse engineering from the photos .....
platform framed with 2x4 ceiling joists on the upper level
walls & joists completely wrapped in plywood
plywood joints and intersections are taped
plywood covered with house wrap
then roof trusses AHW (After House Wrap)
then cleats are strapped on
not-so-different from an idea that I had been playing around with
except trusses are added above the Attic Floor Deck and
Larsen-like trusses are strapped to the walls
Lucas,
I noticed that they did not build it like their cross-section showed.
The 2x4 service core(ceiling joists)sit on top of the plate
John, I am recosidering my own strategy now...
For continuity and simplicity, yours and Thorsten's details appear hard to beat.
"0.6 ACH_50 made simple"...
I think I will have to accept a not-quite-as-continuous approach with "air-tight" plywood.
The Riversong truss doesn't do plywood sheathing on the exterior of the inner stud wall...
Certain dyes have already been cast...
This is where I disagree with the "extremeness" of 0.6ACH50...
I don't think there is anything wrong with "extreme" airtightness as long as it is "simple".
Distantly related?
I think making the pressure boundary as simple as possible is the key thing.
The Wall and Ceiling pressure boundary is about 1/2" thick and it is virtually Continuous
It is very similar to Marc Rosenbaum's strategy ....
only there is a ventilated attic instead of a compact Roof
The ventilated attic is the "HAT"
When the roof cladding is replaced in the future...
The Air Barrier is not disturbed
Lucas
Interesting stuff...BTW you might want to check the spelling of Thorsten's last name in your OP...I believe it is Chlupp.
Lucas,
can you explain your 3 comments in more detail?
Is it the not-so-continuous structure or the thermal layer that you will be "accepting"
Thanks Garth.
John,
I had to get an engineer’s stamp to get a permit so I am committed to a Riversong style truss wall.
I haven’t been able to figure out how to locate a sheathing layer between the two rows of studs without getting away from the Riversong framing style.
With structural sheathing innermost, the rim joist becomes a “bump-out” in an otherwise continuous plane of “tightness”.
Consequences are added complexity.
Gaskets and “goo” instead of just tape.
Also, a service cavity is required if you want to minimize disruptions in air barrier continuity and keep services on the warm side – though maybe the latter is more of a cold climate thing…
I think having plywood at the exterior side of the inner studs makes the most sense.
For simplicity and because it creates an insulated service cavity on the warm side of the air barrier.
Just for the record, I still think the Riversong framing system is one of the best.
It just doesn’t “do” mid-wall sheathing is all.
The service chases allow for quite a bit of interior renovation over time without having to disturb the air barrier.
Lucas, could you not use joist hangers to hang your floor joists on the inside face of the plywood/walls. That would solve your continuity barrier. I think it was the guys at 100khouse.com that used that detail on one build.
Affordable is always relative. Since I paid for the project and it wasn't a funded research project I spend more than I wanted but less than some high taste homes we build for clients. And if I look at our outlook on energy prices it was actually cheap...
The SunRise home was for me an invaluable opportunity to push the limits, try out new concepts and be able to learn. Pretty much everything in the home is some sort of a prototype idea and with the help of thermal shutters on all windows it meets Passiv Haus in PHPP07 - which is no easy feat to achieve in a 14,000 HDD climate. Besides that it produces 100% of all its heating and DHW demand solely by either solar or a custom build masonry heater with integrated coils which are molded together in an integral energy system...which requires between 7 to 28 watts of electricity to move and distribute its energy/heat. There is no fossil fuel based heat source in the home - and we stay nice and toasty at 40 below and have not run out of hot water yet. It is simply amazing to see how efficient the home is - and how well the energy system works. And we started the system up under the worst conditions in the dead of winter in December. I see tremendous potential and already have the 3rd generation mapped out in my mind. Data loggers crunch away on the many sensors which have been placed throughout the different assemblies and parts of the many components which make up the home. The Cold Climate Research Center will monitor and crunch this data and analyze how these parts fair in reality.
Anyways, questions about the wall assembly: I wanted the performance of a REMOTE wall with all the goods I have learned to value from this wall system and replace the out insulation with a more renewable product - cellulose. EPS foam works very well, but it is a 100% petrol based product with high embodied energy. I named this variations the ARTIC wall, which is more or less a REMOTE wall insulated with cellulose and which is diffusion open to both directions and has no vapor barrier but a very airtight "diffusion" layer in form of air sealed and taped CDX plywood. At this point and time it is a Prototype wall assembly and I need to see more data from the sensors which have been placed throughout the wall sections before I am ready to claim this to be a good alternative wall assembly to REMOTE/PERSITS.
IMO the key in both assemblies is the placement of the airtightness layer within the assembly - where it can be continuous and most importantly - protected. If you place your ply/air/vapor layer on the inside frame face you just can't get there. Even if you did the best job (and hardest) to air seal you be surprised to see how fast this can deteriorate a few years with homeowners taking over. And you fight your installations of electrical, mechanical and plumbing - now, today and in the future. An installation layer is simply invaluable. Combine this with a fool proof pressure boundary and you got a system which just works. Traditional double walls can work well and create a very efficient home but also can have many problems build in. This is one of the reasons PERSITS was developed so long ago...
Why build a good house when you can build the best?
Happy Building, TC
PS: Lucas email me if you want a ARTIC wall detail, with a beta disclaimer at this point and time
Thorsten,
I realize you may not want to open the door to 100 questions.
My primary questions are about joining the plywood pieces.
It looks like the plywood is in a sweet spot where it does not experience extreme temperatures.
Did you use Euro-tape (Siga) or other?
Was I right about your construction sequence?
Did you skin the "ceiling joists" with plywood and then install the roof structure(trusses)
From the photos it looks like you decided there was no need for the Housewrap at the attic floor?
Or is the housewrap just not visible because it is covered in dust?
Thorsten, thanks very much for taking the time to comment on this thread.
I really appreciate the idea of "0.6 ACH_50 made simple".
I also appreciate your efforts to move to a less-foamy solution.
Like John I am also wondering what type of tape you chose to use at the seams of the CDX?
Is it the Grace/Vycor that is visible at the window boxes?
Thanks again Thorsten, and happy building to you too ;-)
All these questions about wall details when the most important part of the project is successful implementation of seasonal solar thermal storage. Hopefully you'll discuss this in greater detail in the future, Thorsten. We've been discussing this for an anchorage passivhaus for a year now.
But Mike, I already have a successful and time-tested solar storage system that meets my needs - 80 acres of boreal forest.
John O'brien, I'm not sure this would work in my case.
It is an interesting idea though...
I would think that it would be no different using joist hangers through 1/2cdx, into the rim, then it would be to do the alternative.
Something like the attached. You could swing both an internal and external cdx air barrier unbroken with this.. (theoretically). I'd appreciate the builders telling me why this won't work. ;)
John O'brien,
Your sketch would probably work well and would allow one cavity of insulation rather than two. Riversong says this is an important advantage of his system. However it doesn't address what Thorsten says about the services going interior of the air barrier. He's got the air barrier plywood midway through the insulation and no issues with services that penetrate the AB. Unfortunately there's no perfect combination of features. When the plywood goes at the exterior of the inner frame, there are two cavities to dense pack, and it's not as easy to assemble a truss--but it is possible, as in Thorsten's project here.
Window extension detail: the ply bucks are continuous and fastened to the main 2x6 framed opening, then standard flashing detail plus air sealed with 4"vycor tape. Tyvek is v cut at the header and overlaps the buck...pretty much your standard detail.
Foundation: Keeping this sort of foundation dry in our extreme cold climate (frost heave) is crucial - waterproofed in this manner you create a fool proof defense for your foundation...which is a core part of your building after all
Tapes: We mainly use Vykor and 3M...Euro tapes are nice but too expensive. As your tape is on your warm side and protected it is perfectly fine and I have never seen issues in all our testing...or the more the 50 REMOTE homes I have built over the years.
Ceiling: Correct, you build the platform - or your lid, air seal and detail and then roll your truss on the ceiling deck you created. The slide still had and older detail - for the sake of utility chasing it makes more sense to run the ceiling joist over the top plates so wiring can run right into the ceiling. I used Tyvek on the lid, it's just dust covered ...got to love cellulose!
Mike: I agree with you, interesting :-) I most likely will give a talk in ANC and Wasilla in April...email if you want to be in the loop. If you're coming up north I am happy to give you a tour. This isn't the best place to discuss renewable energy systems.
Thomas: You don't need to insulate the interior frame, which sometimes might be the easier/cheaper solution. I need a lot of insulation in my extreme cold climate - in a cold climate an outside blanket will do all you need it to do. It isn't about a perfect combination of features but what your ultimate goal is as far as performance and longevity of your structure you're trying to build goes. Your pressure boundary is the key to this question - and IMO and my humble experience worth any extra effort to get it right.
Thomas, I left out the interior 2x2 strapping channel that would be the service layer. It would cover up the 2" of foam as well in the previous diagram I had.
John O'Brien, I didn't mean to suggest that your detail wouldn't work.
Only that I'm not sure it would work in my case.
I'd have to look into it...
Anyway, I think the idea is interesting.
Thorsten,
I noticed that there is no blocking under the long edge plywood joints.
Did you use a Tongue&Groove plywood ... or is the tape holding the seam together?
I am also curious about the housewrap outboard of the ceiling plywood and the wall plywood.
Is this to enhance the Air control layer or protection from liquid water?
I was just at the lumber yard the other day and they had a 1/2" "t&g" plywood for roof sheathing applications they called "V-groove".
Previously, I had always believed that one needed to step up to 5/8" to get t&g...
Here it is - "Easy T&G Roof":
http://www.canply.org/english/products/easy_tg/easytgroof.htm
I thought it might be "helpful" to copy Thorsten Chlupp's definition of Out-Insulation here at the "SunRise Home" Thread:
That V-groove ply would make for a pretty slick air barrier Lucas. Lock that together with some black death, plus some tape for good measure.
John O, I think so too... I'm not sure how much extra "tightness" it'll give me but if anything the extra support along the seams should make for a more durable air barrier than with square edge... It's only an extra $300 on the whole project to go entirely with the "V-groove".
John B, thanks for reposting Thorsten's comments on this thread.
Hmmm...
I had a "1/2 to 1/2 insulation ration" drawing to post but for some reason the image that appears on my post is not the same as the one as I uploaded...
What's up with that?
Lucas,
did you try to give your image a new name?
Glad to see you are still "thinking out loud"
Buildable is VERY important
I have mentioned this on another thread....
There is another advantage to the plywood attic deck....
It provides a safe "stage" for building"the roof "...stick frame or trusses.
A system like this allows blower door testing before drywall
which was not a feature of the traditional REMOTE
I understand the advantage of the deep-set and "overinsulated" windows for Thorsten's Climate and because of the very thick window frames.
In a not-so-extreme climate with not-so-thick window frames
I think an "outie" window(like Riversong's) would be much more BUILDABLE.
I can't help but notice when I look thru the SunRise slide presentation that the final casing for the windows is avoided until the very last minute.
This suggests that it might be very fussy and labor intensive
Lucas, looks like you grasped the concept and the important difference. There are a few more rather important characteristics which we hadn't even talked about...like the lambda value and decrement delay. I will email you my draft write up on the new wall soon, which will explain some of these characteristics. I like to go over some datasets before I send it, but you should see it in a few days. I say that, performance is incredible...I have not actively heated my house for 3 weeks now...if you check the weather channel for temperatures in Fairbanks Alaska you will see that it was mainly nice and sunny but still cold...with close to 30 below night temperatures. Nevertheless our indoor temperature maintains 68-70F by passive solar gain.
Roof deck/ceiling: I did not use T+G only standard CDX Plywood which we taped with 4" Vycor...it was plenty strong for what it was supposed to do. It surely makes running trusses safer, easier and faster. The ceiling does not have to be flat; we quite often do vaulted ceiling trusses for our clients. I used Tyvek in addition to the taped and sealed plywood mainly because I had a many people voice great concerns about building diffusion open wall system with cellulose in our extreme cold climate and an extra layer of protection with high permeability was the conservative part of me giving in. With the data we collect now I believe that was unnecessary.
The home is tight - final test with HRV system running on high came in at 0.48 ACH_50, the residual loss is accounted by some ventilation leakage from the HRV and the 6"make-up air (passively sealed with a cold air trap) and the 8" masonry heater chimney stack, which requires a slight opening in the closed damper position by code.
John B. - a standard REMOTE can be blower door tested the same before drywall - you HAVE to test before drywall or you missed your best window of opportunity.
Nothing fuzzy about the window detail...the only reason this happened late is because of glazing issues which we had, delaying the windows. I experimented with many different glassing variations which in the end caused the delay...your typical major pain. I know that you don't like the idea of placing the windows in the wall center where they belong, but in a heating climate this is really by far the better option - 20-22% increase in efficiency in your weakest part of your wall is very hard to argue against. The ARTIC wall detail makes the inset placement very easy and labor/cost wise I really don't see a difference...I understand that you don't like the looks - I hear that from clients quite often - as it is just not done normally and so seems odd at first. But this is to me really only a fashion versus function argument. You really, really want function on this part if you're in any way concerned about energy efficiency of your building...
Rolling trusses made easy...
Still processing but after further review of the ARCTIC profile…
In my opinion, the most significant aspect of the ARCTIC profile is the location of the air barrier. It is in a sweet spot:
- Its location allows it to have the simplest pressure plane of any air barrier system - it is a cube and that is a good thing.
- Its location allows it to stay warm and therefore “dry” - no condensation.
- Its location allows it to stay protected for the life of the structure - no extra service cavity required.
In my opinion, secondary to the importance of the location of the AB, but outstanding never the less, are (among other things):
- The choice of a Larsen-style truss system to create “outsulation” - not-so-foamy insulation exterior to the air barrier that can be varied in thickness to adjust the “1/3 to 2/3 insulation ratios” to suit the climate.
- Climate appropriate permeability - the air barrier can do double duty as vapour retarder and still allows drying whichever way it needs to.
Considering the R values involved, this system is very “buildable”.
This system requires some compromises - like flat ceilings.
“Extreme tightness” is almost guaranteed with attention to details like window and door build-outs.
The “extreme tightness” and drying potential will likely have a strong impact on durability on both sides of the air barrier.
Using the same basic approach as ARCTIC and relative to the location of the air barrier, I wonder if a “1/2 to 1/2 insulation ratio would work best in mixed climates?
Using a slightly different approach from ARCTIC and relative to the location of the air barrier, I wonder if a “2/3 to 1/2 insulation ratio”, a sort of “inverse ARCTIC” would be best for cooling dominated climates.
Thorsten, thanks very much for sharing.
It has given me a lot to think about.
SunRise home has been "grist for the mill" so to speak...
I'm looking forward to seeing further information.
I think you're really onto something here...
I agree with John B that buildability is very important.
The fact that this envelope can be made so tight with such relative ease is worth making a few compromises for.
I like "rolling trusses made easy" almost as much as I like "0.6ACH_50 made easy".
Thorsten,
Sorry about my misunderstanding of the standard REMOTE
I thought from looking at your JLC article that the ceiling air barrier was the Poly and that the Poly was put up at the same time as the drywall.
looking back at the article ...I see that I was wrong
The new method (ARCTIC)certainly lines up the layers in a way that was missing before.
Thanks for returning with more answers... I was afraid we were wearing you out ;--)
Of course build ability is VERY important. Don't matter if I can build the most efficient home on the planet if no one can afford it. I build homes for a living, that's how I feed my family and pay my bills. I have a very grand interest in Building Science and developing alternative means of heating our homes but at the end of the day I am a Builder and know how to swing a hammer.
Value engineering is a big part on any project I do...I really don't like to make things complicated or unnecessary expensive - and we spend a good amount of time perfecting details and figuring out best ways to keep costs down. On average I turn-key a home in 90 days - and we can do so because of teamwork, clear processes, quality control and efficiency. KISS rules...
John - don't you know it! No I idea how I always get sucked back over here...every time it seems I get in some silly argument which makes me sometimes wonder if I am from a different planet - gets old quickly...and I already have 5 jobs as it is.
Thorsten,
Just to be clear... I admire your ARCTIC wall and Roof Deck Ceiling because it looks to be very BUILDABLE.
Another aspect of "buildability" that gets over-looked sometimes is that it tends to translate into lower energy methods.
"Walking" up large trusses on a deck as opposed to bringing in the boom truck for example.
I have put up large trusses by hand before. Looking at your photo Thorsten, I shake my head and wonder why anyone would want to do it another way.
John, I have always liked the "outie" approach as well for the same reason.
Thorsten, I understand the performance advantage you describe with a centre installation...
I like the way the bottom of the rough openings are sloped - instead of just tacking in some backer rod...
From a "buildability" perspective:
Are the 2xs that underlie the sloped plywood buck actualy beveled?
How difficult was it to frame the ROs at the interior and exterior to ensure the correct slope?
How difficult was it to ensure that the RO size was correct at the correct point within the wall profile?
Any carpenter worth their salt should be able to frame that style opening - I'm just wondering about the labour time...
I'm unclear, in a cellulose-insulated wall with plywood on the outside of the inside wall, what type of sheathing contains the cellulose on the outside wall? Another layer of plywood? I suspect the wall profile diagrams in Thorsten's pdf stated what that sheathing is, but I wasn't able to read the fuzzy fine print.
Also, I'm wondering what the brand name of the exterior door is, and also the brand of the thermal shutters.
Lucas, good thinking. I actually modified the window detail during construction to an easier and more practical solution. We basically build the bottoms flat until midsection to where the window installs and then dropped it at 10 degree slope outward for drainage (important) – the two sides are cut accordingly in the shape needed. This way your not dealing with your RO question on the sloped part. On your CDS you add the extra width of your ¾ ply buck and frame the window opening accordingly. Once your closed in on the core structure and your trusses are rolled you get your cutlist going (if it isn’t yet on your CDs) and you precut and prebuild all the ply window extensions…drop them in the ROs and nail them of and flash accordingly…done deal. A good carpenter can build them quickly. You want to also use your ply pcs as guides for your overinsulation and precut them at the same time. Then you establish your window installation lines, add temp blocks on the exterior face and install them easily from the inside of your building. You catch the exterior overinsulation with your precuts from earlier when you’re siding and your working at that plain anyways. If you layout your workflow right it really goes fast and does not add much time and labor.
Jack: You do NOT want to add an outside plywood layer – you really want something very permeable as you exterior weather barrier. You will limit your drying potential considerably with a secondary ply layer – besides your cost go up. You can use homesate or an open fiberboard – or simply Tyvek…which is what I recommend. Run up your bottom skin layer, nail your 1x4 strapping on (rainscreen) and make sure you keep the Tyvek tight and then start blowing the cellulose in your cavity from the outside. This way you can see what you’re doing and have good control over your blown-in installation and you can ensure that you don’t have voids. Windows you blow just like on a bib system with a slit in the Tyvek. Works like a champ. The Tyvek gives you a very good feedback also on your density of the install and you can tap it like on a bib system. On a two story building you finish the upper layer after you blown the first floor and then blow it out from the attic. It goes really fast, and you can run multiple hoses to speed things up.
Doors and Thermal shutters are built from us in house, there isn’t anything like it on the market. There is a slide about the exterior door – I am working the bugs out of them right now and we are data logging performance. Once the exterior doors are ready for production we will offer them commercially at one point – from R-20 to R-60, 7 lock points, airtight and thermal bridge free.…since I am just so feed up with the fact that you cannot buy a darn door anywhere in North America which actually works and functions in cold climates.
Blown-in from exterior, wrapping the cozy blanket around the building :-)
A couple more questions for you Thorsten...
1] Are you hanging your trusses from the wall, or are you also resting them on the EPS base.
2] Is there any reason you kept the EPS a few inches from the slab grade.
3] With your 2x4 ceiling/plywood, how would you have handled that detail with no internal bearing walls. I'm assuming 2x4's won't span 20+ feet very well.
So many cool things. How many engineering stamps did you need?
Thorsten, thanks again. I appreciate the photos.
Hopefully you're reading this atop some high ground.
Tsunami warnings issued for the entire Pacific rim...
http://wcatwc.arh.noaa.gov/events/eventmap.php
Thorsten, the questions continue... :)
Are you dense-packing the cellulose in your walls? If so, how do you keep the Tyvek from bulging out? If not, how do you keep the cellulose from settling, especially under windows or in multi-story bays?
It appears you are using vacuum panels to insulate your exterior doors. Who makes the panels? Apparently you are convinced that the panels won't loose their vacuum over time? Could you clarify what you meant by "There is a slide about the exterior door"? Does the door slide rather than swing, or are you using a sliding insulating panel to further insulate the door (perhaps at night)?
Would you mind giving more details for your sliding insulating window shutters? Since you have an uninsulated inner service wall that would create a great space to store the shutters, except that then your window headers would have to be twice as wide as the window -- if I understand it correctly.
You say you are using a masonry heater in your house. Do you mean a wood-burning masonry heater? In another thread on this forum the question of using a masonry heater in a small superinsulated house was discussed.
https://www.greenbuildingadvisor.com/community/forum/general-questions/19546/masonry-heaters-superinsulated-house
https://www.greenbuildingadvisor.com/blogs/dept/green-building-blog/are-masonry-heaters-good-match-superinsulated-houses
What style and size is your heater? Some respondents to that thread thought that a masonry heater would be overkill for a superinsulated house. Are you heating your house directly from the stove, or are you just heating the water in your storage tank, for use later when needed?
You also said that your heat circulating system uses just 7-28 watts of power. Very impressive! Are you distributing heat via hot air, or hot water?
There is no difference in the core structure – you frame your building the same as any other – all the structural loads are on the main framing, shear from the CDX plywood, trusses are load bearing on the exterior walls and just have a longer tail and artic heel. Build the core, get weathered in and a roof on quickly – minimize weather exposure, all the Trades can work inside and complete ROs whilst the exterior outinsulation is build. The outer skin is balloon framed on the outside including the gable end attic walls.
The 2x4 ceiling structure is built on your framing layout and fastened to the bottom truss chord with long screws…parts which span to far need some temp bracing until trusses are installed and then they are secured to the truss, which solves the question on longer spans – not like you would get far with a 2x4 otherwise ;-)
The EPS base from the foundation is kept on a different elevation to ensure you have no thermal bridge on the plate level – which is always a weak point. This way the out insulation completely covers this transition and eliminates any cold bridges.
Masonry heater, yes I was of course talking about a custom build masonry heater – which obviously burns wood. I design my homes more or less around a masonry heater, it is the center of the building with its function and beauty. There is simply no more efficient way to burn wood and no more comfortable heat in a home. A regular woodstove has no place for me in a superinsulated home – but the very special characteristics of a masonry heater make it a match which is very hard to beat – especially if you integrate DHW in the equation.
I find that most people simply have no clue what they truly are and maybe heard and read a little about them but once they hear the price tag they lose interest. I don’t know anyone who has a masonry heater who doesn’t simply love and treasure it. In a nutshell, you burn a very hot fire at close to the holly grail of 2000F at a very clean combustion rate, the hot exhaust is passing through between 21 to 32 feet of heat scrubbing channels on both sides within the heater before it gets to the stack. All the heat is stored in the heaters mass (2-4 tons) and slowly radiates out…no overheating but radiant heat for up to 24/48 hours…if designed right you can at the same time meet your DHW needs at the same token (with 7 watts of electricity and a handful of dry wood).
What doesn’t makes sense here?
Anyways, no details on the shutters or the doors at this point and time…this is all in the prototype stage and undergoes datalogging and field testing right now. Once I worked out the bugs I will publish the findings and details, it really is premature right now…
PS: Jack, I was referring to one of the slides of the presentation which shows some details on the exterior door…energy system heat distribution, I distribute it through radiant loops from the storage tank or directly from the collectors. The next generation will be a tad different, I had some genius idea I already tested out which will be simpler and cheaper.
The SunRise home is really kind of my lab right now and I am tinkering and modifying with what I am able to learn from it every day…and I will be able to make this system very buildable and feasible…100% heating and DHW only by renewable energy (in a 14,000 HDD climate), that is my main focus at this point and time.
Our local paper ran an article yesterday and today on two of Thorsten's buildings. See http://newsminer.com/view/full_story/12332362/article-Builder-uses-solar-power-to-heat-Fairbanks-home-in-the-winter?instance=home_lead_story&sms_ss=twitter&at_xt=4d7d0430951362c3,0 for yesterday's, and here for today's. http://newsminer.com
Could someone help me with some of the framing details for Thorsten’s external-truss cellulose-filled walls, assuming that the cladding will be horizontal siding like fiber cement? How are the exterior corners created from the last truss at the ends of the interior framed walls? Given the 3/4" rain screen air gap created by the 1x4 strapping, how is that gap finished at the bottom, so that water can drain out, but insects can’t get in?
Corners are more or less standard details...depending on your siding you use a 1x6 or 1x10 depending on your corner post width on your finish. With fiber cement we use 1x6, but we make our own corners from cedar and rabbit them. We use Bituthene flaps stapled to the 1x4s under all the joints on the siding.
Of course you want to screen of your bottoms of your rain screen to keep critters out. Staple on your standard 8 inch screen material usually used for building vented soffits and staple it on to your framing 2" above your foundation flashing, nail on your 1x4s, fold over the screen material and staple it on the face.
Very impressive building. Are the sections and other drawings available for viewing? The one in the pdf presentations are fuzzy, and impossible to read the details.
I noticed that Thorsten has updated his website...
http://www.reina-llc.com/
and added lecture videos
http://www.reina-llc.com/resources/videos1/
and pdf Slideshow (for the lectures)
http://www.reina-llc.com/resources/videos/
Thanks John.
I'll have to have a peruse when I have a moment.
Many have been interested about this project and with my insanely busy life I have done a very poor job getting promised information out. My apologies. For anyone interested in a progress update on the performance of the building ACAT filmed a talk I gave in Anchorage this spring about the measured performance a year later and generously made it available. It can be found here: http://youtu.be/Xen_VWyDezY
Disclaimer: It is over two hours, lots of my usual rumbling, view at your own risk.
An official project report by the research center is still not released - simply too much to do, with so little time to do it all. Time has become such an issue and the 20 hour days getting old.
On a side note - the concepts of the SunRise project really have become main stream for us this year and all of our projects are based on the model of superinsulation, integrated solar heat, seasonal storage and biomass backup at almost zero energy level. We are doing some way cool projects this year ;- )
Happy Building - TC
Thorsten,
Thanks for checking in and I appreciate the link - I will check it out for sure.
I'm looking forward to seeing what comes next.
Cheers.