
Image Credit: Peter Yost The original sink had to go; it just took up too much room (this sink did end up at the local ReNew Salvage store).
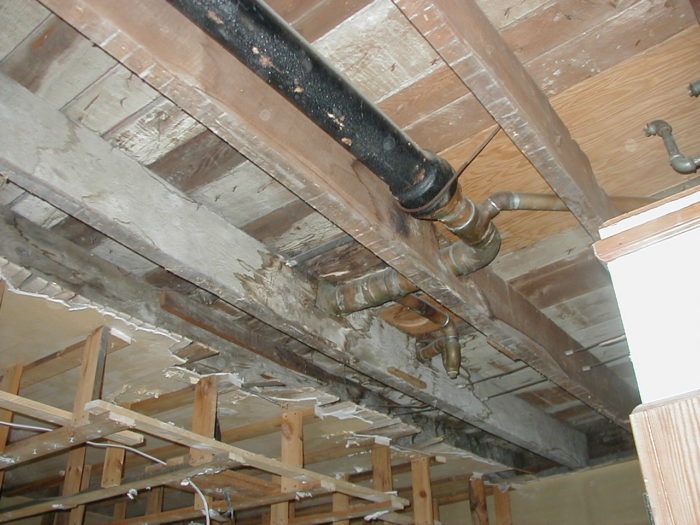
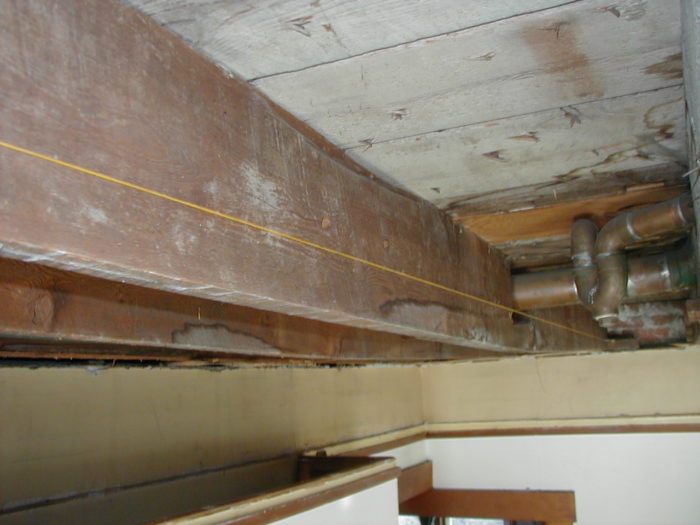
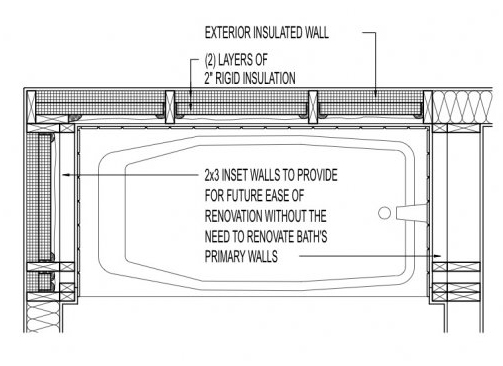
Image Credit: Peter Yost This is the floor framing for the bath as seen from the kitchen directly below the bath. Long ago, a plumber cut through three consecutive joists to install the waste line for the toilet. Note the 1x3s for the kitchen's dropped ceiling — an important aspect of the floor-framing solution.
Image Credit: Peter Yost The yellow string line is just about level, revealing a serious drop in the bathroom floor framing. The slope and "spring" to the bath floor was obvious and disturbing to almost everyone — not just the carpenters using the upstairs bathroom.
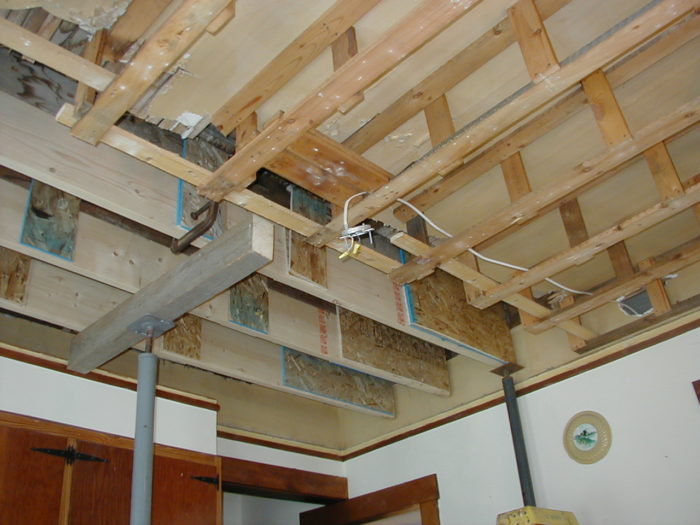
Image Credit: Peter Yost The framing solution was to sister new 2 by 10s underneath each of the compromised bath floor joists. The dropped ceiling in the kitchen provided enough room to permit this. We got back most of the floor sag before fastening the OSB gussets joining the new and old aligned floor framing.
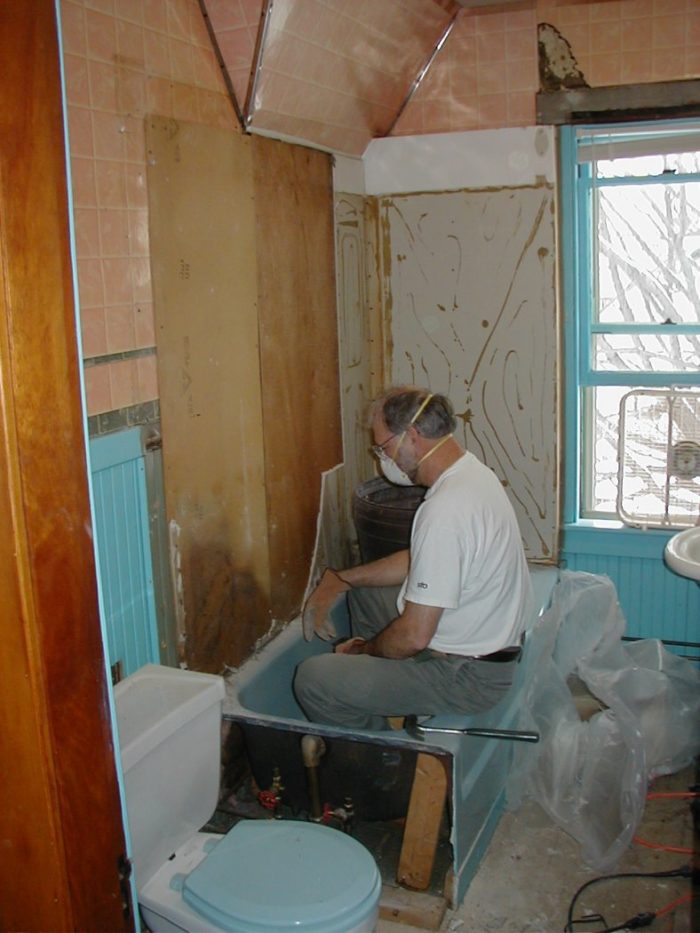
Image Credit: Peter Yost As suspected, there was plenty of moisture damage behind the failing sectional tub-surround panels. A window exhaust fan ran continuously, 24/7, during the renovation — an important strategy to help dry the damaged areas and to keep dust and mold out of the rest of the house.
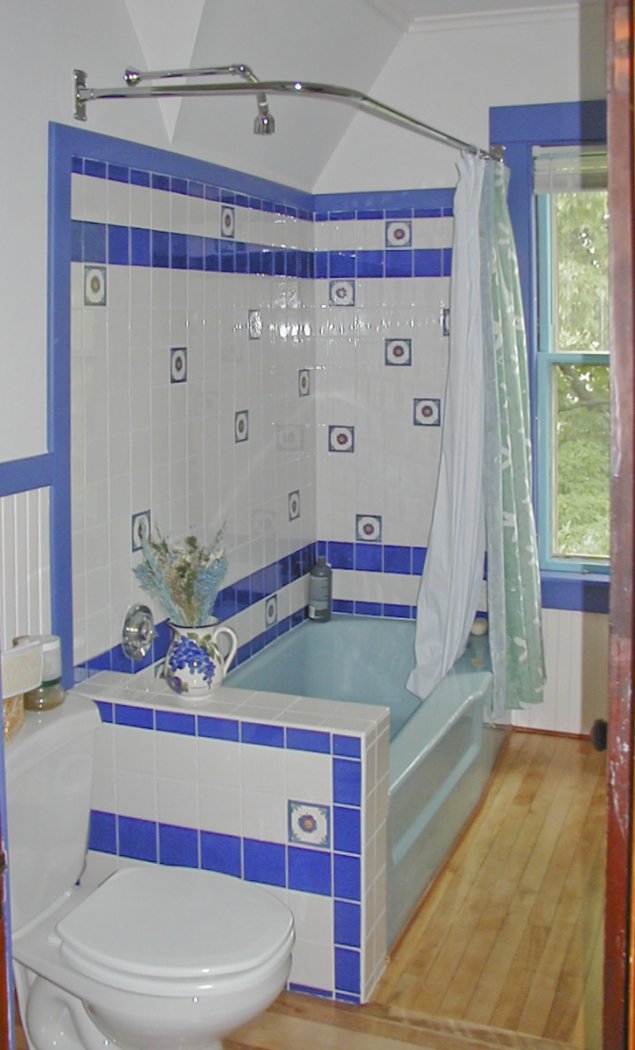
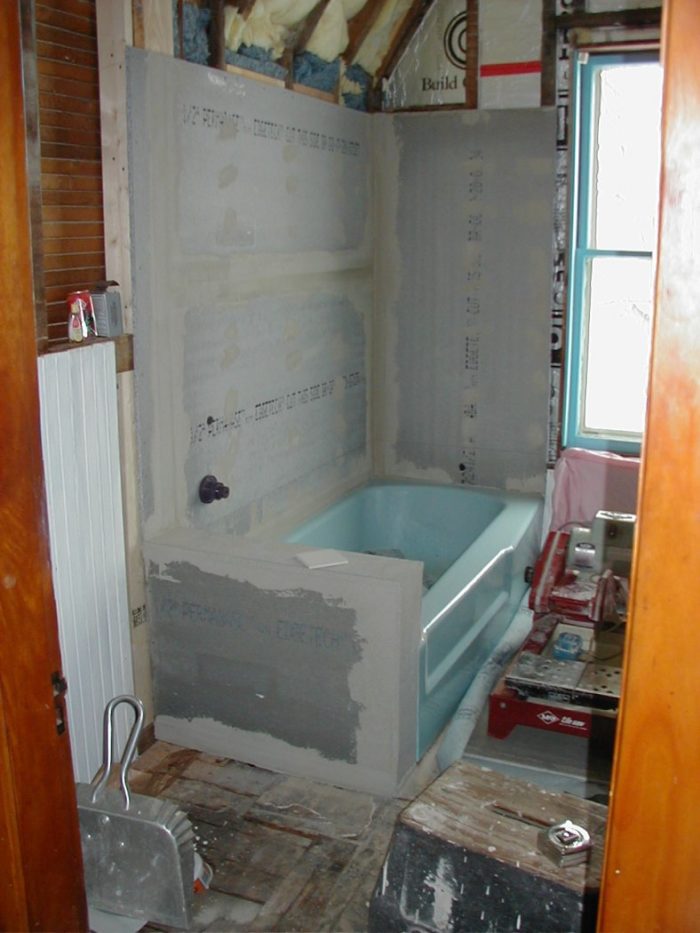
Image Credit: Peter Yost After a lot of wall straightening, the Durock tub surround is just about ready for tile. Since the baby blue cast-iron tub was in mint condition, it was retained, and the new bath's color scheme was designed around it.
Image Credit: Peter Yost You wouldn't think that just a couple of inches less projection on the bath sink would make much difference — but in a room this tight on space, it did.
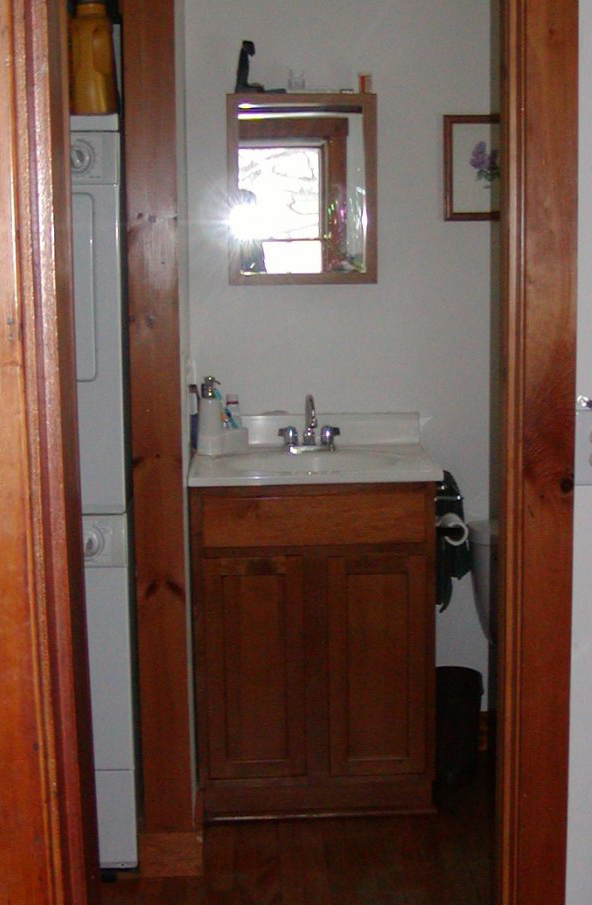
Image Credit: Peter Yost Just off the kitchen, we gave up half of a big pantry to create a half bath and laundry room.
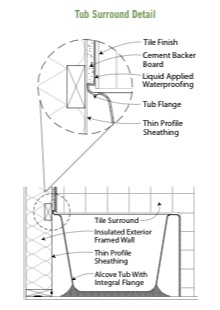
Image Credit: Peter Yost We used foil-faced rigid foam insulation between the studs in the tub surround area. The foam was rough cut and spray foamed between the studs, following this GBA detail (log number 9-01030).
Image Credit: GNA Note how the cement backer board's bottom edge sits right on the turned-up lip of the tub, that joint is sealed with a liquid-applied waterproofing (such as C-Cure), and then the finished tile runs a bit past this joint but is held up off of the tub and NOT sealed or grouted. This creates a free-draining space at the bottom course of the ceramic tile.
Image Credit: Steve Baczek
Making a 50-square-foot full bathroom work
Our second-floor, 50-square-foot full bathroom provides the only bathing in this 100-year-old house, so we had to make it work. We wanted to make the room feel bigger and deal with what we were sure was structural damage around the toilet. Underneath several layers of failing linoleum, we found the original beautiful yellow birch flooring, but also floor framing so compromised that the toilet waste line was “structural.”
How the kitchen ceiling assembly saved us
The water damage extended to the kitchen ceiling below, so we could combine replacing the kitchen ceiling with the bath remodel. The bad news was that opening up the kitchen ceiling revealed three 4-plus-inch notches in three consecutive floor joists in the bathroom; there was a sag of at least 5 inches.
The good news was that the kitchen ceiling was a dropped ceiling, providing enough room to “stack” new floor framing underneath the three failing floor joists. OSB gussets were extensively screwed to both the new (bottom) and old (top) two-bys after we had jacked out as much of the floor’s sag as we felt we safely could.
Dealing with the hand you are dealt
We really did not like the baby-blue tub, but it was cast iron and in perfect shape. We spent a lot of time looking through tile samples before coming across an accent tile that worked well with the tub color.
We also struggled with the existing sink; it was small, but even so, it jutted out more than 16 inches into the 35-inch space between the tub and the opposite wall on which the sink was hung. We finally found a wall-mounted sink just 13 inches deep that does the job.
Would we like a bathroom double the size with decent counter space? Yes, we would, but the new bathroom is attractive and functional, and we were simply unwilling to reduce the adjacent bedroom size to create a bigger bath. After all, which room do you spend more time in?
Looking ahead as we focused near-term
Not only was the 50-square-foot upstairs bath the only full bath in the house when we moved in in 2000, it was the only bathroom in the house. And there was no laundry room (or even a laundry hookup).
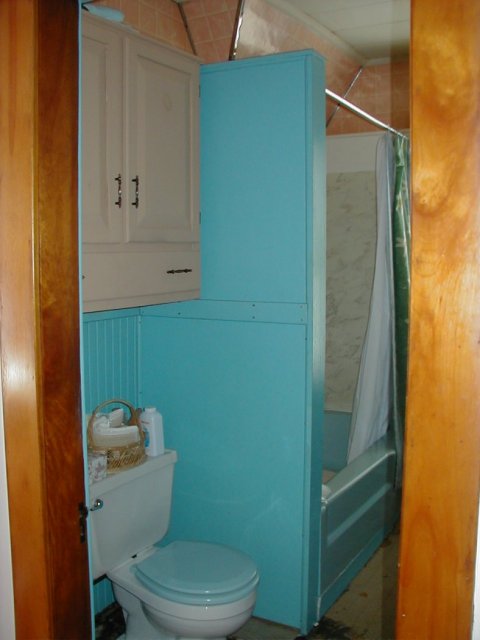
The remodel of the upstairs bath occurred at the same time as a remodel of the large (7′ x 10′) kitchen pantry, which was truncated to create a half bath plus stacked laundry. Again, the space was tight but perfectly functional.
Those two projects anticipated another plan: to eventually move the stacked washer and dryer to the basement and build a shower stall in the downstairs bathroom laundry space, gaining a 3/4 bath just as the girls turn into teenagers.
Weekly Newsletter
Get building science and energy efficiency advice, plus special offers, in your inbox.
General Specs and Team
| Location: | Brattleboro, VT |
|---|---|
| Living Space: | 50 |
| Cost: | 70 |
| Additional Notes: | This cost includes the floor framing and the new finish on the kitchen ceiling. Although it includes some labor costs, it does not include the author's labor. |


2 Comments
Real costs, please?
In my opinion, there's no way this remodel, including materials, the floor jacking and repairs in the kitchen could have cost (USD/sq. ft.): $70/sqf. That's $3,500.
What about materials?
Can you please expand on this, and give us readers the REAL cost?
Real cost of bath retrofit
Yes, it does seem mighty low and I will try to elaborate and make it more real:
1. tracking costs: my wife is a bookkeeper and dumps all materials, labor, and tool purchases for our home into a single line item. I arrived at the $3500 by adding up all of the costs in our home repair line item over the 3 months I worked on this project. If I add in the couple of months "bracketing" this project, the cost would go up by no more than another $500.
2. The materials in this project were quite spare: 12 square feet of birch flooring, tile backer board, ceramic tiles, thinset, and grout, the 2 by 10s, and gypsum board, paint, the sink (free toilet and reused tub). This was a labor-intensive project for which including my labor could very well double the total project cost. Unfortunately, I was not quite smart enough to log my hours on any of my projects; sure wish I had.
Hope this is helpful.
Log in or create an account to post a comment.
Sign up Log in