Installing a Grab Bar
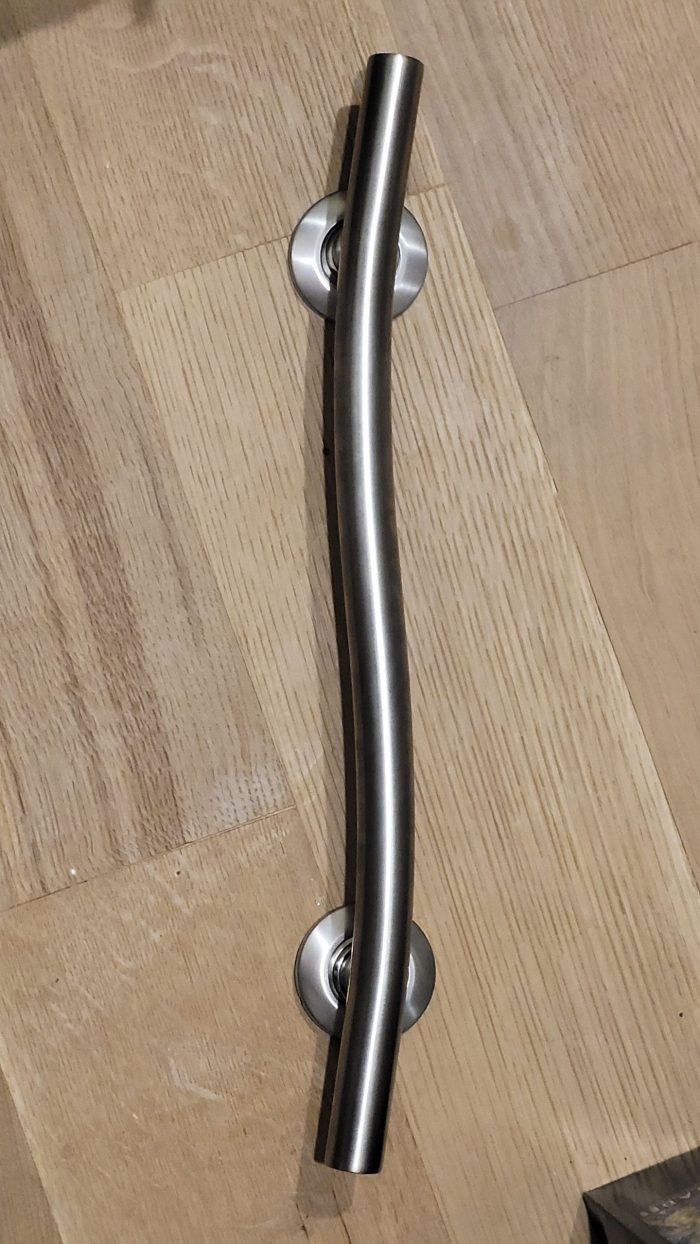
Not a green building question, but I like the experts here. I need to install a toilet grab bar in our guest bathroom for a regular guest. Sounds like a simple project, but . . . . In pics, you can see the grab bar, one of the few with mounting points 16″ apart.
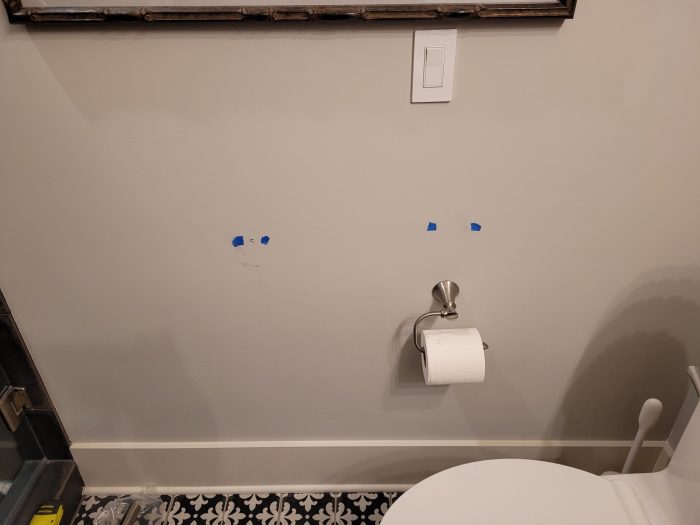
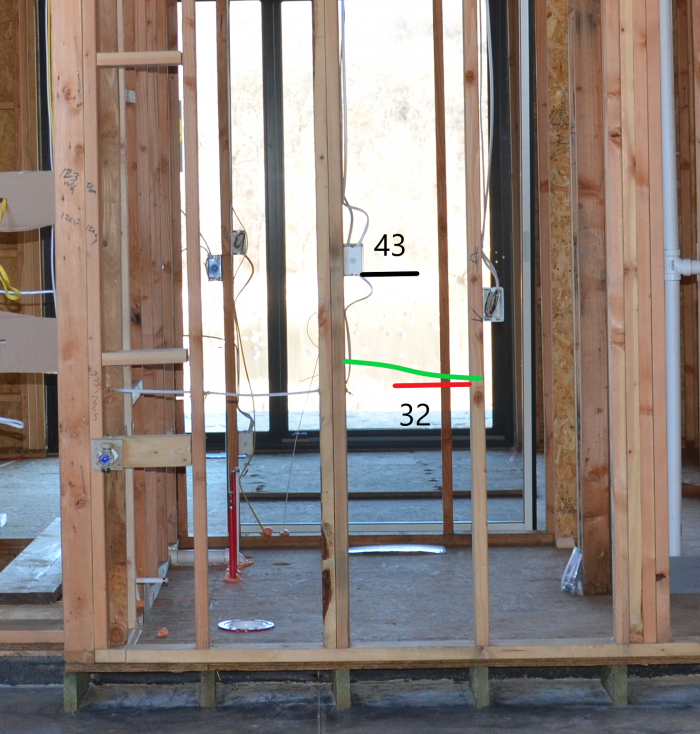
Pics also show the wall in the bath with the two studs marked by blue tape and you may be able to see the drilled hole between tape points on left. Last pic shows the wall, pre-insulation from the outside of the wall in the garage, so pictured studs are reversed from finished photo inside bath.
For sure, the junction box for fan on inside bath is 43″ off floor as marked in black. The lower mount, below the garage outlet, marked in red, is 32″ off bath floor but only estimated location in picture. Green is the planned grab bar location.
Because mount covers are already attached to bar, it’s a bit difficult to drill perpendicular to the wall. I utilized a 3/32″ x 12″ long bit to help with that. The included screws are 2-1/2″ long, plus 1/2″ drywall, I marked the drill bit for 3″ penetration.
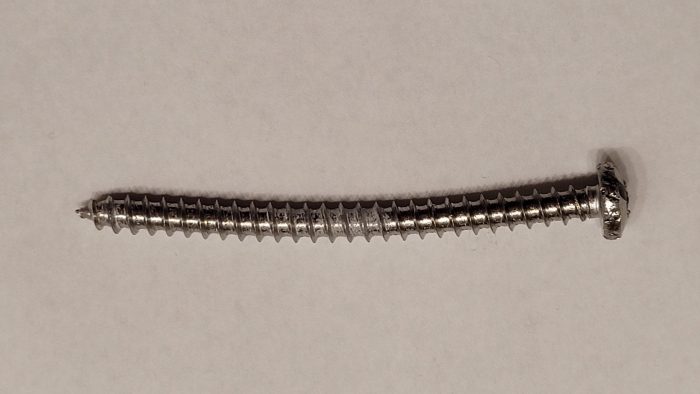
At some point drilling became difficult, then impossible. From the picture, there are no obstructions, a clean wood stud. Drilled in the area of where the red & green lines meet on single stud. Put the phillips screw on a battery impact driver and was difficult, then impossible. Got about 1-1/2″ penetration and felt like hitting a rock or steel. The impact driver couldn’t even reverse the screw. Unscrewed it with some RoboGrips. See pic for how bent screw is.
The only thing I can think of is hitting the knot right below where the red & green meet. But would a knot stop a drill bit and an impact driver? What other possibilities are there?
On the other mounting point, I’m a bit too close for comfort on the electrical wire going through the double-stud. Any way to detect the wire? My little red-light, beep tester isn’t sensitive enough to go that deep. Otherwise, I’ll have to raise bar higher than desired. Thanks in advance for any help.
GBA Detail Library
A collection of one thousand construction details organized by climate and house part


Replies
I think the answer to both of your questions is you don't need to go that deep. If you only penetrate the wood 1" the wire is safe. I would think four 1-1/2" #10 screws would hold that load. If the heads are covered you can use star drive deck screws.
A knot wet with sap can bind and jam screws. You should be able to drill a hole in it though, but you need to drill a little, then back out the drill bit to clear the chips, then drill a little more, then back out again, etc, until you’re done. If you don’t back out to clear the chips periodically, the sappy chips clog the drill and you won’t make much progress drilling past that point.
A “tone probe” or “toner”, a common wire tracing tool used in the telecommunications industry, can locate wires in the wall like this. You would need to deenergize the cable first, then connect the toner, then use the probe to locate the wire. The tool combo of toner and probe is around $100-150, and can be purchased from telecom tool suppliers like techni-tool.
I would stay away from that wire unless you are able to accurately locate it.
BTW, it’s common to use a 3/4” or 1” thick oak board as a sort of back plate for rails like this. Use the board to span a few studs to get better mounting locations to secure the board to the studs, then secure the rail to the board using machine screws and T nuts.
Bill
Do you countersink the T-nuts in the back of board, mount the board on the wall, then secure rail to board with machine screws? Do they make the boards already milled? Thanks.
Yep, you want the T nuts placed flush with the back of the board. Install the board, then mount the rail to the board.
I’ve not seen the boards premade, but it’s easy to make one with a saw, drill, and router.
Bill
I've often used 2x6 blocking between studs to attach grab bars. It's a good idea when framing a bathroom, even if you aren't planning to install grab bars in every potential location. I put a 42" bar in the shower and another against the wall next to the toilet. With the right blocking, you can put any size grab bar where you want without worrying about hitting studs.
When we built the house four years ago, we added a lot of ADA type stuff such as no step from garage to house and even an elevator so as to make this our forever home. I added grab bar blocking for the toilet & shower in the master, but didn't think about it for the other bathrooms. Add that to my list of misses.
Confirmed wire location (sort of) with a neighbor's so-so wire locator. Used shorter 1-5/8" self-tapping construction screws as an extra margin of caution. Used a cordless impact drill. Maybe that was too much and I should have drilled pilot holes and inserted screws with a regular drill.
I wound up with what appears to be two drywall screws backing out a few inches above each of the two mounting points. What caused this? Also, in the last picture, the base molding seems to have bowed in between these two studs. May have been this way before and I never noticed, but odd coincidence then. Grab bar looks good though. Thanks.
You probably pulled the drywall tighter against the stud and caused some screw pops from the screws that were originally used to hang the drywall. This can happen sometimes when you mount something with “serious” screws that can squeeze the drywall down.
The easiest way to fix this is probably going to be to clean off the heads of those two popped screws (usually you can just scrape/chip the mud off of the top of the screw with a screwdriver or small drywall knife), drive them a little deeper to get them just below the surface of the drywall, then spackle over them and do some paint touch up.
Bill