Spray Foaming a Cantilevered Rim Joist
My home in climate zone 4 was built in 1980 with a CMU foundation. There is a brick facade over the CMUs. At the rim joist, the brick stops, giving way to cedar siding.
The walkout basement is about 800 square feet. On three sides, the 2×6 sill plate is about 7-9 feet above grade, and on a fourth, it is anywhere from 7 feet to 2 feet above grade. The sill plate does not appear to be pressure treated, and there does not appear to be a capillary break. Nevertheless, it is completely dry.
Since the brick facade only rises to the sill plate, the 2×10 floor joists cantilever the rim joist a few inches beyond the sill plate, in order for the siding to sit flush with the brick. This creates an opening that allows a lot of cold winter air into the basement, and rodents, too.
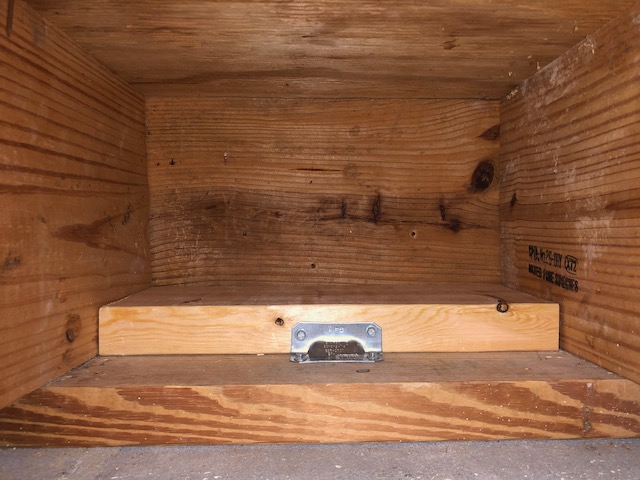
Previously, the rim joist was insulated with fiberglass batts, which were moldy and rodent-infested upon removal. I want to replace that insulation with closed cell spray foam, but due to the cantilever, I need something to hold the spray foam and block rodents. For this reason, I’ve added wood blocking to the rim joist.
Before getting spray foam bids, I wanted to inquire with the GBA brain trust about the wisdom of covering the interior sides of the sill plate in closed cell foam, as opposed to just the rim joist boxes. The blocking I’ve added should prevent the spray foam from encapsulating the exterior side of the sill plate. Will one side of air exposure be enough for the sill plate to dry, if the top and interior sides are covered in foam?
Pic 1: Rim joist with blocking added
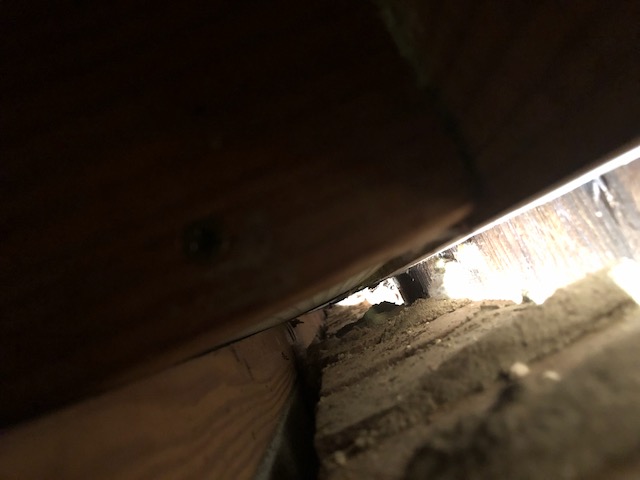
Pic 2: The exterior side of the sill plate, at the top of the brick facade
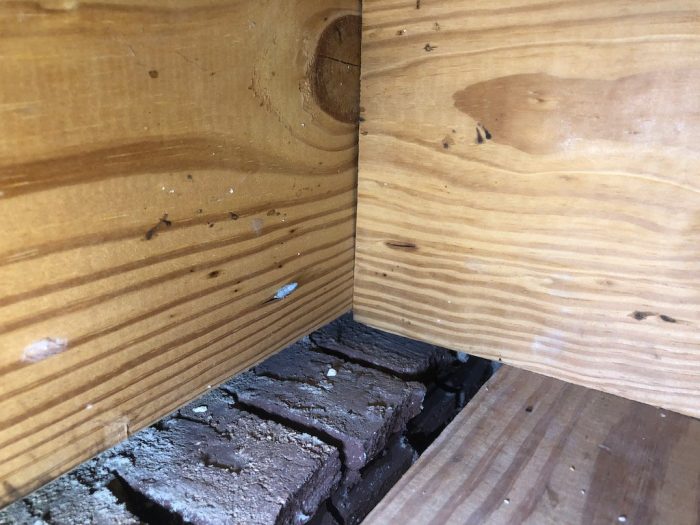
Pic 3: The cantilever beyond the sill plate
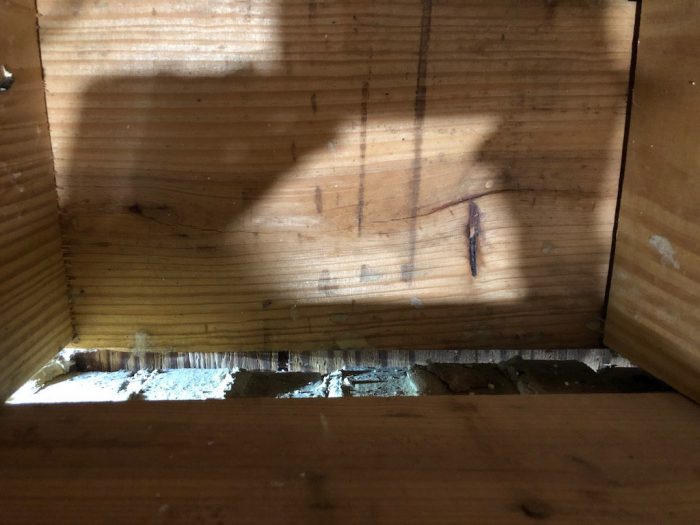
Pic 4: Daylight visible between the siding and brick. A lot of air moves through here.
GBA Detail Library
A collection of one thousand construction details organized by climate and house part


Replies
How about using open-cell spray foam to facilitate drying to the interior in the summer when you likely have the humidity lower inside than out?
What's the insulation of the basement wall?
Currently, there's no insulation on the masonry walls, but the plan is either XPS or spray foam on the walls, then a stud wall with Roxul stone wool.
What an awful detail. You basically have no air barrier.
Spray foam of any kind is not going to keep the rodents out. They will chew right through it, and if you have termites or carpenter bees in your area, they will also burrow through the spray foam.
The load of work answer is to jack up the house, including sill, over the brick and a) slip a vapor barrier between the sill and the concrete, then drop the sill and b) slip a drip edge over the brick and over the sill. If it were my house that would not be happening due to the quantity of work and potential unintended consequences.
So since the sill is not rotten I would not worry about it not having a vapor barrier, and move to option B, which is get a drip edge on top of the brick. If you can buy it in 10' or so sections with a small vertical leg on the inside, and slip it in from outside to butt to the sill and attach to the outside of the sill through the small vertical leg, that would be helpful. It would be difficult to attach, but predrilled holes, strips of treated and a right angle drill may do it. That should theoretically keep water and rodents out of the gap between the brick and the concrete, but it does not solve the rodent entry and air barrier issue.
For step B2, I would install treated blocking, as shown in photo 1. That would give you a rodent barrier and if you install it tight, also the start of a bug and air barrier. Then for B3 I would foam the resulting cavities from the inside.
If you are not worried about water or rodents in the gap between the brick and concrete, you could go right to B2 and B3.
Thanks very much for the suggestions, C L.
What an awful detail, indeed. I was taken aback when I discovered it was built this way.
I don't think jacking up the house is going to happen. The sill plate is fastened to the foundation, and I don't want to deal with the potential unintended consequences you mention.
I've heard mixed opinions on whether the air gap between the brick and block is desirable (something about convection?), but regardless, I'm not sure I can get a drip edge in there without removing siding. I'll take a closer look from the outside.
Is pressure treated required for the extra blocking? I ask because (A) like the untreated floor joists, the extra blocking isn't touching masonry anywhere, (B) I'm concerned that wet PT blocking is going to shrink over time, allowing more critters in (mice apparently only need 1/4") , and (C) I've already installed a bunch of non-PT blocking, and it's been incredibly tedious in places.
"So since the sill is not rotten I would not worry about it not having a vapor barrier"
So would you go ahead and encapsulate the interior side of the sill plate with spray foam, too, all the way down to the block?
Thanks again.
You are supposed to use pressure treated lumber wherever it's in contact with the concrete.
Ideally you want to install a capillary break (which isn't quite the same thing as a vapor barrier), but that would probably be difficult. It's probably not as difficult as you may think, since you only need to jack the house up maybe 1/8" or so, which can usually be done in small(ish) sections with some bottle jacks and a beam without much risk of damage. Slide some 1/32" HDPE sheet into the gap, then lower the house and move on to the next section. It's not fun, but it's doable. You would need to loosen the bolts holding things to the foundation though.
If you are worried about critters, embed some 1/4" or 1/2" mesh hardware cloth into the spray foam. The hardware cloth will serve as a critter barrier, and the spray foam will encapsulate the hardware cloth and prevent it from rusting out. This is a cheap and easy way to critter proof spray foam installations in these areas.
Bill