Trimming Innie Windows
Hi,
I have seen various approach different builder have taken but I am looking for suggestion on how to best trim out my innie windows for my new build homes.
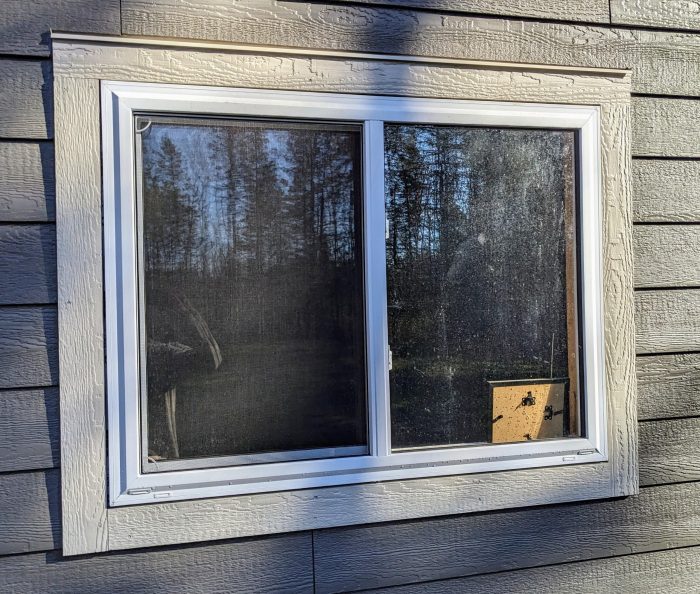
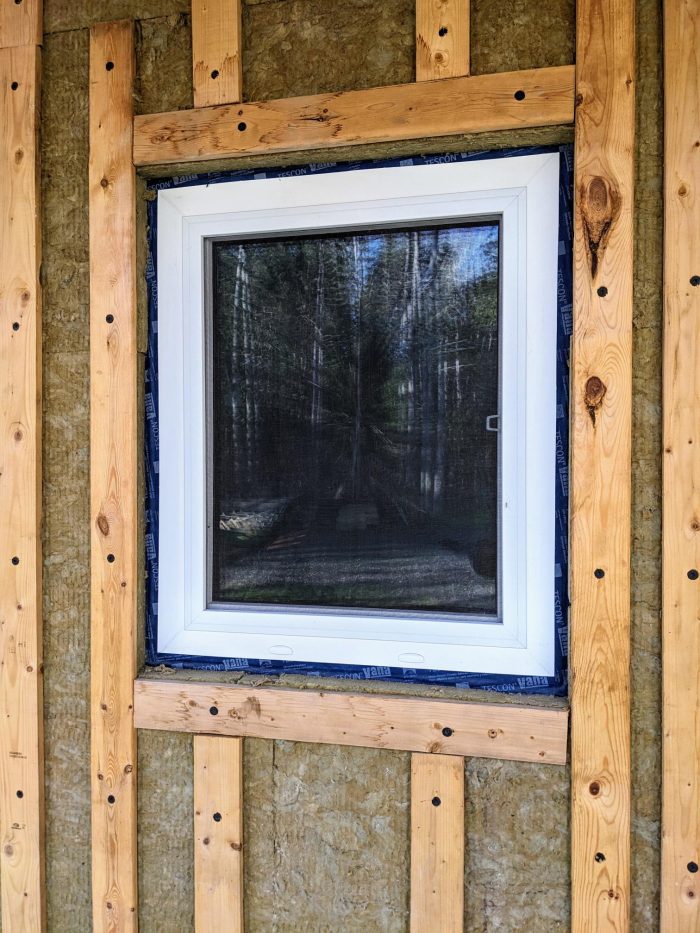
The windows sit flush with the exterior wall (2×6 with 1/2″ plywood sheathing) where 2″ of exterior insulation (Rockwool Comfortboard 80) was install and help with 1×4 strapping.
I practiced installing the LP Smartside 8″ lap siding on the garage and I am hoping to create the same look on the house around the windows. I would prefer to use the LP Smartside trim or some type of PVC trim since I do not have access to a metal bend brake tool.
I am open to anything and let me know if I forgot to provide curial information.
Thank you,
Arnold
GBA Detail Library
A collection of one thousand construction details organized by climate and house part


Replies
Trouble with thick walls and centering the window is a porthole-ish effect when looking out, and in-swing limitation when, for some strange reason one wants to open a TNT window all the way.
I found an exterior side jamb flare of 23 deg. Worked well aesthetically.
Interior jamb flares allowing 150 degrees opening are feasible but painful. Allowing about 120 deg opening eases the feel of intrusiveness.
All deviations from the standard are painful.
I'm partial to an approach I call "fin jambs," usually 5/4 material (±1") that extends past the siding. I wrote about it here, in the first diagram: https://www.greenbuildingadvisor.com/article/windows-in-thick-walls. An example that I detailed for Ecocor when I worked there is attached. The siding is metal and the fin jambs are PCV composite.
Hi Michael,
Your option is what I was leaning towards which is very similar to the two below picture I found online. The only down fall with this option is it has a sill compare to the detached garage that does not.
Thanks,
Arnold
You can add an apron under the sill extension to get a similar look (if you squint). I have been involved in hundreds of renovations and I can't remember one without a sill extension that didn't have moisture problems. I'm sure they exist, I just haven't seen it yet. There's no way I would do an inset window without a sloped sill extension.
ArnoldK,
The complication with your detail on a wall with exterior insulation, is the metal head-flashing above the trim. It should go back to your WRB, and I'm not sure how you would do that.
Hi Malcolm,
I thought about that issue but I am not sure how important it is in my case since the metal drip cap is mostly there to protect the LP Smartside trim and try to "kick" the water await from the window sill. If any water happens to get behind the siding, it will simply drip down along the exterior insulation or the WRB that is behind it. The water droplet will either drain down until to hits the top of a window (where it's been taped all around except the bottom) and get redirected toward the exterior of the wall assembly or makes its way right to the bottom of the wall assembly if it doesn't evaporate before than.
It's similar to the below picture on the Building Science website. https://buildingscience.com/documents/insights/bsi-085-windows-can-be-a-pain
Maybe my thought are misplaced or I am not factoring something important which if that is the case, please let me know.
Thank you,
Arnold
Arnold,
Ah - okay, you are not planning to include a head-flashing. The function you are describing, where the flashing is just there to stop water getting in between the top of the trim and the cladding above, is one that gets used whenever there is a horizontal change in material - like a belly band, or one type of cladding above another. That isn't head-flashing, and that flashing doesn't not extend back to the WRB, so that the drainage plane remains open.
That's not an option under our code, but in some climates that may well be the accepted practice. The primary function of head-flashing is to direct any water that has made it's way behind the cladding to the exterior, so it does not get to the window head, and is also unable to move laterally around the window frame (hence the end dams). That's why it is always taken back to the WRB. For that function you are substituting tape. Tape may be enough where you are to protect the window, but it still leaves the trim itself vulnerable.
So looking at the BSC detail, my question would be: What happens to any moisture that gets behind the siding into the rain-screen? It seems like it ends up on what they call the "horizontal return trim" , and has nowhere to drain.
I was planning on putting a slight angle on the horizontal return trim towards the drainage gap which will have a perforated aluminum screen covering the gap to keep out insect and rodent.
Thanks,
Arnold
Arnold,
I think you should rethink where that drainage gap is, and how it is detailed. On the drawing, one side of the gap is formed by the window frame itself. When that occurs on a standard rain-screen, the top of the window has a head-flashing.
I have to agree with Malcom, this detail seems a bit wonky.
Do you recommend the drainage gap should be at the front where the exterior trim is located?
Thanks,
Arnold
That's where I would (and do) locate it with that type of design, with a small gap between the extension jamb and the head casing. I have tried locating it between the extension jamb and the window but that's hard to execute in practice.
Yes, I would also seriously consider removing your rain screen board and cutting the insulation above so you could install a metal head flashing to direct water out. It would not be much work now and water is what ruins houses.
Then reinstall insulation and rainscreen.
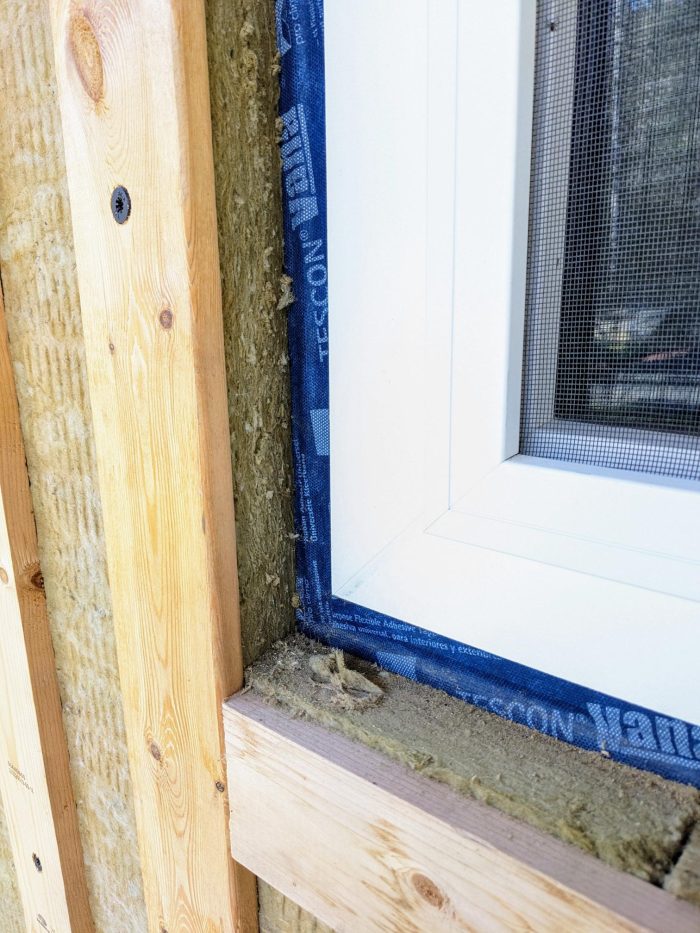
I am wondering what additional benefits is there in installing a head flashing above the window. I tapes the sheathing all around the windows, installed the WRB over the sheathing and tape the WRB to the windows.
Would this simply be an additional lay of protection at kicking water out and over the window?
Thanks,
Arnold
Yes, at all vertical to horizontal transitions you want a single piece flashing that daylights water out. Water is like a snake, it will wiggle its way in, you want to give it an easy way out. Even with all the taping and overlapping windows are still a weak spot in your envelope, you want to direct as much water out as possible. Even if you just tape the flashing to the vertical wrb it should work, as the water is going to sit on the horizontal. You just want to make that transition a single piece.
In my case, the exterior side of the window is flush with the plywood sheathing. Would adding a head flashing still be beneficial?
Thanks,
Arnold
Arnold,
Yes, just act like your a drop of water running down your wrb, what happens when you hit your return trim.
I would look at where the window is. If bellow a roof overhang and not exposed to water, I would do an in-between to Michel's suggestion. Slope to top jamb extension and instead of gap by the trim, cut a couple of 1/4" weep slots. Not much water will get there and what little does, can drain through the weep holes.
If exposed (say roof that dies in a wall above the window), I would go with what freyr_design proposes.
Hi Akos,
I had thought about doing weep slots but second guessed it since I have not seen it done and the additional labour required given I have been mostly a one man crew for this entire build while still working full-time.
The house has 24" roof overhand and there is only two windows on the first floor at the back that may see more water. There is may be worth the trouble in installing a head flashing.
Thanks,
Arnold
Arnold,
Freyer_deign, Michael and Akos have all given you good options. The only thing I would add is to think through how you will fasten everything together. So for instance - what does that horizontal return trim get nailed to?
I was planning on prebuilding the horizontal frame as one piece before face nail the trim around window to it so that everything is one piece. It would than be install by face nail it to the 1x4 strapping as per LP Smartside guideline to hold it into place and finish it by applying a caulking where the trim meets the windows.
Thanks,
Arnold
Many ways of making those weep slots, table saw or trim router work equally well. Once you have the top pieces cut it will not take much time. You can even drill them after install.
Looking at your elevation, the smaller 2nd floor windows are well protected by the roof, I would not worry too much about those.
The ones on the main floor and the gable end are more exposed, I would do the weeps or drip edge there.
If you want it looking like your garage, I would build the exterior jamb extensions as a box (sloped bottom/top) shim and nail it in place to your strapping and nail the trim to it in the same picture frame style. No need for a fancy sill.
When I've made these before, I drilled pilot holes into the jamb extension and screwed it into the window frame for extra support, a drill press makes this much easier with longer extensions. The trim covers the screw holes and you end up with a pretty solid install.