Will a hot roof (R-60) avoid ice dams in a 134psf snow load area? Or over-vent cold roof ?
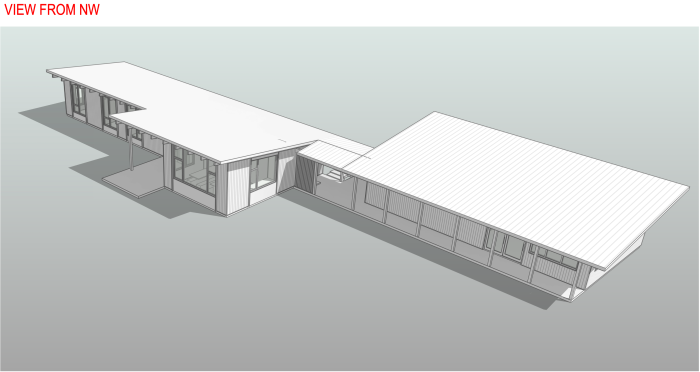
I’m building a house in southern Washington in a town called Trout Lake, it’s just south of Mt. Adams, lots of winter snow, fairly hot summers. The ground snow load is 134psf, which apparently is quite high. Ground snow load is very locally defined here, due to lots of elevation changes in the area. We’re building a 1600 sqft rectangular, 1-story house, with a simple shed roof with generous 3-4ft eaves/overhangs. House is located in the middle of a field, with a covered connection to similar garage. The roof is held up by large exposed glulam beams. My architect and structural engineer have designed an unvented roof assembly using 9” of polyiso (roughly R-60) with a standing seam metal roof.
I’m worried about ice dams. Assuming proper air tightness and vapor permeability, should I over-vent the insulation by elevating the metal roof 2”, making it a “cold roof” as Dr. Joe advises in heavy snow areas? Or does this seem like overkill for my region of the country? The snow loads are high, but winters are typically short, from December to February.
GBA Detail Library
A collection of one thousand construction details organized by climate and house part


Replies
If I remember correctly Joe L recommend over-venting for above 50lb snow load. Your are more than twice that, so well outside the squishy range where one questions if they should vent or not. Snow being an excellent insulator and with that much snow that can sit on your lowish slope roof, no matter what R value your roof is, an unvented roof will have ice issues.
As for the r60, that only makes sense when using low cost fluffy insulation like blown fiberglass or cellulose. When you are using expensive insulation such as polyiso, the ROI on anything above code min is never.
With exterior insulation, your insulation also works better, so you also want to comply based on the U factor of the assembly. For most codes this is the equivalent of R38 to R42 of rigid, so a significant insulation and install cost save. Even in cold climates, the energy cost saved between and R40 and R60 roof is in the range of tens of dollars/year so not something that is worth chasing.
Beams and exterior insulation generally mean T&G ceiling. You have to take care with these as you need a solid air barrier above the T&G and you need to tie it into the wall air barrier. The typical ceiling T&G that continues past walls adds about a square foot or two of leakage area because of all the gaps, this is a huge energy loss and can create condensation and moisture issues. The best is to stop the T&G half way across the outside walls, run the ceiling air barrier (usually a self adhered membrane) down to the walls then continue the T&G into the soffit areas.
Thanks Akos, I appreciate the advice on the T&G ceiling ('car decking' as it's called out here) regarding the air barrier. Structural engineer recommended a 1/2 plywood above the T&G for the buildings diaphragm, so perhaps using 1/2" Zip and taping it will be both an air barrier and diaphragm in this case.
For the roof assembly, is suppose the R60 was intended to provide less likelihood to heat the snow, In other words, a not-quite-as good solution to keeping ice dams at bay. I'm sure the over-venting option is a safer bet, but the over-venting option is fairly pricy because of all the sleepers/purlins and an entirely new layer of sheathing, membrane, and the labor to do it.
But I hear you, at 134psf snow load, we're not really in the gray area. Perhaps the savings on reducing the polyiso down to R38-R42 could help pay for the over-venting?
Thanks again for the advice
Zip as the air barrier over the deck is fine, it will stop airflow up through the T&G, you still have to deal with connecting it to your walls to stop the airflow along the boards. That is an important detail to get right.
For over-venting you have a couple of options.
First, you don't need a 2nd deck. You can install the sleepers over the foam to create the vent gap and run the deck over that. A bit more work, but not all that much more.
You can also get nail base with built in vent gap (ie Hunter Cool Vent). These are not cheap but saves on labor so it might pencil out especially if the bulk of your rigid is commodity polyiso.
Another option is to skip foam completely and build an over-roof with either lumber/I-joist/trusses. This can now be insulated with regular batts and vented like a standard cathedral ceiling assembly. Probably the lowest cost option but will add thickness. You can hide that by extending only part of the over-roof over your outside walls and running the siding up past the top of the walls.
Mont Lamothe,
This is a judgment call. Your standing-seam metal roof will prevent water entry, so that any ice accumulation on your roof (which should be rare) really shouldn't cause much concern. Ice accumulation is only a problem if water enters your roof assembly or wall assembly.
Its my opinion that if you have overhangs you are going to have ice dams. No heat under the overhang.
I have similar roof structure with a 3 1/2 pitch roof and 2 foot overhang and ran 6 feet of I&W
What Akos is talking about air leakage is there is a gap between every board, on my house in the gable ends, that no air barrier can eliminate. The architect can call out airsealing here, and if the contractor does it then it can be sealed. In 1970 they did not think of such things. It would involve sealant or foam tape or the like between every board, so you can see how that could get tedious or ignored.
@Akos Thanks you very much for info on the over-venting. The Hunter panels look like a real labor saver, I'll have to check on price. Questions on assembly; I’ve included a diagram of what I’m currently thinking based on your feedback:
Will the top of the polyiso (exposed surface in the ventilation cavity) be ok with only the fiber-paper facing that comes bonded to it?
Is running the 2” sleepers straight up (from eave to ridge) the best layout for these? For diagram clarity, it incorrectly shows them running parallel to the ridge.
Thank you
Deleted
That is a good plan. Make sure to run it by your structural engineer as they might want to spec strapping width and spacing.
The strapping needs to run from eave to ridge and you probably want more slope than 1.5:12 for it to be effective. Bonus of the higher pitch, it is a much cheaper standing seam install.
The top polyiso can be left exposed if you can get it covered quickly. If you'll have a lot of time between 2nd roof deck and iso install, it might be worth it to have a layer of underlayment over the iso and under the strapping. I've had this (iso with just underlayment) exposed for months without issues.
For vent intake and exhaust the simplest is standard soffit vents. Extend the strapping past the roof and install them on the bottom. There are other option like perforated Z closure or facia vent like:
https://www.metalera.com/products/details/metal-era/hi-perf/hi-perf-vented-fascia-attic
Make sure to check screw sizes as not to poke through the T&G. You might have to tweak the foam thickness a bit just for that. Putting the strapping just over the gluelams will probably not be enough for the snow load you have.
Thanks Akos, somehow missed your reply earlier. With your suggestions, I think this will be our plan. I’m still trying to get pricing on the Hunter Cool-Vent. My architect has concerns that the top side of the Polyiso in the cool-vent panel, which has a fiberglass(?) facer, may be susceptible to leaking at the joint of adjacent panels. I’ve gone a bit crazy trying to figure out all the different types, classes, and grades of all the different polyiso panels available, what a mess.
Just an aside to this conversation with regard to ice daming on a non vented roof.
I've had a temp sensor (used for the pool solar/automation system) sitting on the ground surface in our back yard, but covered in snow each winter now for 3 years. Even at -30C, the sensor reports temps just below freezing and stays with 1-2 degrees of this...all winter, as song as there is 4-6" of snow cover. Turns out snow is a pretty good insulator. No surprise there, but I was surprised at how effective it is.
It stands to reason that even a well insulated hot roof insulated with even a small quantity of snow will see temps above freezing at the snow/roof interface as you have much warmer temps inside, and will always have heat loss. If you don't have adequate cooling at the roof surface, then you'll get ice dams. I've been looking at the cost comparison of a vented vs non-vented for 7A and it makes pretty much zero sense (at least cost wise) to go with non vented alternative in a very cold climate, particularly as you can do R80 for miles cheaper in a vented attic, and still have great roof surface venting.
I understand that this is a specific application but one wonders if a scissor truss with raised heel combined with "fake" beams inside would be a lot cheaper and easier to build vs R60, much more expensive insulation (vs cellulose) and the extra material in overventing, building out overhangs etc.
Using some very rough numbers, snow weighs an average of 1.25 lbs per inch per square foot, so a 134 pound snow load equates to roughly 107" of snow depth. You are unlikely to have that depth for extended periods but let's keep it as a worst-case scenario.
Snow insulates at very roughly R-1 per inch, so a full snow pack will be somewhere around R-107. I'd round up to R-1.25/in to be safer, coincidentally equaling R-134 in the snow pack.
That means that roughly 2/3 of the R-value will be on the exterior side of the roofing, and that the roof surface temperature will be about 2/3 of the difference between the outside temperature and the inside temperature. I don't know what your average winter temperature is but let's say 20°F, which is likely on the high side to be safe.
With an interior temperature of 70°F, that leaves a 50° differential. 2/3 of that is 33°, so the roof surface would be somewhere around 20+33 or 53°F.
Even if my estimates are off, that's far enough above freezing that I would assume you would have some periods of melting at the roof surface, which can re-freeze at the eaves, leading to ice dams.
134 pound load is two feet of WATER. Not sayin its wrong, but....
Have a look at the town of Trout Lake (upper left corner of the county snow load map) https://www.klickitatcounty.org/DocumentCenter/View/9826/Klickitat-County-Ground-Snow-Load-Map---Update-12-23-2020-Map-Plan-2
Didn't believe it myself at first.
Gus, I'm not sure what you're surprised about, can you clarify? Snow density varies significantly, from light fluffy powder to cement-like saturated bricks, but that's a value I found in a few different places online. Within an hour's drive, my local snow loads here in Maine vary from 50 psf along the coast to 110 psf in the foothills of the White Mountains.
Thanks Michael. The roof's pitch is fairly low 1.5/12 pitch. Will over-venting (as in my diagram above) to prevent ice dams still work with such a low pitch? I contacted Hunter about their Cool-vent panel product and even with a 2" airgap, they do not recommend installation if below 3/12 pitch, claiming not enough ventilation. I've attached an elevation image. Longest run from eave to ridge is around 36'.
montelamothe,
No chance of increasing the pitch to 2/12? It makes a big difference in how metal roofs work. All their detailing typically relies on laps. Once you get below 2/12 that changes and you need to rely on gaskets and sealants to keep water from moving up the slopes by capillary action. Luckily your roof is fairly simple and free of complex details, but that extra 0.5/12 still makes a big difference.
The low pitch and long rafters both work heavily against you, as Malcolm noted. Martin's classic article explains all of the details: https://www.greenbuildingadvisor.com/article/insulating-low-slope-residential-roofs.
I design for a 50 to 110 psf snow load and avoid slopes less than 4:12; when I have to do them I use rubber roofing. A traditional, double-lock standing seam roof is pretty water resistant but I would not expect it to hold up against any depth of standing water. I have done flat-lock soldered copper metal roofs, which are fully watertight, but expensive. There are rubber roofs meant to look like standing seam; you might want to consider using that.
If the roof is not visible in a way that you care about, I would go rubber
The back of my house is 2 floors up and slopes away, you have to be 100 feet away in the woods to see that it is a rubber roof.
Looking at your image, yeah, entry on the low side, so I guess it is visible.
Lots of I&W I guess
Thanks to everyone for the insights here. Speaking with my architect, we may alter the design to a 2:12 pitch giving us better standing-seam metal roof options.
There is still the venting issue; Can a 2:12 pitch shed roof with roughly 36ft eave to ridge length use an over-venting strategy to avoid ice dams? I spoke with a rep at Hunter about their venting Cool-Panel (suggested by Akos) and he said they don’t use it on less than 3:12 pitch due to lack of convection.
Am I relying on faith-based ventilation here? Is there some way to calculate whether this slope can be used with either a Cool-panel type product or similar field build ventilation channel, what height channel, etc?
@montelamoth, roofing considerations aside, why can't you just go with a paralel chord truss with that design? If those walls are load bearing, you should be in the 24 to 36" range between chords which would give you lots of room for insulation and venting ... and likely cost a lot less too.
@denniswood We're hoping to do exposed glulam beams and fir t&g decking as feature of the house. Your solution sounds more affordable, and one we will most likely use on the adjacent garage. Thanks
I figured it was an aesthetic consideration. Sounds like your pic in post #6 is the way to go. Everything wood based has a good path for drying.
I would be tempted to look at eliminating the OSB layer under the metal roof, applying the peel and stick to the insulation itself (under your vertical runners) and then applying horizontal strapping over that to spec for your roof. This would give you another 1" or so of separation, eliminate the OSB layer, and give you a bit more vent space as well. I'll let the metal roof experts chime in on this one.
Thanks Dennis, great idea with the horizontal strapping. One reason I liked the Hunter Cool-Vent panel is that it allowed for ventilation in both vertical and horizontal directions, but this solution does too and doesn't require propriety panels. I'll run it by the architect and builder. Would be happy to hear from metal roof experts about the feasibility and type of standing seam metal roof that can be applied on wooden strapping. Could we use 26 gauge? Our roof is 2:12 pitch.
To sum up many of the suggestions on this thread, here's a revised version of the roof assembly. Remaining questions are:
Can peel/stick membrane adhere directly to top polyiso layer? Applicable products?
Are untreated sleepers and purlins ok, directly under a metal roof as the ventilation channel?
If this assembly is do-able, it saves quite a lot on decking costs and provides lots of air flow to avoid ice dams.
I would run this by your metal roofing supplier. With that much snow load, they will most likely require a solid roof deck for most except some tall rib commercial profiles.
Otherwise it looks good. Untreated wood is fine, this is similar to a rain screen cavity, the wood will not be exposed to the elements and there is lots of drying capacity.
Peel and stick adhere just fine to the fiber facer. Metal roofs are considered liquid tight, so I would only put peel and stick by the eves where code requires it and use regular underlayment for the rest.
Make sure to picture frame the rigid around the perimeter of the roof with lumber to prevent critters from making a home.
When I pulled the roof of my current house, there was Grace I&W stuck to the[whole 1 inch] foil faced ISO. It sure stuck, but it was not serving any purpose there. The roofing nails just wallowed the holes in the foam.
WE ended up with a similar if lower tech stack up to the proposed here, with I&W on the decking, with underlayment, then foam, sleepers, plywood, more I&W and underlayment, shingles.
NOt sure what the purpose is of the I&W on top of the foam is here, airsealing?
I agree with Akos, talk to your metal roofing manufacturer about their requirements for supports with this much snow load. If you want to reduce your costs, I think you could eliminate the top layer of purlins and just run the 2x4 sleepers diagonally as that will allow you to get eave to ridge venting while effectively increasing support for the metal panels.
Check with the reps from Grace and Siga to see what they recommend. Grace has a good butyl based ice and water shield that I would recommend: https://gcpat.com/en/products/grace-ice-water-shield-roofing-underlayment . Though my preference is SIGA Majvest 500 SA, but check with them on your exact details as they have really good tech support: https://www.siga.swiss/us_en/products/majvest/majvest-500-sa . Ken Britton is your local rep: [email protected]