WW2 era 1.5 storey retrofit – which insulation type/method?
Good day GBA!
First I wanted to express my gratitude for this forum. It is truly an invaluable resource!
I’ve read all the articles, blogs, and Q&A’s regarding my objective, but I have not been able to find what I’m looking for with regards to my current situation.
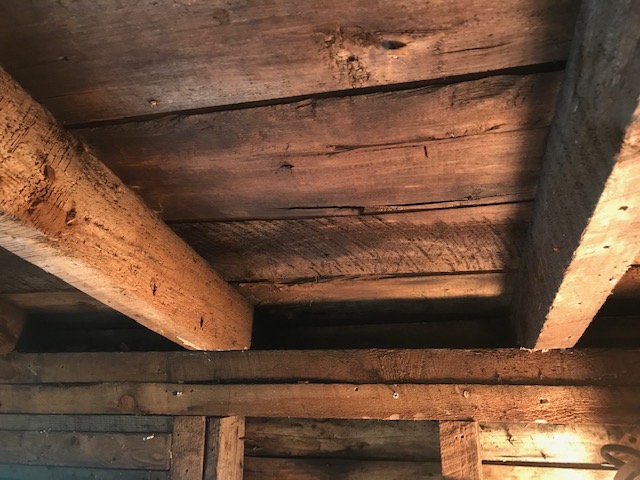
A bit of background here… I believe I am in climate zone 7 (Thunder Bay, Ontario). Ive got a WW2 era 900 sqft (newspaper found in the walls from 1948) 1.5 story home with virtually no roof overhangs. all framing (wall studs and rafters) is full dimension 2×4’s, aluminum siding, thick felt paper, 1×6 shiplap plank siding, and stud bays filled with wood shavings.
My grand plan was to do a complete energy retrofit to include 6″ exterior recycled polyiso on the walls and 8″ on the roof over a complete application of peel and stick, followed by new windows, rim joist sealing, and re-constructed roof overhangs. Unfortunately the reality of that undertaking is fading.
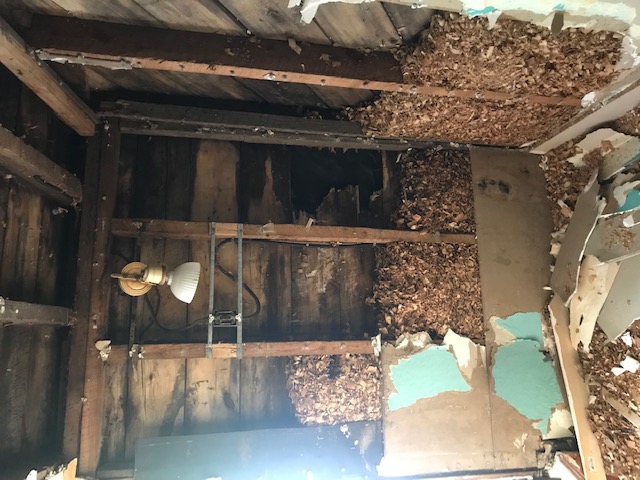
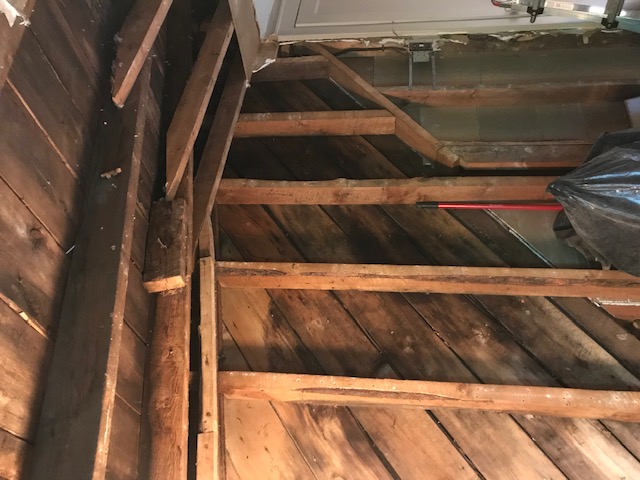
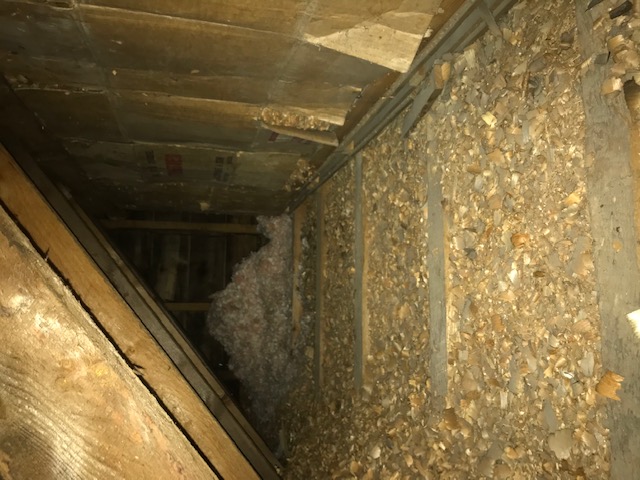
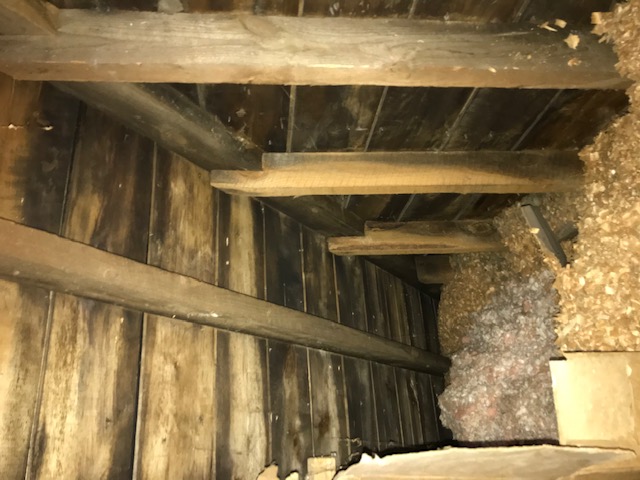
I’ve began working on the small second story from the inside. I opened up some walls to discover several layers of wall paper, other paper/cardboard products, a couple layers of gypsum, and stud bays to contain massively settled wood shavings. The shiplap plank sheathing has shrunk considerably showing large gaps between every board, revealing a heavy felt on the exterior of the walls and the sticky roof underlay on the roof. The knee wall only has 1.5″ worth of wood shavings. The small attic had some fluffy rock wool blown in, and is not vented.
My immediate plan is to gut the entire second floor interior, as the current layout is useless and the full bathroom needs work.
As far as an insulation/air sealing plan, keeping in mind the possibility of doing exterior rigid foam later, I understand that I should use a permeable insulation on the interior to allow for inward drying. I get that the most ideal plan would be to use closed cell spray foam to tackle air sealing and insulation all in one..but I want to avoid a future foam sandwich that can’t dry in either direction. I have noticed some dry rot in the plank sheathing as well as evidence of water entry. I will be replacing some of the planks as best I can from the interior. My roof is essentially an unvented cathedral ceiling.
Option 1 – (should be the most economical/simple/quick – R13+ R8) Install batts of Roxul in the stud bays (walls and ceiling), plus 2″ of rigid foam on interior of studs. Cons: batts would probably get wet from exterior as there is no continuous barrier. Q: can a poly/smart barrier be used between fluffy insulation and studs/sheathing to prevent water damage?
Option 2 – (expensive, but possibly best performance – R18+R8) Full application of closed cell spray foam, with or without additional interior rigid foam over the studs. Cons: would be dangerous to do exterior rigid foam later ,and replacement of rotten sheathing planks later would be difficult due to adhered foam.
Option 3 – (time consuming, but fairly economical, good performance – R16+R8) Cut and cobble EPS with or without additional continuous interior rigid foam over studs. Cons: obviously very time consuming. The use of EPS would allow some interior drying if I did decide to do exterior foam in the future.
Unfortunately I do not have recycled rigid foam available in my area. Plan 1 is my intention at this point, but I am a little concerned with putting fluffy insulation in the stud bay with no real continuous barrier on the exterior. The foam on the interior would be detailed as the air barrier finished with either drywall or a panel board/hardboard. Canned foam would be used to help with this.
I would love to be able to do this job 100% “properly”, however budget doesnt allow for that at this point. I get that the total R value, especially for a cathedral ceiling, will be dramatically low for my climate zone, however it will still be a massive improvement from the R3-4 equivalent that was in there before.
GBA Detail Library
A collection of one thousand construction details organized by climate and house part


Replies
Josh,
In you post you mention you can see the heavy felt between the boards. If this is the case, then you have a WRB outside your sheathing, you should have no problems with batts in the cavity. You would still have to fix your water entry issues. Leaks + fulffy insulation is a bad combo.
Your option 1 is probably the best for DIY, just keep in mind that the insulation will need to be trimmed to fit between the studs since you have real 2x4s. I find that going with 24" wide metal studs batts turning them 90deg and then cutting them to fit is less work with trying to trim .5" off the sides. You will also have to seal all the ugly air leaks 1.5 story houses have.
Cut and cobble is generally a big waste of time, the R value of the overall wall is about the same as batts (once you take into account the thermal bridging from the studs) and the air sealing is questionable in the long run.
Overall, air sealing is your bigger challenge. Spray foam is the easy way to do it, but you don't need to fully fill the cavity. About 1.5" to 2" is all you need, the rest can be fluffy insulation. You can strap out your walls to get the cavity depth back to 3.5". If you want even better wall than go with foam strips:
https://www.finehomebuilding.com/2014/11/26/breaking-the-thermal-bridge
With 1.5" of SPF, putting on 1" foam over the stud will get you a pretty high performance wall without too much effort and do a decent job of air sealing. With this you end up with something like an R18 wall.
A full SPF (3.75" ~R24) without foam strip would only be an R13 overall wall and cost you way more in foam.
Thanks for informing me of that method. Strapping put the wall with foam seems like a no brainer.
The only issue with this method, is it closes the door on future exterior foam, however this isn’t a forever home, and the ease of air sealing with spray foam is certainly appealing.
Hey Josh,
I don't think you said what your rafter depth is, just that any insulation would be inadequate, which seems to me to be a bigger concern than your walls. I like Akos' idea for flash-and-batt or flash-and-fill in the walls with a furred out, thermally broken assembly. You could do the same for the roof, if you have the headroom to spare. Fur down the rafters, and then install a combo of closed-cell and some type of fluffy insulation, carrying the insulation all the way down to the top plate so that the attic spaces behind your kneewalls are conditioned. Just in case you hadn't seen it, I included an article link below that may be helpful. I also agree with Akos that you need to fix any water leaks before you do any of this.
https://www.greenbuildingadvisor.com/article/how-to-build-an-insulated-cathedral-ceiling
Thanks for everyones advice.
I decided against furring out the studs, due to a bit of a time crunch...it's getting colder up here and I'm a one man show!
I opted for -just-shy-of 4" of walltite CCSPF, plus 2" of Polyiso on the interior of the studs. Each sheet of Polyiso is sealed with canned foam.
I'm curious what the "whole wall" or "whole roof" R value would be if anyone has a calculator or easy formula for figuring out framing losses. The studs are 16" oc, full dimension 2x4's.
The Walltite is rated at about R6/inch. 3.5" = R21
2" Firestone Polyiso LTTR = R 11.6
Total: R32.6
Assuming no interior drywall, that works out to R30 for the whole assembly. Pretty good compared to what was there.