
Image Credit: John Hartman, Fine Homebuilding Magazine #208
More Q&A Spotlight


Gregg is renovating his 50-year-old house in Wisconsin and trying to devise the best way of insulating exterior walls from the outside. The house was built conventionally, with 2×4 walls, fiberglass batt insulation, fiberboard sheathing, and hardboard siding.
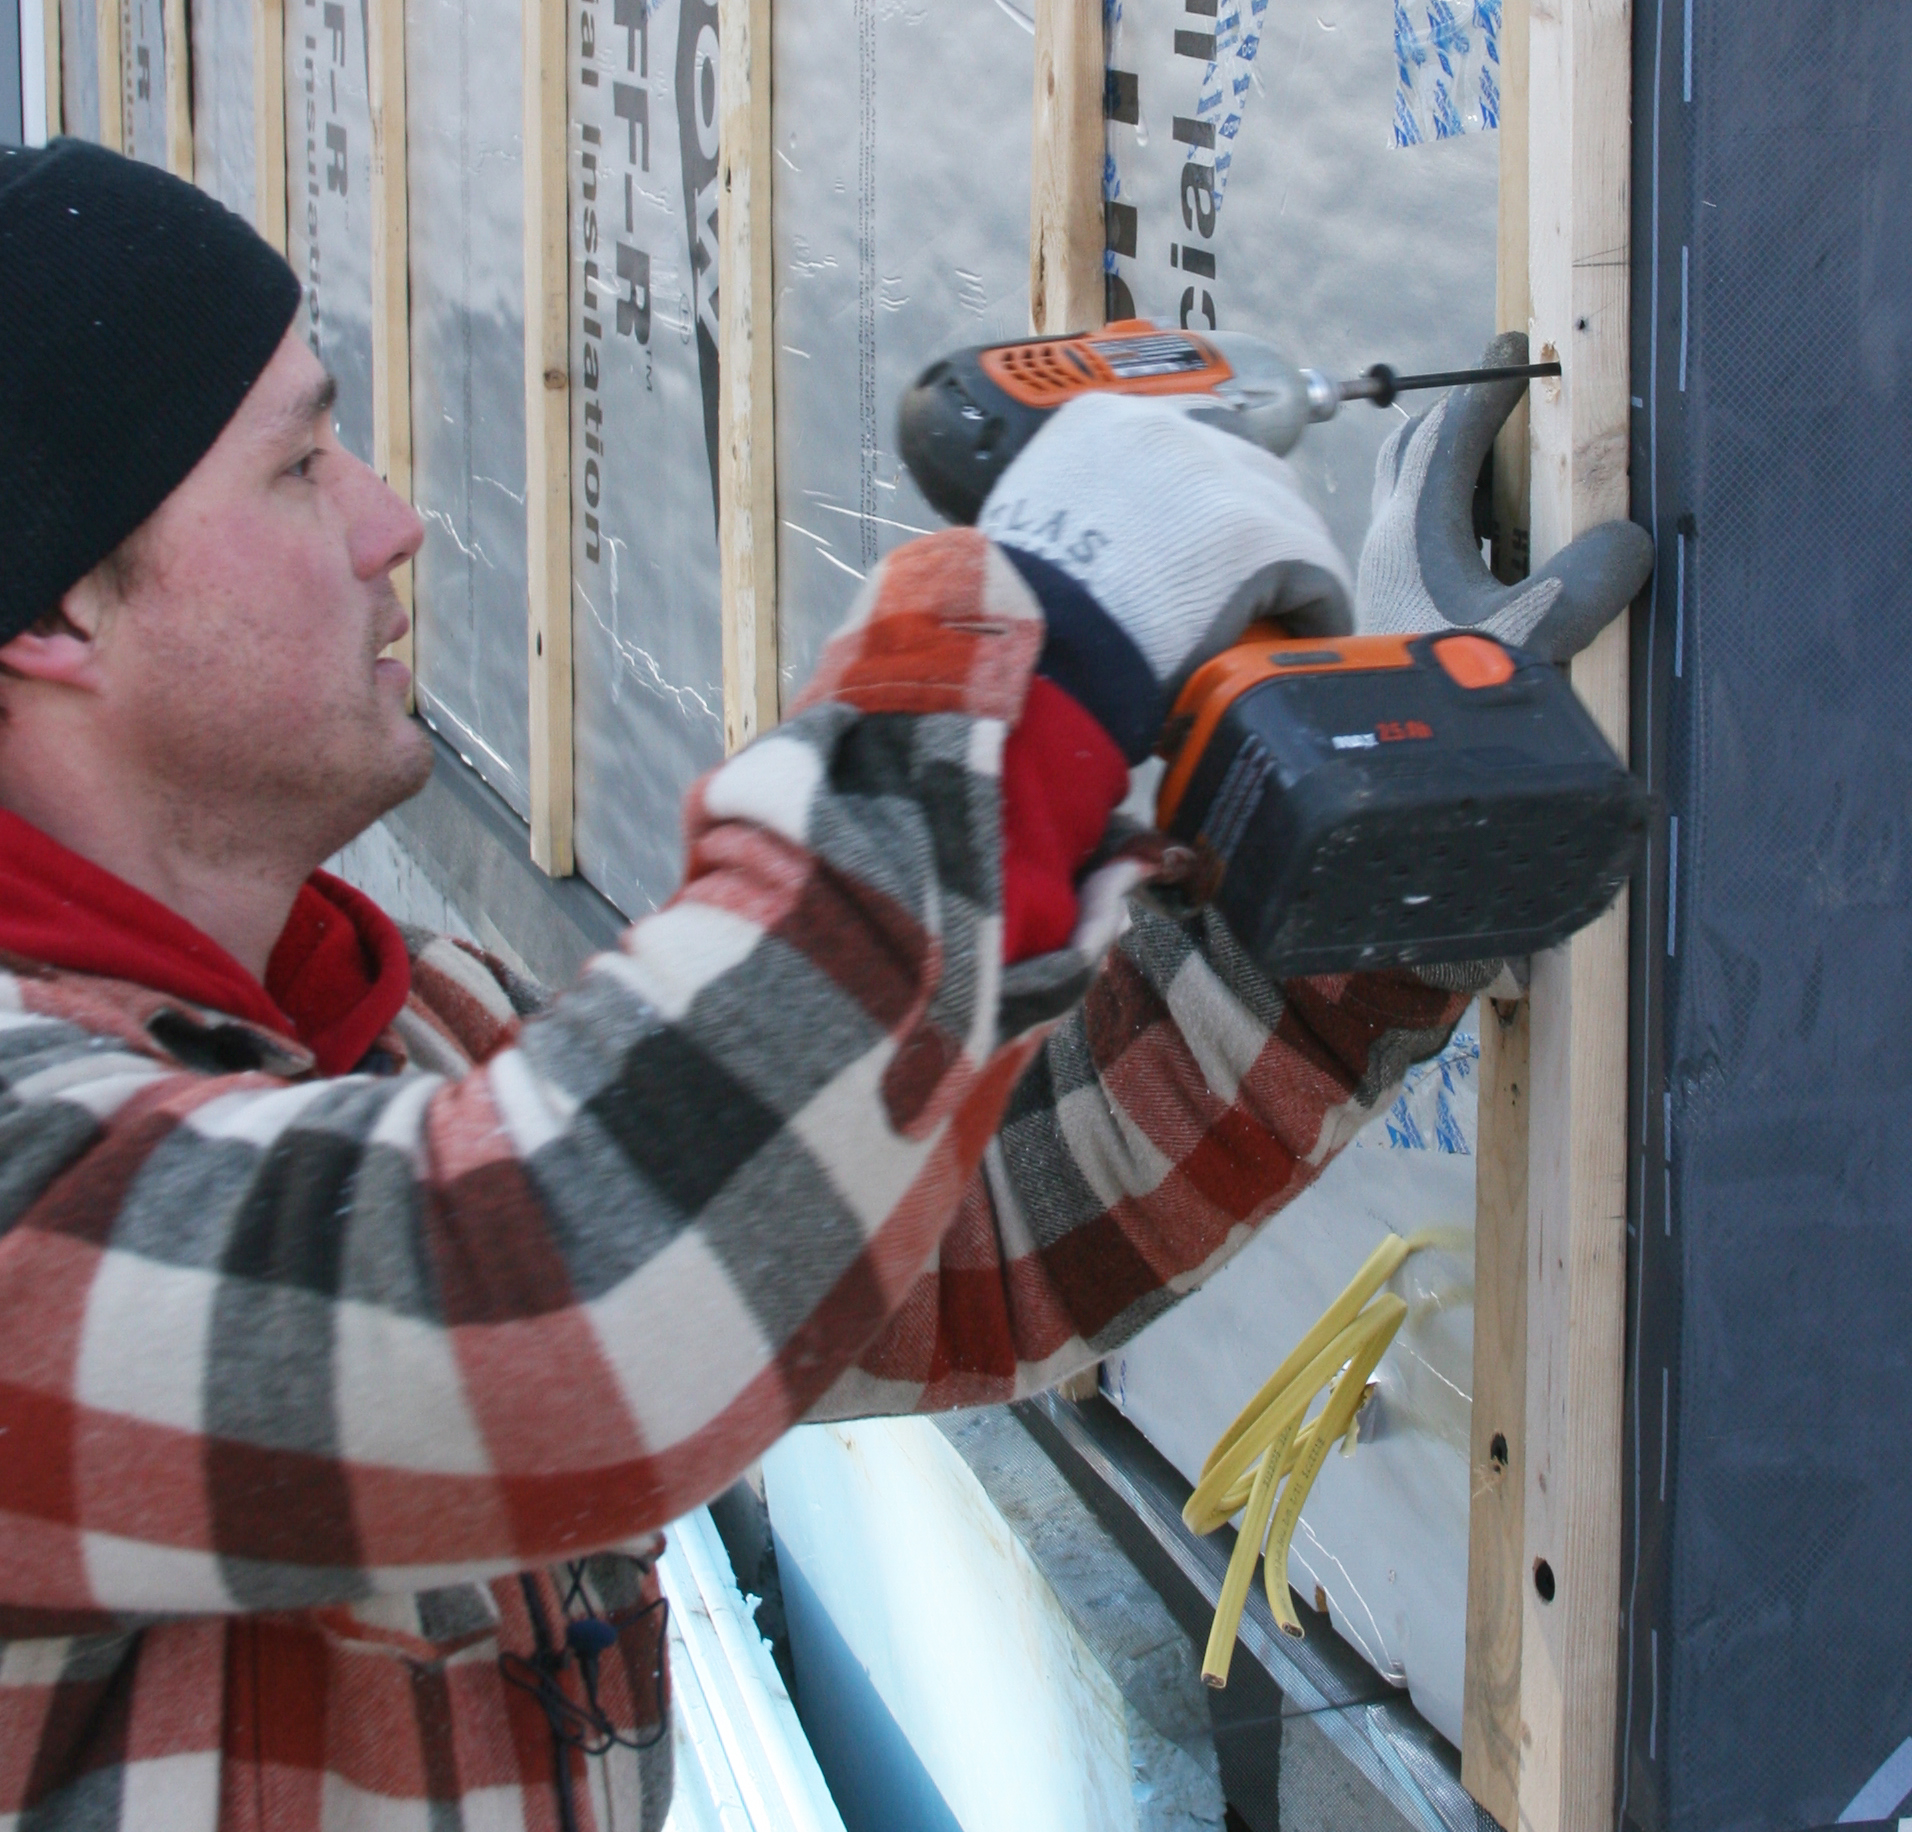
He plans to tear off both siding and sheathing and remove the batt insulation, then apply 3 in. of spray polyurethane foam insulation into the stud bays. The existing kraft paper vapor barrier on the interior side of the wall will stay in place.
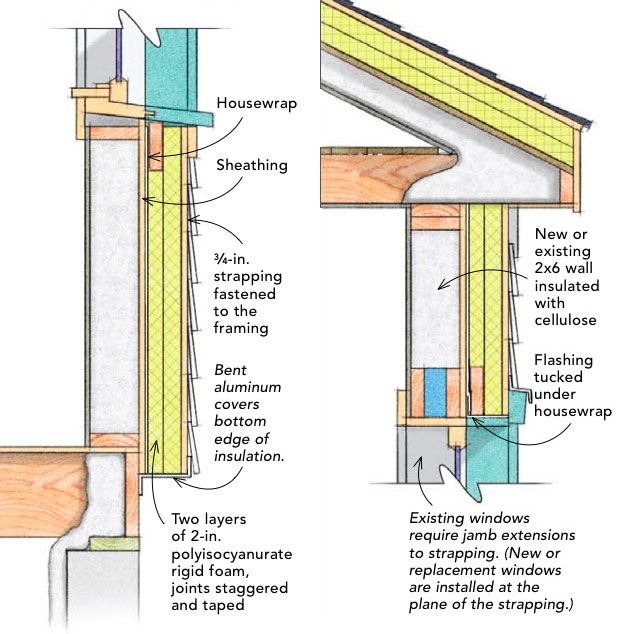
Several local contractors have recommended the addition of between 3/4 in. and 1 in. of rigid foam insulation over the studs before applying 1/2-in. OSB sheathing and lap siding. But the recommendation is giving Gregg pause for thought.
“While I like the idea of eliminating thermal bridging through the studs,” Gregg writes in this Q&A post at GreenBuildingAdvisor, my concern is that there will be an air gap between the two layers of foam insulation (both of which have limited permeability). In this scenario, wouldn’t I be creating an ideal situation for condensation to form between the two layers? We obviously live in a very cold climate and winter temperatures regularly reach -20°F to -30°F.”
Making the wall structurally sound
One concern, voiced by GBA senior editor Martin Holladay, is that when the sheathing is applied over the foam, and not directly to wall framing, it can’t provide much structural rigidity. In that case, he’d have to install metal strapping for bracing before the foam is applied.
An alternative is to put the sheathing on first, followed by the rigid foam insulation.
“I wouldn’t hesitate to install OSB (or, better yet, plywood) over the studs, and then rigid foam and vertical strapping to create a rainscreen, if…
Weekly Newsletter
Get building science and energy efficiency advice, plus special offers, in your inbox.

This article is only available to GBA Prime Members
Sign up for a free trial and get instant access to this article as well as GBA’s complete library of premium articles and construction details.
Start Free TrialAlready a member? Log in


14 Comments
How's it supposed to drain?
When I look at an illustration like the one above... I try to imagine what "happens" to the water that gets past the siding.... how does the water "exit" at the head flashing above the window?
How does it "exit" at the bottom of the wall.
It looks to me like the pants are tucked into the rainboots.
Definition of Rainscreen from BSC Glossary:
"A building enclosure rain control strategy that accepts that some water will penetrate the outer surface (the cladding, which “screens” rain) and removes this water back to the exterior by gravity drainage over a drainage plane, through a drainage gap, and exiting via flashing and weep holes."
Easier with closed cell Spray Foam.
There are a tremendous amount of contradictions in this article. Let me try to help as I have been successfully applying rigid foam on the exterior of the wall for a couple of years now. I was first introduced to it by Dr. John Straube in Colorado at an EEBA conference. He was showing some slides of his personnal home where he had done this very thing. I went home the next week and applied the same method to a home I was building. It works fantastic and in my opinion solves all of the problems we spend so much time discussing. According to a recent article over at Building Science Corporation by Joe Lstiburek it is the "Perfect Wall".
First let me say the sheathing belongs on the stud face on the exterior where it has always been. Don't get tricky just keep it simple. Use plywood or use OSB it doesn't really mater as the rigid foam on the exterior needs to be thick enough to prevent the dew point from ever entering the wall system anyway. If you don't know how thick that is find someone who does. In my climate here in Boise Idaho, you need about 3.5" of closed cell foam to achieve this. We use a spacer and a 2x2 to stand off from the wall sheathing at 4". We extend out our window bucks and door bucks the same amount. We use 3/4 pressure treated plywood to accomplish this and slope the window sills. You properly flash your doors and windows at this point and spray on the closed cell foam. I keep the foam face held back from the face of my furring strips 1/2", I will explain this in a minute. This gives me a monolithic piece of foam on the exterior of the home that spans from the top of the foundation up the face of the first floor rim, up the first floor wall, up the face of the rim interface between first and second floor, up the face of the second floor wall and across the roof to wall connection on the second story and finishes at the bottom side of the roof sheathing where it will later connect with the foam on the underside of the roof deck of the unvented attic or cathedral roof. It is a beautiful thing. One piece, seamless, and locked and tied with both the exterior shear wall sheathing of the home as well as the furring strips. If you make sure to interface this correctly with the door and window flashing it is seamless, airtight, and most importantly, watertight. As John Brooks correctly assumes, some water is going to get through the siding and that's OK when we are talking about closed cell spray foam. Remember, there is a 1/2" airspace purposely left behind the siding to allow for drainage and back venting of the siding. By the way I recommend Hardi Plank Siding in this application. I also painted the spray foam and furring strips behind the siding for extra protection against moisture but I really feel this is just a precautionary measure. Again, closed cell spray foam is both vapor and air impermeable and in addition to that I have helped the situation of drying with the 1/2" airspace. A couple of key details in conclusion of this process on the exterior. I use a piece of aluminum screen at the very bottom to allow moisture to drain out, it's tucked up underneath a band of siding at the bottom and can't be seen without getting down low and looking up. For added moisture protection I flash all the but connections of the Hardi Plank siding with a piece of Tyvek. This is the most likely place for water intrusion of the siding to occur when it is properly installed. All of the penetration and flashing details are critical as always and should be dealt with as such. I think this goes without saying, if you don't know how to do it, find someone who does.
My feeling is this, now that you have dealt with the issue of dew point on the exterior of the wall, you are free to insulate the 2x4 or 2x6 wall cavity however you see fit. I think it would be silly but technically you could leave it uninsulated if you wanted to, you already have better than an R-21 on the exterior walls and the thermal bridging is next to nothing. Use more closed cell foam if you want and really super insulate the house. If you went 5.5 in of additional closed cell in a 2x6 wall at R 6.7 per inch along with the 3.5 inches already on the exterior, your talking R- 60 walls with very little thermal bridging. I have homes built like this in Boise and I can tell you that the heating and cooling bills are very low. But that's not to say you couldnt also put cellulose, fiberglass, open cell foam, blue jeans, sawdust, or just about anything you wanted in the interior side of the exterior walls. Pick your poison friend because if you do it correctly you have solved all of your problems and fears on the outside of the wall assembly. I believe this is why it's good enough for Mr. Lstiburek to call it the "perfect wall" and Mr. Straube to use this method on his own home. If it's good enough for them, it's good enough for me.
Perfect & Not-So-Perfect
Bond,
Nice post.
If I understand ... It is a "perfect wall" that transitions to a "not-so-perfect" roof ?
An Apple of a wall and an Orange/Turd of a roof ? ;-)
If So....Why is "not-so-perfect" Good enough for a roof? and not for a wall?
Do you consider your method affordable?
edit to add link to apples & turds
https://www.greenbuildingadvisor.com/community/forum/energy-efficiency-and-durability/19969/apples-turds-mineral-wool
Response to John Brooks
John,
Q. "When I look at an illustration like the one above, I try to imagine what happens to the water that gets past the siding. How does the water exit at the head flashing above the window?"
A. It evaporates. Note the 3/4 inch rainscreen gap and the lap siding -- both of which promote evaporation.
Q. "How does water exit at the bottom of the wall?
A. It evaporates. Remember, only a small amount of water actually gets past the siding. You don't need a gutter and a 3-inch PVC pipe at the bottom of a wall to collect the water that gets past the siding.
Love affair with foam
A cost benefit analysis will show a wall with foam as a poor choice, a double stud wall with blown cellulose is far greener and cost effective. Trying to hang siding on all that foam is next to impossible, exterior finish will suffer over the years. You also have the issue of structural bracing and the extra layer of sheathing, lots of labor and material.
Call me Conservative ...or a slow learner
Martin,
I know you and Dr Joe you have tried to splain this to me before
I agree that with lap siding and flashing behind siding butt joints...
There should be very little "leakage" in the field of the siding.
But the siding is not all "field"...
What about around windows and penetrations?
What do windows and window casings do sometimes?...they leak
And sometimes windows align above windows.
Handling leaks
John,
Of course you want to detail your windows to handle leaks. That means that windows should be flashed and housewrap should be properly lapped. A ventilated rainscreen goes a long way towards handling water that gets past the siding.
Some builders choose to put rigid foam on the exterior side of the housewrap; that's what is shown in the illustration. I'm not saying that's the only way to do it, but it can work. The housewrap is the WRB, but it's deep behind the foam.
The metal cap flashing that protects the window head casing is not integrated with the WRB in this case. Big deal -- it still works. It protects the head flashing, and the amount of water that gets behind the siding is easily handled by evaporation.
Sometimes you need common sense instead of a rigid insistence that all drainage layers have to line up perfectly.
Why replace the sheathing and fiberglass
I'm just wondering why the existing wall assembly can't be left intact. We approach similar projects by establishing a blower door testable air barrier at the existing sheathing with something like Blueskin or its ilk applied at that plane to establish the air barrier there, then the layers of foam to establish the thermal performance (including a rainscreen for its virtues). Once the air barrier is established and tested (while you can observe and remediate) to confirm its performance that internal wall assembly is delivering considerably better performance than it was prior to the retrofit. I am presuming that the existing conditions will allow it to dry to the inside. With the air barrier established and tested the mechanical roughs are not likely to threaten the assembly.
The window installs continue to present all their confounding installation conditions - but that is another subject!
Why is "not-so-perfect" Good enough for a roof? and not for a wa
Hey John,
I assume you are a builder with a "desire to to do better" as am I. A guy who is willing to live outside the box and be a leader, not a follower. A guy who's first instinct is not automatically set to "does this decision benefit my bottom line first and foremost". A guy who finds its necessary to move well in front of "code compliance" and "energy star" and "Green building labels". If so you and I would have a lot in common. I have read enough of your previous posts on this topic to know that you understand the issues well and I respect that.
Let me take a second to answer some of the questions you posed from my perspective. Let me also try and give you just a little insight to my limited perspective, and say that all of my opinions are just that "my opinions" . I don't have anywhere near the perspective that guys like Mr Lstiburek and Mr. Straube have because quite frankly, I'm not an "Old Guy" yet. But i have spent both the time and money to listen to and talk to and read about what a lot of the "Old Guys" have to say. Thats how I landed on this web site. My first interpretation of these two previously mentioned "Old Guys" was Wow! These guys talk like me! And they think like me! And I like that! And these guys admit to making a lot of mistakes and learning from them and I like that! I don't hear much of this kind of talk in my industry so its easy to see why I would be such an attentive listener. All I have to offer is my 20 years of experience as a home builder. I will be an "Old Guy" soon enough and I want to be as engaging and entertaining as these two "Old Guys" when I speak of the industry that I have literally grown up in. By the way, I am by no means calling you an "Old Guy" yet, because I have never met you and would not want to offend.
Why is "not-so-perfect" Good enough for a roof? and not for a wall?-
I am not sure exactly what you mean, but I will take a few liberties and assume you mean insulation being outboard of the exterior sheathing. If Im wrong, ehhh wont be the first time, you will straighten me out. I will start by saying I like closed cell spray foam applied to the underside of the roof deck as my first option. Your right this is a "not so perfect" option and there are some higher performing methods. Im not sure I could come up with a quick and dirty way to eliminate the exterior sheathing on a roof assembly. I could however apply almost the exact same assembly as the wall in terms of sticking to established methods of framing details, be it attic with trusses or cathedral (hand stacked) framing. Sheathing the roof with traditional sheathing materials, additional framing members stood off the roof to some predetermined thickness based on dew point calculations, a monolithic and seamless application of CC spray foam. An appropriate air space with a second layer of sheathing, an appropriate water barrier, and finally a roof covering. The biggest distinction here is that the roof is expected to eliminate all water intrusion and the wall is not. No, I am not suggesting that the walls be built to leak. Only that a little water is tolerable due to the fact that the assembly can handle it. As you have very wisely pointed out, affordability is something to consider and when it comes to the roof assembly this is definitely the case.
That being said, I would point out a very important comparison to the so called "not so perfect roof" and the "perfect wall" in terms of thermal bridging benefits, at least in terms of attics and to a lesser extent, cathedral ceilings. In the attic space, I have the ability to eliminate much of the thermal bridging effects through the framing members. I don't have this ability in the conventional wall assembly. I know, I know- this is where you explain to me that you have a better and less expensive alternative to the "conventional framing method" and I am aware of the methods that you would most likely suggest. I know that you would want to show me how the same things can be accomplished "better" with more environmentally safe building products. I also know that your opinion would differ in terms of durability with some of the "old guys". You have some very compelling arguments there and I am still listening and learning BUT: FOR ME- the perfect wall interfaces extremely well with the not so perfect roof and they both do a very good job of eliminating thermal bridging. AND, unlike rigid sheet foam, which is fine within its design limits, I don't want to work with it period. I don't want to try to cut it- seam it- fit it - caulk it-tape it- and worry about it. Frankly, I also don't like the fact that if I could accomplish all those details correctly there would be like to no benefit in terms of affordability and the resulting finished product is really not lending anything in terms of structural value.
Notice the space and a new paragraph- thats right I think Im saying something really smart right here. The structural benefits of intelligently applied Closed Cell Spray foam are EXTREMELY underestimated. Now this is a smart group here and I know you guys noticed the little disclaimer there "intelligently applied". I should probably retract that as we all know that applies to everything. Really, what doesn't it apply too. Would it not apply to the rain water management details, or the framing details, or the materials takeoff- of course it does. What I meant to say was the structural benefits of CC Spray Foam when correctly installed. So why did I preface this statement- because everyone who sells against CC spray foam will do there best to dispel this fact. Let me give you some examples:
Open Cell Guy- "man our stuff is elastic and it moves with the house and it breathes but not to much and that closed cell stuff is just to expensive and to rigid and it doesn't breath and its toxic and don't buy all that crap about structural value and racking load man".
Cellulose Guy- "man our stuff is elastic and it moves with the house and it breathes but not to much and that closed cell stuff is just to expensive and to rigid and it doesn't breath and its toxic and don't buy all that crap about structural value and racking load man".
Fiberglass Guy- "man our stuff is elastic and it moves with the house and it breathes but not to much and that closed cell stuff is just to expensive and to rigid and it doesn't breath and its toxic and don't buy all that crap about structural value and racking load man".
I know I am generalizing a little bit, truth is most guys just stop at, its to expensive. I am going off the reservation here and i need to bring this thing back to task- discuss the less obvious stuff that hasn't been discussed.
Next discussion topic was mentioned by Doug:
Doug said:
Trying to hang siding on all that foam is next to impossible, exterior finish will suffer over the years. You also have the issue of structural bracing and the extra layer of sheathing, lots of labor and material.
Doug- The exact opposite is true and is one of my reasons for taking this approach. Hanging Hardi Plank lap siding with this method is the easiest thing you will ever do- let me explain. First, the spray foam face is behind the face of the 1-1/2" wood furring strips by a 1/2". This is a beautiful thing in terms of siding, a relief area between studs for back venting of the siding material. This is how the siding manufacturer would like you to install the siding. A very small percentage of siding goes on the wall with any back venting. This method of insulating just happens to provide this scenario. Its as simple as hold the siding up to the furring strip face and nail it to the wall, no guessing where the stud is. Its not hidden behind a layer of OSB or plywood and a layer of Tyvek. Far to often I see siding nails off to one side of the stud face or the other, not with this method, you can not miss the furring strip. By the way the furring strips are rock solid attached on three sides by high density foam. I would argue that the exterior finish, and by that I assume you mean paint on the siding will last much longer with this method as the vapor drive and moisture retention is dramatically reduced. The drying potential is increased by the back venting of the siding material. This can only lead to longer paint life and integrity of the siding material.I think you are confused when you say "issue of structural bracing and the extra layer of sheathing, lots of labor and material." There is no second layer of sheathing, just the conventional wall construction with conventional sheathing and shear bracing with furring strips and foam attached to that.
By the way, I am a builder first, and a spray foam contractor second. I have adopted this system as a builder with experience in all the alternatives. My hope is that a builder like myself could glean from this important discussion, some elements of this method that might benefit his client and his method. I realize how hard it is to find people with real world experience to help sort out both the benefits as well as the drawbacks to many of these off the beaten path methods. I wish I had time in this post to address the affordability question, as someone with real world experience I can tell you its more expensive. Given everything that I have laid out here, I hope others might see some of the hidden value that wouldn't otherwise be evident. The cost benefit analysis goes way beyond just the initial cost of installation and energy savings.
Bond Campbell
Kudos to you
Another very good post
you should start a thread and post some photos in the Q&A
"if the cavity insulation is
"if the cavity insulation is not air-permeable, then the first condensing surface is not the structural sheathing, and that is really what you are trying to avoid."
Hi. Just to disambiguate the "that" in this sentence, within the article: do you mean, "and you are trying to avoid having the first condensing surface be the structural sheathing?" Thanks.
Response to Minneapolis Disaster
Minneapolis,
Yes.
Using rockwool in place of foam
Does anyone have experience using a rockwool product like "Roxul" in an installation similar to the one illustrated? Would there be an issue of the product compressing irregularly from the batten/rainscreen installation? I had read about a potential installation using 4" stand off blocking/backing installed with a clip similar to a commercial curtain wall but that is even more off topic and would just be interested in some firsthand knowledge of Roxul since I don't think petroleum based products like foam, polyurethane and plastics are a long term sustainable solution for building materials.
@ Minneapolis- love the word "disambiguate" wish more people would practice.
If this is posted in the wrong section of GBA I will gladly go elsewhere.
Sam
How not to insulate a wall?
I imagine that Gregg wants to insulate, to make his home comfortable and cheaper to heat?
Perhaps he should consider insulating on the inside?
Insulating on the inside will use less materials (It will also make the rooms smaller) It will cost less, be easier, will not change the appearance of his home and will ensure that there are no
condensation problems with the walls, it will be easier to make the structure both airtight and water vapor tight, while doing it he will not have to worry about the weather.
When his home was built, insulation was in its infancy, homes were more or less waterproof, they relied on fires and cracks to dry the
structure.
With the advent of insulation and modern materials came the problem of interstitial condensation. Yet once you understand how moisture/water vapor/condensation works, the solutions are
simple.
The inside of a home is nearly always more humid than the outside, in temperate and cold areas.... and minus 20 to 30C fits that criteria.
This is easy to confirm, simply buy a Weather Station with two or three transmitters, attach it to your computer and see how the air
temperature and relative humidity change over 24 hours in your home, attic and basement. (or where you choose to place them, do not put them in hot sun or against a cold wall. On a table in the middle of the room is fine)
Watching the hourly changes can help one understand the problem.
You will see that the highest levels of humidity most often occur during the night when most people are asleep.
Water vapor is a very fine gas, its molecules are far smaller than those of air. It can easily pass though drywall without sign or trace, the smallest crack is a wide open door to water vapor. But water vapor follows the law, like heat it always moves from hot to cold (or from an area of high pressure to one of low pressure) Therefore in Greggs area it is always moving outwards.
As Bond Campbell wrote on 05/03/2011 three and a half inches of closed cell insulation polystyrene will solve the "Dew Point" problem
and will stop running condensation inside a wall.
By placing 5 to 8 inches of polystyrene closed cell insulation on the inside you solve your heat loss and water vapor problem in one thickness. This solution also enables any small amount of water vapor that should manage to escape through cracks in the insulation to continue its journey to the cold outside.
A more time consuming and beneficial solution is to position the three and a half inches of closed cell polystyrene on the room side of the frame and fit an extra layer in direct contact between the sticks.
Log in or become a member to post a comment.
Sign up Log in