Air sealing & insulating above Mitsubishi ceiling cassettes
Found this response in a related question but wonder if you can illustrate if anyone has an elegant solution for keeping the ceiling cassettes and their awkwardly placed pipes sealed inside the envelope and still making it possible to service from above should it be necessary.
This specific installation is a retrofit where the thermal boundary is the ceiling plane and the insulation is spray foam in between existing ceiling joists. The rough opening for the cassettes extends at least 6″ beyond the end of the unit where the electric, drainage and refrigerant connections are made. Since everything needs service at some point, we want to make the surround/box both airtight and removable without destroying anything.
“Kevin,
The cassette can go in the ceiling assembly or in a soffit. In either case, it’s possible to install an air barrier and insulation above the cassette.
Answered by Martin Holladay, GBA Advisor
Posted Oct 2, 2013 6:08 AM ET”
Thanks.
GBA Detail Library
A collection of one thousand construction details organized by climate and house part


Replies
Mary,
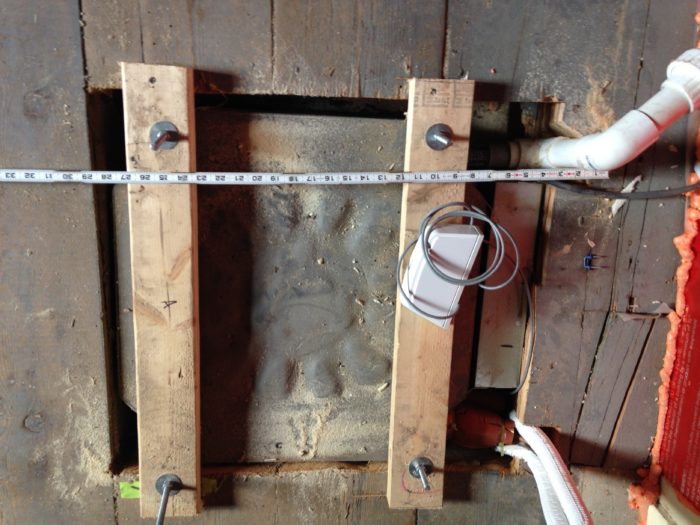
What perspective was this photo taken from?
If you want to air seal and insulate a rough opening in your ceiling, make sure that the air sealing work is completed on the sides of the rough opening (along the joists and at the blocking between the joists) before the cassette is installed.
If the boards in the photo are attic floor boards, the gaps between the boards need to be sealed with caulk -- at least the gaps in the vicinity of the rough opening. Then you have to build an insulated box of the required size. The box should have some type of thick weatherstripping (for example, garage door weatherstripping) to seal the gap between the bottom of the box and your attic floor. You'll also need some type of hardware (at the minimum, four hook-and-eye fasteners) to secure the insulated box in place.
At the penetrations (pipes, wires, etc.) you'll probably have to use canned spray foam, and re-create this seal with new canned spray foam whenever the box is removed for maintenance procedures.
Thanks Martin, The photo was taken while standing above in the "unfinished but saved for active storage" attic. Your approach is aligned with our plan, thanks for the feedback. Only departure is that I'll apply side cleats to the box that are screwed down into the floor boards so that the removal requires a tool... I'm happy to have the ceiling cassettes as an option for clients who don't want the wall units but need to remember that the additional labor to handle the installation properly adds significant cost .
Mary,
Are you trying to insulate above just the ceiling cassette RO or you also trying to insulate all the various piping?
I like to peel the attic boards away enough to access the top sides of the joists. I then build a box out of XPS, that extends high enough above the RO to allow room for the pipes to exit it on the sides of the box, and then I create a overlay inset cover out of two layers of XPS. (The inner layer fits inside the box, and the top layer fits on top of the box).
The key is to caulk the XPS to the joists, and then tape the seams. I also fully tape the the cover layers to themselves. It is important to ensure that there is a very tight fit between the box, and the inset layer/cover. EPDM seals at the top edge of the box, and two rubber bungee cords screwed down on each side adequately keep the cover tight. Air seal at the penetrations for the pipes and you're all set.
The benefit to using the foil tape to connect the layers, the XPS, the caulking, etc., is that all the materials are readily available, and can be easily sized to handle any opening or R-value requirement.
If the description doesn't make sense - I'll upload a pic.
Good Luck!