When it comes to a building’s energy efficiency and long-term durability, air leakage through an assembly is undesirable. Air infiltration and exfiltration can account for significant energy losses; and moisture-laden air can lead to the rotting of lumber over time, compromising durability.
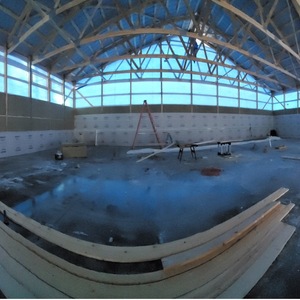
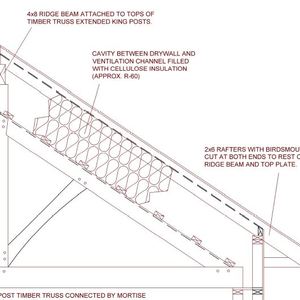
For the vented roof illustrated here, there is both intentionally designed air movement and unwanted air movement within the same assembly. The lower vent—located in the soffit—communicates with the vent located at the ridge (stack effect is what vents the attic). This system takes any moisture-laden air in the attic that is a result of diffusion or leakage from the house below and vents it out through the ridge. The attic air is then replaced by cooler, drier air entering through the soffit. While the sloped portion of the roof is vented and requires air movement for its success, the floor should be as airtight as possible for the conditioned house below to retain its heated or cooled air. So, how to achieve this . . .
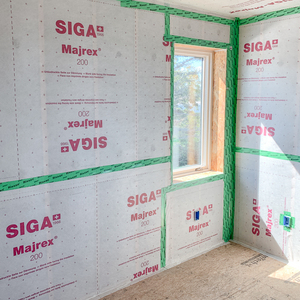
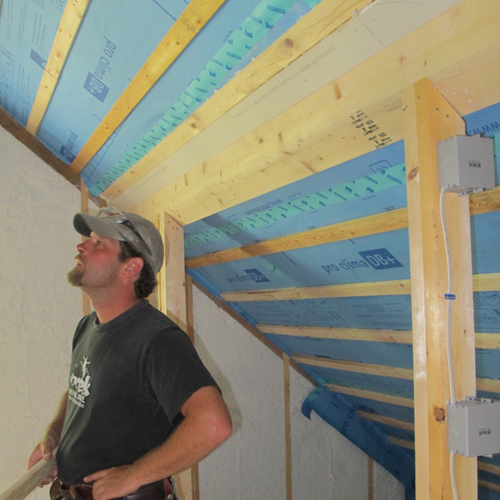
Siga Majrex is a smart vapor retarder that allows for diffusion while maintaining an air barrier. It is staple-fastened to the underside of the roof truss (or ceiling joist). The critical transition in this assembly is the vapor retarder along the ceiling plane to the exterior air barrier, which, in this case, is Zip sheathing. To maintain continuity of the air barrier, two beads of sealant are applied at the exterior face of the top plate; and a 16-in. flap of the Majrex is centered and draped over the top plate. Then the sheathing is installed. The sheathing compresses the beads of sealant, resulting in an airtight connection between the interior vapor retarder/air barrier and the exterior sheathing/air barrier.
On the interior, the flap is rotated upward and stapled…
Weekly Newsletter
Get building science and energy efficiency advice, plus special offers, in your inbox.

This article is only available to GBA Prime Members
Sign up for a free trial and get instant access to this article as well as GBA’s complete library of premium articles and construction details.
Start Free TrialAlready a member? Log in


7 Comments
Minor edit: The label “1½-in. vent space” should point to just underneath the roof sheathing (rather than deeper below)?
The line between the vent space and the insulation is not labeled. What would you use for a barrier to keep loose fill out of the air space? You have a lot of useful details on materials elsewhere.
Most GBA articles discussing rainscreen furring note that 1x3 wood furring tends to split, and recommend using plywood strips or 1x4’s instead. James Hardie installation literature says best practice is 4” nominal furring.
Out west it is common practice to install ceiling drywall directly to trusses rather than first installing ceiling furring. Using precut studs, bottom plate and two top plates, the walls are 97 1/8” tall. With ½” ceiling drywall, that leaves a 5/8” gap below wall drywall, at the bottom plate. With ceiling furring, that bottom gap is pretty tight or nothing. Wet finish floors could lead to wet drywall. Why the extra labor and material to use ceiling furring?
Is the Siga Majrex robust enough to not get torn up and ripped up during the installation of the trusses/roof rafters? How resistant to doing this can framers be since it is an extra task?
JWolfe1,
One way around that would be to sandwich it between the top plates. That's what we do when we put strips of poly on the top of interior walls here. Then you can still walk the walls, there are less fastener penetrations, and you can mark the layout for your trusses on the top plate before standing the walls.
Malcom, thank you on the sandwich idea.
A question about the Foam-lok. It does not seem to be functioning in an air sealing capacity in this detail. Is the foam there for R value because the cellulose tapers to such a minimal dimension? Would it not be better to raise the truss heel height?
I suspect the Foam-lok was intended partly as an air seal, blocking leakage at the intersections between the truss, 2x8 truss blocking, top plate and unspecified vent space barrier material.
The approximately 3" thick x 8" high Foam-lok also would provide higher R-value than cellulose attic insulation at that lower height area (although I wouldn't make that choice myself.) So yes, raising the truss heel height would help raise the somewhat lower insulation value in that area (but adds to the height of the building and associated costs).
Raised heels are definitely a good approach and would eliminate the need for spray foam at the heel/plate interface. However in a retrofit situation where existing heel height is limited, foam is a solid solution.
Log in or become a member to post a comment.
Sign up Log in