

Image Credit: Tristan Roberts
Image Credit: Tristan Roberts The best opportunity to make important decisions that will deliver energy-efficiency for the life of the home is during design. There is rapid diminution of these opportunities during construction and then during use of the home.
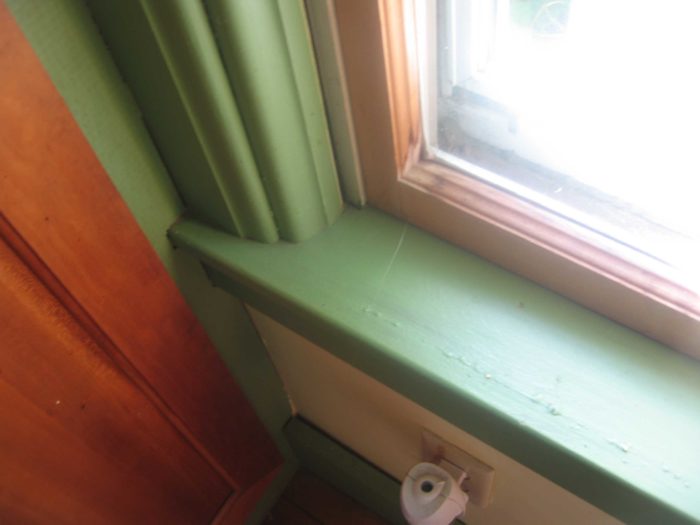
Image Credit: John Straube, Building Science for Building Enclosures A blower door test revealed air movement at this joint in window trim in an old house. Similar wood-to-wood joints throughout the house create a significant amount of the home's air leakage — and are easily sealed with caulk.
Image Credit: Tristan Roberts
More Energy Solutions


From an energy-efficiency standpoint, the trouble with owning an old home is that you’re stuck with whatever bad decisions the previous owners made, and historical trends also tend to work against you. The trouble with building a new home is that you are the one that is going to make the bad decisions.
The best opportunity to make important decisions that will deliver energy efficiency for the life of the home is during design. There is rapid diminution of these opportunities during construction and then during use of the home.
Capitalizing on energy-saving opportunities
By the same token, small decisions that can add little or no cost when a home is being designed, like how it is oriented toward the sun, have huge benefit and are impossible to do later on. Once a home is built, you are left with much smaller opportunities, like plugging air leaks.
Here’s to small opportunities! This week we complete to our two-part series on finding and fixing air leaks in existing buildings (read Top 10 Air Leaks in Existing Homes — Part 1). After downplaying the importance of this topic I’ll say that I consider attention to air leaks in existing homes and buildings an essential issue, for reasons I covered last time: huge effects on durability, heating and cooling costs, and air quality. Getting an energy audit and sealing air leaks can reduce heating bills by a lot and help you breathe easier
Your caulk and spray foam can are ready to go — where to look for leaks? The first five noteworthy air leaks I named were: 1) The chimney case, 2) Light fixtures and plumbing, 3) Interior wall cavities, 4) Windows and doors, and 5) Basement masonry and sills.
Now we’ll look at the rest , in no particular order.
6) The floor
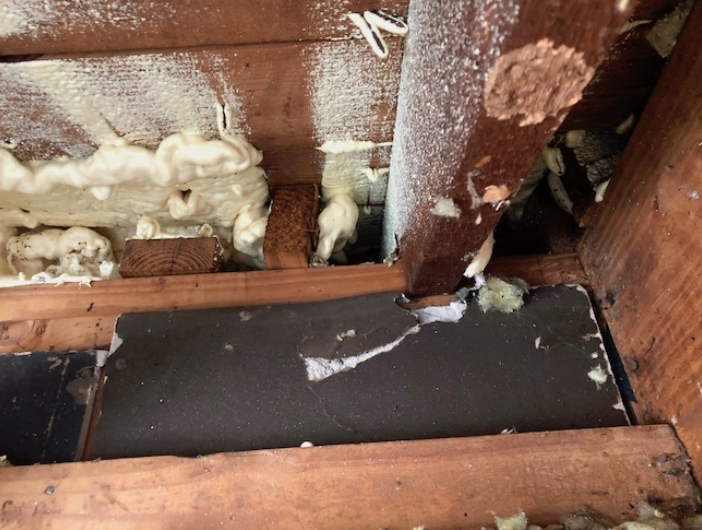
Leakage point #6 harkens back to #3: interior walls. Because of how houses are framed, particularly balloon-frame houses (built up until the mid-1950s), interior walls communicate with the floor structure, which communicates with the exterior wall, often at a location with no insulation or air seal. Floor systems, particularly at the second story, communicate with exterior wall cavities, and often these areas are uninsulated or poorly insulated.
If insulated with spray-in cellulose, for example, an installer has to take special care, often with the “grain bag” technique, in which an empty bag is inserted along the floor joist cavity, just inside from the exterior wall, and filled with cellulose, “plugging” the joist cavity. Without the grain bag, that part of the wall is likely to go uninsulated.
If your floor not only feels cold but you also get drafts of air blowing at you through cracks or through old heating vents, consider hiring a contractor to look at insulation, and use using caulk, spray foam, rigid roam pieces, or simply floor repair to reduce those issues.
7) Wall penetrations
Holes cut in the wall, both interior and exterior, for electrical boxes and other penetrations are often responsible for a fair amount of air leakage. If this is a problem for you (and on a cold, windy day it should be easy to tell), it’s easily worth a few bucks to buy foam inserts at the hardware store to tighten them up. (For more on this, and some debate, see More Energy Myths.)
If you don’t notice a problem and it’s not a windy day, the reason may be something called the neutral pressure plane. Because warm air rises, air is trying to force its way out at the top of your house (positive pressure), while air is trying to force its way in at the bottom (negative pressure). Somewhere in the middle of the house, you have neutral air pressure. At the neutral pressure plane, you could open a window (or have a leaky outlet) and not notice any air coming or going.
The location of the neutral pressure plane changes all the time due to wind and other factors, but in general there is more air moving in the basement or attic, and electrical boxes in the middle of the house are a minor (but noteworthy) issue.
8) Attic hatch or door
It’s very common for an attic door to not have any weatherstripping, and to badly leak air due to the pressure dynamics just discussed. Getting that door really tight through weatherstripping or other means should be a top priority in any home.
9) Behind stuff
Nearly every home has a place, or several, where the drywall or plaster on an interior wall is missing, and a lot of air is leaking through the exterior sheathing and the insulation. If you’re saying “not in my home,” think about not the obvious places, but behind stuff. Three common places: behind a bathtub, or tub or shower surround; above wall cabinets in the kitchen soffit; or inside any built-in cabinets. If you have a chance to access these spots and add drywall — great. If you can’t reach them, try isolating them from the interior with caulking, foam, and other tools.
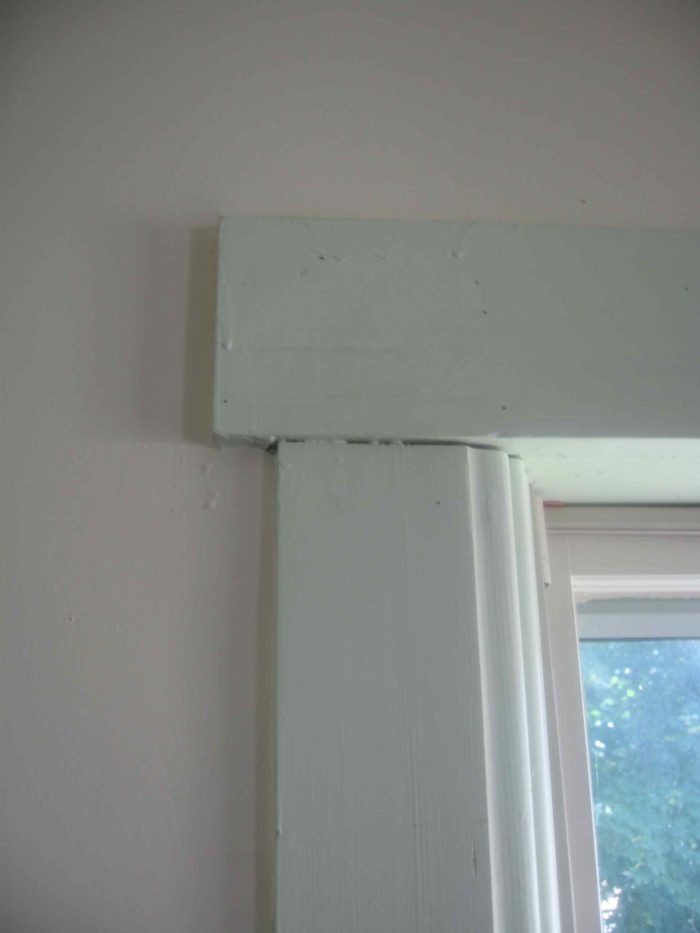
10) Wood-to-wood connections
Anywhere wood meets wood in a home is a place where air can move. If you can’t see light, that doesn’t mean it’s tight. Common culprits are wood paneling on cathedral ceilings, the crack between the baseboard and the floor, and where pieces of window trim meet each other or the window. Delving deeper into the walls, common problem areas (if you can access them) are at the top and bottom plates, where wood framing meets other wood framing components. Again, get out that caulk gun and go to town — looking especially for problem areas that are high or low within the building.
Feeling cold? Send in your questions and comments!
Tristan Roberts is Editorial Director at BuildingGreen, Inc., in Brattleboro, Vermont, which publishes information on green building solutions. You can learn more at www.BuildingGreen.com.
Weekly Newsletter
Get building science and energy efficiency advice, plus special offers, in your inbox.


7 Comments
Caulk inside or out?
Does one usually focus on the joints/seams inside rather than outside? The air must come in from somewhere, right....
I just ran around caulking baseboards. The house is supposedly tight-ish at 1400 CFM50 but I still feel drafts... and cold. (thermostat at 66 can't help I guess)
airtight drywall approach
Eric, it may be useful here to contrast two approaches to an air barrier in new construction: the airtight drywall approach and a variety of approaches that center around taped sheathing or some variety thereof.
In new construction I think there are a lot of advantages to the sheathing approach, but unless you're doing a deep retrofit, old homes don't have that option. Looking to the drywall as the main air barrier in an old home is the most feasible option, until someone convinces me otherwise. There are a lot more surfaces to check, but looking for continuities in that drywall and caulking on the inside makes sense.
Air barriers
Stooping air leakage at both the warm side and the cold side will yield results in an older home, the goal is to keep insulation bays airtight and maximize the rated R-value. Infiltration reduction as we all know will increase comfort and reduce heating bills.
What now?
I've recently investigated air leakage around a sliding patio door in my 12 year old home. While the materials are all very good quality, the workmanship is poor. What I found was that the seams in the house wrap are not taped and the house wrap was crudely cut away around the framing for the door wall. The insulation stuffed between the frame and jam of the door wall was dark gray with the dust that has been blowing into the house for years. I've found other problems in the attic where the sheathing has been poorly fit to the peak of the gable end to the extent that I can see daylight seeping through. I wonder what issues are hidden in the areas I can't access. And in the finished basement along the one side that is open, I foudn significant gaps between the sheathing and the base plate. With these and other problems my "new" house with all the materials for tight construction is drafty and cold when the winter winds start blowing. My question: now what do I do short of stripping the siding, gutting the basement, and repairing the details?
Response to D. Mikulec
D. Mikulec,
1. First of all, if you have a vented unconditioned attic, the gaps that allow you to see daylight are probably doing no harm, unless you get a lot of drifting snow in your attic during the winter. After all, most attics are outside of your home's conditioned envelope.
2. The problems you describe are fairly common, although it is always distressing to hear that such problems occur in a new house. (I'm aware, however, that new construction is often leaky.) A good home performance contractor or weatherization crew will know what to do, so don't despair. You need to hire an experienced crew to perform blower-door-directed air sealing at your house.
If your family has a low income, the work will be free. Contact your local weatherization office.
If you need to pay for the work yourself, choose a contractor who is certified by RESNET or the Building Performance Instutute (BPI).
divide and conquer
I second Martin's suggestions. I would also suggest thinking of a "divide and conquer" strategy rather than despairing of the overall condition of the house. Get that audit, then identify your home's personal "top 10" problems in order of priority, and go after them when possible. A home,. even a new one, is a long-term project.
thanks
Thank you, Martin and Tristan, for your comments.
Log in or create an account to post a comment.
Sign up Log in