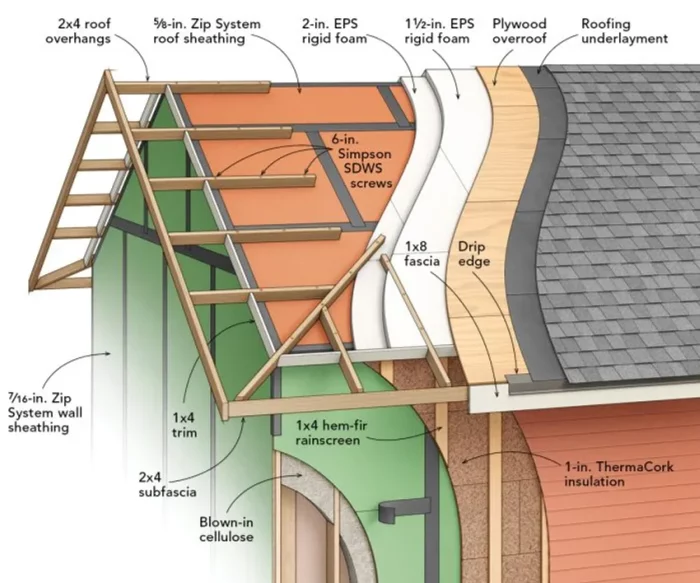
Framing the rake overhangs of a vented over-roof
Zone 3A – I’ve been investigating the feasibility of doing a chainsaw retrofit over-roof on a 1970s ranch-style house and the one thing I have had a fair amount of issue finding information on is how to frame the rake overhangs on a vented assembly in a moderate climate.
The problem I am running into is almost all of the over-roof assemblies I can find are either non-vented and/or that are in far colder climates necessitating considerably thicker insulation that can allow for layered insulation and framing to minimize thermal bridging.
The assembly I am considering would be the following –
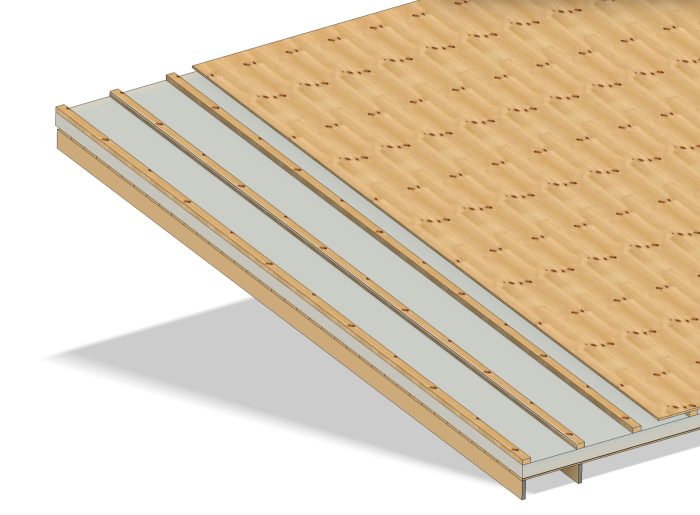
– 3/4″ TG 1×6 Decking (existing)
– Peel & Stick Membrane
– 2″ Poly ISO Foam Board
– 2″ Poly ISO Foam Board (with aluminum facer)
– 2x4s (on the flat screwed through to the rafters)
– OSB Sheathing
The proposed assembly is in the first attached image. If I framed the overhangs like they are commonly monopoly framed (shown in the second assembly) I am not working with enough insulation to be able to avoid thermal bridging at every location the framing ties into the roof.
Should the overhangs simply be ladder-framed and attached with fasteners to the gable wall and the 2×4 that is screwed through the foam into the rafter?
GBA Detail Library
A collection of one thousand construction details organized by climate and house part


Replies
We added 11-in. ladder framed rake extensions to our ‘58 ranch as the roofers stripped asphalt shingles (and a fair amount of delaminated plywood sheathing).
I held the extension width to 11-in. so 1/2-in fasteners from the rake rafter to the inboard rake extension rafter would suffice. (I alternated threaded rod connections with lag screws driven from the interior).
If you built your ladder with 6” blocks , and added a layer of 2” foam (at first blush I’d turn to 60 psi XPS,).
If you extend the thermal break foam down another 3”. You could create a frieze with some interesting relief. I see inverted gargoyles exhaling moist rain screen air…
I did go down a rat hole to avoid putting foam in the extended rake, but quite frankly, that violated the KISS principle and weighed heavily at the new outer rake board.
If you want a sketch I could possibly accomplish that
You should apply the rafter tails after-the-fact. Do exactly what Matt Risinger did on the roof of his personal house which was the same construction method you are proposing.
Risinger used LVLs on his and given the overhangs I would be replacing are 24in deep I would be looking at ~100 rafter tails, and about ~50-60 for the rakes @ ~$30 in material cost each for the LVL and screws that ends up being $4500+ framing material cost bump.
I really like the concept, but that LVL cost makes it a lot more painful😀
Matthew25,
The OP wants to extend the rake, which in my songbook is the gable edge of the roof which doesn’t grow tails.
I suppose one could cantilever the foam, and upper sheathing, and add rake extension after, but it seems unduly onerous.
I shouldn’t have called them rafter tails but Risinger did applied outriggers on the gable ends too. Looks like OP found the video I was referring to.
aston01,
Another option to support overhangs at the rakes, which you see on many craftsman style houses, is to use brackets, and make the fascia load-bearing.