Attic / roof air sealing and insulating
I am a novice DIY trying to avoid mistakes. This house is in Iowa.
I have a house and am renovating before occupying. The first goal is air sealing and the first project was the rim joists.
Now I am preparing to seal and insulate the attic, which I think in this case would require sealing and insulating the roof.
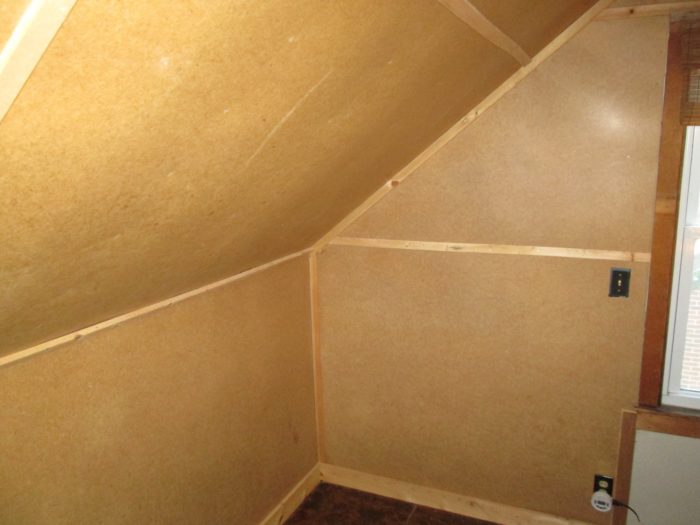
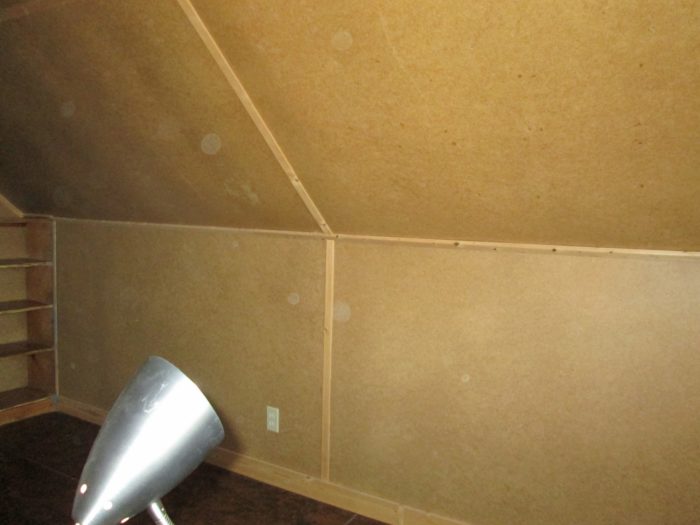
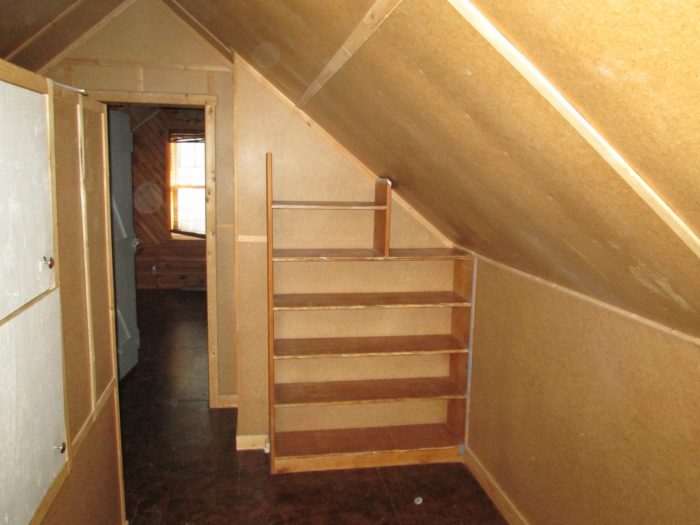
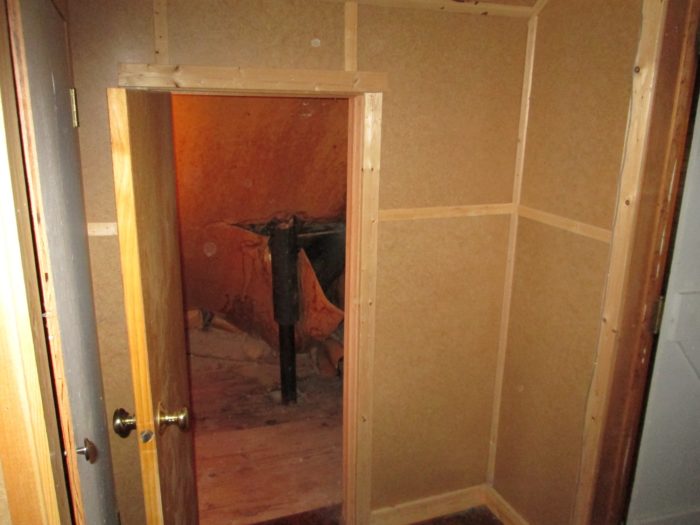
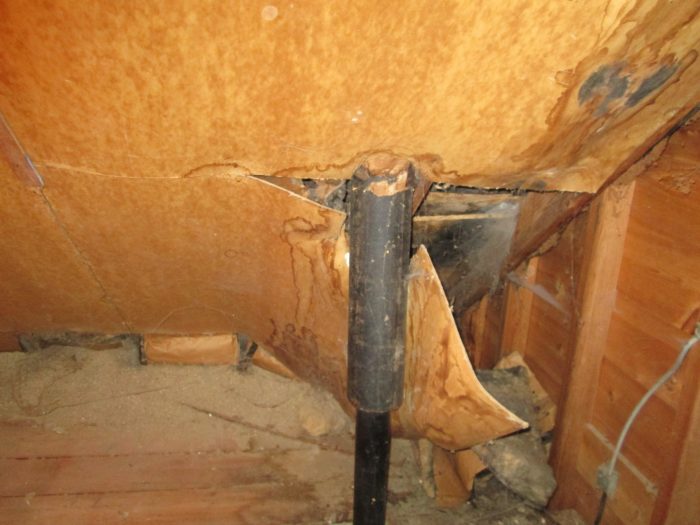
The finished attic has two main rooms. The photos show the progression from the top of the stairs into a type of crawl space adjacent to the first room. Some of the paneling has fallen within the crawl space so I can see the roof rafters and sheathing, though I have not inspected closely.
My guess is the roof / attic are only slightly sealed and insulated. Part of the gutter fell this winter after ice dams formed.
My question is, should I simply remove the paneling throughout to get a better look at and access to the roof? I hope to insulate it myself if there is not any rot or mold. I could remove part of the paneling, work on the roof, and then do another section. If there is mold or water damage I would probably have to hire that work done.
I am having trouble envisioning what would be the appropriate thermal envelope. As I spend more time on it I think I will get a better idea. Thank you.
GBA Detail Library
A collection of one thousand construction details organized by climate and house part


Replies
Erich,
This is an insulated sloped roof assembly. There are many ways to insulate this type of roof, but it's easy to make catastrophic mistakes, so you need to understand the pitfalls and the building code.
This type of insulated sloped roof assembly can be either vented or unvented. Either approach will work, as long as you get the details right.
Here is a link to an article that should answer most of your questions: How to Build an Insulated Cathedral Ceiling.
Finally, to address one of your questions -- "Should I simply remove the paneling throughout to get a better look at and access to the roof?" -- the answer is yes.
Thank you Martin. I think I will take down panel in one of the crawl space / kneel areas.
The house faces east and west. The crawl / kneel areas only run about half the length of the walls, the other half is living space.
My guess is opening up the panel in the crawl area will cause less air flow and heat loss pending replacement.
The primary book I have on roofing is Renovation 4th edition, a Taunton publication. Things will make more sense once I see the roof.
Thank you.
Thank Erich for explaining this so clearly. I was confused earlier about the concept.
Here are a couple photos with a piece of the panel in the crawl space removed. It looks a lot like the photos and diagrams on the websites and books so that is reassuring.
I spoke with the city permit department and was told the city does not currently monitor or have codes for roofing ventilation. He did give some advice on ventilation and said insulation should be at least R-38. Thee is only one layer of fiberglass batt loosely set in between each roof joist so I am guessing that is not the case. The gutter fell off this side of the house. When I entered the house after the tenant vacated the thermostat was not working due to a bad battery and I think the heat had been 90F+.
Attached are a couple photos with more paneling removed. The circled area shows where the roof joists meet the ceiling joists. It looks like the ceiling joist has a top and bottom panel and is filled with loose fill insulation.
My plan now is to cut off the nail stubs and apply polyisocyanurate / expanded polystyrene insulation directly to the sheathing with an adhesive and seal with caluk and Fill and Seal, at least in this small area and get an idea for the amount of effort this would rquire for the entire roof.
You may find that cut'n'cobble with virgin-stock 1" iso with can-foam edge seal to be as expensive as a 1" shot of closed cell polyurethane installed by a pro (at about a buck a square foot) which would be sufficiently protective of the roof deck in your climate if those are 2x6 or 2x8 rafters, with blown cellulose or batts fully filling the remainder of the space. The ratio of foam-R to fiber-R determines how many hours/winter the interior side of the foam is below the dew point of the interior air, but 1" of closed cell is a ~1 perm vapor retarder, which protects the roof deck from rapid adsorption via diffusion, but still lets it dry at a reasonable rate in the spring as the average roof deck temps rise.
Putting foil-faced goods in there can be problematic without a vent space, since the foil facer is extremely vapor-impermeable, but so is a layup of 30# felt + shingles, so the roof deck would not be able to dry in either direction at a reasonable rate. With unfaced EPS you'd be at 1 perm with a 3.5-5" thickness- at only 1-2" EPS would not be sufficiently protective without an interior side vapor retarder or a vented air space.
There is no way to get R38 into a 2x6 rafter bay. To get R38 into a 2x8 rafter bay would require 6" of closed cell foam (and not very green at that thickness, unless you went with 7" of Icynene's R5.2/inch water-blown 2lb foam which has only about 1/1000 the greenhouse gas potential of 6" of HFC-blown foam.)
A saner more cost-effective approach would be to go with a 1" flash'n'fiber approach on the interior, and add plan on adding rigid foam above the roof deck when it's time to re-roof for bringing it up to full-R. In a 2x8 rafter bay with 1" of R6 foam and 6.25" of R3.5-4/inch fiber you would be in the R30 range, and with 2" of EPS or iso above the roof deck you'd be there, and have a pretty good thermal break over the rafters to further enhance performance.
Cut and cobble has gone much better than I expected. Cutting 4 foot lengths is a lot quicker and less tedious than cutting all the smaller odd shaped basement rim joists. I tried polyisocyanurate and it is slightly easier to cut than expanded polystyrene but not much. Right now my plan is to fill the bays with rigid foam and eventually cover the bays with rigid foam.
Cutting and installing the foam takes a small fration of the time relative to removing the paneling and drywall, though all of it will get easier with experience.
Erich,
That looks more like expanded polystyrene (EPS) to me than extruded polystyrene (XPS). XPS is typically blue or pink.
In case no one else has mentioned it, make sure you get a fire barrier (1/2" drywall) over that EPS at some point. Your old paneling may not be a valid fire barrier.
UPDATE - The attic is about 95% insulated between the rafter bays. The rafter bays are perhaps 5 1/2 inches deep, and have been filled with 4-5 inches of expanded polystyrene, at least 2 boards 2 inches thick, and 1 board 1 inch thick if it fits. Cut by hand with a serated blade to fit tight, and sealed with silicone caulk or Great Stuff Pro.
It has taken perhaps 2.5 months of 4-6 hour days to complete. Removing the finishing and figuring out what to do is the hardest part, and I have no prior experience with the frame of a home. The actual cutting and inserting is less difficult at the attic than the rim joists.
Since posting this question, new information has been posted at GBA. Here is a recent article specifically on cut and cobble. https://www.greenbuildingadvisor.com/blogs/dept/musings/cut-and-cobble-insulation
This article discusses insulation, and from my perspective in a cold climate, reconfirms the choice of expanded polystyrene versus polyisocyanurate which had been widely assumed. https://www.greenbuildingadvisor.com/blogs/dept/musings/cold-climates-r-5-foam-beats-r-6
I plan to add foam boards across the rafter bays. I have not noticed any condensation, water, or any problems.
For anyone considering attic insulation, it is plain to see which areas of the roof have the least insulation by the amount of snow left on various parts of the roof. Less snow means it has been melted by leaked heat.
I would encourage anyone planning to "do it yourself" to thoroughly read GBA, read the debates, and understand if you have the time and tolerance. I have dozens of books on home renovation and insulation but ultimately GBA is timely and thorough. (Another site - Family Handyman - had wrong information about why not to use expanded polystyrene at rim joists, for instance.)
Hi Keith - You are correct, it is expanded polystyrene, not extruded. Expanded seems the best choice in cold climates, more environmentally friendly than extruded and cheaper with higher R value than polyisocyanurate. I haven't used any extruded and just a few panels of polyisocyanurate.
I plan to place at least another layer of foam across the rafter bays for a better air seal, followed by a second layer of foam or mineral wool, followed by finishing.
I am taking the finishing very slow because I don't want to have to reopen and redo at some point. I will hopefully get a thermal camera sometime this year to check for any gaps.
I am also hoping some higher density mineral wool may become available for easier installation. I also need to figure out a finish. I would like to avoid drywall and use a wood paneling that can easily be removed for maintenance in case of water damage.
This is an "urban farm" with plenty of outdoor work as soon as the snow is gone so winter is good for this sort of work.
Thanks for your comment, Erich
I think your insulation job looks wonderful. Great job.
Thanks Lucy. I think it is done correctly, there are not any "how to" books on using rigid foam this way.
I have read other comments on condensation. The pieces are fit tight and each layer is sealed, so I think it will be okay, but I don't know how others have done it which led to problems.
I have not found anything online about do it yourself rigid foam insulation from the inside,so am posting some pictures. The roof rafters are fitted with three layers of expanded polystyrene for 5 inches, and attic walls have 2 layers at 3 inches.
Now I am planning to place at least 2 layers, 4 inches, of expanded polystyrene under the rafters and wall studs, followed by mineral wool and finishing.
Two things I have learned about the final layers of rigid foam. First, I am using 2 in x 2 in furring strips. The first set is placed horizontally, the second layer is vertical. This allows for the strips to be attached with screws to the studs / rafters.
The second is to use insulation plates to attach rigid foam to studs and furring strips. I am using plastic plates and regular metal screws. I originally bought metal plates but was worried about galvanic corrosion so switched to plastic.
Attached is a photo which shows 3 stages of completion 1) roof rafters, 2) one layer of bottom foam and 3) two layers of foam.
Erich,
For more information on the technique you are using, see Cut-and-Cobble Insulation.