

Image Credit: All photos: David Murakami Wood
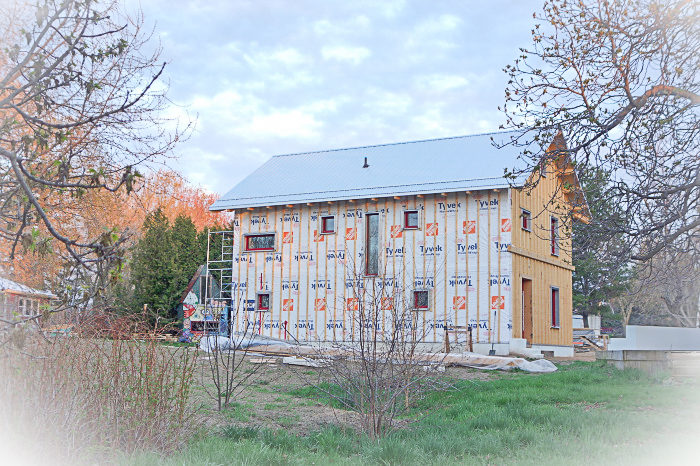
Image Credit: All photos: David Murakami Wood Before it could be installed over the exposed rafter tails, the sheathing was finished with a coat of Sansin SDF, a waterborne finish designed to cover in a single coat. Pro-Clima Solitex Plus membrane protects the roof. The membrane is installed over the insulation and sheathing, and will be followed by battens and galvanized steel roofing. The no-frills galvanized steel roofing should last a long time. With little money left in the construction budget, the author opts for a basic design — no hidden fasteners for the roofing panels. Porch framing designed for a big snow load: Porch rafters will be attached to this ledger, attached to blocking that matches the 11-inch thickness of the wall insulation. The ledger runs the full length of the house. Managing a 36-foot-long timber wasn't easy.
More Guest Blogs


Editor’s note: David and Kayo Murakami Wood are building what they hope will be Ontario’s first certified Passive House on Wolfe Island, the largest of the Thousand Islands on the St. Lawrence River. They are documenting their work at their blog, Wolfe Island Passive House. For a list of earlier posts in this series, see the sidebar below.
As I write these words, it’s the middle of March, and we are just about where we had originally hoped to be by Christmas. I guess three months behind schedule is not actually that bad, and now the snow has suddenly all melted and spring is in the air. It feels like things are much better. If only we weren’t reaching the limit of our funds…
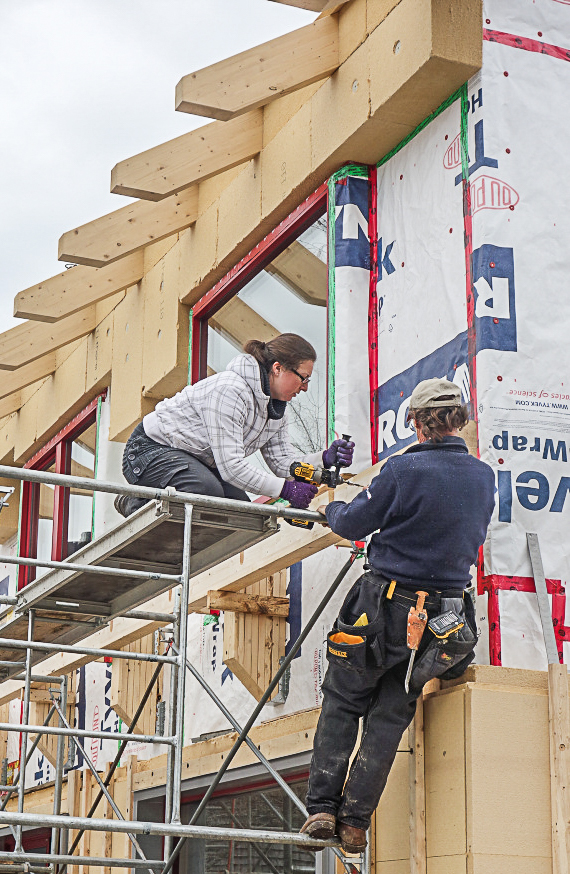
This week the crew has been getting everything on the south side of the house finished so the scaffolding can be shifted to the north side next week. The insulation had all been finished, and the window trim completed. We then spent a weekend staining spruce sheathing with Sansin SDF.
Why would we bother staining sheathing? Well, the sheathing is only being installed on the overhangs where there is no insulation, and our overhang design will leave the rafters and the sheathing on top of them open. There will be no fascia or soffit because we want the lovely engineered rafters to be seen. Someone said it looked “very European” this week. We’ll take some more detailed pictures once the scaffolding has been moved.
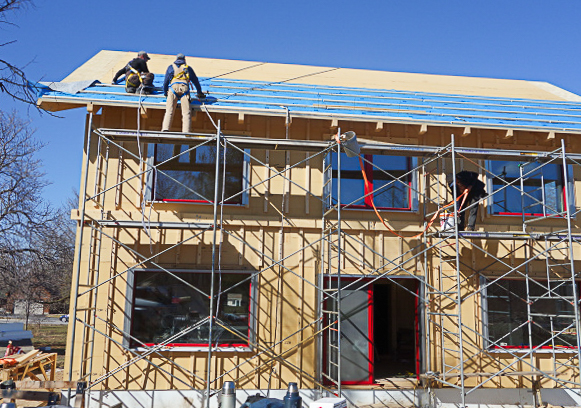
On top of the insulation and sheathing we are fitting a Pro-Clima Solitex Plus membrane, which is high-performance and expensive and was luckily bought back when we still had some money. On top of this are going double-width battens, which are secured right through the entire assembly into the cross-laminated timber (CLT) roof structure with very long (and difficult to source) screws. The battens are double-width because eventually they will have to take screws for solar panels too. The metal roof will be installed by Prestige Roofing of Kingston. We can’t afford anything fancy, and luckily we didn’t want anything other than basic galvanized steel, anyway.
A minor snag with the insulation
We did run into a few minor problems when the crew turned to the north side of the house and the roof. The Schneider-Holz 110 base layer wood-fiber insulation remains messy to cut to size, and we didn’t have enough of the long fasteners we’ve been using to screw the battens and top layer of insulation into the CLT.
However, we managed to source another load more from the marvelous Canadian Log Home Supply, and apparently they are already on their way. That’s what I call service!
We also don’t have enough of the Schneider-Holz Top 220 waterproof wood fiber insulation top layer, and aren’t going to be able to get any more. We will have to improvise with some 1 1/2-inch Roxul Comfortboard and more housewrap, which at least have the virtue of being relatively cheap and easy to source. The snow and rain that is forecast means the crew won’t be on site for a couple of days.
We barely had time to notice that the roofers from Prestige Roofing had arrived before they had finished. We were all away for the time it took them, so we have no pictures of the roofing in progress, just the results! They did a great job.
We have arrived at the point where we have very little money, so we have had to go for the most basic choices, without compromising on the quality of the basic materials or the installation. So this is simple galvanized steel with no hidden fasteners or fancy designs. Environmentally, steel might have a fairly high embodied energy, but a steel roof has a long lifespan and it is entirely recyclable at the end of its useful life.
Building a porch roof to last
Despite the warm winter we’ve been having, Ontario is still a place that often gets plenty of snow. And you have to account for snow load on a house in all kinds of ways. With porches or any lower roof, you have to plan for the sudden shear forces from snow falling from the a higher main roof. A lot of, let’s call them “country porches,” the kind of self-built, not-really-to-code constructions you see all over rural Ontario, look cute, but often aren’t built with shear forces in mind.
There are basically two ways of building a porch that is strong enough to resist these shear forces. One is to have the porch as a structurally independent construction, with two sets of posts — one on the outside, as all porches will have, and another on the inside next to the external wall of the house. The other option is to have the porch connected strongly to the structural elements of the house walls.
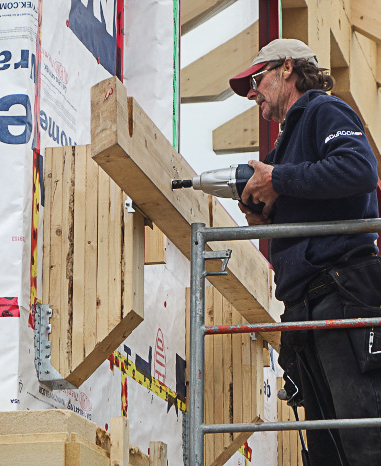
In our case, because the house has solid CLT walls, it is relatively easy to do the latter. This means that connections and the main beams for the porch roof have to be installed now, while we are wrapping the house in insulation.
Our porch components, like the main house assembly and the roof rafters, were also designed by Tomaz Stich and prefabricated by Merk in Germany, along with the rest of the house structure. The connections to the house were modeled after another CLT construction that Tomaz is involved in, located in Calgary, and manufactured by Chris of New Leaf Custom Homes, our builder. The engineer who reviewed the design insisted on extra steel brackets, so the connections will be somewhat over-engineered, but they will definitely be strong enough to resist any sudden dump of snow, and probably could be hit by a meteorite from space.
Of course, the porch itself will have to wait until the rest of the house is finished and we are able to pour its separate foundation. Winter seems to be coming to an end, so maybe that won’t be so long after all!
Weekly Newsletter
Get building science and energy efficiency advice, plus special offers, in your inbox.


7 Comments
Exposed fastner metal roof ?
Brave.
Regarding the porch blocking
Regarding the porch blocking laminations used to extend the ledger out 11”, how are the individual pieces of the lamination attached together?
Porch blocking
I know that the glue between the wood can be as strong or stronger than the wood itself, but it there were a couple of voids....just doesn't seem very prudent.
Small roof
That's what can happen when you leave a detail to be engineered after the fact. If you look at the initial sections, all that is shown is that the roof doesn't extend back to the CLT wall. The engineer was then tasked with designing a connection capable of supporting the ledger hung 11" outside the structure.
In retrospect it would probably have been simpler, and incurred about the same amount of thermal bridging, to secure the ledger directly to the wall and insulate outside it. It is a very small roof to cause all that gymnastics to support.
Reply to Jon Kunesh
I am just generally curious about the structural requirements of that connection. It is not just vertical shear loading that needs to be addressed. There is 11” of cantilever in the offset, so the ledger load would tend to rotate the offset blocking piece about its bottom hanger, causing its top to pull away from the wall.
Roof screws
I'm interested in the layout/design for how your battens were screwed down to the roof. What length screw was required? Was the screw spacing specifically engineered or did the manufacturer have a recommendation?
Also the article mentioned the screws were hard to source - was that due to the length? There are a number of manufacturers which make long screws, though perhaps not if your length was really extraordinary. What manufacturer / product did you use?
Thanks
Blocking and Screws
Sorry, I've been busy at work and haven't replied to the comments recently. There seem to be some misunderstandings or rather negative assumptions here. The porch blocking was not an entirely 'after the fact' solution. The structure of the porch would always have been this way. As a result of some miscommunication in the ordering process, we didn't get factory-cut CLT blocks from Merk for this purpose. The only difference is that our builders ended up making their own instead of haivng them provided. The blocks are not only supported by the bottom hanger, or multiple brackets - that would be weak. The brackets / hangers are supplementary and required by Ontario building code. The blocks are screwed into the CLT wall with multiple screws, and the ledger is screwed into the blocks. The blocks can neither come apart or pull away from the wall. Like most things about the house, the connections are all over-engineered rather than under-engineered or simply meeting requirments. As for the screws, they were (I think) 15" long, as they had to go through the battens, the 11" of insulation and bite deep into the CLT roof (but not go all the way through). The original screws came from Germany and were made to a very high specification and were correspondingly expensive; the extras we sourced from inside Ontario seemed pretty much the same but weren't quite as costly. Make of that what you will! All the screws used to go through the insulation also had plastic head covers etc. to reduce thermal transmission.All this was accounted for in the calculations carried out by Tomaz Stich. Hope this helps!
Log in or create an account to post a comment.
Sign up Log in