Image Credit: Dan Morrison
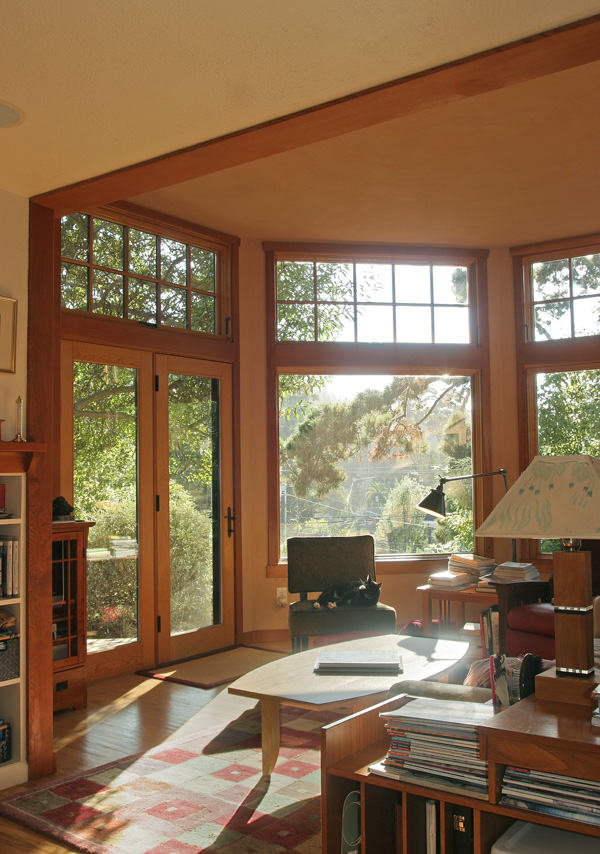
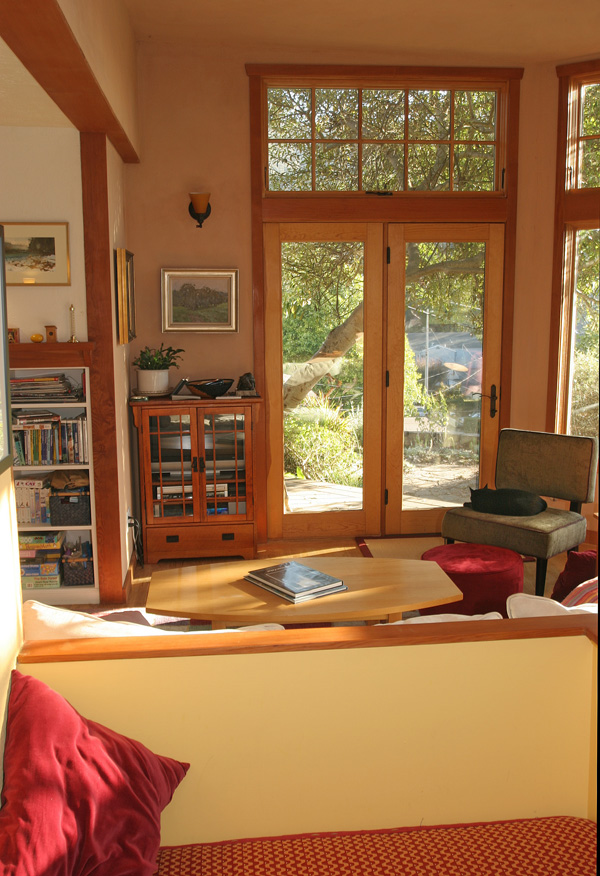
Image Credit: Dan Morrison ONLY A FEW STEPS FROM THE GARDEN. The addition created a better link between the home and its surroundings. Fully glazed double doors open right into the yard and contribute to the passive lighting and heating strategies.
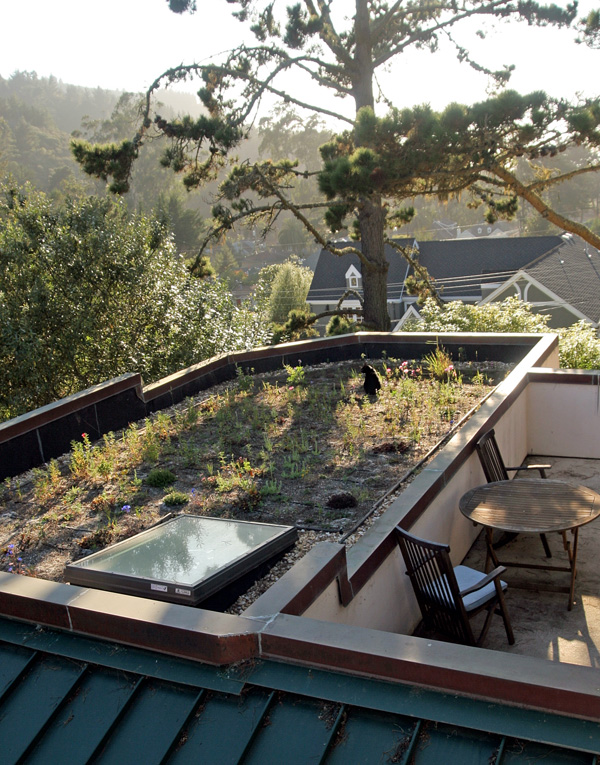
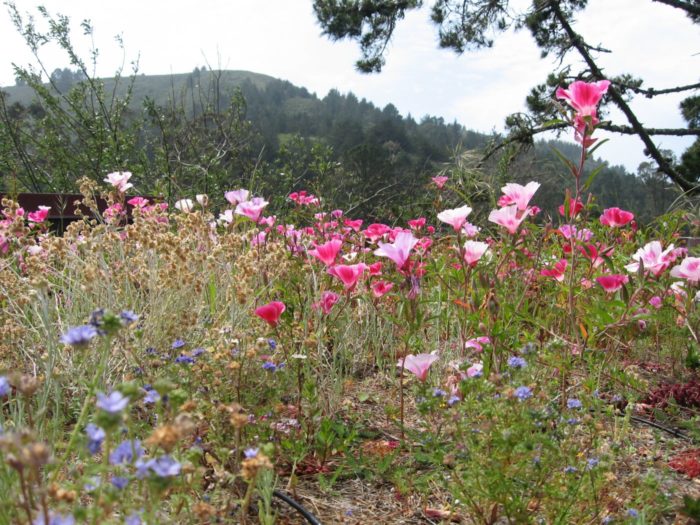
Image Credit: Dan Morrison A BEAUTIFUL PLACE TO RELAX. The accessible rooftop deck makes it easy to take care of the roof garden, but more important, it's a place to enjoy the garden.
Image Credit: Dan Morrison View from our upstairs terrace
Image Credit: A. Edminster A ROOF WITH A VIEW. More space and energy efficiency were important to Ann and Hal, but better access to this view was as good a reason as any to build the new addition.
Image Credit: Dan Morrison
Achieving durability, livability, and efficiency through building science and integrated design
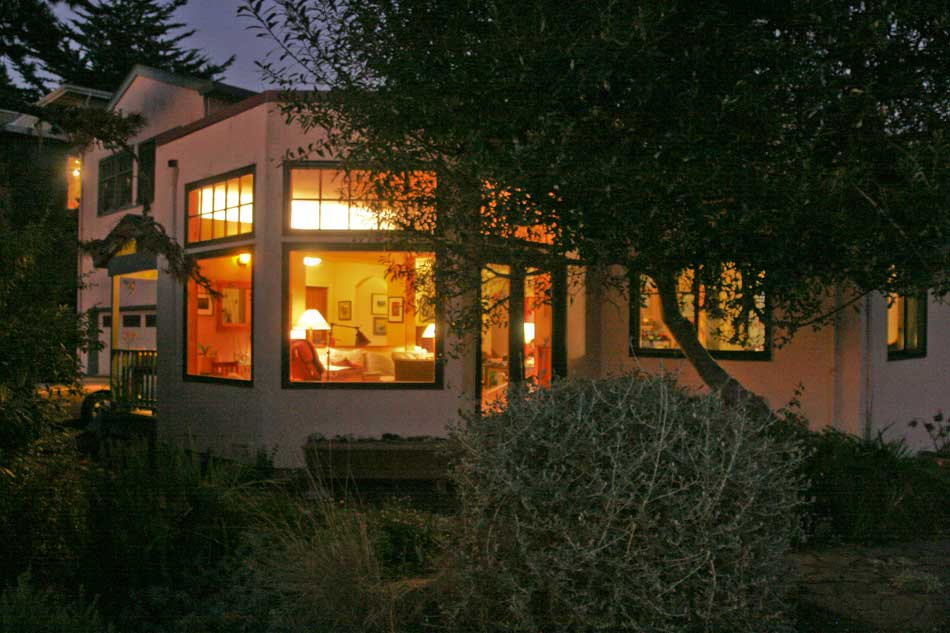
A small addition and an extensive renovation helped this Bay Area 1940s kit home truly take advantage of its prime location. The south side of the home faces a beautiful section of the Golden Gate National Recreation Area. However, with no south-facing windows, the main living areas previously had limited views of the scenery and limited access to natural light. A 200-square-foot pop-out addition created a bright, high-ceilinged seating area with windows oriented to the south and southwest. The renovation included installing larger, better-placed south-facing windows to give an existing bedroom greater light and views. The new glazing gave the house more solar gain in winter. The new window configuration has also enhanced natural cross-ventilation through the house. Neither summer shading nor air conditioning is needed in this temperate climate.
Applying integrated design
The owners, Ann Edminster and Hal Bohner, achieved elegant and cost-effective solutions to their various design and environmental goals by considering the project as an integrated package. Their first priority was to address the durability risk of a below-grade, wood-framed stem wall. They also wanted to improve the home’s energy performance and overall durability, as well as improve daylighting and ventilation while enhancing comfort and aesthetics. Ann recounts, “Because our durability concerns dictated dealing with the foundation under the exterior living room wall and exterior entry wall, and both of those walls were dominated by old windows that would be replaced to meet energy and aesthetic objectives, we had an opportunity to expand the small, poorly designed living room, while at the same time greatly improving solar and daylight access and eliminating some of the below-grade framing.”
Taking a scientific approach
Ann and Hal intend to stay in the home indefinitely, so they wanted it to be as durable and low maintenance as possible. They hired 3-D Building Solutions, LLC, to perform a comprehensive durability analysis. This was instrumental in resolving a number of issues, including drainage, window detailing, ventilation, heating strategies, and insulation selection. They had to balance certain energy efficiency measures with durability measures to ensure that the below-grade wooden parts of the structure would last. Peter Yost explained, “We radically reduced drying capacity in the crawl space by eliminating the uninsulated forced-air heating ducts, and we radically reduced the wetting potential by solving some site and roof drainage problems and covering the bare dirt in the crawl space with polyethylene sheeting.”
The building analysis was especially valuable because it provided an economical solution to Ann and Hal’s energy efficiency goals. “It would have seemed more material-efficient to extend the existing forced-air ducting to serve the new living space,” Ann said, “but the existing furnace was quite old and the ducts were in the unconditioned crawl space and were not insulated. We had to either insulate the ducts or move them into conditioned space, both of which would have required destructive remodeling — even less material efficient!” In-floor radiant heat proved to be the answer. The new system had the added benefit of eliminating the forced-air blown particulates that her son is especially sensitive to.
Clever insulation installation
To install new windows, walls would have to be opened up, offering a great chance to economically add insulation where there had previously been none. Pacific Circle Construction also installed insulation throughout the new walls and in the crawl space, under the radiant-heating tubes.
Polyisocyanurate rigid foam — cut to fit and sealed in place with spray foam — was deemed the best material for the job. The project was too small to warrant a full two-part spray-foam installation, and few other materials could have as easily and effectively achieved the R-values and air sealing that the foam boards did.
Icing on the cake
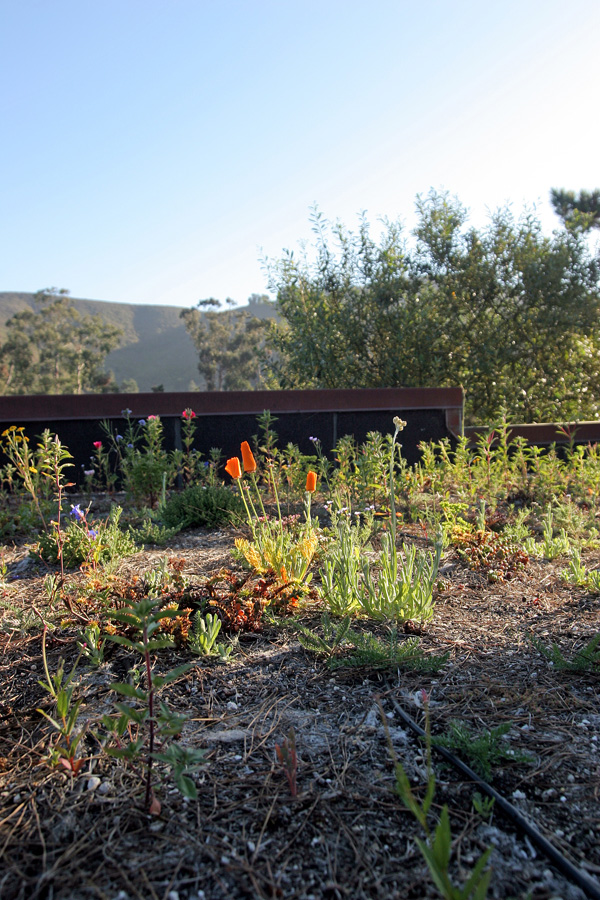
On top of achieving all of their primary goals, there was still room in Ann and Hal’s budget to top the house with photovoltaic (PV) panels and native plants, creating both renewable energy and a beautiful “living” roof.
Thinking ahead
In addition to making upgrades that they can enjoy now, the owners also planned for additional improvements down the road. They had their home preplumbed for future solar hot water system installation (which will have to wait until the mature pines that shade the upper roof reach the end of their natural life span — possibly within a decade). Additional electrical circuits were put in two of the bedrooms for eventual conversions to an art studio and an office.
Weekly Newsletter
Get building science and energy efficiency advice, plus special offers, in your inbox.
Lessons Learned
Ann and Hal are pleased with their renovation. Their low post-renovation energy bills are within the range they had targeted. As for the overall feel of their expanded and upgraded home, Ann says “It’s fabulous! It’s much more comfortable, and we love the new space, with sunlight and views to the south.”
But as with any renovation project, there were challenges and limitations. They settled for non-FSC-certified red oak flooring (chosen to match existing floors) because the timing and size of the order made FSC-certified wood difficult to obtain. Ann also says that, if it weren’t for potential moisture issues, they probably would have gone with an unvented crawl space. If she were to do it over again, Ann says she would have conducted energy modeling to evaluate the glazing performance as it relates to passive solar heating. South-facing (and maybe west-facing) windows with a higher solar heat gain coefficient (SHGC) might have lowered the home’s heating load.
Keeping everyone in the loop
For Peter, the project’s building science consultant, the main hindsight lesson was related to communication. He says, “We needed better chain of custody, given that we were on the opposite coast. Not all of the water management details we recommended were incorporated into the final plans or the execution of those plans — most notably a kick-out flashing detail designed to accompany the cricket on the front porch roof. A web-based project management tool such as Basecamp would have worked really well for this situation.”
Getting the job done
Peter and Ann also note that it was tricky to find a qualified contractor who would properly install and commission the radiant floor heating system. Ann says, “Most local contractors weren’t interested in a project this small. Not many people were adding radiant heating to existing homes; it’s still relatively uncommon, though that’s changing.”
General contractor Bob Vetter brought up one other important detail. Because of the special equipment and licensing required, they had a very hard time getting a price for the roof that had been specified (EPDM). When they did get the price, it was $14,000. The 120# hot mop was $2,000. This was $125 per square as opposed to $875 per square for the EPDM. The single-layer, complex roofs usually specified in large, commercial-institutional living-roof projects are often not practical on this scale because of their cost.
General Specs and Team
| Location: | Pacifica, CA |
|---|---|
| Bedrooms: | 3 |
| Bathrooms: | 2.5 |
| Additional Notes: | Living space: 1,750 sq. ft. (1,550 sq. ft. existing + 200 sq.-ft. addition) |
Builder: Pacific Circle Construction
Architects: Ann Edminster, Design AVEnues,
and John Fordice, Other Fish Architect
Building science consultants: Peter Yost and Nathan Yost, 3-D Building Solutions, LLC
Mechanical design: Davis Energy Group
Living Roof Design and Installation: Bill Wilson, Environmental Planning & Design
Photovoltaic system design and installation: Sun Light & Power
Construction
PRE-REMODEL
Walls: uninsulated wood frame
Windows: single-pane aluminum
Roof: vented with old, loose-fill fiberglass in very poor condition (approx. R-10)
POST-REMODEL
Foundation: crawl space, 2 in. of polyisocyanurate rigid board between floor joists; sealed with spray foam (R-12)
Walls: 2x4 studs with 21/2 to 3 in. of polyisocyanurate rigid board (R-15+)
Windows: low-e, double-glazed, wood-framed
Roof: 2x8 at 16-in. o.c. with 5-in. rigid polyisocyanurate foam (R-30) in living room addition; green roof (approximately 300 sq. ft.), 5-ply hot mop asphalt and fiberglass; built-up roof covered with filter fabric, water-retention layer, engineered soil mix, and drip-irrigation system.
Energy
- Upgraded windows
- Polyisocyanurate rigid board insulation (sealed with spray-foam insulation)
- High-efficiency boiler and multizoned hydronic heating system
- All Energy Star appliances and exhaust fans)
- Some hard-wired fluorescent lighting fixtures; all others fitted with CFLs
- Added windows provide more solar gain in the winter
- Preplumbed for future solar hot-water system installation (when the trees that currently shade the roof reach the end of their natural life span)
Energy Specs
Cooling: High-efficiency boiler and multizoned hydronic heating system (95% AFUE)
Water heating: same as above
Annual energy use:
- Net after PV (post-remodel): 6.7 MMBtu
- Gross (w/o PV): 15.9 MMBtu
- Pre-remodel: 21.8 MMBtu
Water Efficiency
- Dual-flush, EPA WaterSense toilets
- Native and drought-tolerant plants
Indoor Air Quality
- Low-VOC interior wall finishes
- Radiant heating system
- Additional windows enhance natural ventilation
- Exhaust fans installed in kitchen and bathrooms
Green Materials and Resource Efficiency
- Lifetime steel roof in sloped areas (for durability and clean water runoff)
- Living roof
- Highly durable, FSC-certified tropical machiche decking
- Durable, steel-clad wood window frames
- Reclaimed Douglas fir trim throughout addition
- Usable wood scraps retained for future projects
- Old water heater donated
- Remaining recyclable materials (e.g., wood scrap, cardboard, metals) separated and recycled
Alternate Energy Utilization
Photovoltaic: 2.5kW system (14 panels)
Net cost (after state rebate and tax credit): $12,765.28
Cost (before rebate and tax credit): $20,121.00


0 Comments
Log in or create an account to post a comment.
Sign up Log in