Image Credit: Charles Bickford/Fine Homebuilding
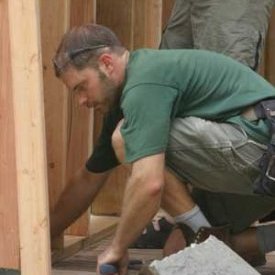
Image Credit: Charles Bickford/Fine Homebuilding **Rim joist air-sealing is essential.** This can be one of the leakiest spots in a home. The insulation goes a long way to helping the heat stay put, but air-sealing can often be even more important. Andy cut small pieces of EPS to fit between the joists and around pipes and wires. Then he foamed them into place. A strip of plywood creates an air barrier at the wall/ceiling junction and gives a convenient place to fasten top plates for the walls he's about to build.
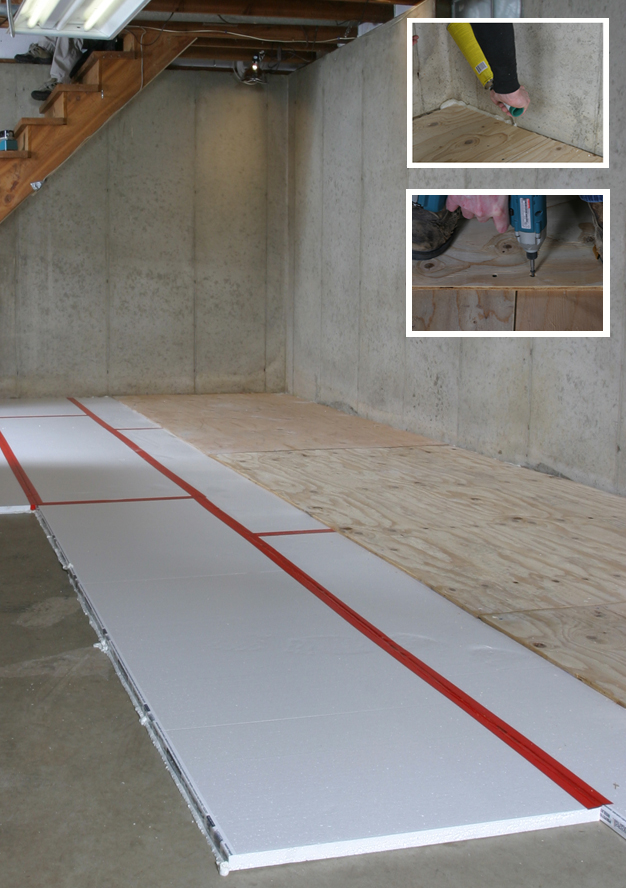
Image Credit: Charles Bickford/Fine Homebuilding **A simple but multi-layered system.** EPS has plenty of compressive strength to build a floor right on top of it. Andy sealed the seams with spray-foam and seam tape before laying down a layer of plywood subfloor. He used masonry screws to fasten through the subfloor to the slab. One more layer of plywood, staggered and fastened with more screws, completed the solid, insulated assembly. Andy sprayed foam around the perimeter before moving on to the walls.
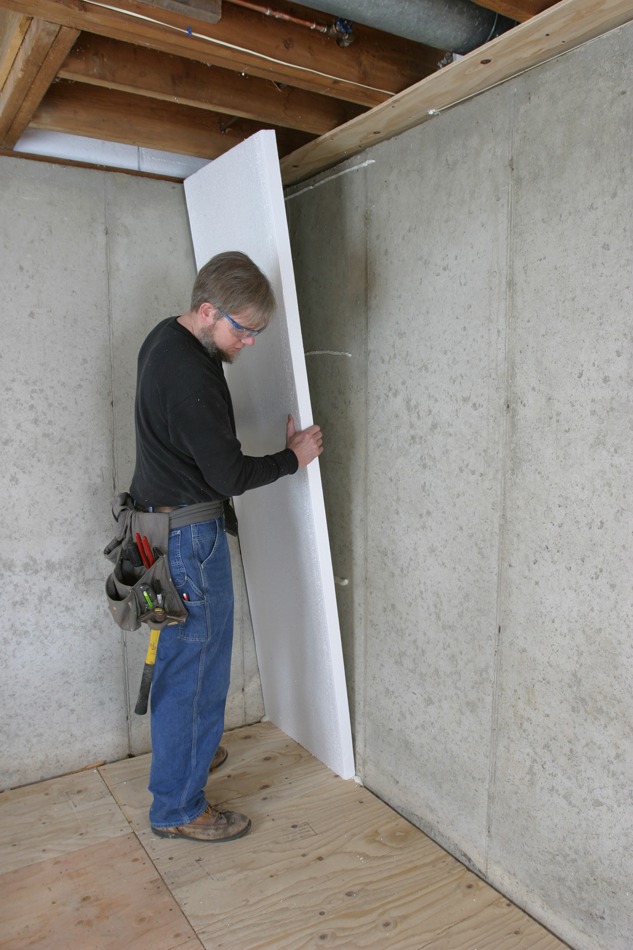
Image Credit: Charles Bickford/Fine Homebuilding **Insulating existing basement walls.** Just as with the floors, a simple combination of EPS foam panels and cans of expanding spray-foam were enough to air-seal, insulate, and keep moisture at bay. The spray-foam works well as an adhesive and a sealant, while the EPS stops capillary action and condensation by separating the finished space from the cold concrete walls.
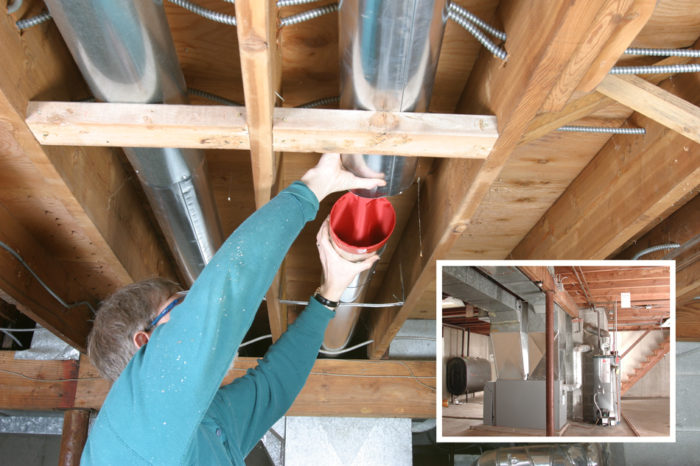
Image Credit: Charles Bickford/Fine Homebuilding **Fuel-burning devices need fresh air.** The boiler and water heater share a 6-in.-dia. flue. Andy provided two 6-in. supplies (based on a rule of thumb that makeup-air ducts should be twice the size of the combined flues)—one that ended at the ceiling level and one that ended near the floor in the mechanical room. To prevent them from chimneying nice, warm air to the outside, he fitted the ducts with fabric dampers.
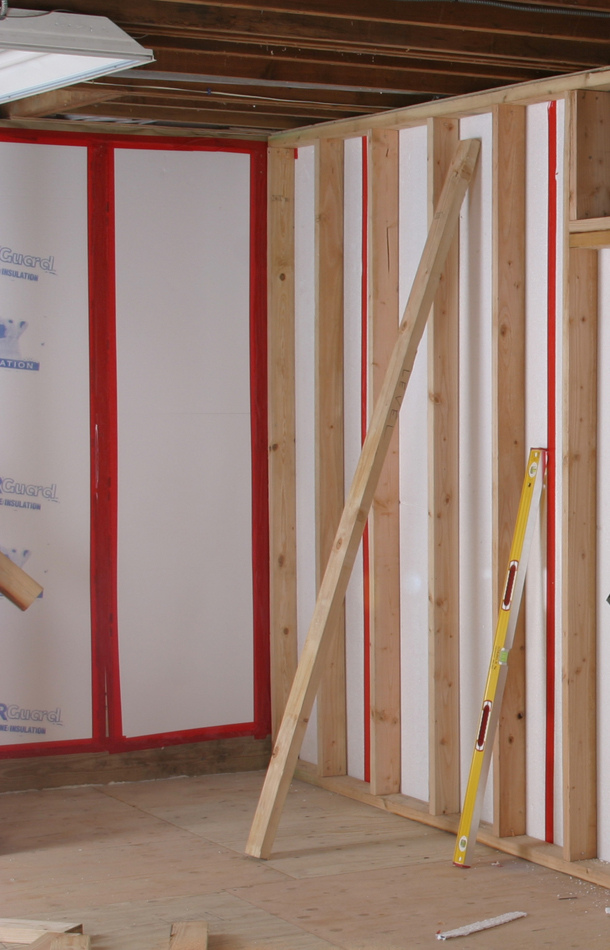
Image Credit: Charles Bickford/Fine Homebuilding **Just like any other framed wall.** Some people might use furring strips screwed through the foam into the concrete, but Andy felt a traditional wall would be easier for running electric and plumbing. Plus, with sturdy surfaces above and below, there was no need to puncture the insulation or the foundation wall to fasten the framing.
Image Credit: Charles Bickford/Fine Homebuilding
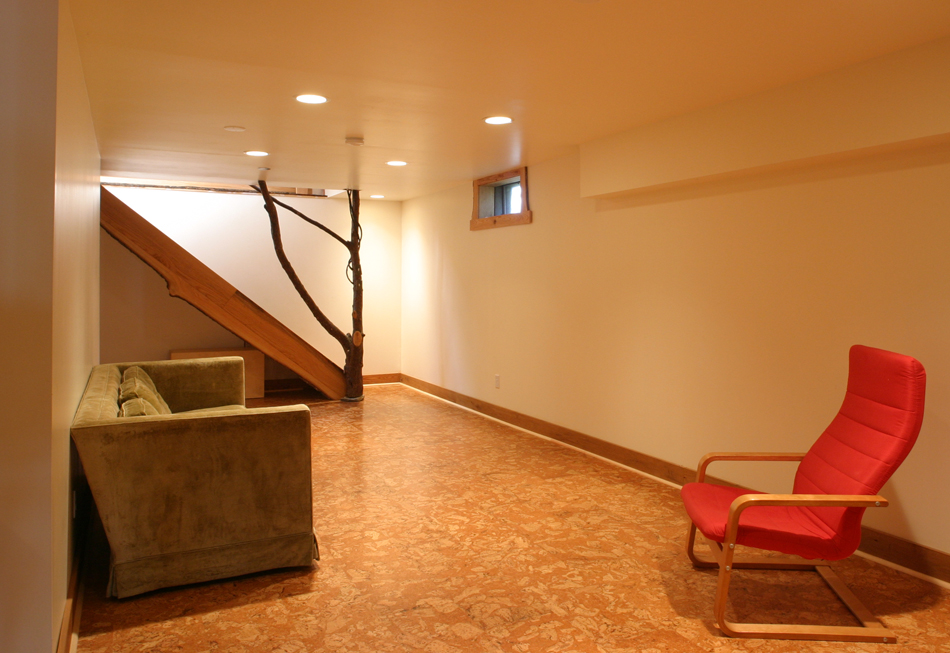
A layer of rigid insulation covers cold concrete and makes a warm and inviting new room
When the owners of this home in Bridgewater, Connecticut called in contractor Andy Engel to convert a portion of their basement into a rec room, they weren’t sure how far he would need to go to make it comfortable and healthy. Fortunately for them, there was no evidence of water problems, so Andy was able to do all of his moisture, air, and, heat control details within the existing basement. He drew from his experience as a remodeler and a former editor at Fine Homebuilding Magazine, and from Joe Lstiburek’s Builder’s Guides, to choose a durable and economical system—essentially a conventionally framed and finished room separated from the concrete walls and floor by a continuous, well-sealed layer of expanded polystyrene.
Design approach: Make existing space more useful
The project’s driving concepts were simplicity and versatility. The family was starting to outgrow the modest-sized home and they just needed some more adaptable living space. A modest budget meant that using what they already had made the most sense.
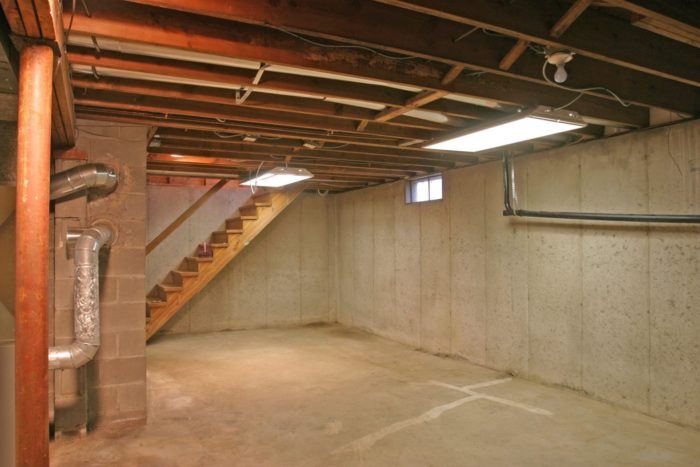
Because the basement was relatively dry, Andy was comfortable omitting drainage and waterproofing from the project. Instead, he made sure that all of the materials he used would let water vapor pass through. The foundation is in direct contact with the ground so it will absorb water; often the best thing is to let the small amount that makes it through keep on going. A dehumidifier that automatically switches on when the air is too damp will keep that moisture in check.
Rigid foam separates old from new
Andy picked EPS because it’s the most vapor permeable of common rigid foam insulations. It also happens to be one of the most affordable. The foam does several things. First, it forms a capillary break between the old concrete and the new wood. It also does a decent job of stopping heat loss, both as an air and thermal barrier. From a structural standpoint, it has plenty of compressive strength to support a typical floor or wall.
Andy covered the entire slab with 1-inch EPS boards, sealing the seams with spray-foam and tape as he went. Two staggered layers of ½-inch plywood subfloor — the first one screwed right to the concrete floor — topped off the EPS. He then glued a 2-inch thick layer of EPS to the foundation walls with the same spray-foam he used to seal the gaps. The most time-consuming step was cutting small pieces to fit around pipes and framing against the band joist. A conventional stud wall, just inside the foam, finished off the assembly.
Finish as usual
The final surface is nothing more than standard drywall. Latex paint and glue-down cork flooring top off the list of vapor permeable layers. Just by picking the right materials and putting the time into installing them properly, the homeowners ended up with an attractive, practical addition, that should be durable, healthy, and comfortable for years to come.
Affordable compromises
After weighing their options, the homeowners found a comfortable middle ground between a DIY project and a full out design/build remodel. They hired Andy to build a clean and simple space that was pretty much defined by his building science know-how and the condition of the existing foundation. They were able to cut some costs by taking care of several of the finish details—like the oak stairs—themselves.
Weekly Newsletter
Get building science and energy efficiency advice, plus special offers, in your inbox.
Lessons Learned
There's always an easier, better, less costly way
Andy was able to avoid fastening through the insulation into the concrete walls, but felt that he needed to screw the subfloor to the slab to get a solid base for the new floor. He says he would have done things differently if he had more information at the time.
Instead, I'd have used a leveling compound and done a true floating floor. I just recently learned that's approved by the Wood Flooring Manufacturers Association.
The steps Andy took are mainly common-sense ones aimed at long-term durability and economy, two goals that happen to go hand in hand with the green movement. So, you might say that Yankee frugality is a good quality to have for when renovating sustainably.
General Specs and Team
| Location: | Bridgewater, CT |
|---|---|
| Additional Notes: | **Space affected:** About 2/3 of a 900-sq.ft. basement **Remodeling contractor:** Andy Engel **Completed:** Summer 2004 ##General Design and construction## - Remodeling existing space with simple details keeps the project's actual and environmental footprint small ##Building Envelope## - Relatively dry basement - no drainage system required - Continuous, vapor-permeable insulation (EPS) on floor and walls - Thorough air-sealing (spray-foam and seam tape) ##HVAC## - New fresh air supply ducts for existing boiler and water heater - [Backdraft dampers](http://www.tamtech.com/userfiles/CBD.1%20Sales%20Sheet.pdf) in fresh air ducts ##Interior Finishes## - Glue down cork flooring ##Use## - Owners run a dehumidifier to maintain a comfortable and healthy relative humidity |


3 Comments
Basement renovation
One problem that never seems to be mentioned when employing this method of insulating a concrete floor in a retrofit situation is the loss of riser height on the bottom step of the staircase. If the existing stairs are easy to remove and replace it isn't much of a problem but an expense none- the-less. If they can't be replaced, you end up with the bottom riser being 2-3" shorte than the rest of the staircase which can render them very awkward to use and not code compliant.
Good point
I've run into this problem myself several times. Luckily this homeowner had included building new custom stairs into his plans. It's definitely something every builder or DIYer should be aware of when planning a basement remodel.
“[Deleted]”
Log in or create an account to post a comment.
Sign up Log in