

More Best Practices


When I purchased my small 1950s vintage Cape Cod home in 2018, I knew there was a lot of work to do to improve its performance and interior comfort. I also knew I would be doing the work alone, and I was planning for a deep energy retrofit—as opposed to a shallow energy retrofit—that would take several years to complete. Given the scope, I decided to approach my experience as a case study and to share lessons from my first-time endeavor, which is, in part, what I’ll do here. I will also talk more generally about installing exterior insulation on existing houses.
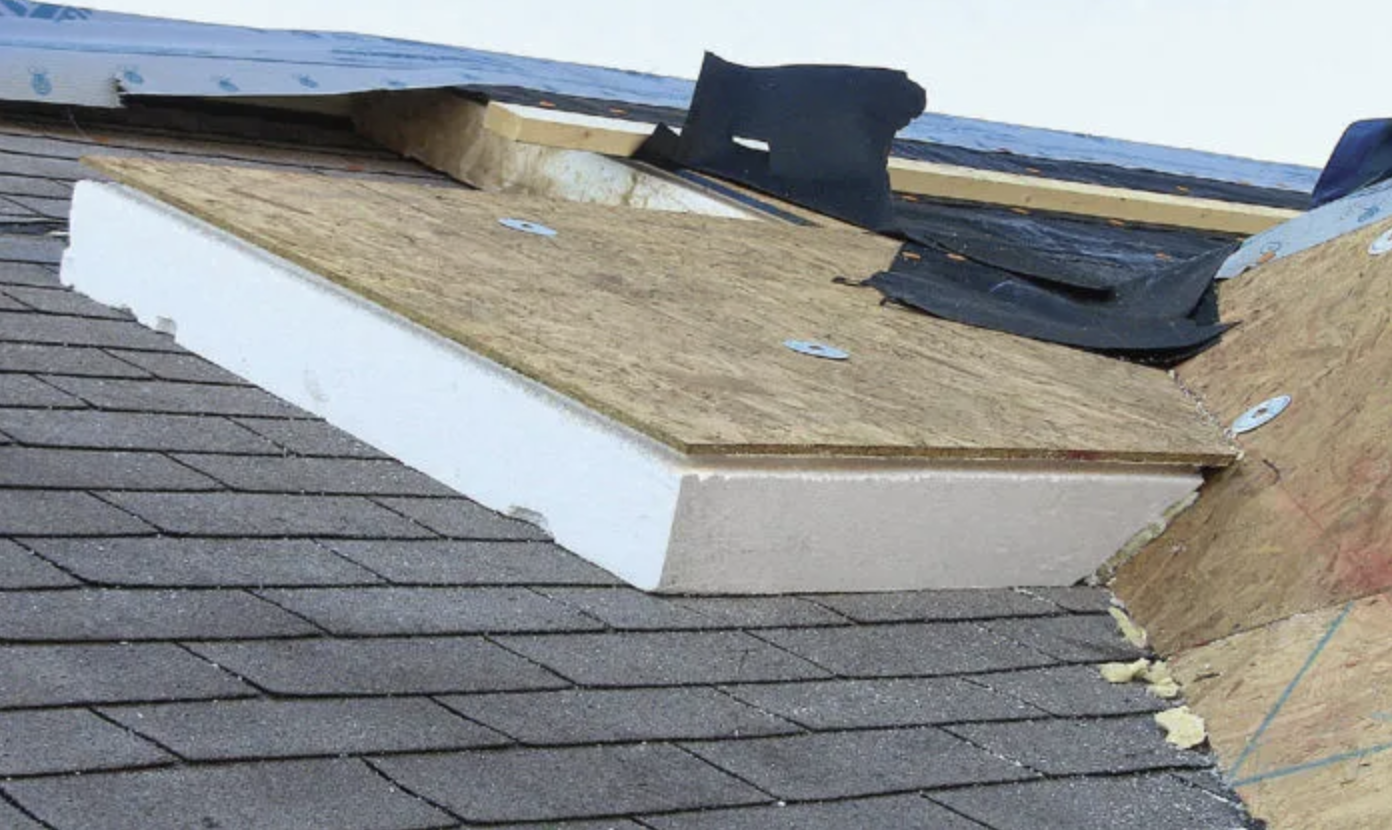
One of my goals was to improve the insulation levels of the walls and roof. I went back and forth trying to decide if I should add a layer of continuous insulation to the exterior. After all, I was going to remove the siding and replace all the windows—typically the ideal time to add what some builders call “outsulation.” In the end, I decided against it. The gable ends of my roof have no eave, so adding exterior insulation would have required rebuilding a portion of the recently re-shingled 12/12 pitched roof. I now regret that decision, but more on that later.
The reasons for including continuous insulation have been more fully discussed here on Green Building Advisor and other forums, but the biggest benefits are comfort, durability, and energy/cost savings. Recently I wrote a two-part article on continuous insulation, where I concentrated on new construction, though much of the information also applies to existing homes, the subject of this post.
Where to start
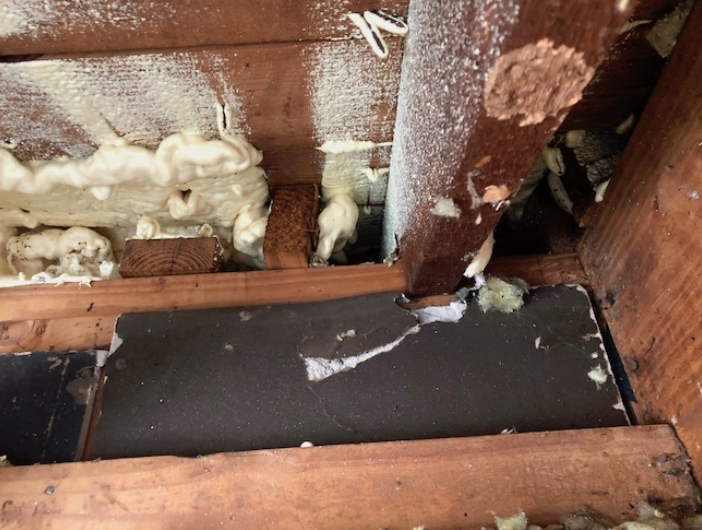
With this type of project, I start by figuring out how the existing wall is assembled. I identify the products and techniques used at the time it was built. I also…
Weekly Newsletter
Get building science and energy efficiency advice, plus special offers, in your inbox.

This article is only available to GBA Prime Members
Sign up for a free trial and get instant access to this article as well as GBA’s complete library of premium articles and construction details.
Start Free TrialAlready a member? Log in


2 Comments
Excellent breakdown. I'm slowly embarking on an energy retrofit of my own home built in the 40's. I think I'll strip the cedar claps as carefully as possible and reuse them as best as possible. My current assembly is drywall or paneling (Depending on the room), questionable density cellulose, board sheathing, tar paper, cedar claps, tar paper, asbestos shingles, typar, and vinyl siding. I have my work cut out for me... My biggest concern is the windows, but I've studied enough details to have a plan.
I've been considering residing and adding CI to my 1970's house in zone 4c but since I would be doing the work myself don't see being able to get it done during the dry season here in willamette valley. Curious if anyone has tried doing a project like this in stages? Doesn't seem like the kind of thing that could be done one wall at a time, but happy to hear other thoughts on the matter.
Log in or become a member to post a comment.
Sign up Log in