

More Guest Blogs


Editor’s note: This is one in a series of blogs detailing the construction of a net-zero energy house in Point Roberts, Washington, by an owner/builder with relatively little building experience. A list of Matt Bath’s GBA articles can be found at the bottom of this page. You’ll find Matt Bath’s full blog, Saving Sustainably, here. If you want to follow project costs, you can keep an eye on a budget worksheet here.
Today I weathered in the roof by installing the dripedge and underlayment. Together with my fiancée, Elena, who I hired as head designer, we decided on navy blue/gray aluminum shingles for the roofing material.
Aluminum is supposed to hold up well against the salty ocean air of Point Roberts, and the system I ordered from the Aluminum Shingle Co. came with a lifetime warranty. This becomes extra important for a solar net zero home like the one I’m building, because if you have to replace the roof then you have to remove the entire solar system first. The aluminum shingles are built to interlock together, which not only makes installing them a little easier, but also ensures a watertight barrier.
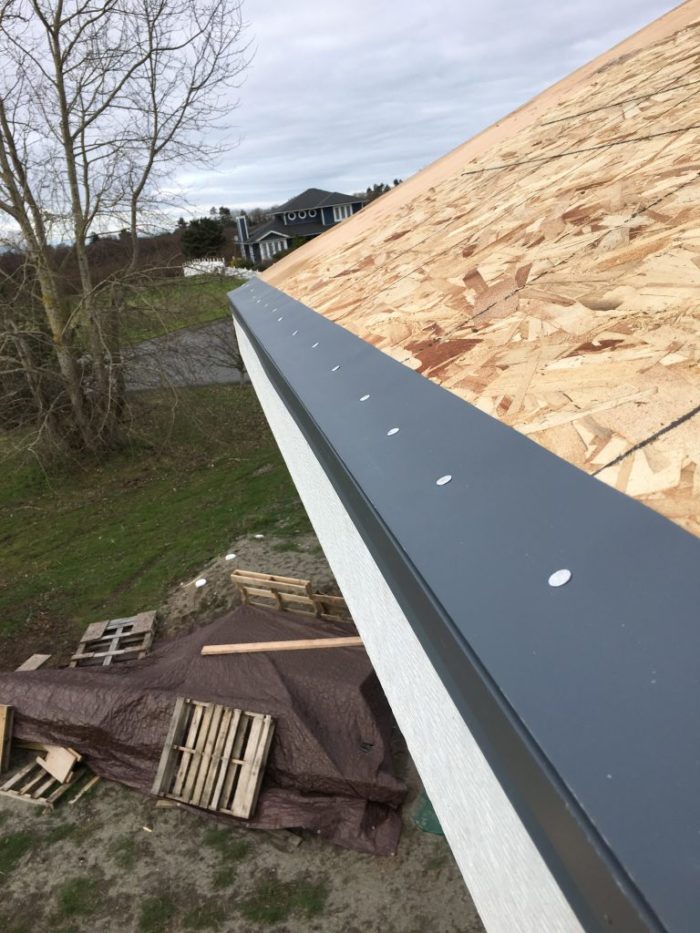
The first step of the installation was to attach the dripedge to the eaves of the roof (see the first photo in the gallery). For this aluminum shingle system, the dripedge came with the package because the shingles will actually lock into it. (Even the nails to install it were included!) For a more typical shingle roof, the dripedge can be purchased separately.
Dripedge ensures that water doesn’t drip down the fascia as it travels to the gutter. The face of the dripedge extends out over the fascia so the water coming off the roof drops directly into the gutter without touching the fascia. After watching the installation video a few times, I carried the dripedge up to the roof and set about installing it. Some small cuts had to be made with some tin snips where the different pieces locked together, but overall the process was extremely simple.
Adding the underlayment
Getting the roll of underlayment up to the roof was probably the most difficult part. It weighs close to 100 pounds, and it wasn’t quite wide enough to ride up the rails that I had used to haul up the roof sheathing. I decided the best way to do it was to unroll a little more than the amount I needed to complete a course, cut it off, and then roll it back up. Then it was light enough for me to be able to carry it up the ladder safely.
Starting at one end, I positioned the underlayment so it almost covered the nailing flange of the dripedge, nailed it in place, and then unrolled it all the way to the other side of the roof. After tacking it at the end and cutting the roll flush with the gable end, I nailed it down with cap-style roofing nails every 8 inches or so.
I overlapped each successive course of underlayment about 5 inches to ensure that rainwater wouldn’t be able to get through to the roof sheathing. When I got to the ridge of the roof, I placed the middle of the roll of underlayment over the top of the ridge and cap-nailed it down over each side, to ensure that water flowing down the roof would always flow over the next course instead of under.
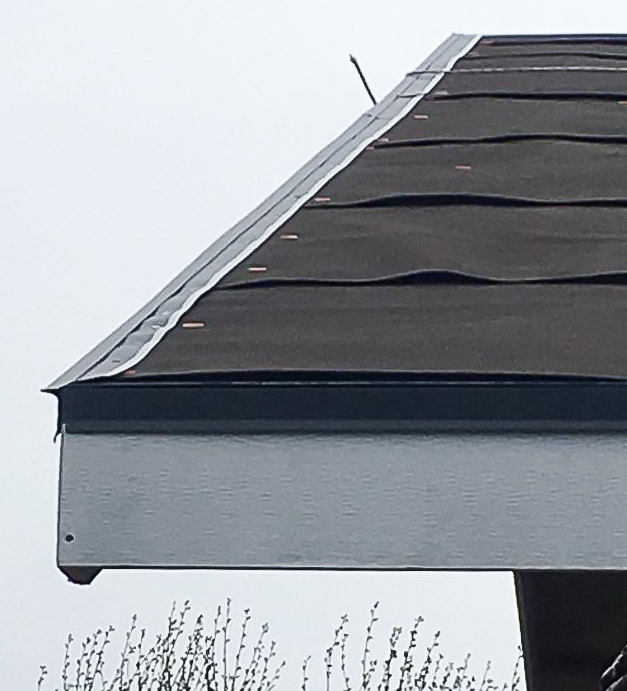
With underlayment now covering the entire roof, the last step was to install the gable dripedge at the rakes (see Photo #2 in the gallery). This went on almost exactly the same way as the eave dripedge, with aluminum nails every 4 inches. The shingles lock into the very end of the dripedge and will cover up all of these nails, as well as the eave dripedge nails.
Shingles interlock on four all four edges
The company from which I bought the aluminum shingles offers 11 different instructional videos on YouTube. After watching them multiple times, I had a really good grasp of how to install the shingles. It really is impressive how they all interlock together on all four edges and yet all of the nails end up getting covered by other shingles!
There is only one way to install the interlocking shingles, and that is to start at the lower left corner of the roof and work your way to the upper right corner. The first shingle must be cut in half, and then you have to cut off some of the shingle so it fits into the gable end dripedge. This wasn’t explained directly in the videos because the roof shown in the videos was primarily a hip roof, whereas mine is a gable. However, they did show how to end a shingle on a very small section of a gable, and I was able to figure out how to get started.
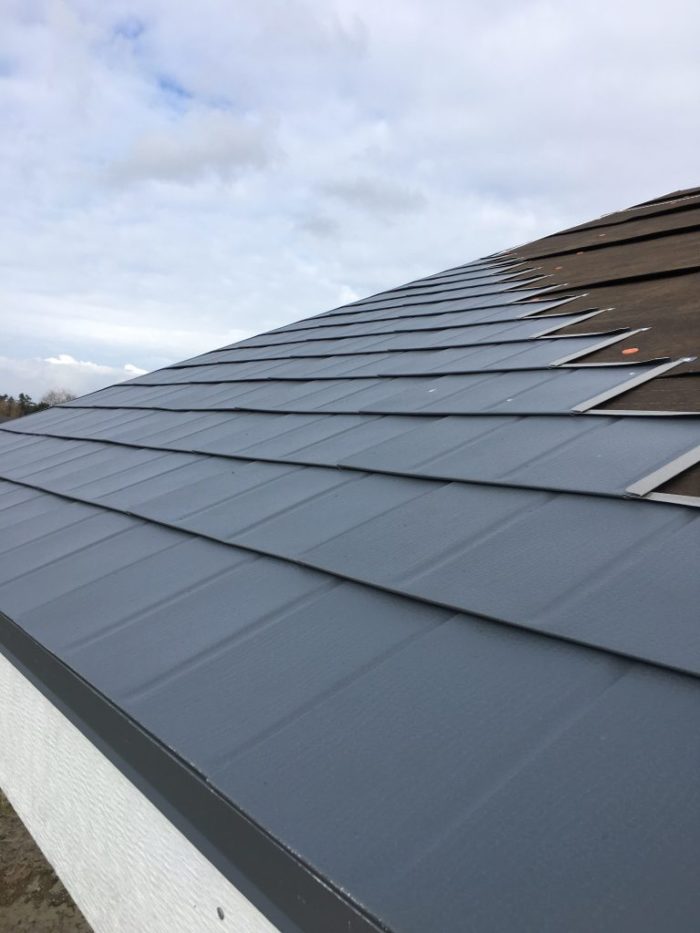
The first shingle in each diagonal row locks into the dripedge along the eave, and then you shingle up diagonally to the left until you get to the one that locks into the dripedge along the rake (see Photo #3 in the gallery).
One important detail was mentioned very briefly in the video, and I didn’t realize how important it was right away. I was having trouble getting the shingles to line up straight, so I watched the video again and realized what I was doing wrong. Each row of shingles is attached from the bottom at the eave to the top at the gable, but then they are nailed down from top to bottom. I had been nailing them at the same time as I attached them and that small change made quite a difference in the quality of the installation. I removed the last course and reinstalled the shingles correctly.
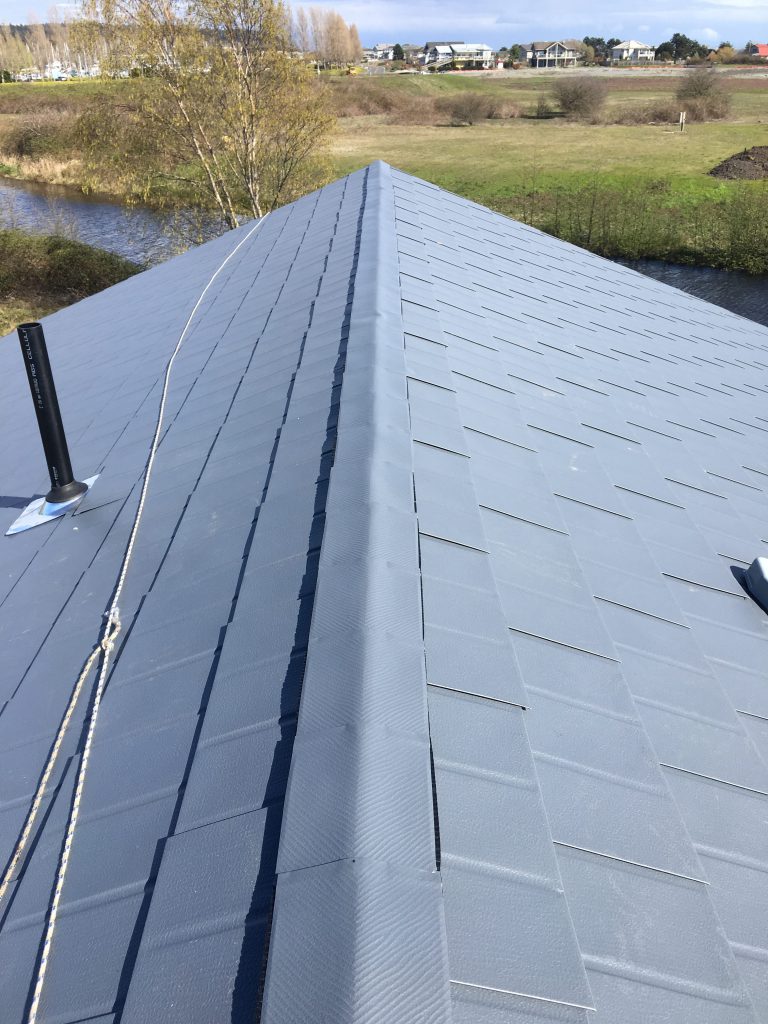
With each course I got a little more efficient at installing the shingles and my speed quickly increased. Before I knew it I had reached the top of the roof. At this point, instead of finishing a row into the gable end, I simply cut off the top shingle at the roof ridge and nailed it down. The ridge caps will cover these nails. I continued with the diagonal rows of shingles until I reached the opposite gable end. Now, instead of starting at the eave, each row started at the gable end on the left side of the roof. Just as with the shingles on the other gable end, some cuts had to be made to allow the shingle to lock into the gable dripedge.
Adding the vent stack and solar hub
When I reached the marking for the Soladeck (the wiring hub for my solar panels), I cut the shingles so the unit would slide underneath the shingles above but over the top of the shingles below, ensuring water flowing down won’t be able to go under the shingles.
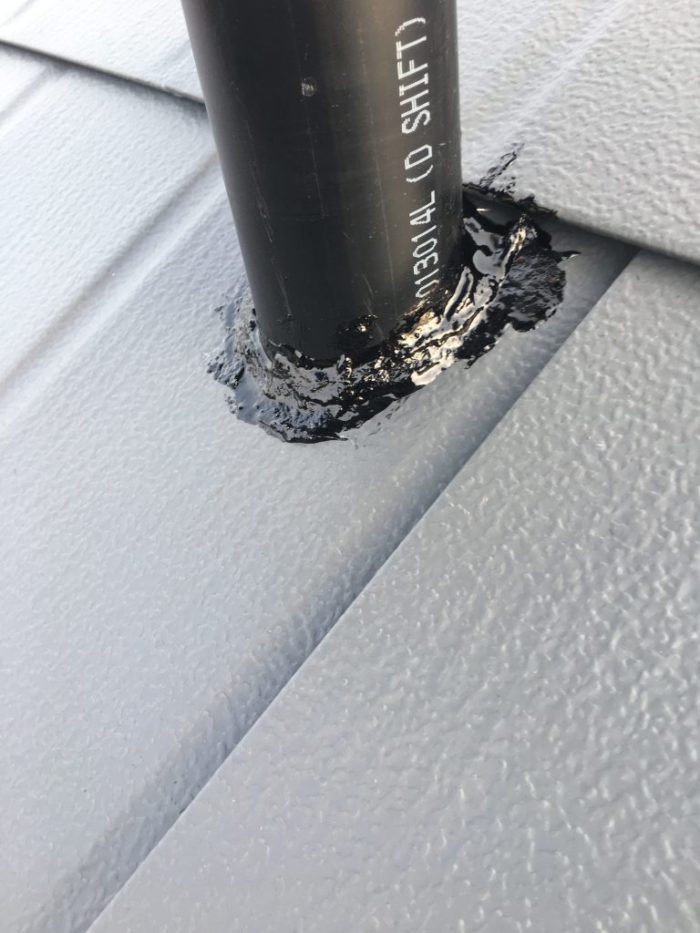
The opposite side of the roof was installed in precisely the same way. On this side, instead of the Soladeck I had the vent pipes to deal with. I cut the shingles to fit around them and applied a thick bead of heavy duty roofing sealant around the opening (see photo #4 in the gallery).
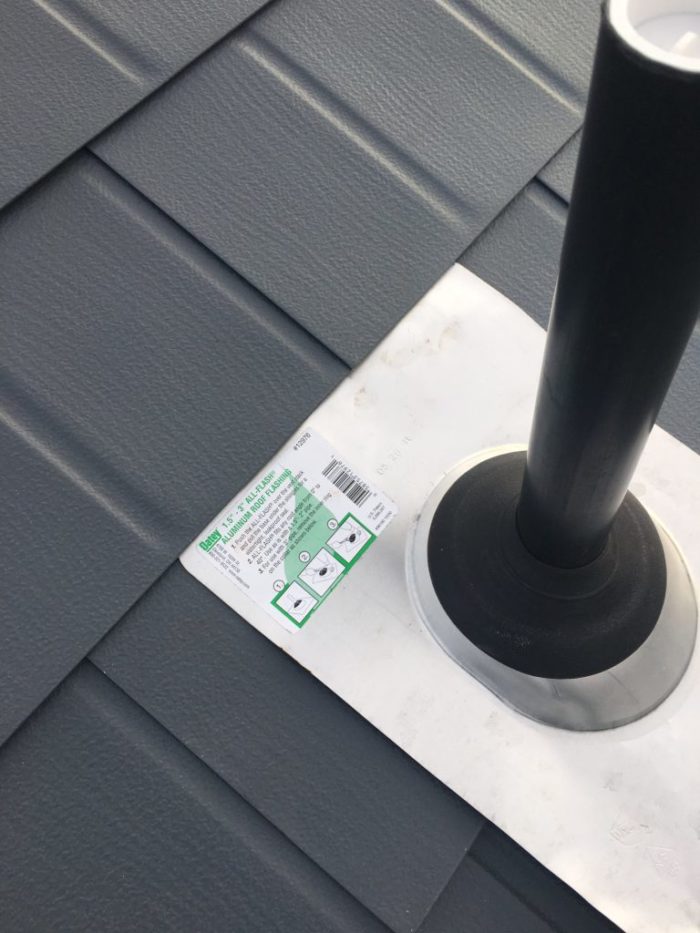
Then I slid the vent flashing down over the top of the ABS pipe, tucked the top side under the shingles above, and left the bottom side over the top of the shingles below (see Photo #5 in gallery). I nailed the flashing down with aluminum nails and used a clear sealant to cover the tops of the nails.
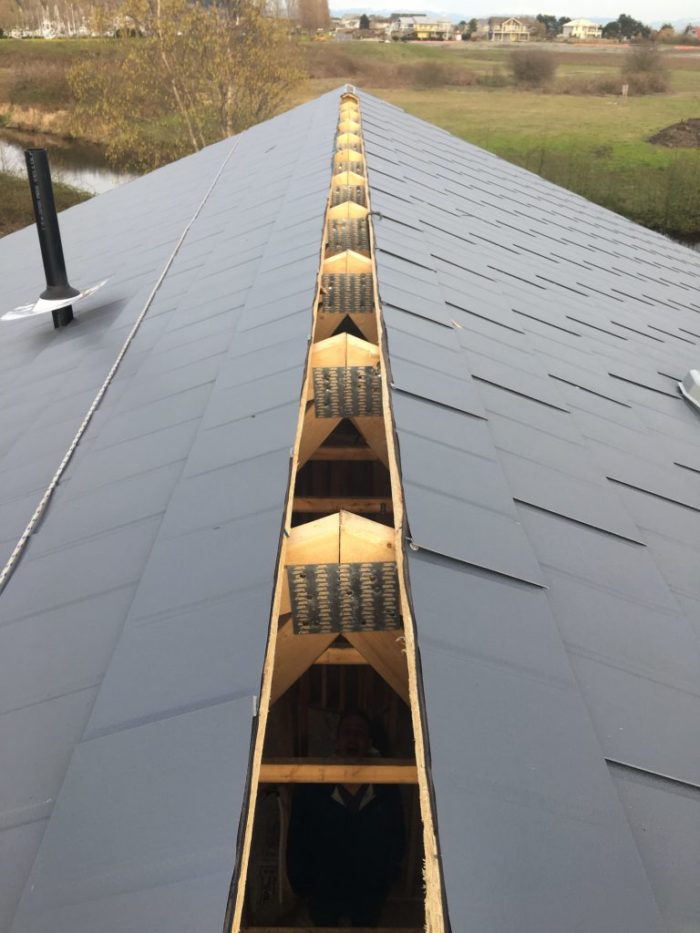
After both sides were completely shingled, I used a knife to cut out the underlayment to create an opening for the ridge vent (see Photo #6 in the gallery). I filled this area with a special roof ridge underlayment that allows air to pass through but keeps particles out. I then covered it with the aluminum ridge caps, which also interlocked together.
The first one slides into the gable dripedge and the other side gets one nail on each side. Each successive ridge cap covers up the nails from the one before it, and then the last piece is trimmed so it tightly slides under both the gable dripedge and the shingle that came before it.
I was extremely happy to see how the roof turned out. Standing on top and scrutinizing my work, I can definitely spot some areas that aren’t straight. However, from the ground the roof looks amazing and I’m very proud of the job I did with zero experience with this type of roof. I would recommend the Permalock system to anyone who wants a beautiful roof that will last at a good price.
Other posts by Matt Bath:
Designing and Installing a Septic System
Weekly Newsletter
Get building science and energy efficiency advice, plus special offers, in your inbox.


5 Comments
Interesting and cool looking.
How to you manage passive ventilation (eve-ridge) and moisture vapor drying of the assembly?
Nice looking Matt! I'd put a protective aluminum cone as flashing over the metal/gasket pipe flashing you have. Those gaskets (rubber/synthetic) don't last long under the sun. I seal top of the cone as well. Easy to make out of aluminum flat stock in many colors.
Matt,
It appears (from Image #5 in the Gallery) that there is insufficient overlap between the course of shingles above the aluminum flashing for the vent pipe and the aluminum. (I can see the rounded corner of the top of the aluminum flashing, and that's not good.) If you don't follow Paul's suggestion, you need at least to slip an additional piece of flashing under the shingle at this point, to solve the "limited overlap" problem.
Martin, I hadn't checked out the comments in a while but I do appreciate the feedback. I did slip a positively flashed shingle between them. Thank you!
I wondered if you thought the texture of these shingles along with the roof slope you have, would retain snow in an area with a consistent winter long snow pack? Or are they similar to sheet metal roofing where the snow would slide relatively easily?
Thanks
Log in or create an account to post a comment.
Sign up Log in