
More Q&A Spotlight


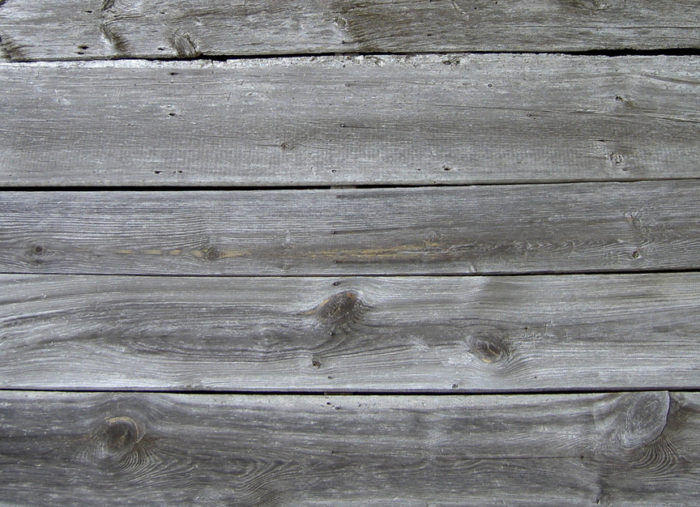
The use of plywood and OSB sheathing is a fairly recent phenomenon. Before these sheet goods became readily available, builders nailed wood boards to the frame of a house for sheathing, and it is a house with this type of sheathing that Nick Welch is trying to update.
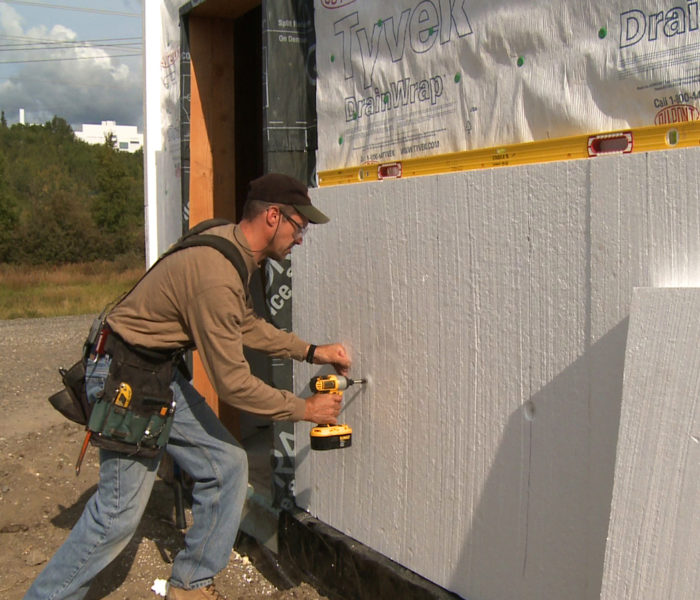
His 900-square-foot house in Climate Zone 4C is sheathed with 1×8 boards, apparently over a layer of asphalt felt. There is apparently no insulation in the wall cavities behind the sheathing. His plan of attack is to air-seal the house, then install foil-faced polyisocyanurate insulation over that. The question is how.
“I’m having a hard time finding much information about how to air seal old horizontal 1×8 board sheathing,” Welch writes in a post at GreenBuildingAdvisor’s Q&A forum. “Housewrap seemed like the clear choice until I realized that you aren’t supposed to tape the bottom seam.”
Should he use flashing tape to seal each every seam between boards? Could he skip the housewrap under the exterior foam and use polyethylene sheeting instead? And if he applies foam over the sheathing, will the layer of asphalt felt present a problem?
Those issues are at the heart of this Q&A Spotlight.
Tape the polyiso seams
A layer of foil-faced polyiso will be the air barrier, GBA Senior Editor Martin Holladay tells Welch. “Caulk the perimeter of the wall when you install your polyiso,” he writes, “and tape the polyiso seams.”
Welch is correct in assuming that the permeance of housewrap beneath the foam is irrelevant, Holladay says. “The key will be making sure there’s enough foam on the outside of the house to keep the stud cavities above the dew point so moisture from the interior of the house doesn’t condense inside the walls.” (Holladay has written an article…
Weekly Newsletter
Get building science and energy efficiency advice, plus special offers, in your inbox.

This article is only available to GBA Prime Members
Sign up for a free trial and get instant access to this article as well as GBA’s complete library of premium articles and construction details.
Start Free TrialAlready a member? Log in


21 Comments
it seems to be fine
My retrofit was done over plank sheathing too. The guys applied
a big flashing ledge of metal all the way along the bottom
of the sheathing at foundation level, caulking that to the lowest
sheathing plank. Then they applied housewrap over that and caulked
it to the metal. And I believe the lowest course of polyiso
foam got caulked along the bottom of the housewrap, so in
effect the whole sandwich was sealed along the bottom. They
sort of had to do this because they were using DrainWrap which
would otherwise put lots of little holes along there due to the
crinkled nature of it.
I agree that if water's gotten *behind* your housewrap there is
a much larger issue going on...
_H*
This is really cool; thanks
This is really cool; thanks for putting me in the spotlight.
Since the WRB bottom edge taping issue was cleared up, I decided that the WRB is the air barrier. The foam on top won't be meant as an air barrier, and its bottom edge won't be attached to the WRB -- that way, water can drain down the face of the WRB, as intended (I'll be using DrainWrap). Flashings will bring water out to the exterior of the foam, where there will be a rainscreen gap. So, when at all possible, water will be brought out past the foam, to the rainscreen. But if/when any water stays behind the foam, the DrainWrap will be able to do a pretty good job of letting it drain out the bottom, and diffuse into the interior.
I'm not comfortable using the foam as a WRB due to the various issues with that that have been discussed here on GBA before. The DrainWrap layer is very cheap insurance, so I think it would be silly to omit it.
The windows still give me the most apprehension, especially on the gable ends where there is very little overhang (and it's far above the windows). I guess the fact that they're innie windows will help somewhat, because the vast majority of water will just come down the face of the siding and not even touch the top of the window. Water that gets past the siding, to the rainscreen, will dry easily. But if water gets behind the foam, then it will take longer to dry. I hope that all of these redundant water management layers (DrainWrap, taped foam, rainscreen gap) will compensate for the non-ideal window flashing. I'll still be searching for more info on this for a while.
I will be filling the walls with cellulose, and the minimum rigid foam I need is less than 1/2", and I'll definitely be adding more foam than that. The interior walls are plaster and drywall, with regular old paint. It should be able to dry to the interior without issue.
Drainwrap BEHIND foam?
This seems very wrong to me: putting a mini-rainscreen behind the foam seriously reduces the effectiveness of the insulation.
Leaving the windows in place seems like such a weak point in this plan: I would pull the windows and reinstall. If it seems hard to pull intact, I might run a skillsaw around the flanges so a bit of siding comes out with the window, then chip it off the flanges.
Response to Dustin Harris
Dustin,
Here's what Joe Lstiburek has to say on this issue (in Mind the Gap, eh?):
"Yes, closed cell high-density foam cavity insulation applied to the inside of OSB sheathings that are in turn covered on the exterior with impermeable foam sheathings is risky. Unless you provide a small gap between the exterior face of the OSB and the back surface of the foam sheathing to provide for some hygric redistribution. Or if you are “perfect” with your rainwater control such as when you use a fully adhered membrane – think roof membrane standing up applied to a wall. Otherwise, go with a gap. What works? Grooved foam, “bumpy” OSB, “crinkled” building wrap, 1/8-inch polypropylene mesh, dimpled polypropylene sheets. Lots of stuff. But won’t the tiny gap cause a loss of thermal performance of the foam sheathing? Yes. How much? About 5 percent of the thermal performance of the foam sheathing (not the entire wall assembly) with the 1/8-inch gap, less with a smaller gap. With “crinkly” stuff you loose next to nothing. Is it worth it? Yes, in my opinion, the loss in thermal performance is trivial compared to the reduced risk and improved durability."
Response to Dustin Harris
I did some reading about this because I had the same worry, and the answers I found were along the lines of the Joe Lstiburek article Martin just referenced.
The DrainWrap's bumps are about 0.5mm, I believe. The foam will be compressed against the DrainWrap tightly enough that air is not exactly going to be blowing through there, though the wrinkles will provide enhanced drainage. Installing foam over 3/4" furring would be pretty stupid and self-defeating, but over a crinkly housewrap it works well.
I may end up re-installing the windows. Feedback like yours is helping me craft my plan; it's surprisingly hard to find any information or recommendations on the subject.
Easier airseal, better outward drying potential
Instead of adding foam to the exterior. There are other options to insulate on the outside of a 2x4 wall. One can use mineral wool, dense fiberglass boards, or even TJI's, Larson trusses etc. To airseal on the warm side of the insulation, wrap the hole house in an exterior grade ProClima smart vapor vapor INTESANA. This can also be wrapped up on your roof as a temporaryvapor variable roof underlayment, when you are chainsawing off your overhangs (see image).
This is much easier than adding an airtight vapor retarder on the interior in a retrofit.
For foam free DER solutions for wood sheathed buildings are described in this 475 blogpost
remove or leave windows
vinyl windows fail. Actually, most windows fail sooner or later, but vinyl typically has a 25-30 + year life, so we know at some point they have to come out and be replaced. leaving them in means that the flanges are buried behind insulation and will be difficult to remove. So take them out now and put the flanges outside of the outside layer of foam, and tape them to your framing on the interior. You'll probably be able to leave your interior wood trim in place and simply install an "extension" jamb.
Approaching from the Inside
I'm renovating an 1880's balloon-framed masonry-veneered home and have struggled with the same issue of air sealing and insulating the exterior walls with sheathing boards. The wall composition is a 2" x 4" framed wall, 7/8" T&G pine sheathing boards, heavy tar paper, ~1" air gap, 4" masonry veneer. Since insulating from the outside isn't possible, I've attacked the problem from the inside by opening all of the exterior walls. Local experts have given contradictory advice, which has motivated me to become better informed. I've read numerous articles but haven't found anything that matches a masonry veneer wall structure. I've come to appreciate the importance of careful air sealing and having sufficient insulation to prevent condensation inside the wall.
One expert told me to tape/caulk the seams of each sheathing board and fill the cavities with wet-spray cellulose. Another suggested cutting pieces of 2" XPS foam to fit the stud cavities and caulk the edges to achieve a good air seal. Given the irregularity of the framing, this careful cutting of the foam would be time consuming. It's also been suggested to spray foam the entire cavities, which is expensive, or go with the lower cost "flash and fill" approach.
The approach I'm planning to take is to roughly cut 2" rigid XPS foam to fill the majority of the stud cavity and then air seal it by using a 2-part closed-cell polyurethane spray foam around the perimeter of the XPS sealing it to the framing. I've found this technique goes very quickly and should give me R10 to which additional insulation can be added. Special attention will also be given to insulating above the top plate of the exterior walls in the attic as well as sealing all penetrations into the attic from wiring, plumbing vents, etc. Windows on the sides and rear of the home have been replaced with quality thermopane windows, and the original sash windows in the front are being carefully repaired to be fully functional and provide a good weather seal.
I'm curious to hear thoughts on this approach. Need I worry about this insulation causing moisture to accumulate in the sheathing during heating/cooling seasons especially given the masonry veneer is very porous acts as a water reservoir? Should I treat the masonry with a water repellent siloxane solution to reduce the moisture in the wall? Need I worry about thermal bridging through the studs? Any advice is appreciated. I'm trying to ensure the improvements I do will last for another 100 years rather than being like the improvements done by prior owners that I've had to remove because they ended up doing more harm than good.
Response to Jim Skrentny
Jim,
Your insulation method, informally called "cut and cobble," is commonly used by homeowners like you who want to choose a technique that costs less than spray foam. It is fussy, time-consuming work, which is why is it never performed by insulation contractors, but it works.
You didn't mention your climate zone. My only caveat is to choose rigid foam that is thick enough to keep your joist bays above the dew point during the winter. To read more on this issue, see Calculating the Minimum Thickness of Rigid Foam Sheathing.
Approaching from the Inside - Climate Zone
Thanks Martin. I'm glad to hear this technique works though I hadn't seen it described/discussed anywhere. I'm in climate zone 6A and had already read your article resulting in the choice of 2" XPS or R-10 for 2x4 walls. I've done one room with ~25 feet of exterior walls in less than 2 hours. Though this isn't fast, it hasn't been that fussy given the rigid foam doesn't have to be carefully cut to fit the cavity. The spray foam easily fills the gaps, which are intentionally at least 1/2" on all sides. It's far easier than other diy techniques that have been suggested and it's relatively inexpensive.
My concern about the masonry veneer holding water caused me to question if this insulation would cause harm since moisture in the walls could no longer effectively dry to the inside. Sounds like it is not a concern so long as the foam keeps the joist bays above the dew point. Thanks for the articles and advice.
Can you clairify, the article states:
A layer of foil-faced polyiso will be the air barrier, GBA Senior Editor Martin Holladay tells Welch. “Caulk the perimeter of the wall when you install your polyiso,” he writes, “and tape the polyiso seams.”
But then comment #4 brings up Lstiburek‘s point of having a small gap under the foam.
My situation is the same board sheathing and am trying to come up with the cheepest but correct exterior air barrier and foam.
Matt,
I recommended the use of foil-faced polyiso as an air barrier over board sheathing. The situation with OSB sheathing is different.
If you are installing rigid foam on the exterior side of OSB sheathing, it sometimes makes sense to install "bumpy" housewrap to provide a drainage channel for hygric redistribution between the rigid foam and the OSB -- especially if you have insulation between the studs (like spray foam) that limits inward drying. Lstiburek explains all of this in his article, "Mind the Gap, Eh?"
The situation with board sheathing is different (since board sheathing is better able to redistribute moisture, and since board sheathing allows inward vapor diffusion and inward drying). With board sheathing, you don't need the bumpy housewrap between the foam and the board sheathing.
Two other questions
1. Would caulking the perimeter of the stud bays on the interior have any benefit with a board sheathed wall?
2. With foil faced polyiso sealed & taped to board sheathing as exterior air barrier & vapor barrier does there need to be an interior smart vapor retarder under drywal & latex paint? Membrain/ INTELLO for cellulose or kraft faced batts
Matt,
Q. "Would caulking the perimeter of the stud bays on the interior have any benefit with a board sheathed wall?"
A. No.
Q. "With foil-faced polyiso sealed & taped to board sheathing as exterior air barrier & vapor barrier, does there need to be an interior smart vapor retarder under drywal & latex paint?"
A. No. Just follow the rules explained in this article: "Calculating the Minimum Thickness of Rigid Foam Sheathing."
Martin,
In your post https://www.greenbuildingadvisor.com/article/the-high-cost-of-deep-energy-retrofits, the Utica, NY homes got a layer of Thermoply over the boards: "Once the walls were stripped to the sheathing boards, contractors installed a layer of Thermoply with taped seams as the air barrier. Then they installed two layers of 2-inch-thick polyisocyanurate with staggered seams, followed by vertical rainscreen strapping and new siding." Can you shed light on what additional benefit the Thermoply could have provided? Going with foil-face polyiso as air barrier over board sheathing as you suggest would save the materials and labor cost of the Thermoply, correct?
Vilas,
Thermo-Ply comes in three thicknesses; the most common thickness is 1/8 inch. It's basically foil-faced cardboard. The R-value is insignificant because it is so thin, but it includes a radiant barrier. It has a low permeance -- its permeance ranges from 0.53 - 0.63 depending on grade.
Q. "Can you shed light on what additional benefit the Thermoply could have provided?"
A. It's an air barrier and it's relatively cheap. One possible problem: It reduces outward drying.
Q. "Going with foil-face polyiso as air barrier over board sheathing as you suggest would save the materials and labor cost of the Thermoply, correct?"
A. Yes, and the polysio, if the proper thickness is specified, will do a better job of keeping the sheathing warm and dry because of its R-value.
Martin, what do you recommend for the WRB with board sheathing if you plan to do all of the insulation (rockwool) on the interior of 2x6 walls? I'm exceedingly gun shy about using foam on the exterior of the walls because I plan to do stucco. I won't be convinced otherwise until I see 20 years of success with exterior foam and stucco. lol. Plus, the additional stucco materials and labor cost is astronomical, which isn't something I've seen discussed on GBA.
Johanna,
You can use any high-quality housewrap. Of course, taping the seams of the housewrap is important, and potentially allows the housewarp to double as an air barrier (although an imperfect one, because of the nail holes from the fasteners). If you care about airtightness, it may be worth investing in one of the tougher brands of housewrap, like Dupont Tyvek CommercialWrap, WrapShield SA, or Cosella-Dörken Vent S.
Martin,
That anwsered my question. The project im working on has board sheathing so I am planning to use foil faced as air barrier. And drainwrap or similar on outermost foam surface for WRB to make outie window flashing more robust as opposed to just taping foam seams.
Thanks
Thank you Martin. Would you recommend polyiso on the interior side of the sheathing before the rockwool — as another air barrier? I’m in 4A, so “condensation” isn’t an issue, but couldn’t hurt I’m thinking.
Johanna,
You can do that if you want; that method is called the cut-and-cobble approach. For more information, see "Cut-and-Cobble Insulation."
Log in or become a member to post a comment.
Sign up Log in