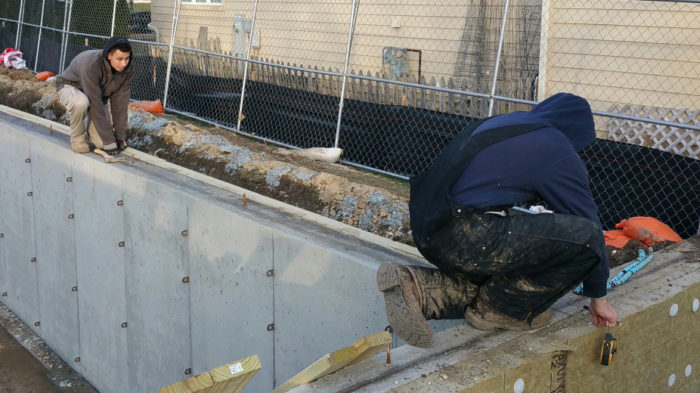
Image Credit: Eric Whetzel
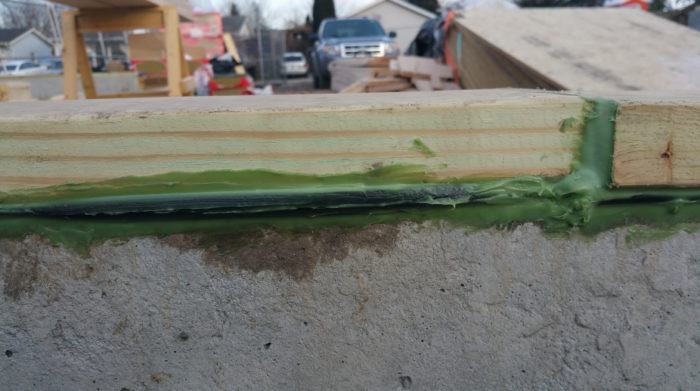
Image Credit: Eric Whetzel Nils applies a thick, continuous bead of Contega HF sealant before the 2x6 pressure-treated mudsill is installed with a gasket. A flexible gasket is stapled to the bottom of the mudsill before the mudsill is installed on top of the foundation wall. Sealant provides a second layer of protection against air leaks. It’s not visible, but the wood-concrete connection at the side wall has a piece of backer rod embedded between the two materials, making it easier for the sealant to bridge the gap over the long term. The connection between the rim joist, a floor joist, and the mudsill after the sealant has been applied. Applying the sealant before the subfloor was installed made the job a little easier.
More Guest Blogs


Editor’s note: This post is one of a series by Eric Whetzel about the design and construction of his house in Palatine, Illinois, a suburb of Chicago. The first blog in his series was called An Introduction to a New Passive House Project; a list of Eric’s previous posts appears below. For more details, see Eric’s blog, Kimchi & Kraut.
In a conventionally built home, mudsills are typically an area of significant air leakage. If you’ve ever seen sill sealer — a thin layer of foam normally used to address this lumber-concrete connection — under an actual mudsill, you can readily imagine just how poorly it performs.
In contrast, after reading about various strategies employed to reach the Passive House standard of 0.6 air changes per hour for air tightness, I decided to use the approach developed by architect Steve Baczek. There is an excellent article in Fine Homebuilding magazine that describes the details, and there is a companion series of videos available on Green Building Advisor.
We didn’t use the layer of poly, or the termite shield, but the remaining details we followed fairly closely. And we did make one product substitution — instead of using the Tremco acoustical sealant, we decided to go with the Contega HF sealant (see Image #2, below). It’s not as messy, emits fewer volatile organic compounds, and it skins over and firms up enough to apply the Pro Clima tapes, all while remaining permanently flexible like the Tremco product. These products are available at 475 High Performance Building Products.
Based on Steve Baczek’s design — going from exterior to interior — here is our mudsill air-sealing approach:
Redundant layers will help prevent air leaks
The approach assumes I will make mistakes at certain points with each layer of air sealing, so I’m counting on these layers of redundancy to protect me from myself. Again, this is the first time I’ve ever done this, so the theory is that even if I make a mistake in one area, it’s unlikely that I will make a mistake in exactly the same spot with successive layers of air sealing.
Obviously I’m trying to do my best with each layer, but I like the idea of added layers of protection (a Passive House obsession), especially when accounting for the long-term life of the structure. Even if each layer could be installed perfectly, presumably each layer will fail eventually at different times and in different places (hopefully 50 to 100 years from now if the accelerated aging studies are accurate), so hopefully these layers of redundancy will help maintain significant airtightness far longer than if I chose to use fewer layers.
Plus, I’m enjoying sealing everything up, so I don’t mind the process, which always helps.
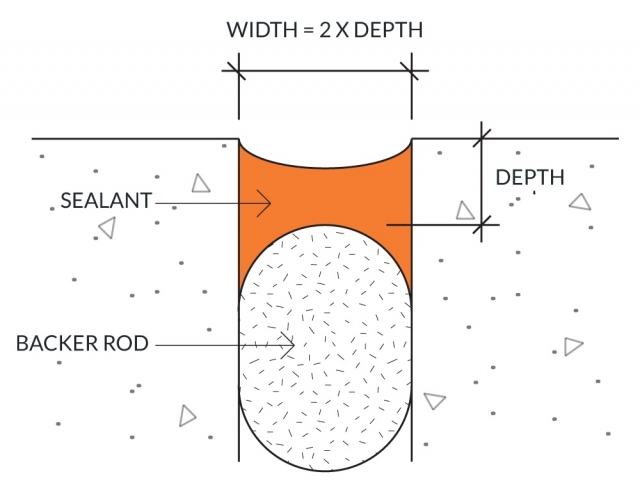
Backer rod for larger gaps
For larger gaps (not just for mudsills, but anywhere in the building envelope), roughly 3/8 inch or larger, I used backer rod to help fill the gap before applying sealant.
The backer rod (readily available at any hardware store) makes life easier for caulks and sealants — less stress on the connection between materials as the inevitable expansion and contraction occurs in the gap.
Hammer and Hand’s Best Practices Manual has the best explanation for their use that I’ve come across:
“While the humble sealant joint may be uncelebrated, it is vital to building durability and longevity. Proper installation is key to sealant joint integrity and function throughout a life of expansion and compression, wetting and drying, exposure, and temperature fluctuation.
“Note: Because sealants are just as good at keeping moisture in as they are in keeping it out, placing a bead of caulk in the wrong location can result in moisture accumulation, mold and rot, envelope failure, and hundreds of thousands of dollars in repair and remediation. If we know anything, we know that building envelopes will get wet — the question is, “where will the water go?” Make sure you know the answer throughout construction, especially as you seal joints…”
The manual makes these points:
Additional air sealing
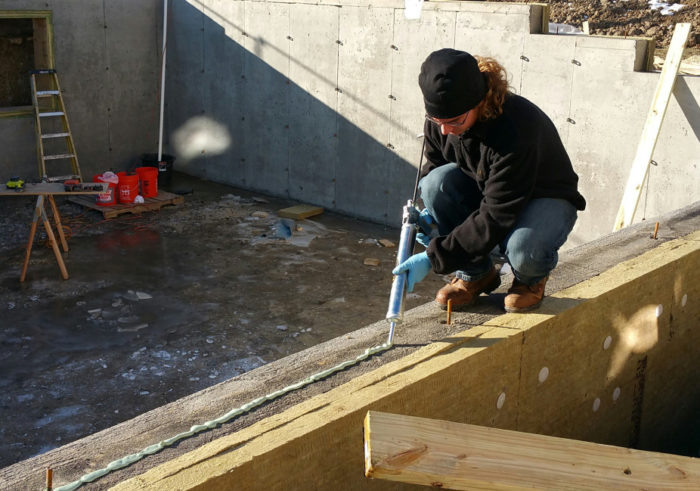
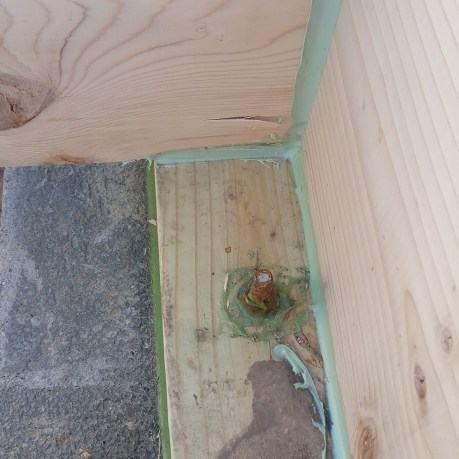
Since there was time between completion of the rim joist/floor joist installation and the installation of the subflooring (a weekend), I took the opportunity to seal up all the visible connections. Once the subfloor goes in, these connections are still accessible from inside the basement, but the space to work in would be really cramped and uncomfortable (at least I thought so). For what it looked like after sealing, see Image #5 below.
I found the silver Newborn sausage gun worked great for thick beads under the mudsills, but the blue gun worked even better for all other seams. Because the blue gun utilizes disposable tips, it was easy to cut the tip to exactly the size I needed, thus using (wasting?) less material (and hopefully saving a little bit of money). An added benefit of the disposable tips is less time required for clean-up at the end of the day (always a good thing). Both guns work great, and appear to be really well-made, although I would probably only buy the silver one again if I consistently needed a fat bead of sealant.
I filled larger gaps with either backer rod, or in the case of the largest gap, bits of pulled-apart Roxul Comfortboard 80, before applying the sealant. Since this is the first time I’ve done this, these are the kind of connections that I failed to anticipate beforehand. They are definitely worth planning for.
The temptation is to just fill these kinds of voids with sealant, but for the long-term durability of the connection backer rod or some kind of insulation stuffed into the gap is a better solution. Filling the voids before sealing doesn’t take much additional effort, so it’s definitely worth taking the time to do it right.
Weekly Newsletter
Get building science and energy efficiency advice, plus special offers, in your inbox.


2 Comments
COST
Eric - Thank you for sharing your experiences. It appears that you have the beginnings of a very well built home. I don't know if you could "ballpark" these numbers, but some idea of the relative cost of these materials would be very useful to builders and designers alike ( like cost per foot of the caulks or gaskets). Thanks, again. Kevin
Cost
Thanks Kevin!
We're going to share financials, especially for the "green" related items like sealants, tapes, gaskets, and the like, but I'm waiting until we're done, mainly because I don't have much time at the moment, but also because total amounts might prove more helpful to others.
Log in or create an account to post a comment.
Sign up Log in