
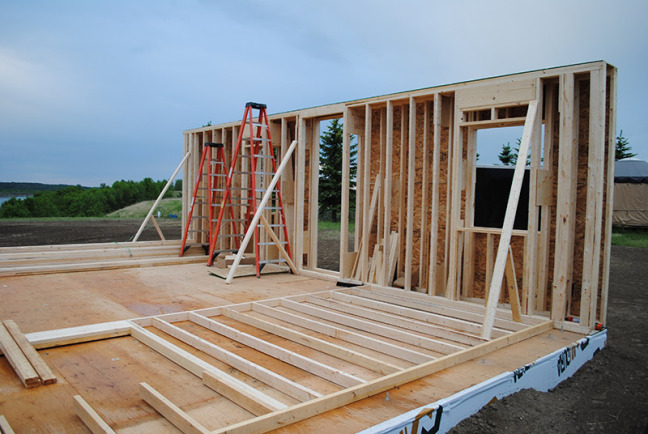
Image Credit: Kent Earle
More Guest Blogs


Editor’s note: Kent Earle and his wife, Darcie, write a blog called Blue Heron EcoHaus, which documents their journey “from urbanites to ruralites” and the construction of a superinsulated house on the Canadian prairies. GBA first posted a blog about their decision not to seek Passivhaus certification in May 2015, and later posted a blog about how the couple decided to heat their house.
After deciding on the mechanical system of the house, we needed to choose what type of wall system we were going to use. As I’ve learned, with an Eco-house, there’s more than one way to skin a cat! (Who came up with that saying?!) Again, it was a matter of weighing the advantages of each option and ensuring that our contractor felt comfortable with whatever system we decided on.
Passivhaus tends to utilize a double-wall system, although there is no set way to do this, as long as you meet the Passivhaus criteria.
Double-stud walls aren’t new. There are many houses from the 1970s that utilized a system with a 2×6 wall with studs 16 inches on-center (o.c.) parallel to a 2×4 interior wall with studs 16 inches o.c. Nonetheless, the biggest concerns in ensuring an exceptional envelope for a Passivhaus or any other superinsulated home are thermal bridging and airtightness (and to a lesser degree the overall R-value).
Thermal bridges provide an easy pathway for heat to flow out of your home. In a conventional single 2×6 wall, this happens every 16 inches as the 2×6 piece of wood is connecting the inside to the outside without a “thermal break.” This is why a 2×6 wall insulated with R-19 insulation has a whole-wall R-value that is a lot less than R-19.
Airtightness refers to the leakiness of your house. While thermal bridging can be limited by proper design, airtightness can only really be ensured by paying attention while on site, building the house. Airtightness is tested with a blower door, with results often reported in terms of “air changes per hour at 50 pascals of pressure difference.” As previously mentioned, the Passivhaus standard requires a maximum leakage rate of 0.6 ach50. The Canadian R-2000 standard requires at most 1.5 ach50.
R-value is of course also important, but not as important as reducing thermal bridging and ensuring excellent airtightness. This is because R-value is a rating of the “effectiveness” of the insulating materials. You could have a so-called R-50 house, but if it is leaky and has thermal bridging it will not function like a “true” R-50 house.
New options have emerged
In the last 10 years, there have been numerous high-performance, high-tech wall systems that have been developed, including insulated concrete forms (ICFs – concrete poured into thick pieces of foam) and structural insulated panels (SIPs – OSB laminated to the inside and outside of a big piece of foam), both of which systems almost eliminate thermal bridging.
Passivhaus buildings use a variety of approaches, although many that I’ve read about use some form of double-walled system, sometimes with SIPs on the outside and 2×4 timber framing on the inside. An 8-inch-thick SIP is about R-33 on its own, so add that to the R-11 of a 2×4 wall and you get a well-insulated house with minimal thermal bridging.
We had already decided that we would be best served, given our rural location and 55 kilometer distance from town, to pay our contractor to be at the site working – instead of driving back and forth with lumber. We wanted to utilize a company that could provide either a prefabricated wall system (which could be erected very quickly on site) or a “kit” (with all of the wood cut to size, ready to be put together like a model). Because we have a large shop on site, the materials can be all shipped at once and stored inside. Also, this significantly reduces on-site waste and chance of error.
One of the companies we looked at was Pacific Homes out of Victoria, B.C., a company that our builder has worked with on previous projects. This company produces a “Smart Wall” system – a prefabricated timber wall that eliminates thermal bridging and significantly increases R-value. A standard 2×6 wall is R-19. The 2×6 Smart Wall is R-31.
We compiled a list of attributes for each option that we felt were most important in our decision-making process:
- R-value
- Airtightness
- Ease of construction
- Construction labor time
- Material waste
- Total cost (time/money/energy)
Here are our options
The options for walls were as follows:
1. Pacific Homes 2×6 Smart Wall with 4 inches of rigid foam (EPS) on the outside.
This option was appealing due to its low cost and simplicity. However that simplicity quickly got tossed as we are quite certain that we want to use cedar siding on the house. Trying to secure cedar siding to foam is not possible without significant strapping and labor to ensure everything is kept in place. This would work for stucco, but it would not be ideal for us. The wall system has an R-value of about R-45. Airtightness might be less than other options given that this is really a single-wall system.
2. Pacific Homes 2×6 Smart Wall with offset 2×4 standard wall at 16 inches o.c.
This is a simple option as well. The outer wall would be prefabricated and shipped. Given the prefabrication, the house could be framed with roof, windows, and doors installed in two weeks (the same as Option #1). The interior framing could be done after, and standard batts could be used inside. The good thing about this (compared to Option #1) is that the plumbing and electrical would not pass through the 2×6 outer wall, thereby eliminating potential air leakage. The cost of this one was quoted at about $5,000 more than Option #1, due to the extra 2x4s and insulation batts. R-value for this option was R-41.
3. Fourteen-inch-thick ICFs.
ICFs use expanded polystyrene (EPS) forms with concrete poured into them. The system is appealing for a few reasons: no thermal bridging, super-strong walls (providing disaster protection), good R-value (R-48), and good airtightness (except in the corners and around openings, which of course need to be sealed as with any other system). ICFs are a bit controversial, though, and quite a bit more costly in terms of time, money, and energy. It is a labor-intensive approach and we simply did not think it would be worth it in our case.
4. Eight-inch SIPs with 2×4 standard wall at 24 inches o.c.
SIPs are touted as an energy-conscientious option that can be installed extremely quickly. A 2000-square-foot house can be erected in two days. SIPs use two sheets of OSB laminated to a slab of EPS foam. The panels are very strong and do not require further framing. The R-value of an 8-inch wall is R-33, so combined with a 2×4 wall at 24 inches o.c. you get R-44. I thought this would be a pretty excellent option. SIPs are only marginally more expensive then a standard wall system (and when you factor in the reduced labor cost, the difference is negligible) and are quite a bit less than ICFs. Unfortunately, SIPs have been found to have some pretty serious problems with moisture buildup, airtightness problems, and early decay. None of those sounded good to me. Sorry, SIPs — not for us.
5. And the winner: the Deep Wall System
One of the engineers on our team had worked with a group from Edmonton, Alberta, who utilized the “Deep Wall System.” This wall assembly was used on the Riverdale NetZero house in Edmonton. I had never heard about this, but was intrigued.
Essentially, this system uses two parallel stud walls: a 2×4 wall 16 inches o.c. on the outside and a 2×4 wall 24 inches o.c. on the inside. A 3/8-inch-thick piece of OSB is cut 16 inches inch wide for the top plate and bottom plate. The 2x4s are spaced and secured to the plates with a 3/8-inch OSB sheet on the outer wall. Essentially you make a box with a mesh on the inside.
The 16-inch cavity is filled with blown-in high-density cellulose. This gives an incredible R-value of 56! As if that’s not impressive enough, the material cost of building the wall is about the same as a standard 2×6 wall (not including cost of extra labor time for framing, mind you). The airtightness on the Riverdale NetZero house was 0.59 ach50 and at the Mill Creek NetZero house was 0.36 ach50. Amazing.
As I later found out, Rob Dumont — the energy guru and one of the creators of the Saskatchewan Conservation House (the house that inspired Wolfgang Feist and led to the German Passivhaus Institut) — developed and used this exact method for his house in Saskatoon. He built his house in 1992 and at the time it was considered to be the most well-insulated house in the world. The airtightness was tested at an incredible 0.47 ach50. Why didn’t they just tell us that in the first place!? There would have been no decision-making necessary. We would have just done what he did. We will still have a company cut all of the lumber to size and ship it as a package. Although this system will take a bit more time to complete (due to framing labor), the advantages of this wall system for us far exceeded the other options.
I’m super-excited about our superinsulated and locally developed wall system.
Weekly Newsletter
Get building science and energy efficiency advice, plus special offers, in your inbox.


20 Comments
Pacific Homes Smart Wall
After reading this, I checked the Pacific Homes webpage to see what this Smart Wall product is. http://pacific-homes.com/smart-wall-technology/pacific-smartwall-tm-how-it-works I can understand how they would achieve a slight reduction in thermal bridging, but not substantial. Using R4/inch for EPS, the center of cavity R-value is 20, not 31 (not counting sheathing, drywall, or air films). They claim a 26.5% improvement over conventional 2x6 framing. They also claim that the 'dew point' is eliminated. Am I missing something here?
Congrats on your Wall
Congrats on finding a wall for your project. We know this can be a daunting task... It sounds like there would be very little upcharge on labor as framing crews would view this extra wall as another interior wall. Especially if you are keeping an open floorplan, ordering pre-cuts and trying to eliminate soffits. All that goes a long way in framing labor relations....
This is just a note for people looking at more complicated buildings. We used this double wall for a while on single family homes and then move back to exterior insulation as we got into multi-family or more complicated singe family with bays and more intricacies in the exterior. We found that our structural needs in these buildings we getting too complicated and adding a lot of thermal bridging. Returning to exterior insulation seemed the best route in those types of buildings as we could always ensure total wall R-values and zero thermal bridging no matter what the structure behind it was.
Just a note that's hopefully helpful for someone reading this. Best of luck with the rest of the project!
Condensation? and Blown Insulation Process?
I really like this AGW system but I have two questions that I hope you can comment or elaborate on:
1. Since there is no exterior insulation there seems be be some potential for water vapor to condense on the inside surface of the structural sheathing on the outside face of the wall system. Can you comment on that?
2. How did you ensure that the blown cellulose insulation was blown with uniform density in the massive cavities and spaces between the parallel 2x4 wall framing? I assume that insulating netting was somehow installed. Can you elaborate on the insulation installation process?
Cold sheathing.
Sounds good but with no insulation on the exterior of the sheathing an air space between the sheathing and cedar siding will be critically important. And that usually means some sort of strapping to provide the air space -- which was your main objection to plan #1. True, the strapping need not be as robust if it is functioning only as a spacer, but it will still have to be done. I would do #1. Or better yet, site build something comparable so that the 4" of foam insulation can lap over the floor and ceiling joists.
Air Sealing ICF Corners
Can anyone explain why ICF corners would be hard to air seal?
Wall framing variation
We've settled on the following: A structural interior 2x4 wall with taped sheathing and and an exterior curtain wall which is added after the building is dried in. Interior utility work can proceed once the interior walls and roof are installed. The studs of the curtain wall are wrapped with Insul-web and the cavity is dense packed with cellulose. We then wrap the exterior with building wrap, nail on 1x2s over the studs and apply siding. There is no sheathing to the exterior, and with the venting rain screen, we optimize drying to the outside. Carpenters and insulators seem to adapt very easily to this process. The depth of the curtain wall can be changed depending on the energy goals of the project. No foam or fiberglass and very little thermal bridging. I do agree that this system works best with simple building forms. Dormers and transitions between dormer walls and attics need the most attention. Regular walls are a breeze.
RE: Wall framing variation
Jim, how do you support the curtain wall and what are you using to construct it? Also, how do you seal the bottom of the space where the insulation is? I checked you website and on your David house it looks like the exterior curtain wall is just floating. Do you use plywood boxes for the windows?
Jim
That's quite an appealing wall. Do you find that the insul-web and WRB are sufficient to keep the dense-pack from bulging and blocking the rain screen cavity?
Follow-up
Thanks for all of the thoughtful questions and comments. I’ve certainly enjoyed reading the comments relating to our project. Myself, being a layperson and not a professional in the building industry, I’ve relied on my own research and the expertise of others to come to our decisions. I’ll do my best answer the questions:
Reid – I have to admit I was skeptical of Pacific Homes’ claims of R31 for a 2x6 wall. From reading their website, it seemed that they came to this number from third party testing of the “true R value” of their wall system – taking into account thermal bridging in particular. Performance in application though, I simply cannot comments – i.e) how would it actually perform comfort-wise for the use in a house built with it rather than standard 2x6 wall and 4” EPS on the outside.
Kim – 1. Condensation was not a significant concern to our build team and in reality is not something that is overly concerning to the builder’s in general in our area given our very dry climate (low humidity and low precipitation). We have large overhangs on the house and the shiplap siding is assumed to be sufficient for our climate. (I’ll comment further in regards to the comment from Buzz). 2. The insulators have been in the business since the early 1990s working with dense-packed cellulose. In fact, they were the ones that Rob Dumont hired to put in his insulation in his own home. As I’ve read, he opened up one of his walls 10 years later to determine if any settling had occurred and found that this was not at all the case. The dense-packed cellulose is blown in through small openings cut (at every 16-24”) into a fiberglass mesh that they apply over the interior studs. The meshwork is installed the day before the insulation is blown in. They use a metal hose to work the insulation into the bottom 1/3, top 1/3 and then middle 1/3. They spray this into each cavity at a volume of 3.5 lbs per cubic foot. It is snug!
Buzz – Good points indeed. Firstly, as I later learned (after writing this post, which was originally written over a year ago), cedar can leach tannins into the sheathing if it is in direct contact, which can lead to failure of the sheathing, stain and/or the siding itself. We ended up not using cedar. Instead we used pine with a Swedish pine tar stain that I think may have an article published on GBA in the future. The second consideration for requiring an air space is the precipitation in your climate area. Martin Holladay wrote an excellent post sometime ago describing a rain screen wall system and considerations for it. He recommended that areas above 60” of annual precipitation MUST have an air space and areas with 20-60” should have an air space. Our climate is very dry with an annual average precipitation of only 14” per year, including rain and snow. We also have short wall heights on the bungalow with very large overhangs. Nonetheless I did previously bring the question up with our build team of needing an air space. Simply it is not done in Saskatchewan given our very low level of precipitation. That is unless for a structural reason - as in apply wood siding over EPS and needing something to attach the nails to. If we lived pretty well anywhere else, except for the dry prairies, we would have needed an air space.
Antonio – The corners generally have a gap wear the foam does not interlock as it does in the straight walls. This would need to be sealed with tape or peel and stick. This is not difficult to do mind you. I think my point being is that it is not entirely airtight at those points.
ICF corner blocks
Kent,
With ICF walls, it's the concrete that forms the air barrier, not the foam forms.
ICF walls are airtight at the corners, because the concrete is continuous.
.
A few double stud wall comments
A few code and insulating relaed things come to mind with the double stud wall that is proposed. In the US you need to "draft stop" the continuous wall cavity of a double stud wall every 10' maximum. This needs to be a rigid material, typically plywood or sheetrock. That actually can help with the installation of desne packed cellulose, but our regularl installer actually likes to net every stud bay to acheieve his required density. Both of these things dictate "aligned" inner and outer wall studs.
You also need to draft stop the wall cavity from the attic space. Your description states you will use a 3/8" OSB plate to connect the walls at the top. This wouldn't meed US code which requires 1" minimum nominal thickness wood, or 1/2" GWB draft stop. We typically use 3/4" plywood connecting plates to meet this requirement. This subsequently throws a wrench into using pre-cut studs, but some builders don't like those anyway.
The sheathing should be cold
If the exterior sheathing is warm with a double wall you have done a very poor job of insulating and air-sealing. This is a great example of the most cost effective, builder friendly and energy efficient wall for a cold climate. The double wall was a breakthrough in the 1970's and is still the best. I like fiberboard sheathing instead of the OSB as the drying potential is far greater. A cold climate wall should dry to the cold side, with the flow of heat. With a layer of housewrap and a rainscreen you will be living large and trouble free. The attic should be vented at both eave and ridge with energy heel trusses to eliminate any possible ice dam issues.
This comment is more of a contact request to the author. First let me say that I really like your house plan, smallish and simple. Second, I have been trying to find a way to get in touch with you. I live in Saskatoon and am looking to build a house very similar to yours also out on the prairie.
I was wondering if you might be willing to chat and most specifically would you be willing to share your house plan and possibly sell me a copy.
This site does not appear to allow private messaging so I thought I would post a comment. I apologize if this offends anyone. Kent if you are willing to talk with me please email me at [email protected]. Thanks!
Hello, I am new to GBA and wanted to get some thoughts on a wall system I'm considering for an upcoming build in Vermont Zone 6B. I am ultimately concerned with possible moisture problems, but also want to make sure this wall system will be enough for Vermont's cold winters. Here is what I am thinking -- Listed from exterior to interior. Any feedback is much appreciated!
- LP SmartSide lap siding
- 1x4 Strapping / Rainscreen
- Henry Blueskin VP160 WRB
- 15/32" CDX sheathing
- 2x6 Bearing wall 16" O.C.
- R21 Mineral Wool batts or dense pack Cellulose for wall cavities
- 1-1/2" Polyiso foil faced (Furred in Wall)
- Vapor Barrier Tape (All Seams)
- 1x2 Furring Strips
- 1/2" or 5/8" Drywall Depending on the spacing of furring strips
Thanks!
-Garrett
Garrett,
A quirk in the GBA website is that posts in the Recent Article Comments disappear very quickly. I would repost your question in the Q&A where it will get more responses.
Thank you, Malcom. I will post over there.
Hi Garrett!
Former VT spray foamer here ...
Looks like you are trying to achieve an R30 wall?
Are the furring strips acting as a utility chase?
Hey begreener, thanks for replying. Yes, R30 is the goal and think were just shy of that at around R27. Furring strips will also be acting as a utility chase. This approach would have to use full sheets of rigid to encompass the walls. Instead, I feel the Bonfiglioli wall may be a better approach? Furring strips used with this method would be zip r to eliminate a little bit of labor.
Have you considered using 2X4 Ray-core “SIPs” panels (R26), 1” polyiso zip panels on outside (R3) 1X 2 utility chase?
The studs are in the SIPs panel, but rather than OSB skins it is foil faced
Light weight & structural, then apply the zip on outside for thermal break
Seems way simpler!
https://raycore.com/insulated-roof-panels-wall-panels/
BG
We did look into raycore and in all honesty we’re going to go with them, but their delivery schedule was very backed up so we couldn’t. I do like what you have mentioned and agree this approach would be much easier. I also can’t help but think that they over exaggerate their r values and when thinking from an environmentally conscious view, am skeptical on the manufacturing of their product.
Log in or create an account to post a comment.
Sign up Log in