

More Guest Blogs


Editor’s note: This is one in a series of blogs detailing the construction of a net-zero-energy house in Point Roberts, Washington, by an owner-builder with relatively little building experience. A list of Matt Bath’s GBA articles can be found at the bottom of this page. You’ll find Matt Bath’s full blog, Saving Sustainably, here. If you want to follow project costs, you can keep an eye on a budget worksheet here.
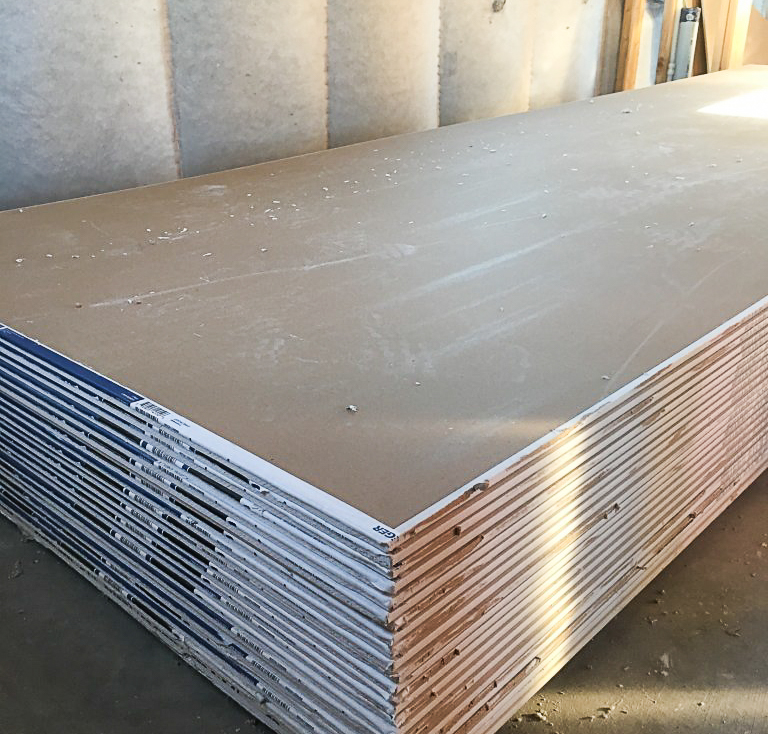
After passing the insulation inspection, I had permission to enclose the walls. I used gypsum drywall, the most common interior wall-covering product on the market.
Drywall, best known by brand names such as Sheetrock, consists mainly of gypsum pressed between two thick sheets of paper. It is very easy to install and paint, is fire resistant, and finds a good balance between strength and flexibility. It is also an excellent tool for saving sustainably as it is relatively inexpensive and also 100% recyclable.
I’ve learned a few lessons over the course of building my own home. One of them is that a good tool will almost always pay for itself in saved time and headache. I bought a few tools to help make installation easier and I highly recommend them to someone doing a project of this size.
The first is a drywall screw gun. Each sheet of drywall takes at least 30 screws and I had more than 150 sheets to install. That’s more than 4500 screws! With a drywall screw gun you can just turn it on so it is always running. That way you can focus your attention on your left hand and getting the next screw ready. It also has a depth setting to ensure that screws are set to the correct depth without tearing the paper. Like most tools, it takes some practice to really get the hang of it but once I’d hung the first 50 sheets or so I really started to get faster.
The second tool is a cutout tool, also known by the brand name RotoZip. It also takes some getting used to, but after using it for a while you really start to get quick with it. The tool uses a special bit that will follow along any solid surface, so you can use it to cut out window openings and electrical boxes, or just install end of wall sections long and use it to cut off the excess. It works very quickly and saves a ton of time.
Where possible, I used drywall clips instead of adding wood framing to support the drywall. On exterior walls, using clips allowed more room in the stud bays for insulation. They also were very handy on interior walls. There were many places where I would have needed to add an additional piece of wood to attach the drywall; it was much easier to screw in a clip.
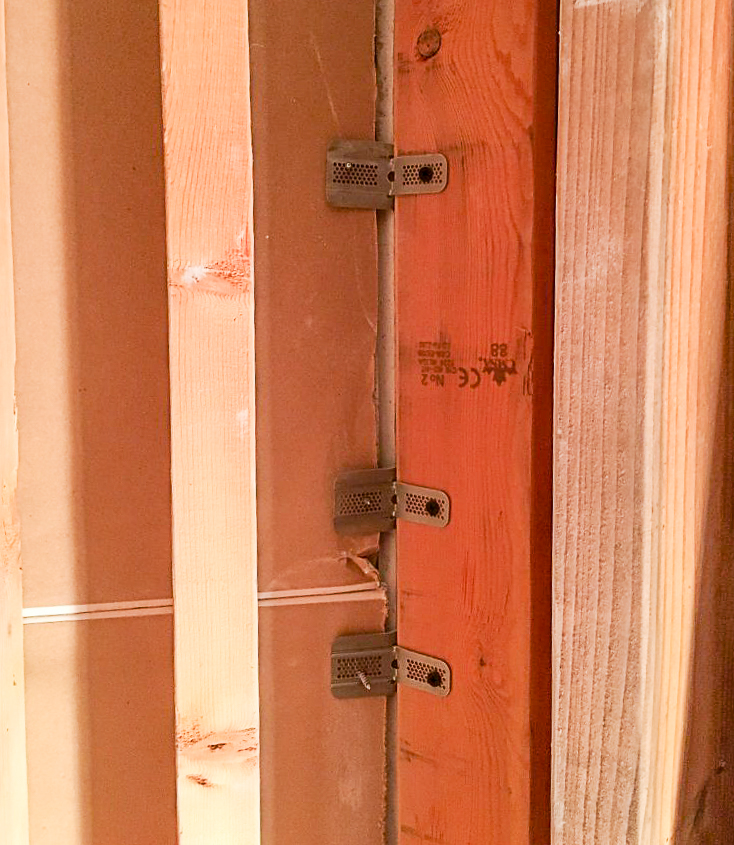
Clips were especially handy as backing where I had a 45° wall intersection, as I would have otherwise had to bevel the edge of a stud. The beauty of drywall is that you really don’t need a lot of tools and you don’t need a lot of precision, either. The joint compound I will be applying next will easily cover up any gaps in the drywall.
Resilient channel reduces noise
Normally, drywall is installed on the ceiling first followed by the upper half of the wall, then the lower half of the wall. I had already installed the second-floor ceiling, but I still needed to install the ceiling for the first floor. To reduce the noise from footsteps upstairs I hung the drywall from resilient channel attached to the bottom of the floor joists.
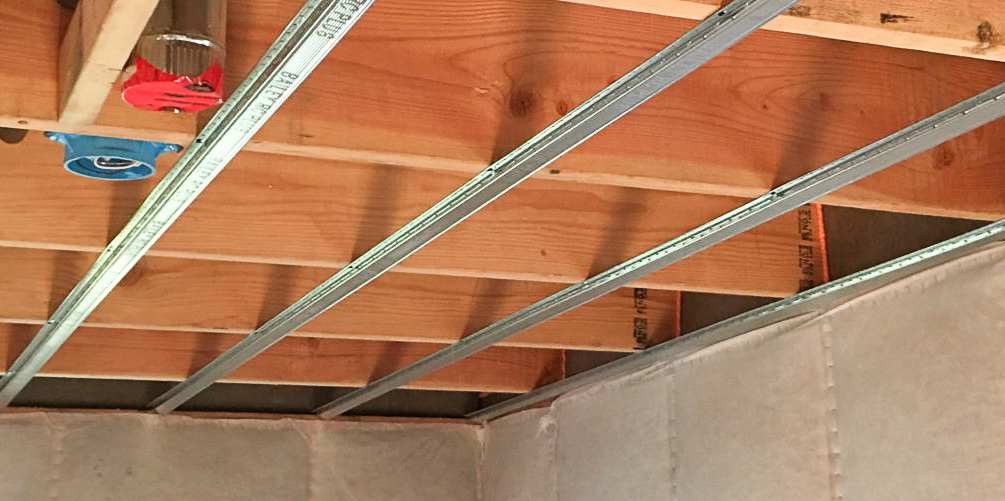
Resilient channel is a strip of metal that works to decouple sound vibrations between building materials. If I installed the drywall directly to the floor joists, the vibrations from footsteps and the washer and dryer and water heater would carry straight through the floor to the joists and straight through to the drywall. The resilient channel breaks this direct path. It is screwed to the floor joists, and then the drywall is screwed to the resilient channel, which is especially designed to eliminate contact between the two materials.
I installed the channel perpendicular to the floor joists every 16 in. I used a 14-in.-long block to help me space the channel as I put it up with drywall screws. It is crucial to make sure that all of the screws going through the drywall penetrate only the resilient channel, not the floor joists.
The channel is easy to trim to size with metal snips, and pieces can overlap to create a splice. The installation was very quick and easy.
Tackling exterior walls
I hung drywall on the exterior walls next. If you recall, I had left a 3/4-in. gap wherever an interior partition wall met an exterior wall, and then installed ladder framing in the exterior wall. This makes both air-sealing and drywall installation easier. I could easily slide a 1/2-in.-thick sheet of drywall through the 3/4-in. gap.
Next, I added in the final stud and nailed it to both the ladder framing and the top and bottom plates. Now it was ready for the installation of the interior walls.

Dealing with arches and curves
Hanging drywall on interior walls was slightly more complex because there were curves, arches, and niches to deal with. That’s the great thing about building your own home, though. You get to include all of the beautiful, custom features that you have always wanted.
I designed the house to have a curved wall to wrap around a spiral staircase, as the photo below shows. This should be one of the more aesthetically pleasing elements of the house. But it was a bit of a pain, not only to frame but also when it came time to hang drywall on the ceiling and the walls.
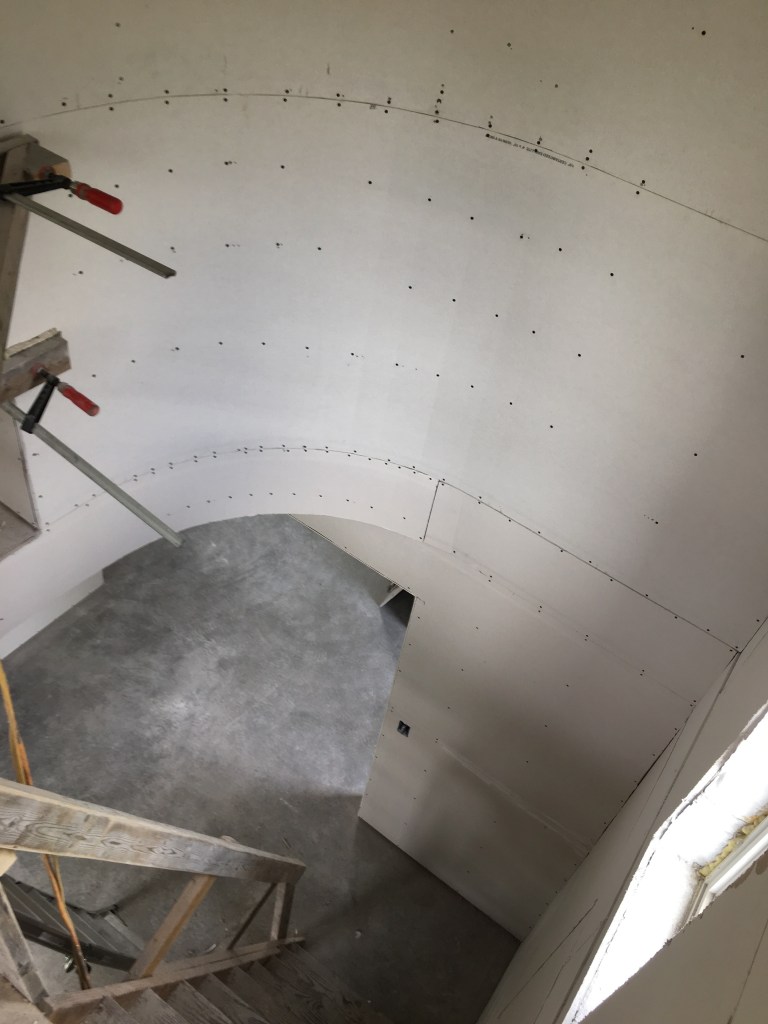
Drywall does bend, but not enough to make this radius. In order to make it work, I started by scoring the back of the sheet every 1-1/2 in. Next, I sprayed the back liberally with water, working it into the scored areas especially. The moisture dampens the gypsum, allowing it to flex more. I wrapped it around the wall and pulled it tight with clamps, and then left it to dry. A few hours later I was able to remove the clamps and the curve remained. At this point I was able to lift it into place on the wall and attach it with drywall screws.
The arches I designed to cover the ductwork are created the same way, but the drywall didn’t require water because it was being bent away from the back side of the sheet instead of toward it (concave curves as opposed to convex). The gypsum snaps at each of the scored lines, but the paper on front remains intact, allowing the sheet to form into a curve. The important thing is to ensure all of the screws are put into the gypsum, not just the paper.
The large curved wall that wraps around the spiral staircase also had this type of curve where the drywall is bent away from the back side. I created these in the same manner. Hanging these sheets was complicated by the fact that they were installed in the stairwell.
For smaller drywall arches, I used 1/4-in.-thick sheets.
Then comes the mud
When you look at a long wall in a modern building, it looks to be one single piece of painted, textured drywall. In reality, any long wall is made up of several different sheets of drywall. Taping is the part that makes it all look seamless.
Ready-mix joint compound like the kind I am using is made primarily of limestone and water, mixed with other additives like talcum (baby powder) and perlite (volcanic glass). Even though it is called ready-mix, it is highly recommended to add a couple handfuls of water and mix it really well with a drill-mounted mixing paddle before applying it.
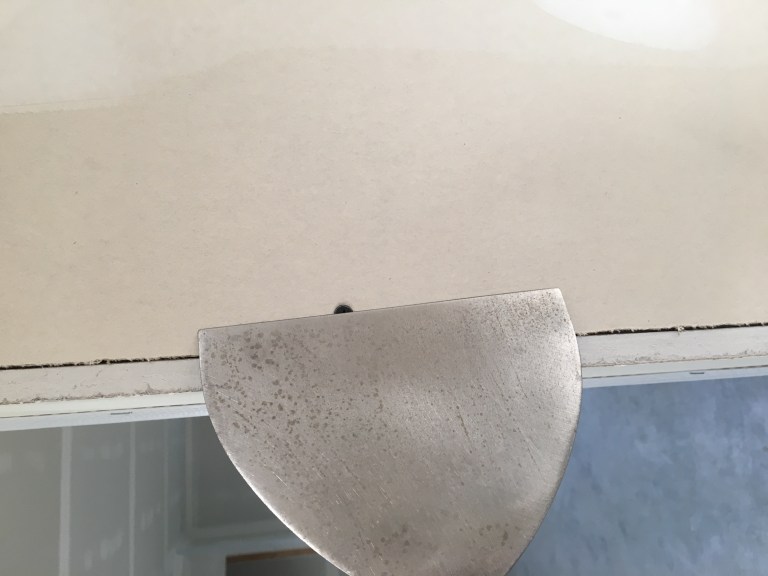
Some joint compounds contain plaster of Paris, which hardens a lot faster. It’s a good idea that before doing any taping you take some of this “hot mud,” as the pros call it, and fill any large gaps, especially in corners or inside edges. The hot mud comes in a powder form, and you simply add water and mix it up until it has a workable consistency. I used a 6-in. taping knife to apply the hot mud to any gaps over 1/8 in. wide.
The other thing you need to do before you begin drywall taping is to make sure that all of the screws sit just below the surface of the drywall. I took my taping knife and ran it over each screw and if I heard a click, I knew it was sticking out and would interfere with the tape. I gave these screws a quarter turn or so until they were below the surface of the drywall. If you used a drywall screwgun like I did, there shouldn’t be too many of these to deal with.
Start taping in the corners
With the gaps filled and screws set, I was now ready to start taping. Starting in the corners, I loaded up my hawk with joint compound and used my 6-in. taping knife to butter up both sides of a corner. It’s best to load up only the front edge of the knife with mud and then hold the knife sideways to apply it so you end up with just a 3-in.- to 4-in.-wide streak of mud on the wall. You definitely don’t need a 6-in.-wide bead of mud, and that’s what you’ll get if you simply run the front edge of the knife down the wall vertically. As with many, many other skills used in building a house, it will take some practice to get the hang of using the side of the knife smoothly, but if you just keep trying you can become pretty skillful rather quickly.
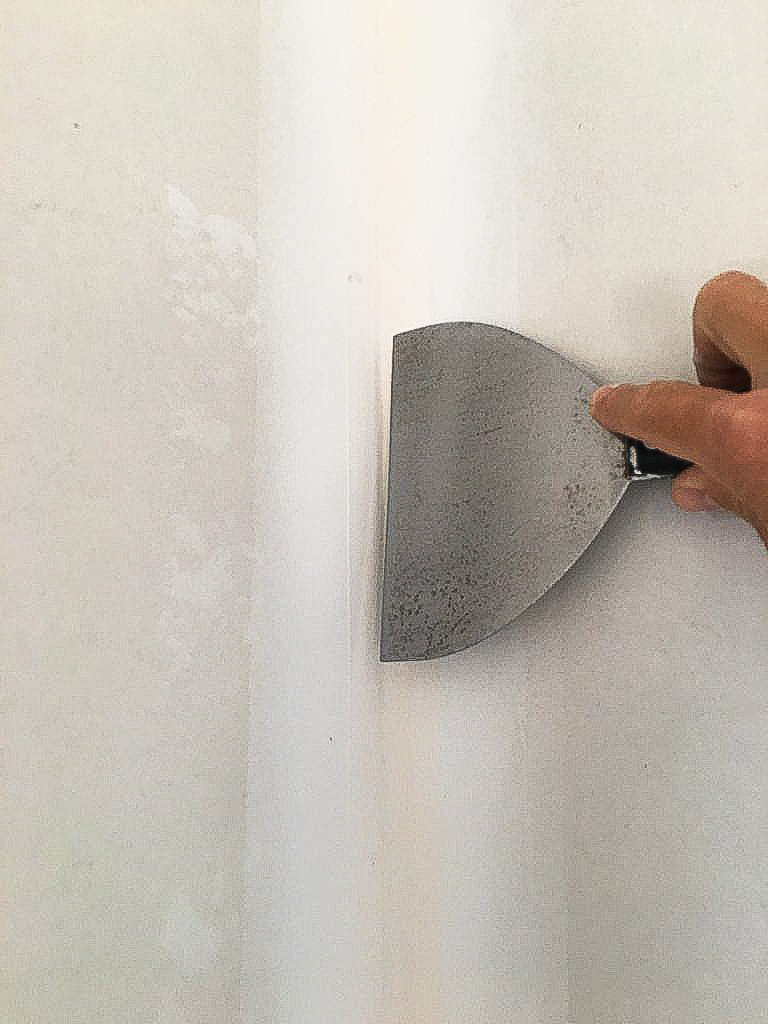
I measured a piece of tape to fit the corner from top to bottom and folded it in half along the crease, then applied it to the corner. I removed the excess mud by holding the taping knife straight. It is best to start from the bottom and go up to avoid excessive dripping. Drywall paper tape must be mudded on both sides, so I then repeated the process to get the front side of the tape, applying the mud with the knife sideways and removing it with the knife held straight.
I taped the flats next. The long edges of drywall sheets are tapered so when you have two of these long edges together, they create a tiny ditch. The tape fits inside this ditch so that after you are done taping you are left with a flat surface. As with the corners, the flats are buttered up, the tape is applied and flattened out, the tape is buttered, and then the knife removes all of the excess mud. When the tape is applied, it should not overlap the corner tape that was already applied.
The last seam to tape is the butt joints. These are the places where the short edges of the drywall sheets come together. Unfortunately, they are not tapered. This means that the tape will sit on top of the drywall and create a hump. With several coats of joint compound, I widened this hump so it was so gradual that I couldn’t tell it was there.
Drywall taping goes a lot faster when you use less mud rather than apply a ton of mud and then have to sand off all the excess.
In addition, joint compound should be applied over the heads of all the screws. You can hit a row of them in just two swipes of the taping knife by applying mud holding the knife sideways in one stroke, and then rotating the knife straight to wipe the excess mud off with the front of the knife. A big thank you to DIY RenoVision for their excellent videos that really helped out!
Other blogs by Matt Bath:
Designing and Installing a Septic System
Installing the Ventilation System
Weekly Newsletter
Get building science and energy efficiency advice, plus special offers, in your inbox.


7 Comments
There is very little point in using resilient channels on ceilings if you aren't also going to add sound attenuation batts to the joist cavities.
Batt insulation and resilient channels are addressing two different types of sound transmission. I think it's subjective as to whether using one without the other has any point. I would certainly say that installing the batts is the low hanging fruit; very little work for at least some benefit, plus it's hard to screw it up. Resilient channel, however, is very easy to negate by anything less than an ideal install. I opted against the resilient channel after reading all the requirements for it to actually work, and realised since I wasn't doing the drywall myself, the chances of it being done correctly were effectively zero. From what I read, a single short circuit (e.g. a screw connecting the drywall to the substrate) reduces the effectiveness to almost nothing. You also have to separate the ceiling drywall from the adjacent wall drywall using acoustical sealant, otherwise that is a short circuit.
Trevor,
While resilient channels and sound attenuation clips are primarily for structure borne sound, and insulation for air-borne transmission, the two are complementary. One approach without the other is exponentially less effective than combining them. I agree though that if you are going to do one or the other, insulation makes a lot more sense - and as you say is a lot more forgiving of poor installation techniques.
Good points, but my understanding is that STC is for airborne sound only. As such it wouldn't apply to sound generated by the floor itself and transmitted down to the ceiling (e.g. footsteps, the vibration of a washing machine on the floor). I haven't read the ASTM test protocol, but I'm guessing it's done with a sound generator, and there is no physical contact between it and the assembly. This is where resilient channel is helpful, but how helpful without the absorption material I don't know.
I agree that subjective was the wrong way to put it; more an open question, which maybe does have an objective answer.
Trevor,
I have edited my post because I had lazily not read your response properly. I agree with what you said.
I'm no drywall expert, but I thought the reason for 1/4" thick drywall was to avoid the very tedious and time consuming art of tightly bending 1/2" drywall? If that's the case, why not just use double 1/4" on the curved staircase walls?
The author was already using 1/4" on other parts of the house, why not there? Some sort of code restriction?
Is that an anchor bolt and washer I see on the interior wall plate?
Log in or create an account to post a comment.
Sign up Log in