
More Guest Blogs


Editor’s note: This is one in a series of blogs detailing the construction of a net-zero energy house in Point Roberts, Washington, by an owner-builder with relatively little building experience. A list of Matt Bath’s GBA articles can be found at the bottom of this page. You’ll find Matt Bath’s full blog, Saving Sustainably, here. If you want to follow project costs, you can keep an eye on a budget worksheet here.
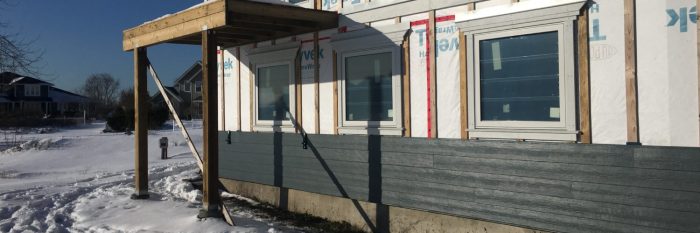
With a break in the weather, it was high time to install the siding. The Tyvek water-resistant barrier (WRB) I’m using should be protected by siding; it will break down if it’s left uncovered for too long.
The fiber-cement siding I will be attaching serves the dual purposes of protecting the WRB and giving a clean, finished look to the exterior of the house. Fiber cement is one of the best products on the market when it comes to siding due to its durability and high resistance to heat, fire, insects, and water.
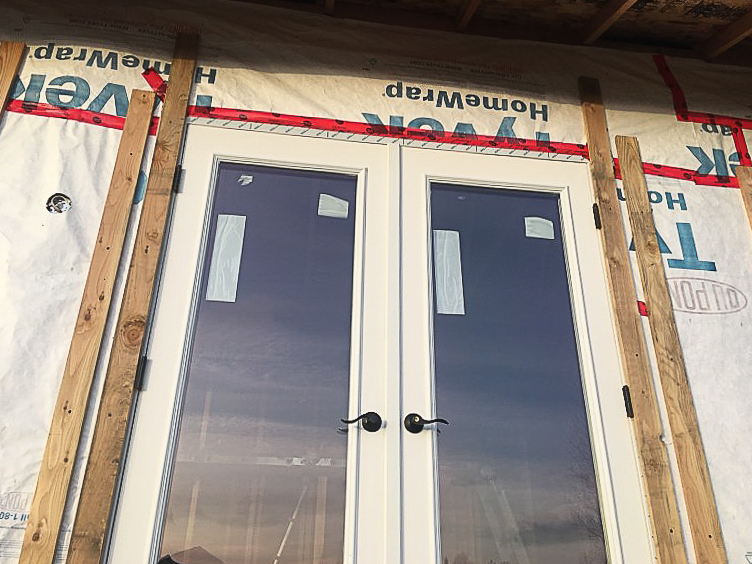
The siding will be attached to vertical 1×4 furring strips I installed a few months ago. It is very important for the ends of every piece of siding to fall on one of these furring strips. For this reason, I added some extra furring strips around the doors and windows so both the trim and the siding would land on something solid.
The furring strips were attached to the sheathing over the studs, providing solid anchoring for the siding. But there were no studs for the additional furring strips I wanted to add. The polyiso foam and sheathing alone were not enough to support them. So I added additional 1×4s on the interior of the house so that the screws that attach the furring strips will have another 3/4 inch of wood to screw into.
I attached the additional 1×4s on the interior with finish nails just to hold them in place, and then used 3-inch #8 wood screws to attach the outside furring strips through the foam and sheathing and into the interior 1x4s.
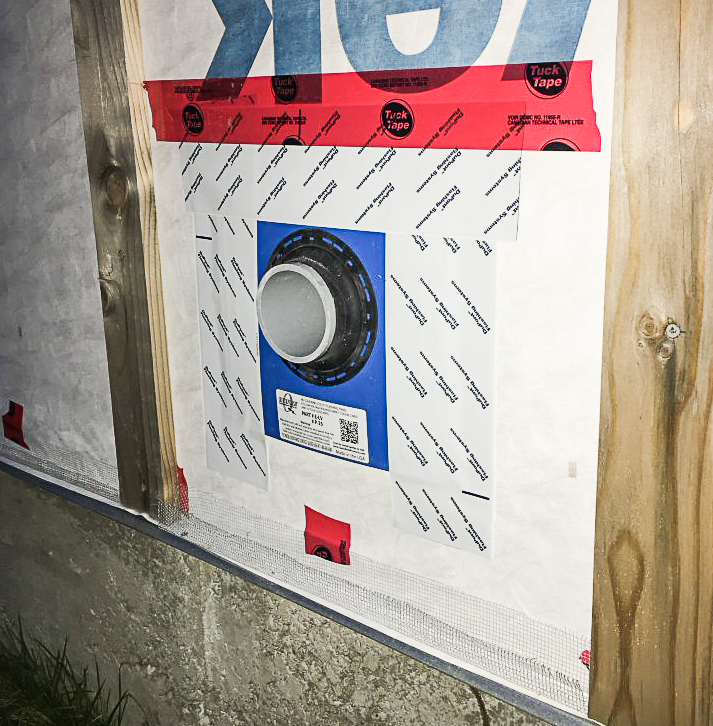
I used QuickFlash products for the minisplit heat pump lines. The QuickFlash products are very handy when it comes to ensuring a nice weathertight seal. I cut a slit in the Tyvek, slid the seal over the stubout, and then slipped the top 2 inches underneath the WRB. I followed that with flashing tape, first on the sides, then over the top, and finished with a counter flashing of WRB tape (see the photo below).
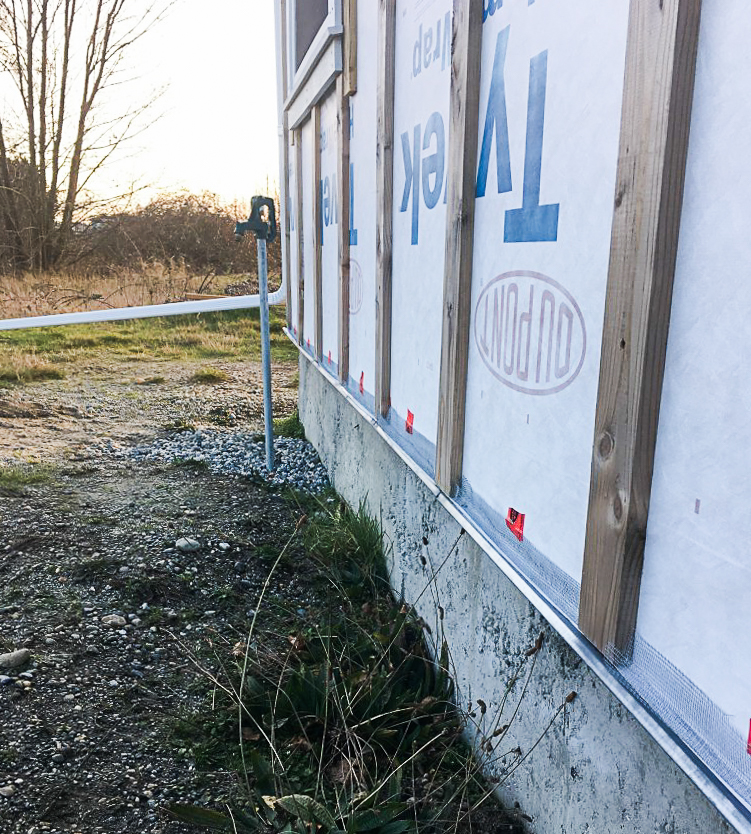
The last thing I did in preparation for installing the siding was to attach insect screens at the bottom of the wall between the furring strips (see the photo below). This will prevent any bugs from crawling or flying into the rainscreen between the siding and the WRB. I used a few pieces of scrap wood to bend some mesh screen into a box shape and wedged them in between the furring strips.
Trim serves more than one purpose
Trim is used primarily for visual purposes, but it’s also a great tool for weatherproofing the corners of the house. I wanted the corners to form a good seal, and it is much easier to match up a few pieces of vertical trim in a corner than it is to match up 30 to 40 individual courses of siding. Siding is not waterproof, and it must be installed in tandem with a water-resistant barrier and a moisture management plan.
I designed the house to have trim not only at the corners, but also around the windows and along the rim joists to give the house a little curb appeal.
The manufacturer of the trim I am using (James Hardie) recommended using stainless-steel finish nails to attach it to the furring strips, but my electric finish nailer simply wasn’t powerful enough to fire through the fiber cement. I was left with the decision to either buy a new finish nailer or attach the siding with trim screws.
I really wasn’t happy with either choice but I decided to use the screws because I would have had to buy not only a new nailer, but also an air compressor, since my other nailers are all electric as well. Using the trim screws was very frustrating, however, as they used a #1 square drive which kept stripping, and the stainless screws were quite expensive.
Start with the window trim
I started on the window trim. For each window, I first installed the side pieces, cut to the same height as the window, but with a 10º bevel on the bottom. This bevel will match up with the sill so that it gently slopes away from the wall, helping to direct water away from the window.
The next piece to go on was the head trim. I cut it 3 inches long on each side, ripped it in half on the table saw, and then cut one of the pieces down an additional 3 inches. This allowed me to give each layer an overhang of 1 1/2 inches on each side (see the photo below). I furred out the second layer of head trim with some 1/2-inch plywood to give it some depth, and then added one more piece on top with 45º miters on the ends. I furred this last piece out with 1×4 so it extended just slightly out from the piece under it
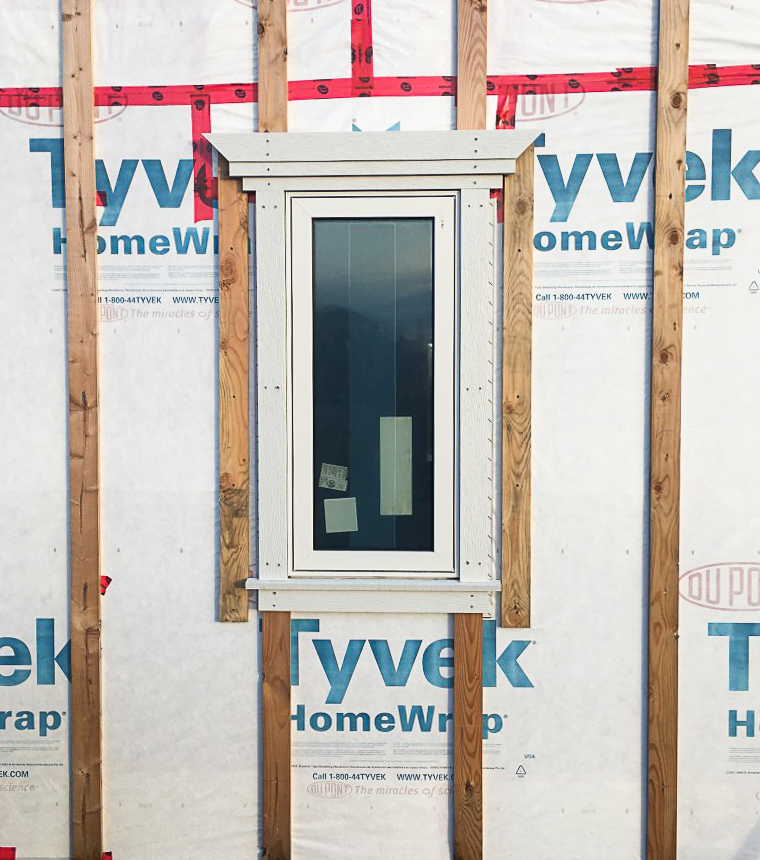
For the sill, I ripped a piece of trim in half and then beveled it 10º. I also cut a groove in the bottom along the front edge to help water drip away from the house. Below the sill I cut one last piece with a 10º bevel to match the sill. I painted all cut ends with high-quality exterior paint before installing. This is specified by the manufacturer to protect the siding. I finished each window with a galvanized drip cap. This will prevent water from pooling on the flat part of the trim.
Trimming the corners is next
With the window trim completed, it was time to move on to the corner trim boards. I purchased two different sizes so that I could attach them together at a right angle but still have both sides extend the same distance from the corner. I used Gorilla glue and clamps to hold the two pieces together and let the glue cure for 24 hours before installing the corners.
I needed more than one piece of trim to span the entire distance from foundation to eave. Where two boards met, I beveled the ends to prevent water from becoming trapped in the joint. Wherever possible, you should avoid having any horizontal surfaces because it gives water a chance to pool. I used the same stainless-steel trim screws as I used on the window trim to attach the corner trim to the furring strips.
The last pieces to go on formed a horizontal band at the the rim joist. I added trim here simply to spice up the siding, which otherwise would have extended uninterrupted from the bottom of the house to the top. Just like the windows, this trim was crowned with a drip cap to prevent water from collecting on the horizontal top surface.
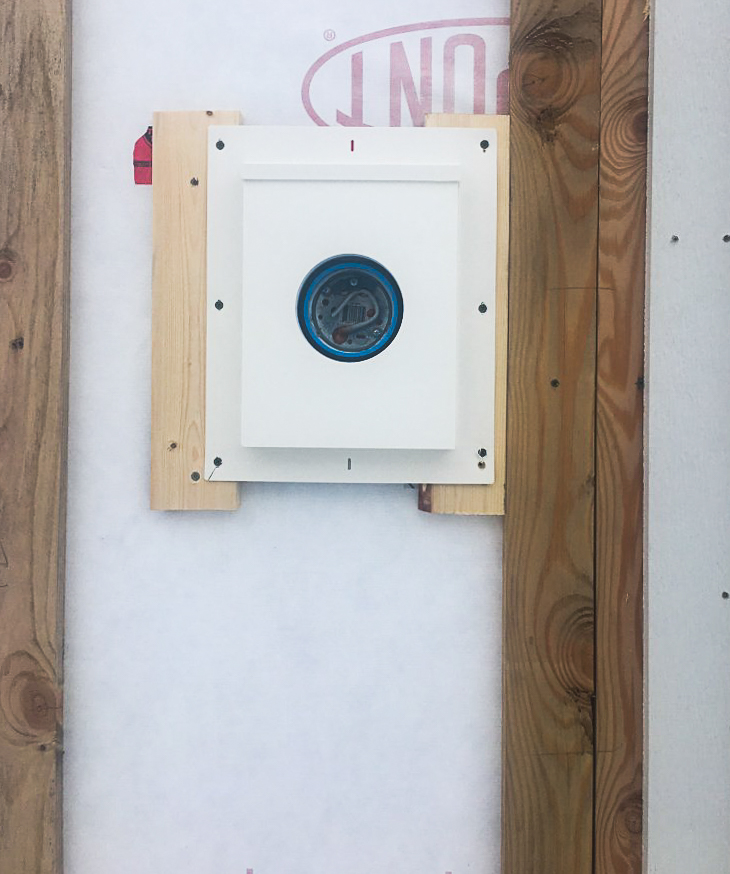
Although it isn’t necessary, I decided at the last minute before applying siding to use trim boxes for the exterior lights. Lights are often attached directly to the siding but the trim boxes give the installation a neat look and, more importantly, do a better job of ensuring proper water drainage. First, I used a QuickFlash electrical flashing to fill the gap between the Tyvek and siding, and then I screwed a SturdiMount flashing to the furring strips. The SturdiMount comes with a built in drip cap and looks really sharp, and both flashings together are under $15.
Using pre-painted siding brings immediate rewards
One of the great things about using pre-painted siding is the feeling you get when you finish installing a couple of courses and stand back to admire your work. You immediately get to see the finished exterior come to life. I was a little worried about the color because there are four other blue houses in my small neighborhood, but the color looks much different than all the others. I was extremely pleased with the selection.
Lap siding is a cinch to install. The first step is to rip a few pieces into 1 1/4-inch strips. These are used at the base of the wall to angle the first row outward. Each of the following rows are angled by the row below. There are really only three difficult parts to the installation of the siding, the first of which is getting the bottom layer straight. I used my transit to ensure it was straight and level all the way across each wall.

Once this first course is complete, the rest becomes a cinch with the aid of Gecko siding gauges. These cheap tools perform dual functions of holding the siding while you screw it in and ensuring that each row is installed an equal distance from the previous one.
I used # 8 x 1-1/4-inch fiber cement board screws to attach the siding to the furring strips. I was a bit leery of the Phillips drive, but found that the screws hardly ever stripped, which was a welcome change from the trim screws. The screws are driven until the head is flush with the surface. The 12-foot-long boards are butted together tightly, without gaps. I slipped a square of blue flashing behind each butt joint to direct water in front of the row underneath.
I paid the price for my elaborate window trim as it was extremely difficult to cut the siding so it matched the profile. Luckily I had a little room for error because all of the gaps between the siding and trim will receive a bead of color-matched caulk.
The last difficult part comes when you have to start using a ladder. The siding isn’t that heavy, so I was able to wrap my arms around the ladder and hold the board as I climbed up, using my elbows to grip the rails. Once I screwed it in I had to go down the ladder, move the ladder, and back up to screw in the ends.
Weekly Newsletter
Get building science and energy efficiency advice, plus special offers, in your inbox.


6 Comments
i like the idea for your bugscreen at the bottom, in fact i thought about doing this exact thing on my house, and it was going to be instead of cor-a-vent sv-3. My ONLY concern with this method is this:
The space inbetween the furring strips, will this not collapse/cave slightly over time, or at least be quite susceptible to collapsing in between the furring strips/contact points? Thus allowing for bug entry... or even just not a very tight fit against the back of the siding.
the only way I could see around this problem was if the mesh was attached to the back of the siding, as well as attached to the tyvek, which it looks like you sort of do have that with the tape. but that seems like a pain to attach it on both sides of the "u" shape of the bugscreen.
Thoughts? anyone else have experience with this or long term results?
Kevin,
If using perforated flashing like this: https://www.menzies-metal.com/metal-flashings/perforated-j-channel-rain-screen-low-back-5-lengths/ or a proprietary product like Cor-a-vent, it's better to install it continuously below the battens, rather than between them.
What I'm not sure about in Matt's case is how much of the cavity ended up open at the bottom. It looks like the siding extends down to the solid flashing at the base of the wall. I'd be more comfortable if the battens and screen were held up 3/4" above that flashing to provide more ventilation.
Malcolm, I agreee that those types of products should be continuously run on the bottom of the wall. My concern with Matt’s application is that the screen was more or less just stuffed between the battens, and not held with much except the tape to the wrb and the backside of the siding rubbing/pushing up against the outside of the u shape of the formed screen.
I was just thinking that U shaped screen wouldn’t last since there’s no rigidity to it.
I’m having a hard time explaining it... But just compared to plastic like sv3, coravent, it doesn’t have any waviness to it, whereas a strip of screen isn’t necessarily going to be arrow straight, parallel to siding/wrb, allowing for small gaps... am I making sense?
Kevin,
I missed that in the photos and completely agree. The bug-screen is usually stapled to the wall before the battens are installed, then folded over. Even then it's not a detail I like.
I'm curious about your corner trim and window details. I take it that after you installed the trim over the furring strips you butted the siding against it (probably leaving a small gap for expansion)? Then you caulked the seams between the siding and the trim?
I've heard that caulk always eventually fails. You say that "I slipped a square of blue flashing behind each butt joint to direct water in front of the row underneath" but did you also add a piece of blue flashing on top of the furring strips (where the siding ends meet the corner trim and window trim) so that any water that gets through the caulking doesn't soak into the furring strip?
One other thing, I've wondered if you should caulk the seams between the siding ends and trim at all? Wouldn't leaving the small gap open allow water to drain out more easily? Perhaps a detail that might work just as well would be cutting a rabbit into the edge of the trim and slipping the siding ends underneath it. Would that work?
Today I learned that there is a city in Washington that is inaccessible from the United States.
Log in or create an account to post a comment.
Sign up Log in