Image Credit: All photos: Eric Whetzel
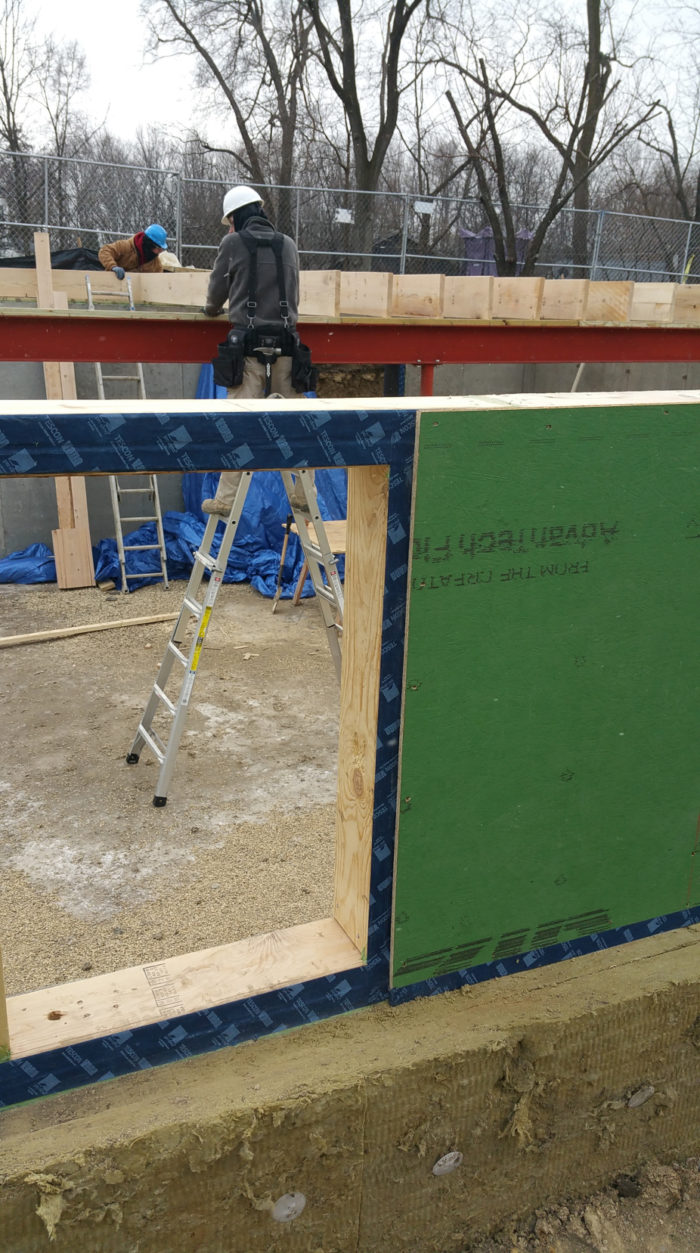
Image Credit: All photos: Eric Whetzel The bottom edge of the OSB kneewall sheathing was sealed with tape to prevent any possible water damage during construction. Later, flashing would keep water out. The inside of the kneewall was sealed once the sheathing had been applied. The builders ran continuous beads of adhesive over the outside edge of the 2x6 studs before applying the sheathing. The idea was to make the bead as consistent in thickness as possible. This section of wall is ready to be raised into place. The sheathing has been nailed and taped, and the nail holes sealed with Contega HF sealant. After stapling a gasket to the edge of the subfloor, builders tipped wall sections into place and used braces to keep them plumb. Headers over doors and windows was one of the few places where foam insulation found a place in the house.
More Guest Blogs


Editor’s note: This post is one of a series by Eric Whetzel about the design and construction of his house in Palatine, Illinois, a suburb of Chicago. The first blog in his series was called An Introduction to a New Passive House Project; a list of Eric’s previous posts appears below. For more details, see Eric’s blog, Kimchi & Kraut.
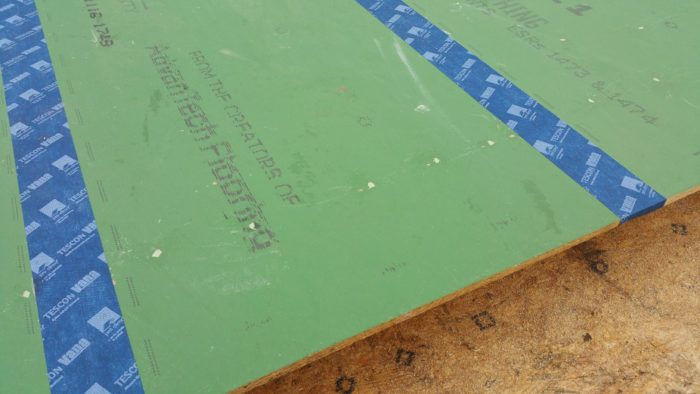
Because our lot is sloped, the plans called for a series of kneewalls. When I saw the first piece of Zip sheathing about to be installed, I realized the bottom edge, which is exposed OSB, would be sitting directly on top of the Roxul insulation on the outside of the foundation. While it’s unlikely that water will find its way to this edge (the flashing for the wall assembly will be installed over the exterior face of the sheathing at the bottom of the wall), it seemed like a good idea to tape this edge with Tescon Vana for added protection and peace of mind (even if it only protects this exposed edge until the rest of the wall assembly is installed).
For the kneewalls, we protected all of the exposed seams in the framing lumber with Contega HF sealant before also applying the Tescon Vana tape, all of which was done prior to the Zip sheathing being installed. The sealant takes about 48 hours to cure enough before you can effectively cover it with the Pro Clima tapes (something to consider when setting up scheduling goals).
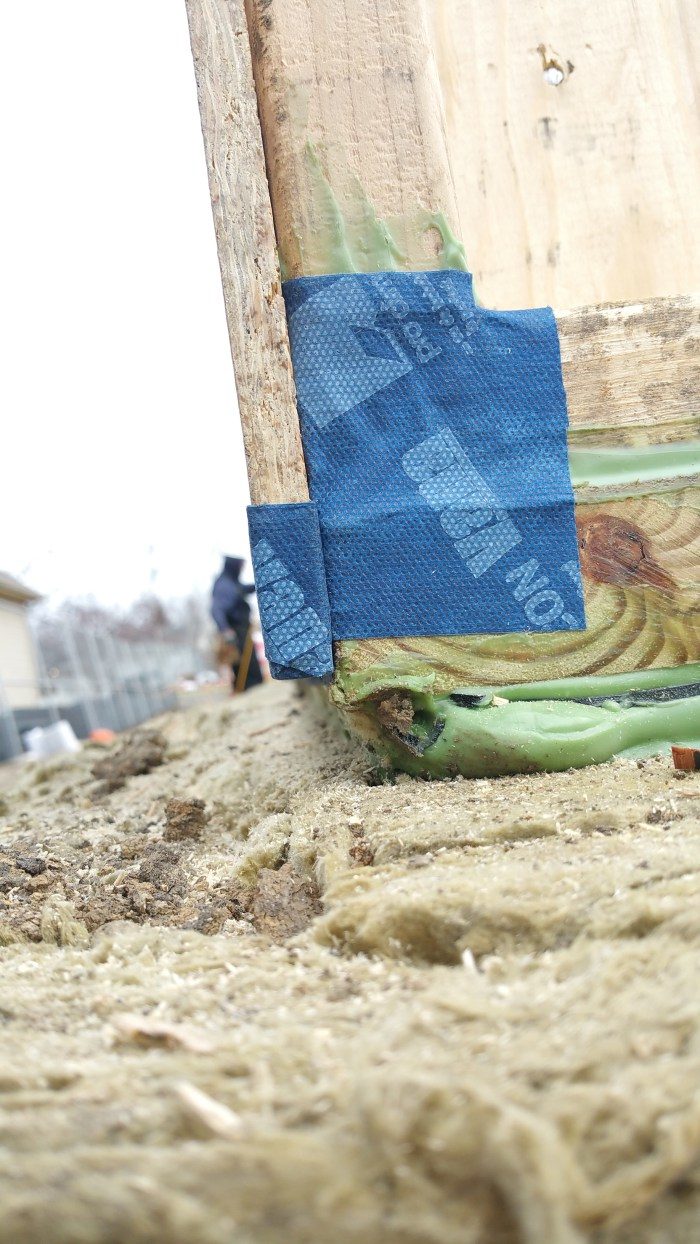
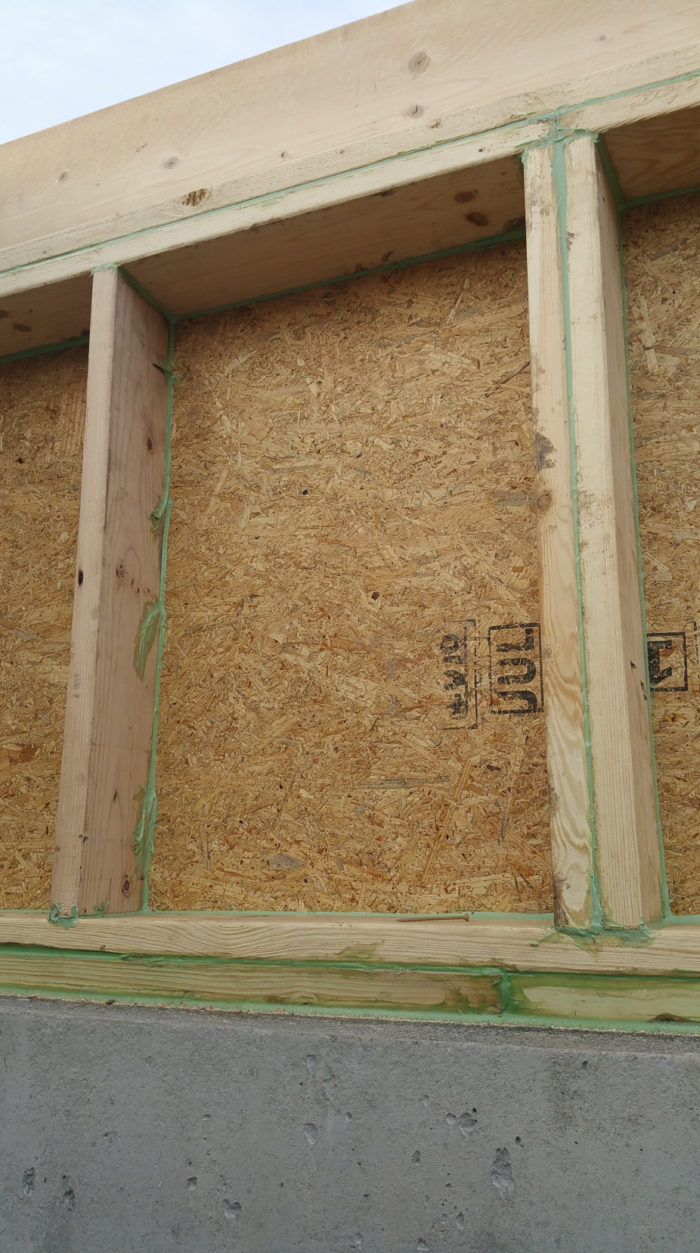
For the bottom edge (the exposed edge) of the Zip sheathing, I cut the Tescon Vana tape like I was wrapping a present (see Image #2 below). Once the Zip sheathing was installed on the kneewalls, I could move into the basement and seal up the connections between the Zip and the framing members, in addition to hitting any seams in the framing itself (see Image #3 below).
Once the house gets closed in, I will go back and tape the connection between the top of the foundation and the mudsill for one last layer of protection against air infiltration.
Adding the subfloor
We decided to use Huber’s Advantech subflooring after years of reading about it in Fine Homebuilding magazine, and based on the online comments from installers who see the added benefits that come with what is an admittedly higher price point. For instance, it’s more resistant to moisture, so it should result in more stable, flatter flooring (whether hardwood or tile) when the house is complete, in addition to preventing annoying floor squeaks.
In order to maintain a high level of indoor air quality (IAQ), we’ve been seeking out low- or no-VOC products. So, in addition to the Advantech subflooring, which is formaldehyde-free, we chose the Liquid Nails brand of subfloor adhesive (LN-902/LNP-902) because it is Greenguard-certified. Another great resource for anyone trying to build or maintain a “clean” structure is The Red Listavailable at the International Living Future Institute’s website.
One thing to keep in mind: Liquid Nails subfloor adhesive takes much longer to dry when it’s cold and wet outside — at least two to three days in our experience (sometimes even longer).
The walls go up
Our wall assembly is almost entirely based on Hammer and Hand’s Madrona Passive House project, which I discussed in an earlier post.
In preparation for construction, I built a mock wall assembly in order to make it easy to explain to anyone on site how the various components should go together. It also gave me a chance to practice using the Contega HF sealant, along with the various Pro Clima tapes from 475 High Performance Building Supply.
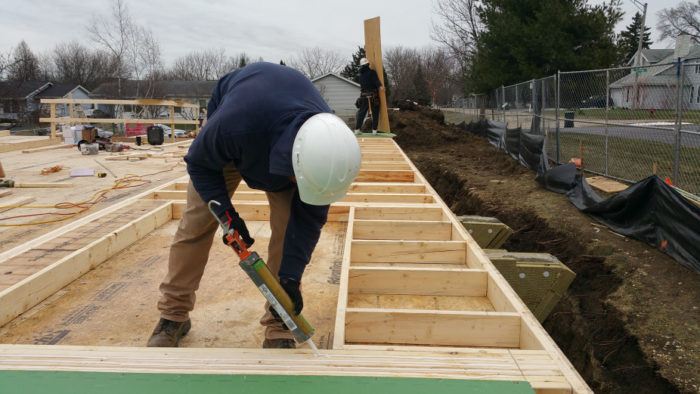
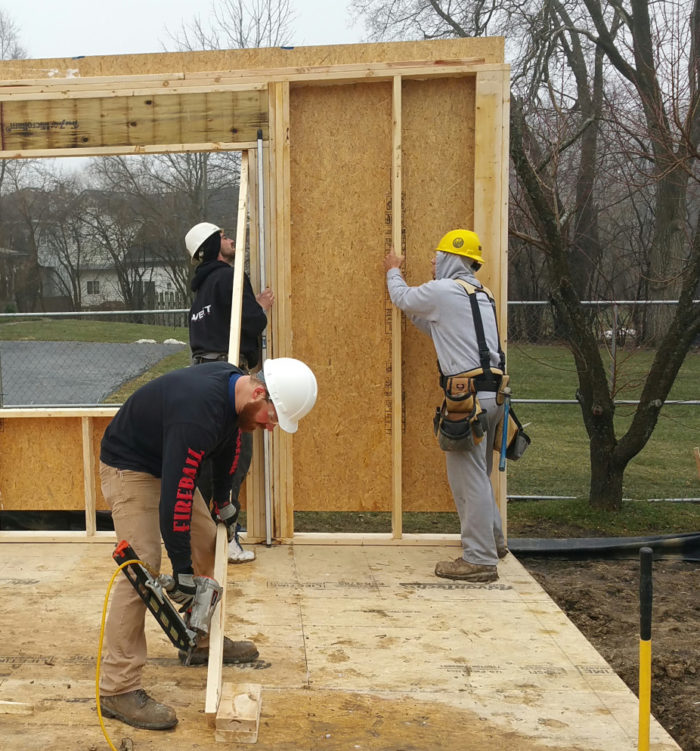
We were careful to lay down a consistent and continuous bead of construction adhesive (trying to avoid a bead that runs back and forth between fat and thin) before the Zip sheathing was installed over the studs (see Image #4 below). We were fighting the rain, ice, and mud, but I was able to get the Tescon Vana tape over some of the seams in the Zip sheathing before the walls went up.

There was only one section of wall where the B75 gasket rolled up on itself. No doubt this occurred because this was the most difficult section to get into place because of the stair opening. Otherwise, the guys had no issues with the gasket.
On the wall where the gasket did roll up on itself, I will cut off the excess that ended up on the interior side before sealing the connection with the subflooring, and then spend some time filling the void on the exterior side with backer rod and sealant as well.
Zach is the only dedicated, full-time framing carpenter on the crew. (The other guys do a variety of carpentry-related work.) He has a production background, and it shows with the energy and ease with which he works. He clearly enjoys what he does for a living. Sammy and Billy may not realize it yet, but they’re learning a lot from him (even if he does razz them all day long).
Keeping it mostly foam-free
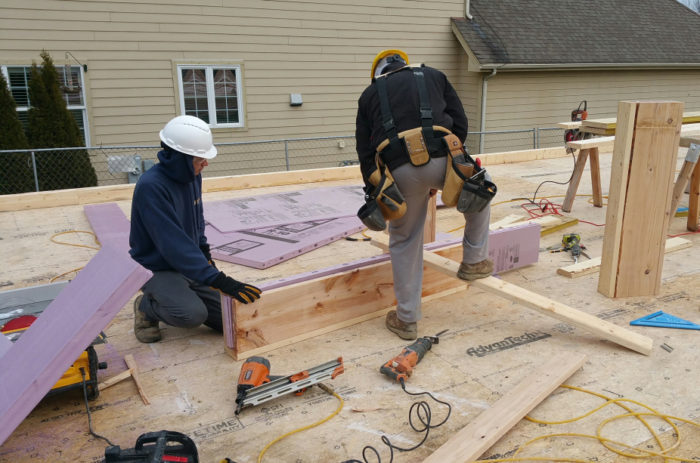
We’ve tried very hard to keep foam out of the wall assembly and the overall structure itself (based on environmental concerns). However, one place where it did find its way in was the insulated headers above the windows and doors (see Image #7 below).
Once the perimeter walls were up, I went around with an impact driver and decking screws to tighten the connection between the Zip and the framing members, especially at the top of the walls. Although the Liquid Nails adhesive helps a lot, it still makes for an imperfect connection between the sheathing and the framing members. This should make sealing these areas easier, and the connection more durable.
Having seen construction adhesive and nails in action, I would recommend a glue-and-screw approach if you’re trying to fully maximize the tightness of the connection between the sheathing and the framing.
Weekly Newsletter
Get building science and energy efficiency advice, plus special offers, in your inbox.


5 Comments
ZIP Tape?
With Tyveks constant advertising of leaks using the ZIP-system, I noticed that you guys did not use ZIP tape.
What was the rationale behind using your tape of choice? Did Huber sign-off on this tape or are you so confident in the mock up that you're not worried about the Huber warranty?
Regards,
JC
Zip Tape
John,
We used the Tescon Vana tape because it's supposed to be more "vapor open" than the black Zip tape, so if there's moisture inside the wall assembly it can dissipate more quickly with the Tescon Vana than with the black Zip tape (at least in theory).
We didn't get Huber to sign off on this, but I've seen Tescon Vana on other projects with the Zip, so hopefully it's nothing to worry about.
Window Box
Is that a sloped head on your window box? Nicely done!
Sloped head
Eric,
My reaction to the photo was the same as Malcolm's. Nice attention to detail.
Slope on the Window Box
Thanks Malcolm and Martin!
It's one of the many details we've taken from Hammer and Hand (www.hammerandhand.com) job site videos on YouTube, along with their Best Practices Manual.
Log in or create an account to post a comment.
Sign up Log in